
30 Computer Vision Projects for Every Skill Level
Here are 30 computer vision projects, from your first weekend with OpenCV to building an object detector from scratch. They cover image filtering, object detection, segmentation, and real-world AI applications, with a recommended tutorial, required tools, and skills breakdown for each.
Computer vision has a reputation for being advanced, and parts of it are. But most projects here don't ask you to train a model from scratch, and the beginner and intermediate ones run fine on a free Google Colab or even a CPU. You don't need to understand the architecture to start. Instead, you just need to build something, see it work, and learn from there.
If you want the underlying deep learning theory once you've got a project or two under your belt, Dataquest's Deep Learning in TensorFlow path covers it end to end.
What You'll Find on This Page
Beginner projects (1 to 8)
- 1. Image Filtering Techniques
- 2. RGB Color Detection
- 3. Real-Time Edge Detection
- 4. Barcode and QR Code Scanner
- 5. Optical Character Recognition (OCR)
- 6. Handwritten Digit Recognition
- 7. Face Mask Detection
- 8. Plant Disease Detection
Intermediate projects (9 to 22)
- 9. Traffic Sign Recognition
- 10. Road Lane Detection
- 11. Facial Emotion Recognition
- 12. Gesture Recognition System
- 13. Object Tracking with OpenCV
- 14. Image Segmentation
- 15. Image Captioning
- 16. Face Swap Application
- 17. Animal Species Recognition
- 18. Drone Image Analysis
- 19. Sports Analytics with Computer Vision
- 20. Augmented Reality with OpenCV
- 21. Image Super Resolution
- 22. Style Transfer with Neural Networks
Advanced projects (23 to 30)
- 23. Deepfake Detection
- 24. 3D Scene Reconstruction with Neural Radiance Fields (NeRF)
- 25. Real-Time Object Detection on an Edge Device
- 26. Visual SLAM for Robot Navigation
- 27. Visual Anomaly Detection for Manufacturing Quality Control
- 28. Video Action Recognition
- 29. Multi-Camera Person Re-Identification
- 30. Building a Custom Object Detector From Scratch
And after the projects
First, What Is Computer Vision?
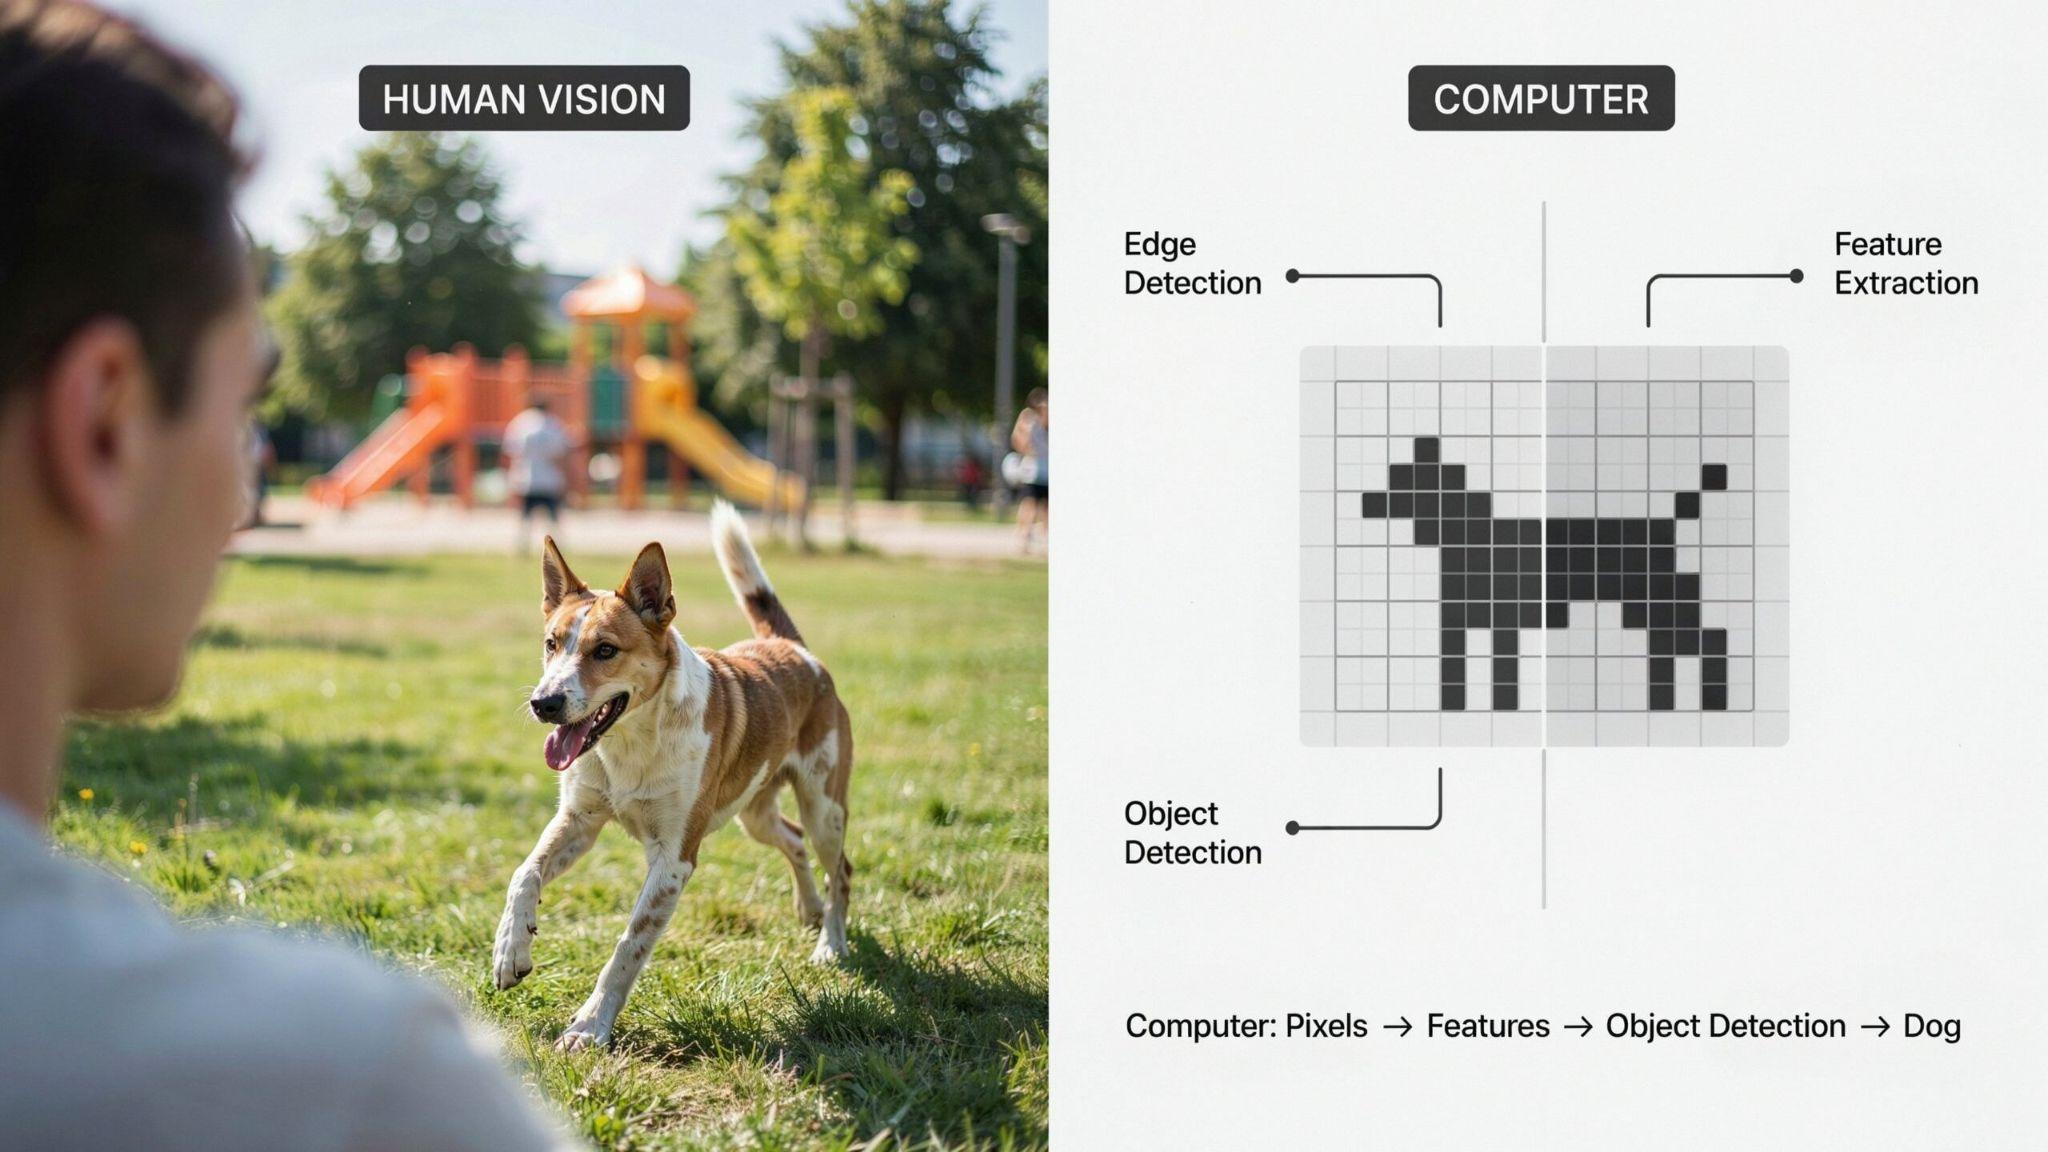
Computer vision is the field of building programs that interpret and act on visual information like images, video frames, and live camera feeds.
A computer vision system does what your eyes and brain do automatically. It looks at a picture and figures out what's in it.
It's a different kind of field from most other ML work. The raw input is pixel data, not rows in a dataframe or vectors in a database. You can open a spreadsheet and eyeball whether the numbers look right. You can't do that with a matrix of pixel values, so almost everything about how you debug and reason about a CV (computer vision) model is different too.
Why Computer Vision Skills Matter Right Now
Computer vision sits at the center of some of the fastest-moving areas in applied AI. Self-driving cars use it to read traffic signs. Farms use it to catch plant disease before it spreads. Manufacturers use it to flag defective products on the line.
Most people assume you need huge datasets and expensive hardware to build any of this yourself. You don't. Many beginner projects use classical image processing that requires no training data at all. Most intermediate and advanced projects start from a pretrained model, meaning someone else already did the expensive training on millions of images. You keep that model's learned features and retrain just the last layer or two on your own data, a shortcut called transfer learning.
Start small, lean on a pretrained model, and understand the output before you worry about the architecture behind it. Working code teaches more than perfect theory.
Beginner Computer Vision Projects
These eight projects start with classical image processing and build up to your first trained model. The first four need no training data and no neural network at all; you're learning how images work as arrays of numbers. Projects 6 through 8 introduce model training, so work through those in order rather than jumping around.
Note: pip now installs OpenCV 5 by default. Most tutorials on this list were written for OpenCV 4, so if a call errors out, pip install "opencv-python<5" is the quickest way to match the tutorial.
1. Image Filtering Techniques
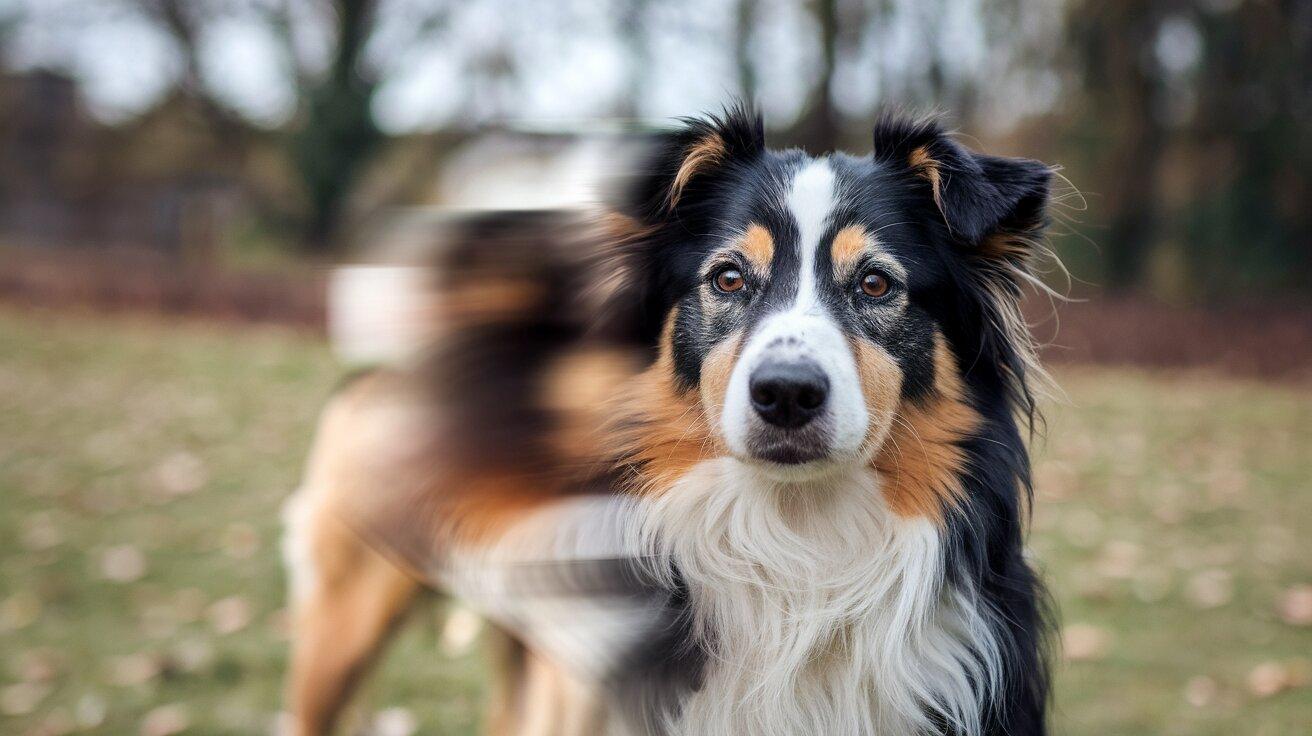
Image filtering is the most foundational computer vision project you can build. Apply Gaussian blur, sharpening, and median filters, then compare them against a bilateral filter, which smooths an image while keeping its edges sharp.
Recommended tutorial: GeeksforGeeks — Image Filtering Using Convolution in OpenCV.
Tools: Python, OpenCV
Key functions: cv2.GaussianBlur, cv2.filter2D, cv2.medianBlur, cv2.bilateralFilter
Prerequisites: Basic Python
Skills: Kernel convolution, image filtering, pixel manipulation, image arrays
Time estimate: An evening
What You'll Build
A Python script that loads an image and applies Gaussian blur, sharpening, median, and bilateral filters. Display the original image alongside each filtered version so you can compare the results.
How to Build It
- Load an image with OpenCV using cv2.imread().
- Apply a Gaussian blur to reduce image noise.
- Create a sharpening filter using a custom kernel and cv2.filter2D().
- Use a median filter to remove salt-and-pepper noise.
- Apply a bilateral filter to smooth the image while preserving edges.
- Display or save each filtered image for comparison.
What This Proves
You understand how images are represented as arrays and how basic transformations work, which nearly every project that follows depends on.
Wrong for you if you want a portfolio piece. This is a learning exercise, not a standalone project.
2. RGB Color Detection
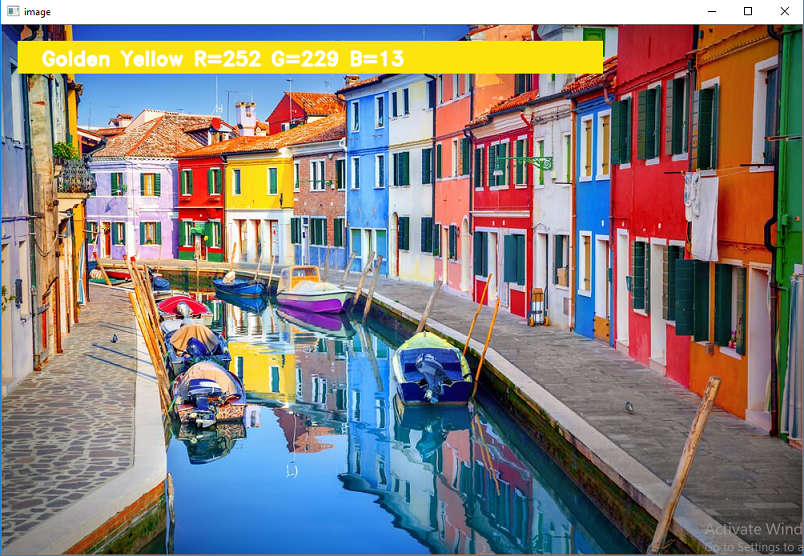
RGB color detection identifies the name of a color by reading the RGB values of individual pixels in an image. Using OpenCV for image interaction and Pandas to search a color dataset, you can determine the closest matching color name.
Recommended tutorial: DataFlair — Project in Python: Colour Detection using Pandas & OpenCV.
Tools: Python, OpenCV, Pandas
Dataset: Color names
Key functions: cv2.imread, cv2.setMouseCallback, pandas.read_csv
Prerequisites: Basic Python, reading a CSV with pandas
Skills: RGB color representation, image interaction, event handling, pixel manipulation
Time estimate: An evening
What You'll Build
A Python application that lets users click anywhere on an image to identify the nearest color name and display its RGB values.
How to Build It
- Load an image with OpenCV.
- Read a CSV file containing color names and RGB values using Pandas.
- Display the image in an OpenCV window.
- Capture mouse clicks using cv2.setMouseCallback().
- Read the selected pixel's color values. OpenCV returns them in BGR order rather than RGB, so unpack them as b, g, r = img[y, x] before comparing against the dataset.
- Compare the pixel against the dataset and display the closest matching color name.
What This Proves
You understand how computers represent colors numerically and how to combine image processing with external datasets to build an interactive application.
Wrong for you if you're looking for real-time webcam-based color segmentation. This project focuses on identifying colors in static images rather than tracking colored objects in video.
3. Real-Time Edge Detection
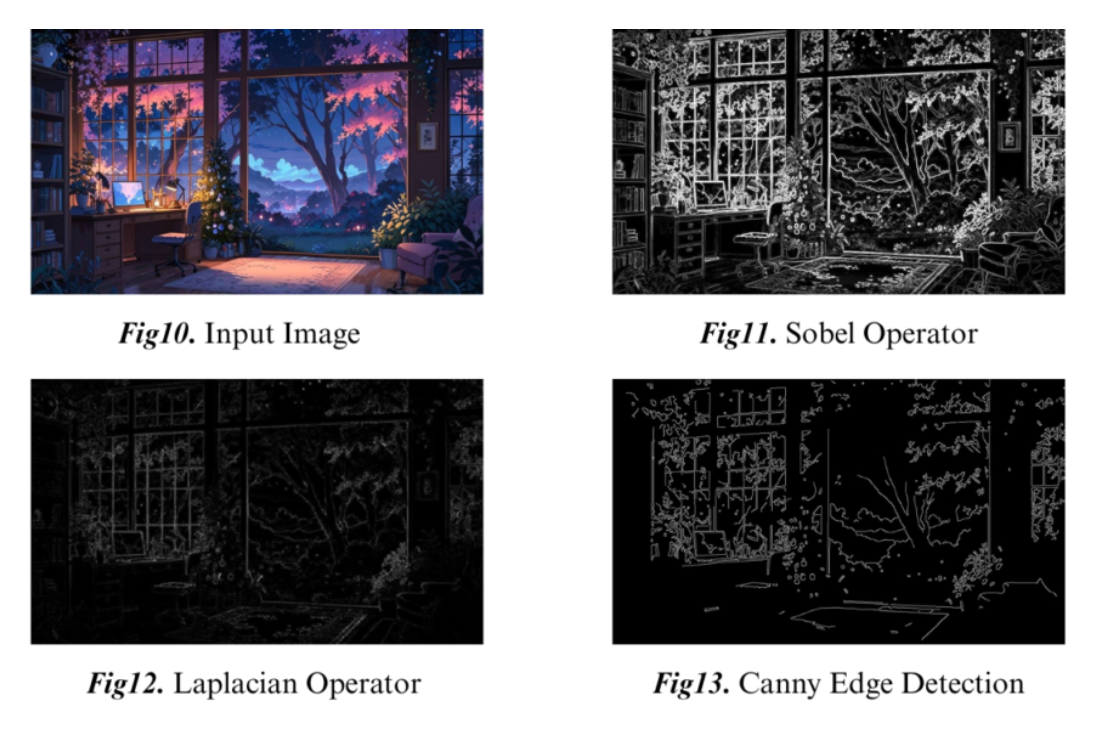
Edge detection identifies boundaries between objects by finding sharp changes in pixel intensity. The Canny algorithm, available in OpenCV as cv2.Canny(), computes intensity gradients, thins them down to single-pixel lines, then applies two thresholds to decide what counts as an edge: strong gradients are kept outright, weak ones only if they connect to a strong edge. Those two thresholds are what you'll be tuning.
Recommended tutorial: OpenCV.org (official) — Edge Detection Using OpenCV.
Note: The linked article covers Canny on a static image. Wrapping it in a cv2.VideoCapture loop and adding cv2.createTrackbar sliders is the part you add yourself.
Tools: Python, OpenCV
Key functions: cv2.Canny, cv2.createTrackbar, cv2.cvtColor
Prerequisites: Basic Python, a webcam
Skills: Grayscale conversion, gradient-based edge detection, parameter tuning
Time estimate: An evening
What You'll Build
A real-time pipeline that reads webcam frames, converts them to grayscale, and outputs a live Canny edge map with adjustable threshold sliders.
How to Build It
- Capture live frames from a webcam.
- Convert each frame to grayscale.
- Apply Gaussian blur to reduce noise before edge detection.
- Run cv2.Canny() on the blurred frame.
- Add trackbars with cv2.createTrackbar() to adjust the Canny thresholds in real time.
- Display the original and edge-detected frames side by side.
What This Proves
You understand how low-level image features are extracted, a concept that underpins every CNN layer above it.
Wrong for you if you are looking for a deep learning project. This is classical image processing.
4. Barcode and QR Code Scanner
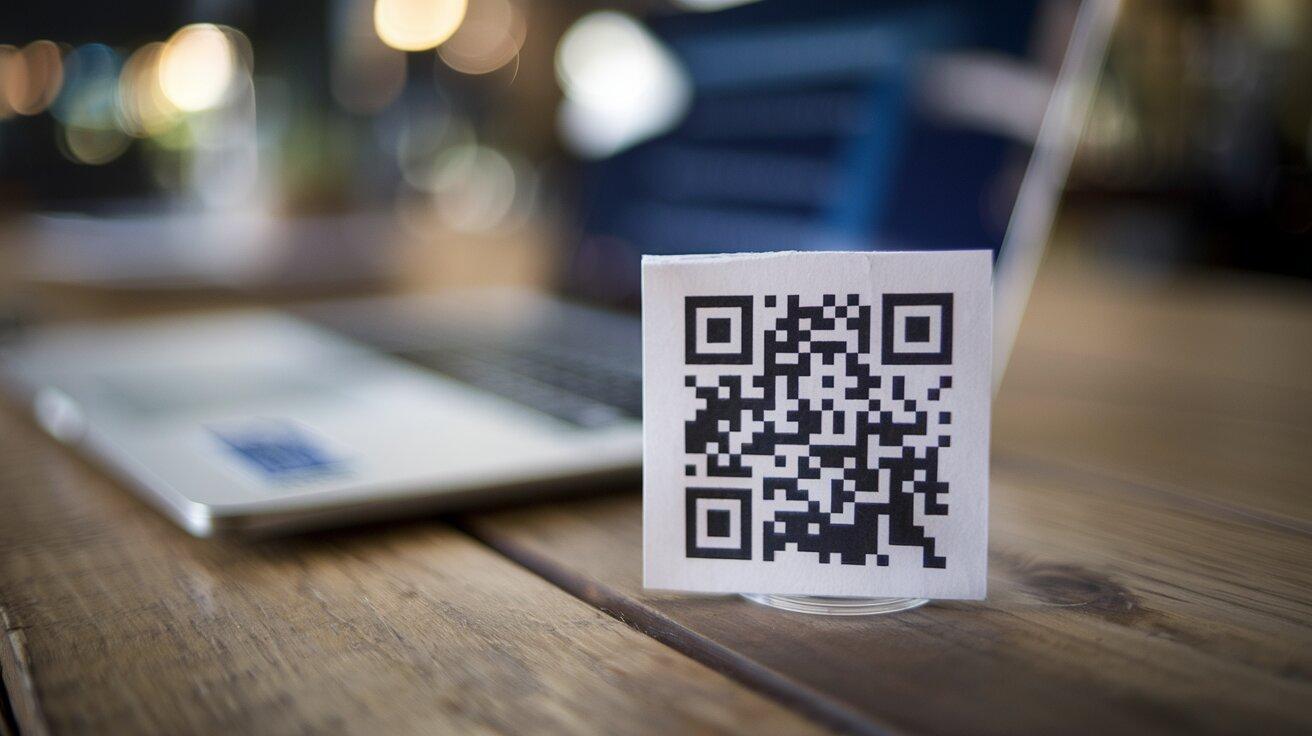
A barcode and QR code scanner decodes structured patterns from images using Python's pyzbar library alongside OpenCV. The library locates the code region, decodes the embedded data, and returns the result as a string in roughly three lines of code.
Recommended tutorial: Towards Data Science — Build your own barcode and QRcode scanner using python (Pruthvi Hingu).
Tools: Python, OpenCV, pyzbar
Key functions: pyzbar.decode, cv2.polylines
Prerequisites: Basic Python, installing packages with pip
Skills: Image decoding, contour drawing, third-party library integration
Time estimate: An evening
What You'll Build
A script that reads barcodes and QR codes from static images or a live webcam feed, highlights each detected code, and displays the decoded text.
How to Build It
- Install pyzbar alongside OpenCV, plus the zbar library it depends on, which pip doesn't include: apt install libzbar0 on Linux, brew install zbar on macOS, no extra step on Windows.
- Load a static image or open a webcam feed.
- Run pyzbar.decode() on each frame to locate and decode codes.
- Draw a bounding polygon around each detected code using its returned coordinates.
- Overlay the decoded text on the frame.
- Test against multiple code types (QR, Code128, EAN) to confirm reliability.
What This Proves
You can integrate external libraries into a vision pipeline and handle structured data extraction from images.
Wrong for you if you want to build the detection algorithm yourself. pyzbar handles that for you, which is the point at this level.
5. Optical Character Recognition (OCR)
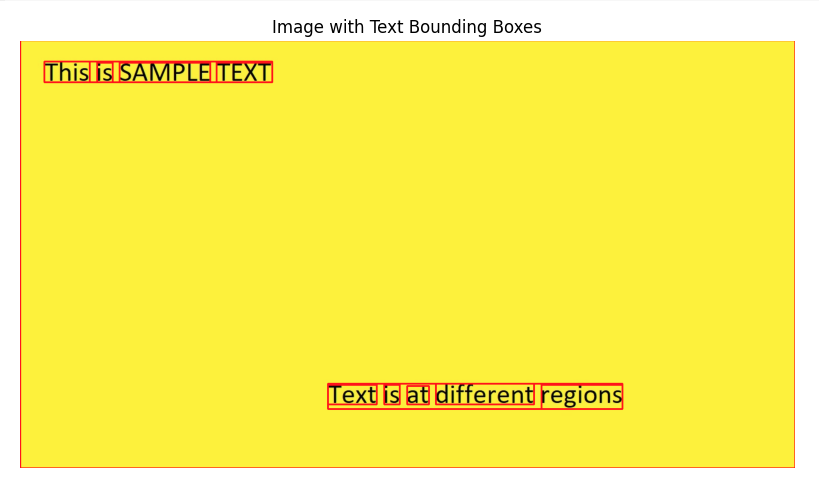
OCR extracts readable text from images using Tesseract, an open-source engine HP originally built. Google sponsored its development from 2006 to 2018, and it's been community-maintained since. The Python wrapper pytesseract connects Tesseract to your OpenCV image pipeline with a single function call.
Recommended tutorial: GeeksforGeeks — Text Detection and Extraction using OpenCV and OCR.
Tools: Python, OpenCV, Tesseract, pytesseract
Key functions: pytesseract.image_to_string, pytesseract.image_to_data, cv2.cvtColor
Prerequisites: Basic Python, plus installing Tesseract outside of pip
Skills: Image binarization, noise reduction, OCR preprocessing
Time estimate: A weekend
What You'll Build
A script that reads text from a document, receipt, or sign using Tesseract OCR. You'll preprocess the image by converting it to grayscale, extract the detected text, and draw bounding boxes around the recognized words.
How to Build It
- Load the target image with OpenCV. pytesseract needs Tesseract installed separately: apt install tesseract-ocr (Linux) or brew install tesseract (macOS). On Windows, use the installer from UB-Mannheim and set pytesseract.pytesseract.tesseract_cmd to its path.
- Convert the image to grayscale.
- Apply a binary threshold with cv2.threshold() so the text is solid black on white, which is what Tesseract expects. Use cv2.adaptiveThreshold() instead if the lighting is uneven across the image.
- Use pytesseract.image_to_string() to extract the text.
- Retrieve word-level data with pytesseract.image_to_data().
- Draw bounding boxes around the detected text using OpenCV.
- Display the annotated image and extracted text.
What This Proves
You can preprocess images for OCR, extract printed text, and visualize detected text regions using OpenCV and Tesseract.
Wrong for you if your text is handwritten. Tesseract handles printed text well but struggles significantly with cursive or informal handwriting.
6. Handwritten Digit Recognition
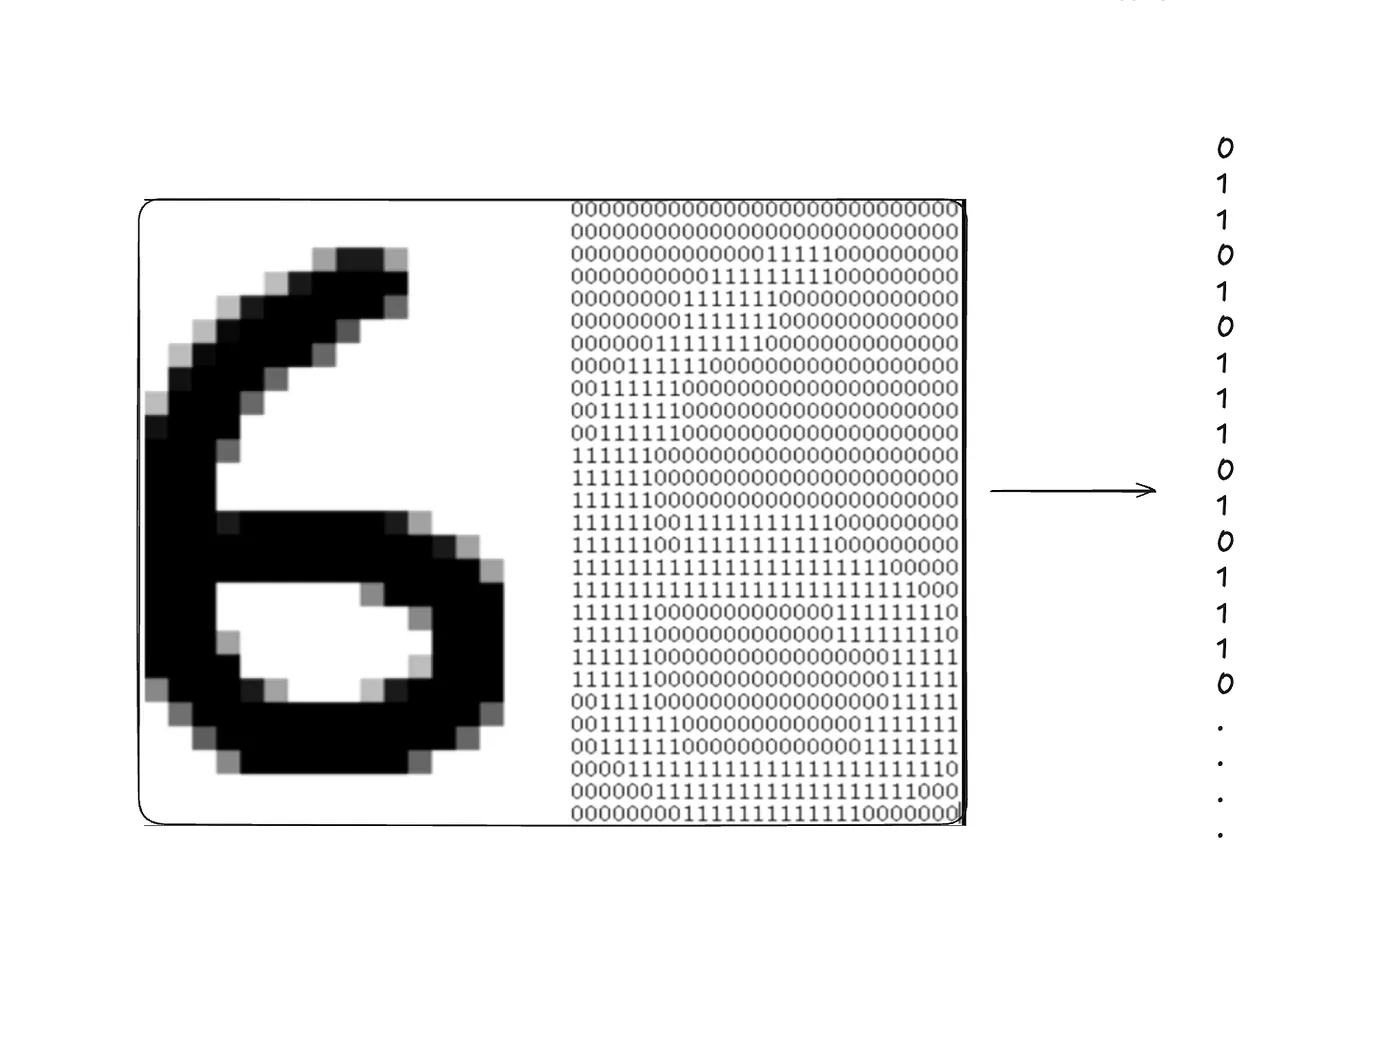
Image source: Medium (@Rezowanur Rahman Robin)
Handwritten digit recognition trains a neural network on the MNIST dataset to classify digits 0 through 9 from 28×28 grayscale images.
Recommended tutorial: Medium — Handwritten Digit Recognition with Neural Networks: From Theory to Implementation by Rezowanur Rahman Robin.
Tools: Python, OpenCV, TensorFlow/Keras
Dataset: MNIST (bundled with Keras as keras.datasets.mnist)
Key functions: cv2.resize, model.predict, np.argmax
Prerequisites: Basic Python, TensorFlow installed
Skills: Neural networks, image preprocessing, multi-class classification
Time estimate: A weekend
What You'll Build
A neural network that loads the MNIST dataset, trains for five epochs, and predicts handwritten digits. You'll also build a simple interface that lets you draw or upload your own handwritten digit for prediction.
How to Build It
- Load the MNIST dataset and normalize the pixel values.
- Build a neural network with a Flatten layer and fully connected Dense layers.
- Compile the model using the Adam optimizer and sparse categorical cross-entropy loss.
- Train the model for five epochs and evaluate it on the test set.
- Create a simple drawing interface or upload a handwritten digit image.
- Preprocess the image and use the trained model to predict the digit.
What This Proves
You can build, train, and evaluate a neural network for image classification using the MNIST dataset.
Wrong for you if you want it to read handwriting from a photo. MNIST digits are centered, cropped, and high contrast, so a model trained on them does poorly on digits photographed in the wild without extra preprocessing.
7. Face Mask Detection
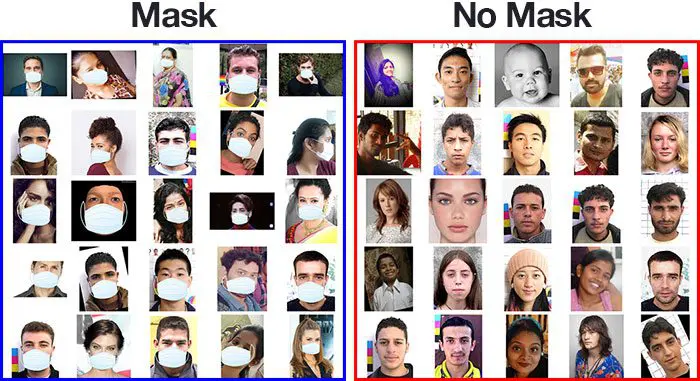
Face mask detection uses a custom CNN trained on a labeled dataset of masked and unmasked faces. Unlike the classifiers you've built so far, this one needs to run in real time on a live webcam feed, which means adding a face-detection step before classification and keeping inference fast enough to keep up with video.
Recommended tutorial: GeeksforGeeks — FaceMask Detection using TensorFlow in Python.
Tools: Python, OpenCV, TensorFlow/Keras
Dataset: Face Mask Detection ~12K Images on Kaggle
Key functions: cv2.dnn.readNet, model.predict, cv2.VideoCapture
Prerequisites: Project 6
Skills: CNN architecture design, binary classification, real-time inference
Time estimate: A weekend
What You'll Build
A webcam application that detects faces in each frame, classifies each one as masked or unmasked with a custom CNN, and displays the label and confidence score in real time.
How to Build It
- Build a Sequential CNN with Conv2D, MaxPooling2D, Flatten, Dropout, and Dense layers.
- Compile with the Adam optimizer and binary cross-entropy loss.
- Train the model on the face mask dataset (30 epochs in the reference tutorial).
- Detect faces in webcam frames using OpenCV.
- Crop each detected face, classify it with the trained model, and display the prediction and confidence score in real time.
What This Proves
You can build a real-time computer vision application by combining face detection with a custom-trained image classifier, and you understand where swapping in a pretrained model like MobileNetV2 would fit if you wanted higher accuracy.
Wrong for you if you need it to work on crowds or at a distance. The face detector runs first, so small or angled faces get missed before the classifier ever sees them.
8. Plant Disease Detection
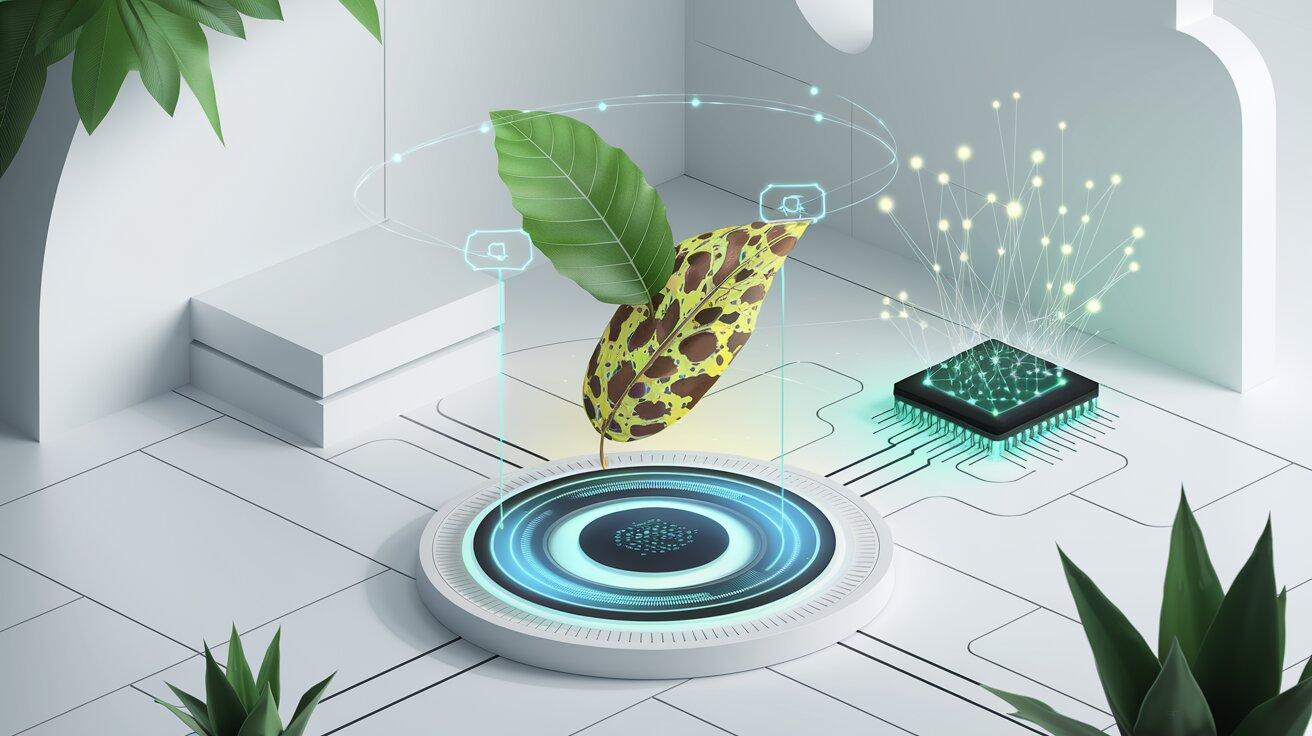
Plant disease detection classifies leaf images into specific disease categories (or healthy) using a CNN trained on the PlantVillage dataset, which contains over 54,000 labeled images across 38 classes, covering 26 diseases in 14 crops plus healthy leaves. Transfer learning with MobileNetV2 or ResNet50 reduces training time to under an hour on a free Colab GPU.
Recommended tutorial: Let's Learn IOT — AI Plant Disease Detection Using Raspberry Pi & TensorFlow Lite (2026 Full Guide).
Note: The linked guide goes further than the steps below, adding MQTT messaging and a REST API on top of the classifier. You can stop after the TensorFlow Lite conversion.
Tools: Python, OpenCV, TensorFlow
Dataset: PlantVillage (38 classes: 26 diseases across 14 crops, plus healthy)
Key functions: tf.lite.TFLiteConverter.from_keras_model, tflite.Interpreter, interpreter.invoke()
Prerequisites: Project 6. A Raspberry Pi and camera are only needed for the optional deployment steps
Skills: Transfer learning, multi-class classification, TensorFlow Lite deployment
Time estimate: A weekend
What You'll Build
An image classifier that takes a photo of a plant leaf as input and outputs the likely disease category, running on your laptop, with an optional step to deploy it to a Raspberry Pi for offline use in the field.
How to Build It
- Download and prepare the PlantVillage dataset.
- Load a pre-trained MobileNetV2 model.
- Train the classification head, then fine-tune the last layers.
- (Optional, for Raspberry Pi deployment) Convert the trained model to TensorFlow Lite.
- (Optional) Deploy it on a Raspberry Pi for real-time inference.
- Test it using your laptop webcam or live camera images and monitor predictions.
What This Proves
You can apply transfer learning to a real-world image classification problem and deploy the resulting model for edge AI inference.
Wrong for you if your images are taken in field conditions with inconsistent lighting. The PlantVillage dataset uses controlled photography, so models trained on it often underperform on real-field photos without additional fine-tuning.
Want More Structured Practice First?
Dataquest's Image Classification Using Deep Learning and TensorFlow guided project is a good next step if you want feedback along the way instead of piecing a tutorial together on your own.
You'll load and preprocess image data, build and train a CNN with Keras and TensorFlow, and learn how to cut down on overfitting. The dataset is dog breeds instead of digits, traffic signs, or plant leaves, but the skills carry over directly to the beginner projects here.
Intermediate Computer Vision Projects
These projects move from single operations to multi-step pipelines: detect, then crop, then classify, then draw. Some train a model and some don't. What they share is that you're chaining several stages together and debugging where the chain breaks, which matters more here than any individual algorithm.
9. Traffic Sign Recognition
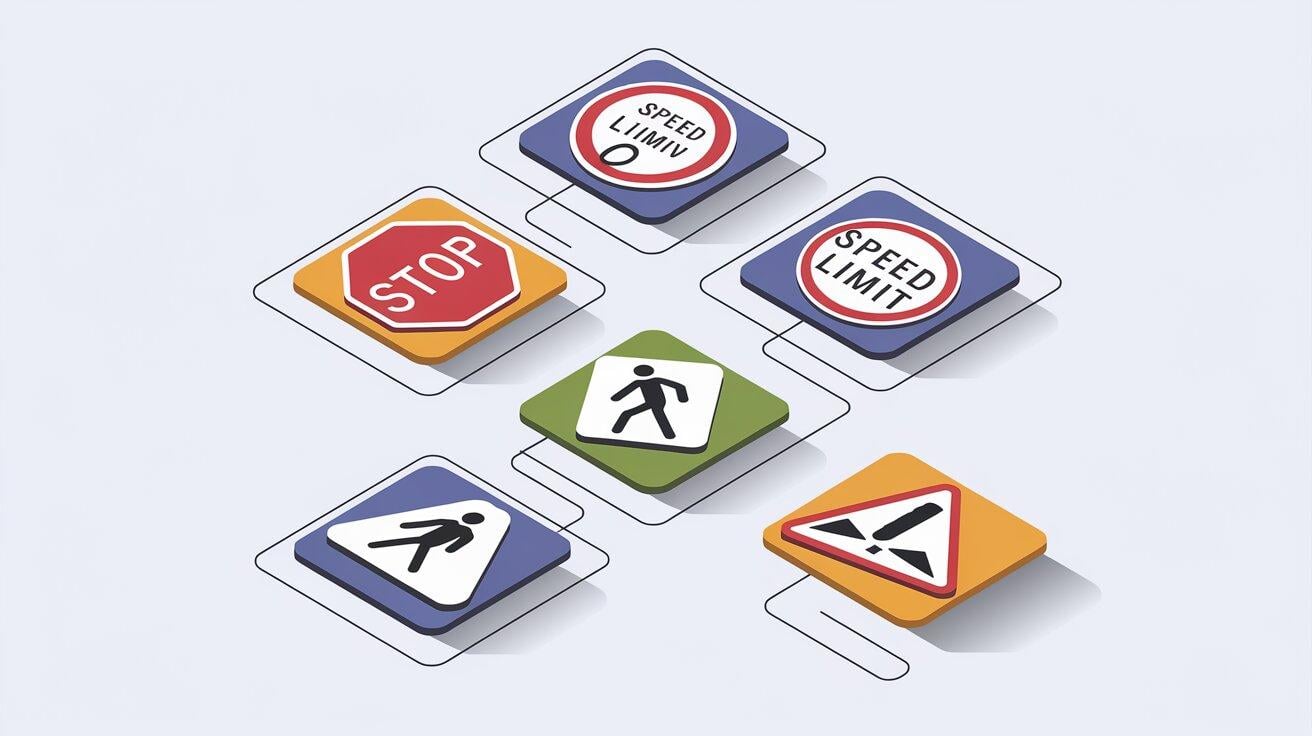
Traffic sign recognition trains a CNN to classify road signs into 43 categories using the German Traffic Sign Recognition Benchmark (GTSRB), a standard dataset containing over 51,000 labeled images. This project is a direct stepping stone toward autonomous driving perception systems.
Recommended tutorial: DataFlair — Python Project on Traffic Signs Recognition with 95% Accuracy using CNN & Keras.
Note: The tutorial calls model.predict_classes(), which was removed in Keras 2.6. Use np.argmax(model.predict(X_test), axis=1) instead.
Tools: Python, OpenCV, Keras
Dataset: GTSRB (43 classes, 51,000+ images)
Key functions: to_categorical, filedialog.askopenfilename, model.predict, classification_report
Prerequisites: Project 8
Skills: CNN image classification, one-hot encoding, model evaluation
Time estimate: A weekend
What You'll Build
A multi-class CNN classifier that reads a traffic sign image and outputs the sign category and confidence score, benchmarked against the held-out GTSRB test set.
How to Build It
- Download and load the GTSRB dataset.
- Resize images and one-hot encode the labels.
- Build a CNN using Conv2D, MaxPooling, Dropout, and Dense layers.
- Train and validate the model.
- Evaluate on the test set, then print a per-class breakdown with scikit-learn's
classification_report. - Save the trained model and use it to classify uploaded traffic sign images.
What This Proves
You can work with a larger, imbalanced dataset and produce a model that performs well across all classes, not just the most common ones.
Wrong for you if you expect it to spot signs in a dashcam frame. GTSRB images are already cropped to a single sign, so this project classifies signs rather than locating them. Finding them in a full scene is an object detection problem.
10. Road Lane Detection
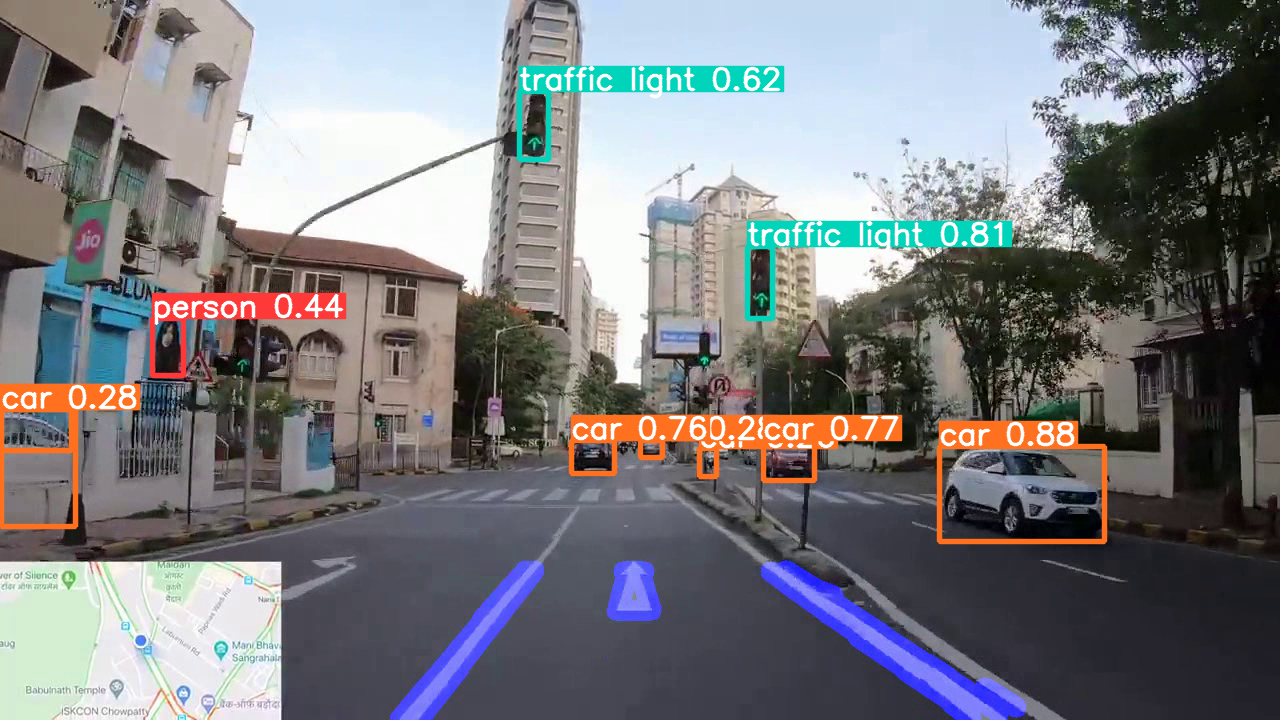
Image source: Github (Nirmal Chathura)
Road lane detection identifies lane markings in dashcam images using Canny edge detection, region of interest masking, and the Hough Line Transform. This is a classical image processing pipeline rather than a deep learning project, so there's no training step involved.
Recommended tutorial: Medium — Real-Time Lane Detection with OpenCV and Python (with Object Detection using YOLOv5) by Nirmal Chathura, Dhayan Dhananjaya & Devindu Dharmadasa. You only need the lane detection half. Skip the YOLOv5 section.
Tools: Python, OpenCV
Key functions: cv2.Canny, cv2.HoughLinesP
Prerequisites: Projects 1 and 3
Skills: Color segmentation, edge detection, Hough transforms
Time estimate: A weekend
What You'll Build
A script that processes frames from a driving video, isolates the road region, detects edges, finds lane line segments, and overlays detected lanes on the original frame.
How to Build It
- Read frames from a driving video using cv2.VideoCapture.
- Apply Gaussian blur to reduce image noise.
- Convert each frame to HSV and isolate the lane markings by color, thresholding for both white and yellow and combining the two masks. Yellow carries the center line on many roads, so a white-only mask misses it entirely.
- Run Canny edge detection on the filtered image.
- Apply a region-of-interest mask and detect lane lines with cv2.HoughLinesP.
- Filter detected lines by angle and overlay them on the original video frame.
What This Proves
You understand how to build a multi-step classical vision pipeline and apply it to video data.
Wrong for you if you expect it to handle curved lanes or poor lighting reliably. The Hough transform approach is robust on clear, straight roads but needs additional work, such as polynomial fitting or a deep learning lane segmentation model, to handle more complex conditions.
11. Facial Emotion Recognition
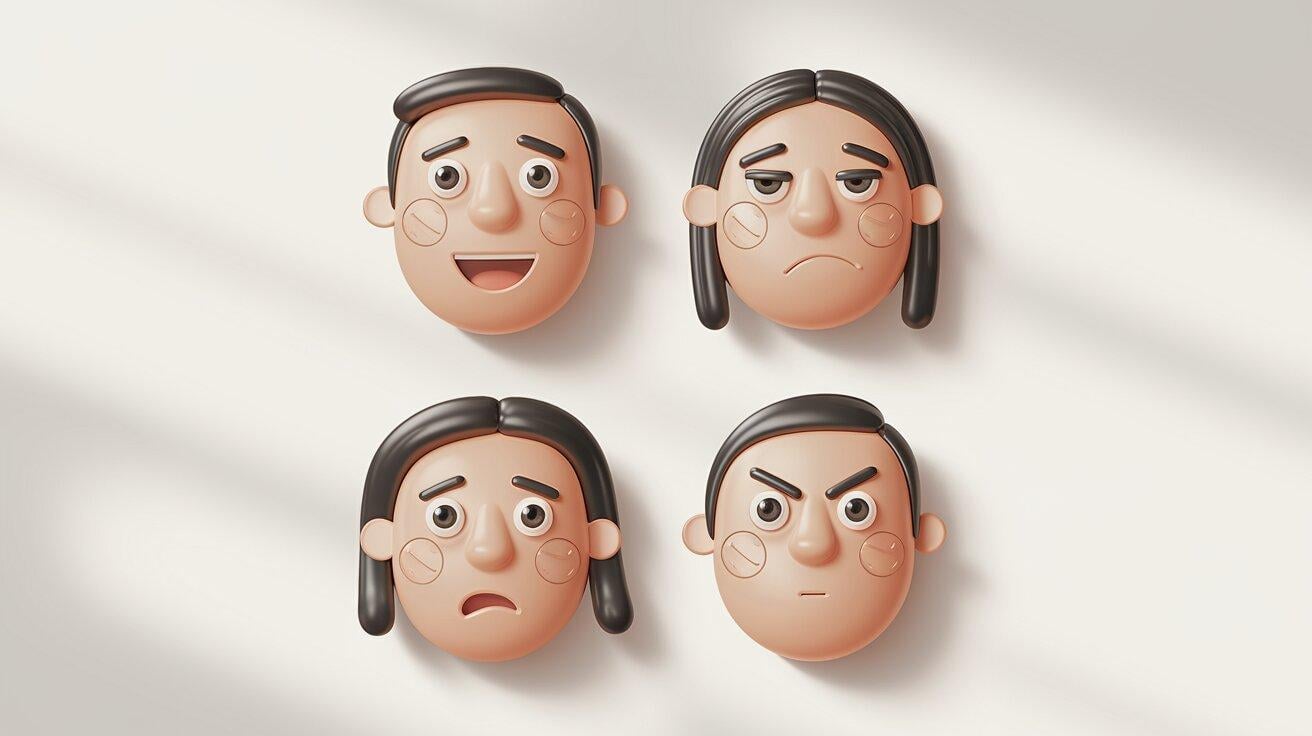
Facial emotion recognition classifies facial expressions into categories such as happy, sad, angry, and neutral using a CNN trained on labeled face images. The FER-2013 dataset contains 35,887 grayscale face images across 7 emotion categories and is the standard benchmark for this task.
Recommended repo: GitHub repo by atulapra — Emotion-detection.
Tools: Python, OpenCV, TensorFlow
Dataset: FER-2013 (7 emotion classes)
Key functions: cv2.CascadeClassifier, model.predict, cv2.resize
Prerequisites: Project 7
Skills: Two-stage pipelines, grayscale CNN input, softmax interpretation
Time estimate: A week of evenings
What You'll Build
A pipeline that detects faces in an image, crops each face, passes it through an emotion classification CNN, and overlays the predicted emotion label on the original image.
How to Build It
- Load and preprocess the FER-2013 dataset.
- Train a CNN classifier on the 7 emotion categories.
- Set up a face detector (Haar Cascade or MTCNN) to locate faces in new images.
- Crop and resize each detected face to match the classifier's input shape.
- Run the classifier on each cropped face.
- Overlay the predicted emotion label on the original image.
What This Proves
You can build a two-stage vision pipeline and understand how detection feeds classification.
Wrong for you if you need high accuracy in production. FER-2013 is a noisy dataset, and models trained on it typically reach 63 to 72% accuracy on the test set, with the linked repo reporting 63.2%. This is a learning project, not a production system.
12. Gesture Recognition System
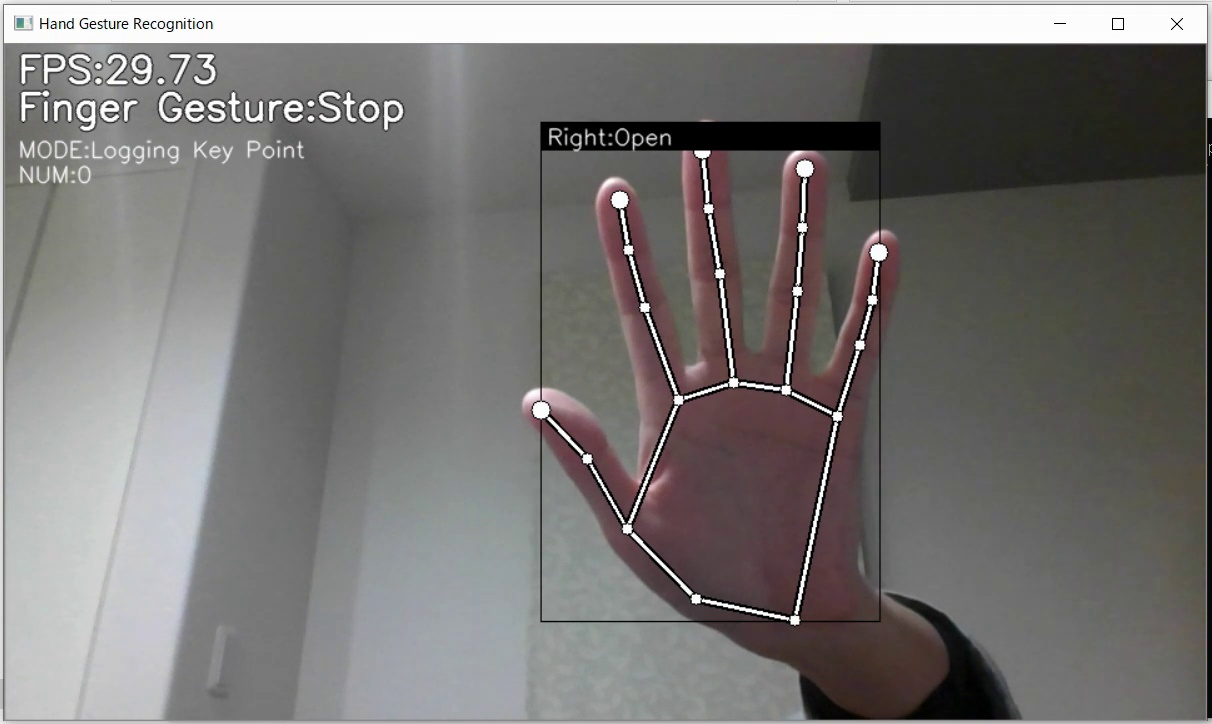
Gesture recognition uses MediaPipe Hands to detect 21 hand landmarks from a webcam feed, then classifies those landmark coordinates into predefined gestures using a lightweight machine learning model. Instead of analyzing raw images, the classifier works on the hand's geometry, making real-time recognition fast and efficient.
Recommended repo: GitHub repo by kinivi — hand-gesture-recognition-mediapipe.
Tools: Python, OpenCV, MediaPipe, TensorFlow Lite / TensorFlow
Key functions: mp.solutions.hands.Hands, hands.process, KeyPointClassifier
Prerequisites: Basic Python, a webcam
Skills: Keypoint-based classification, landmark geometry, real-time inference
Time estimate: A weekend
Note: The referenced repo uses MediaPipe's legacy Solutions API, which still ships but is no longer supported. The current equivalent is HandLandmarker in the MediaPipe Tasks API.
What You'll Build
A real-time application that captures webcam frames, detects hand landmarks with MediaPipe, and classifies predefined hand gestures using a TensorFlow Lite model. You'll also learn how to collect your own landmark data and train the classifier on custom gestures.
How to Build It
- Detect hands with MediaPipe Hands.
- Extract and preprocess the 21 landmarks (normalize relative to the wrist).
- Collect landmark samples for each gesture.
- Train the keypoint classifier notebook (or use the provided pretrained TFLite model).
- Run the trained classifier in real time.
- Display gesture predictions on the webcam feed.
What This Proves
You can combine MediaPipe hand tracking with a lightweight machine learning classifier to recognize custom gestures in real time, and you understand the complete workflow from landmark extraction to model training and inference.
Wrong for you if you want the model to learn from the raw image. This classifies hand geometry only, so anything outside the 21 landmarks (objects held, background, fine finger contact) is invisible to it.
13. Object Tracking with OpenCV
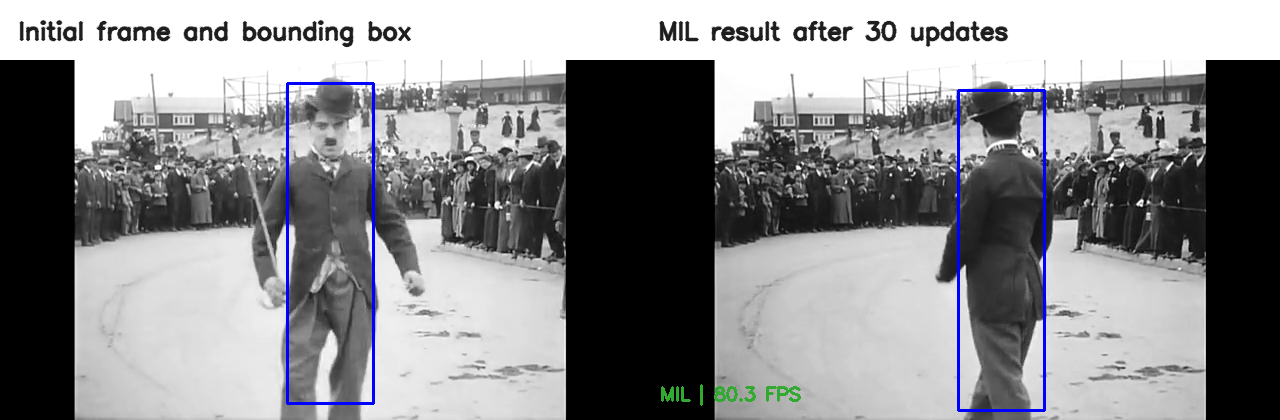
Object tracking follows a target across video frames after it has been identified, updating its position without running object detection on every frame. OpenCV provides several built-in tracking algorithms, including CSRT for higher accuracy and KCF for faster performance, making it easy to build real-time tracking applications.
Recommended tutorial: LearnOpenCV — Object Tracking using OpenCV (C++/Python) by Satya Mallick.
Tools: Python, OpenCV
Key functions: cv2.selectROI, cv2.TrackerMIL_create, tracker.update()
Prerequisites: Basic Python, opencv-contrib-python installed
Skills: Bounding box selection, tracker update loops, FPS benchmarking
Time estimate: An evening
What You'll Build
A script that lets you select an object with a bounding box in the first frame, initializes an OpenCV tracker, and follows that object across the rest of the video while displaying the updated tracking box in real time.
How to Build It
- Open a video file or webcam stream with cv2.VideoCapture().
- Pause on the first frame and select the object using cv2.selectROI().
- Create and initialize an OpenCV tracker such as CSRT or KCF.
- Read each new frame and call tracker.update() to estimate the object's new position.
- Draw the updated bounding box and display the tracking result.
- Compare different tracking algorithms, or one of the newer model-backed trackers, to see how speed and accuracy change.
Note: tracker constructor syntax has changed across OpenCV versions. CSRT and KCF are in the main cv2 namespace from OpenCV 4.5.1 onward (cv2.TrackerCSRT_create()), while older trackers like BOOSTING and MOSSE moved to cv2.legacy. CSRT and KCF availability is also inconsistent in OpenCV 5 depending on build. Check your installed version before following any single pattern, or default to MIL for a tracker that works across OpenCV 4 and 5.
What This Proves
You understand the difference between detection (finding objects in one frame) and tracking (maintaining identity across frames), a distinction that matters in any video analysis application.
Wrong for you if you expect the tracker to automatically find objects. OpenCV's built-in trackers require you to initialize the target with a bounding box before tracking begins, making them best suited for single-object tracking after manual or automated initialization.
14. Image Segmentation
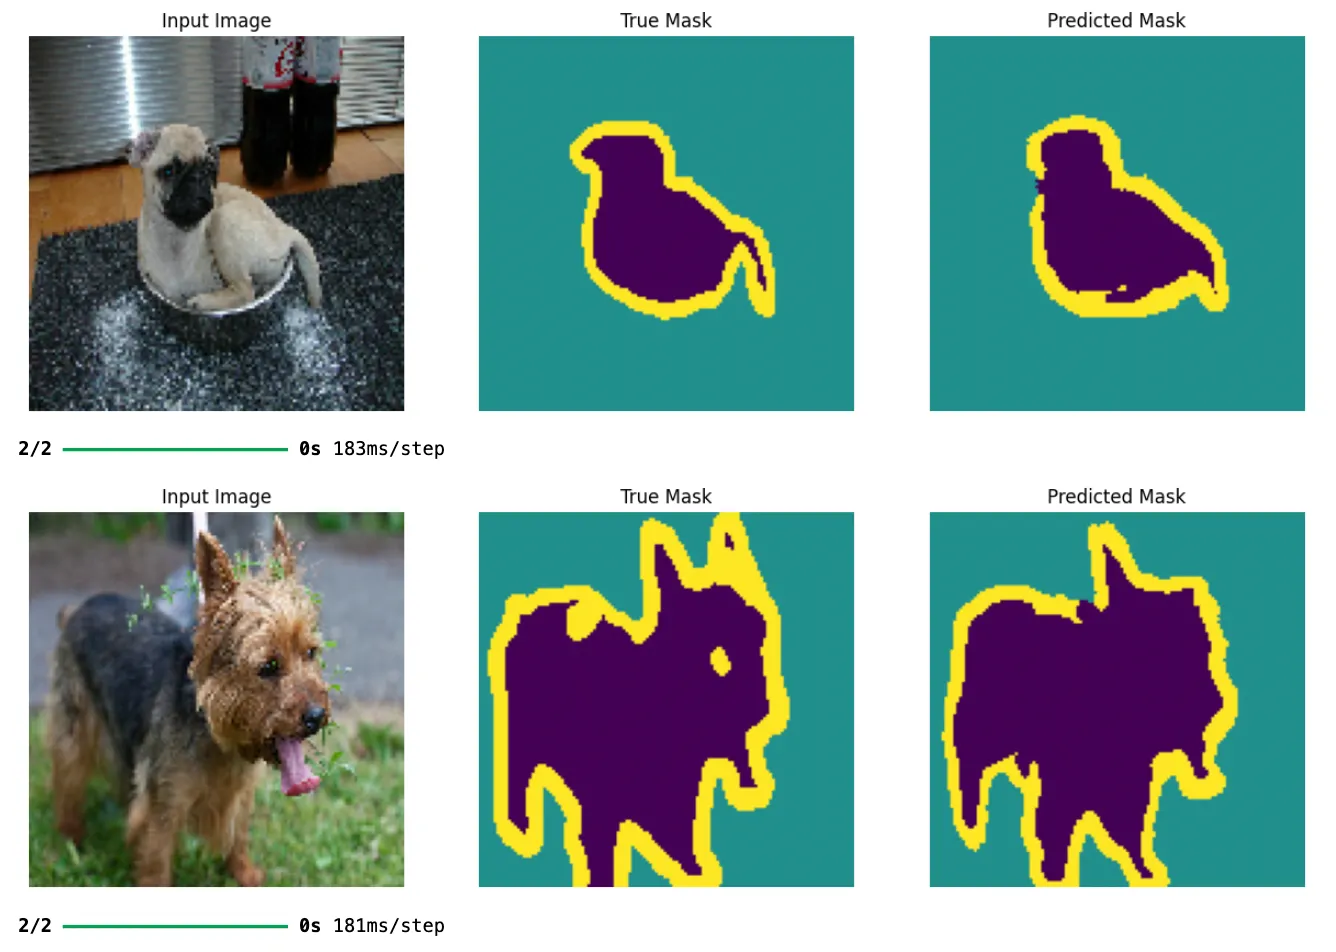
Image source: Medium (Meghna Havalgi)
Image segmentation assigns a class label to every pixel in an image, producing a detailed mask instead of a single bounding box. U-Net is one of the most popular architectures for this task because its encoder-decoder design and skip connections help preserve fine image details while learning high-level features.
Recommended tutorial: Medium — U-Net and Image Segmentation with the Oxford Pets Dataset by Meghna Havalgi.
Tools: Python, TensorFlow, Keras
Dataset: Oxford-IIIT Pet
Key functions: load_img, img_to_array, layers.Conv2D, layers.Conv2DTranspose, layers.MaxPooling2D
Prerequisites: Any of projects 6 through 9
Skills: Encoder-decoder architecture, skip connections, visual mask comparison
Time estimate: A week of evenings
What You'll Build
A U-Net model trained on the Oxford-IIIT Pet dataset that predicts a segmentation mask for each image, classifying every pixel as pet, background, or border.
How to Build It
- Download and load the Oxford-IIIT Pet dataset, including images and segmentation masks.
- Resize and preprocess both the images and masks so they're ready for training.
- Build a U-Net model with an encoder, decoder, and skip connections.
- Train the model using the pet segmentation masks as ground truth.
- Generate predictions on unseen images. Visually compare the predicted masks with the ground-truth masks (input image, ground truth, and prediction side by side), and compute the Intersection-over-Union (IoU) between predicted and ground-truth masks.
What This Proves
You can work with dense prediction models and evaluate them with metrics beyond simple accuracy.
Wrong for you if you need two cats labeled separately rather than both as "cat." U-Net does semantic segmentation, which labels pixels by class without separating individual objects.
15. Image Captioning
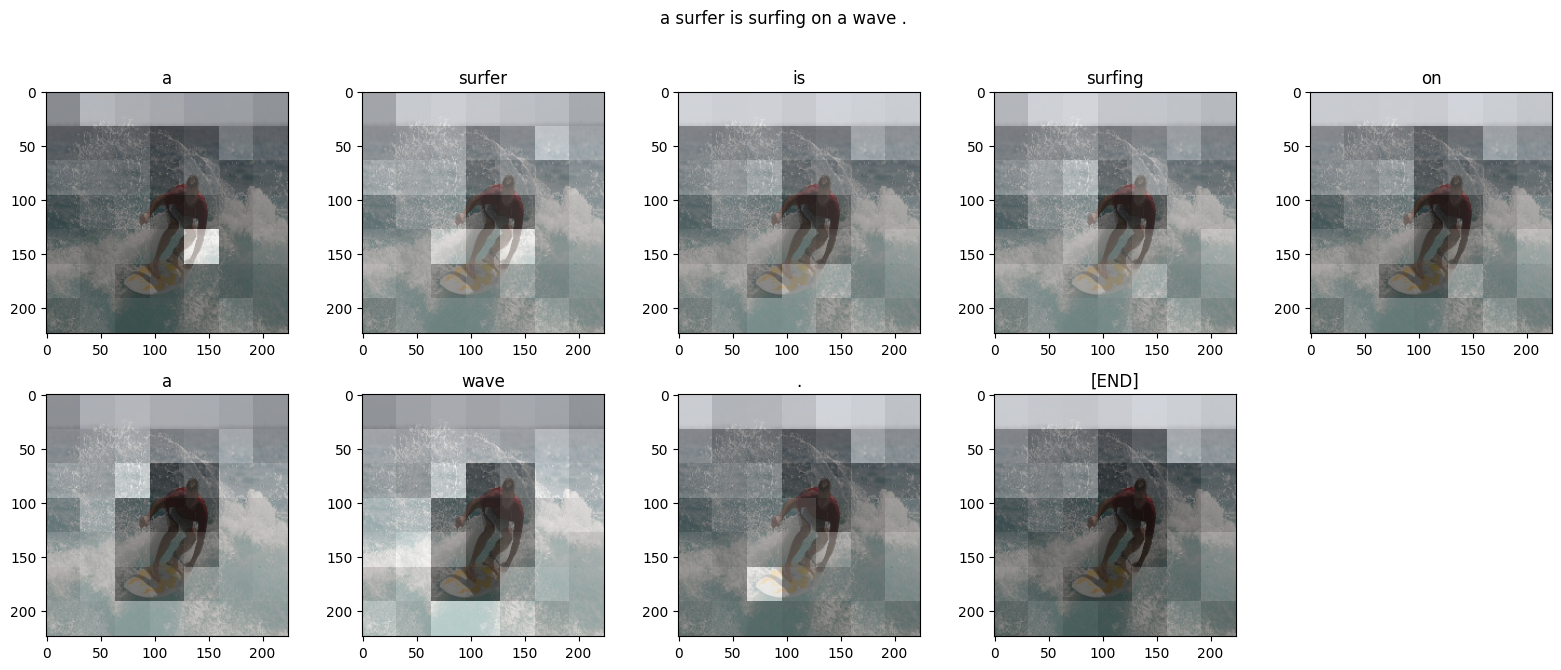
Image captioning combines computer vision and natural language processing to generate a sentence describing what's happening in an image. Instead of simply classifying objects, the model learns to connect visual features with natural language, making it one of the most rewarding multimodal AI projects you can build.
Recommended tutorial: TensorFlow (official) — Image Captioning with Visual Attention
Tools: Python, TensorFlow, MobileNetV3Small
Key functions: MobileNetV3Small, TextVectorization, MultiHeadAttention
Prerequisites: Any of projects 6 through 9
Skills: Multi-modal learning, Transformer attention, Sequence generation
Time estimate: A week of evenings
What You'll Build
A deep learning model that extracts visual features from an image using MobileNetV3Small and generates a natural-language caption with a Transformer decoder trained on the Flickr8k dataset.
How to Build It
- Load the Flickr8k image-caption dataset and prepare paired images and captions.
- Use a pretrained MobileNetV3Small model to extract image features.
- Tokenize and preprocess the caption text for training.
- Build a Transformer decoder model that uses cross-attention to combine image features with text embeddings.
- Train the model to predict captions one word at a time.
- Generate captions for new images and compare them with the reference captions to evaluate performance.
What This Proves
You understand how to combine computer vision and natural language processing into a single multimodal model that generates descriptive text from images.
Wrong for you if you're expecting captions on par with a modern vision-language model. Flickr8k is small by current standards, so expect short, generic descriptions.
16. Face Swap Application
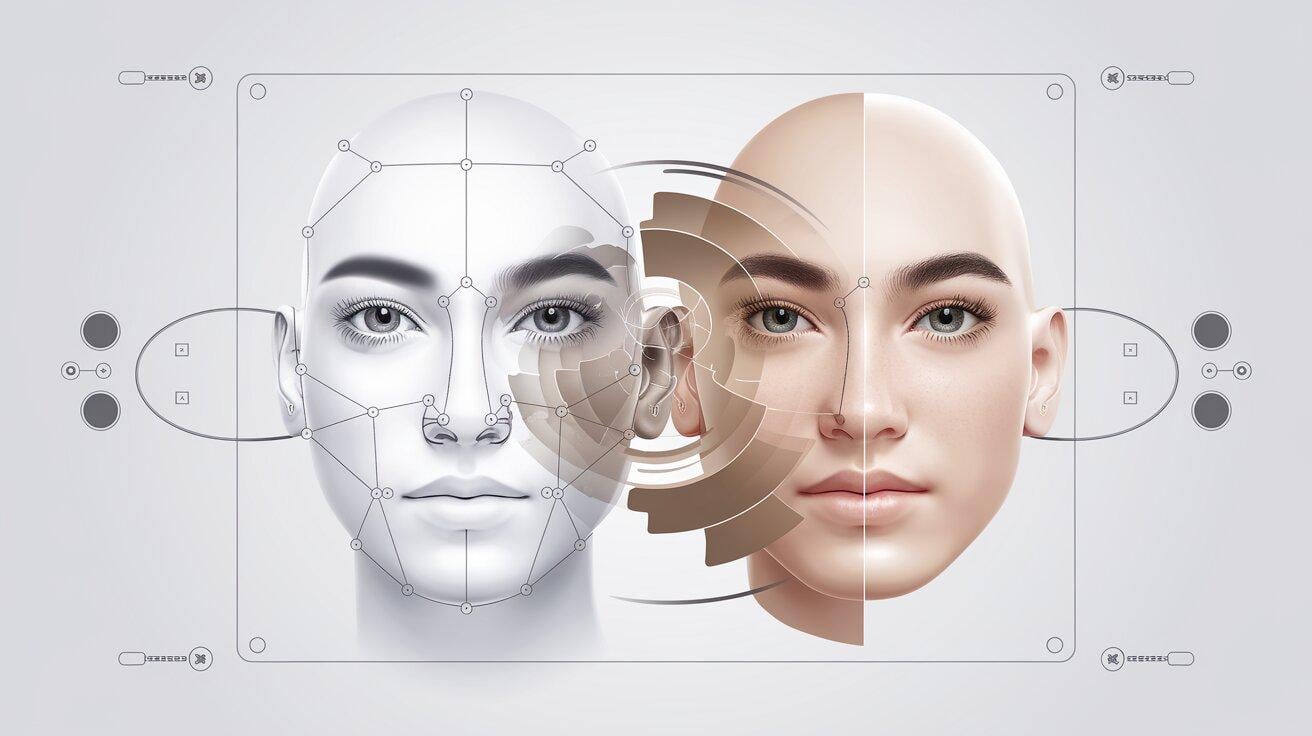
Face swapping detects faces in two images, extracts facial landmarks, aligns the source face to the target face, and blends the result into the destination image using OpenCV's seamless cloning. The combination of landmark detection, affine transformations, and image blending produces a realistic-looking face swap.
Recommended tutorial: DEV Community — Creating a Face Swapping Application with Python and OpenCV.
Tools: Python, OpenCV, dlib
Key functions: cv2.getAffineTransform, cv2.seamlessClone, dlib.shape_predictor
Prerequisites: Basic Python, plus installing dlib
Skills: Landmark detection, affine transformation, Poisson blending
Time estimate: A weekend
What You'll Build
A Python application that detects faces in two images, aligns the source face to the target using facial landmarks, and produces a naturally blended face-swapped image using OpenCV's seamless cloning.
How to Build It
- Load two images and detect the faces using dlib's face detector. dlib compiles from source, so install CMake and a C++ compiler first (or use a prebuilt wheel).
- Extract the 68 facial landmarks from each detected face.
- Align the source face to the target by applying affine transformations to corresponding facial regions.
- Warp the transformed face onto the target image.
- Blend the swapped face using cv2.seamlessClone() to create a natural-looking result.
- Test the application on different image pairs and compare how lighting, pose, and facial expressions affect the final output.
What This Proves
You can work with geometric image transformations and produce visually coherent composite images.
Wrong for you if you need to swap multiple faces or process live video. This project focuses on swapping a single face between two images, making it a good introduction before moving on to more advanced real-time applications.
17. Animal Species Recognition
Animal species recognition classifies wildlife from camera trap images, the kind of automation biodiversity researchers use at scale. In this project you'll build a smaller version: a classifier that distinguishes three groups (toads, lizards, and snakes) from a real ecological camera-trap dataset.
Recommended read: MDPI (Animals journal) — Animal Species Recognition with Deep Convolutional Neural Networks from Ecological Camera Trap Images by Islam et al.
Tools: Python, TensorFlow, Keras
Dataset: Ecological camera trap dataset (snakes, lizards, and toads)
Key functions: ImageDataGenerator.flow_from_directory, Conv2D, BatchNormalization, confusion_matrix
Prerequisites: Project 8
Skills: Transfer learning, Image augmentation, Multi-class classification
Time estimate: A weekend
What You'll Build
A deep learning classifier that sorts ecological camera trap images into three groups, toads, lizards, and snakes, using a pretrained CNN adapted through transfer learning.
How to Build It
- Load and organize the camera trap images into training, validation, and testing sets.
- Preprocess the images and apply augmentation to improve model generalization.
- Load a pretrained CNN such as VGG16 or ResNet50 using transfer learning.
- Fine-tune the model to classify the different animal groups.
- Evaluate the model using accuracy and a confusion matrix to compare predictions across classes.
- Test the classifier on unseen camera trap images and analyze where it succeeds and fails.
What This Proves
You can adapt a pre-trained model to a domain-specific classification problem and reason about its performance at the class level.
Wrong for you if you expect the model to recognize every wildlife species automatically. Like most supervised classifiers, it can only identify species it has been trained on and may struggle with poor lighting, occlusion, or unfamiliar environments.
18. Drone Image Analysis
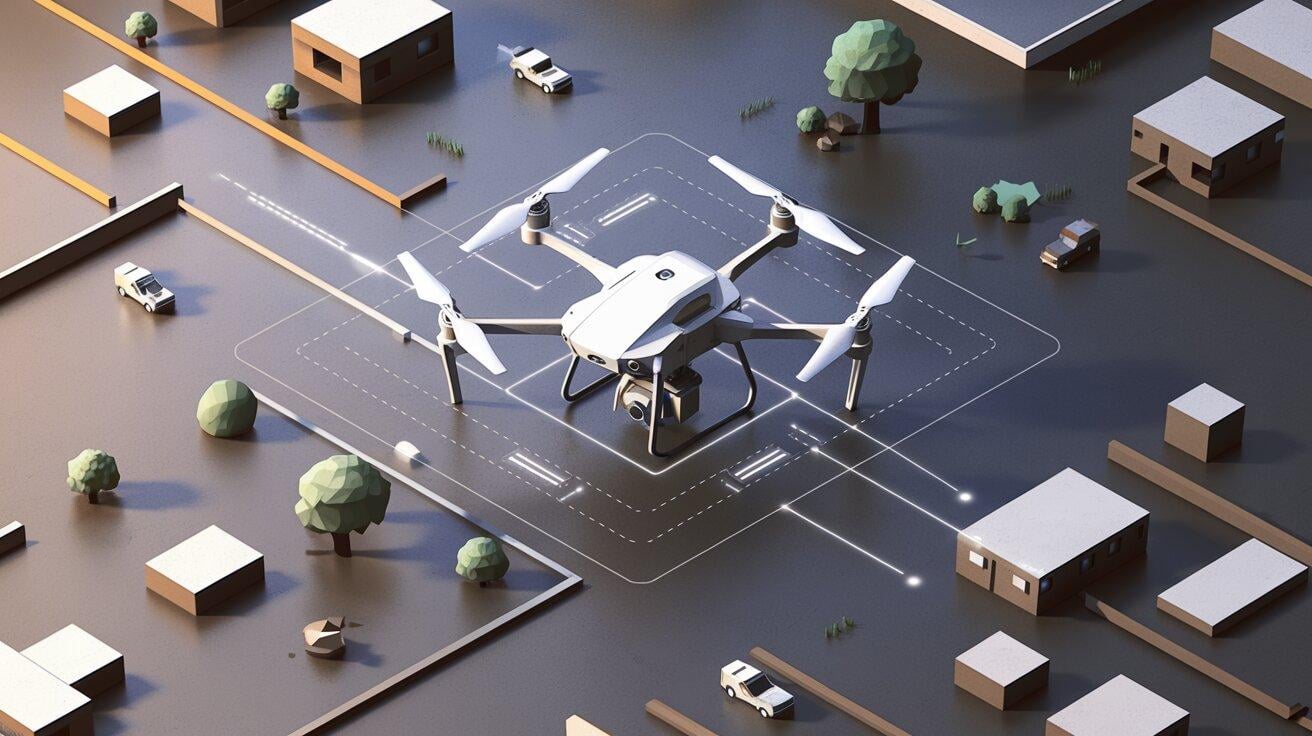
Drone image analysis uses object detection models to identify and locate objects in aerial images captured by drones. Unlike ground-level photos, aerial imagery presents unique challenges such as tiny objects, large image sizes, and varying viewing angles, making preprocessing and data augmentation especially important.
Recommended tutorial: Roboflow (official) — How to Train Computer Vision Models on Aerial Imagery by Kelly M.
Note: The post dates from 2022 and the interface has changed since, but the workflow and the features it uses are the same.
Tools: Roboflow
Dataset: Aerial floating objects dataset (Kaggle) or another aerial object detection dataset.
Key features: Auto-Orient, Tile, Label Assist, Blur/Rotation/Flip/Crop/Mosaic/Noise augmentations
Prerequisites: A Roboflow account, no local setup needed
Skills: Object detection, Dataset annotation, Aerial image preprocessing
Time estimate: A weekend
What You'll Build
A custom object detection model that identifies objects in aerial drone images, complete with annotated bounding boxes and a deployment-ready inference pipeline.
How to Build It
- Collect or download an aerial imagery dataset and upload it to Roboflow.
- Annotate the target objects with bounding boxes or review automatically generated annotations.
- Apply preprocessing such as auto-orientation and augmentations like rotation, cropping, blur, and mosaic to improve robustness.
- Train an object detection model on the processed dataset.
- Evaluate the model using metrics such as precision, recall, and mean Average Precision (mAP).
- Deploy the trained model and test it on new drone images or video footage.
What This Proves
You can build an end-to-end aerial object detection pipeline, from annotation and preprocessing to model training, evaluation, and deployment.
Wrong for you if you're expecting aerial imagery to work exactly like standard object detection datasets. Small objects, high-resolution images, and changing viewing angles require additional preprocessing and augmentation for good results.
19. Sports Analytics with Computer Vision
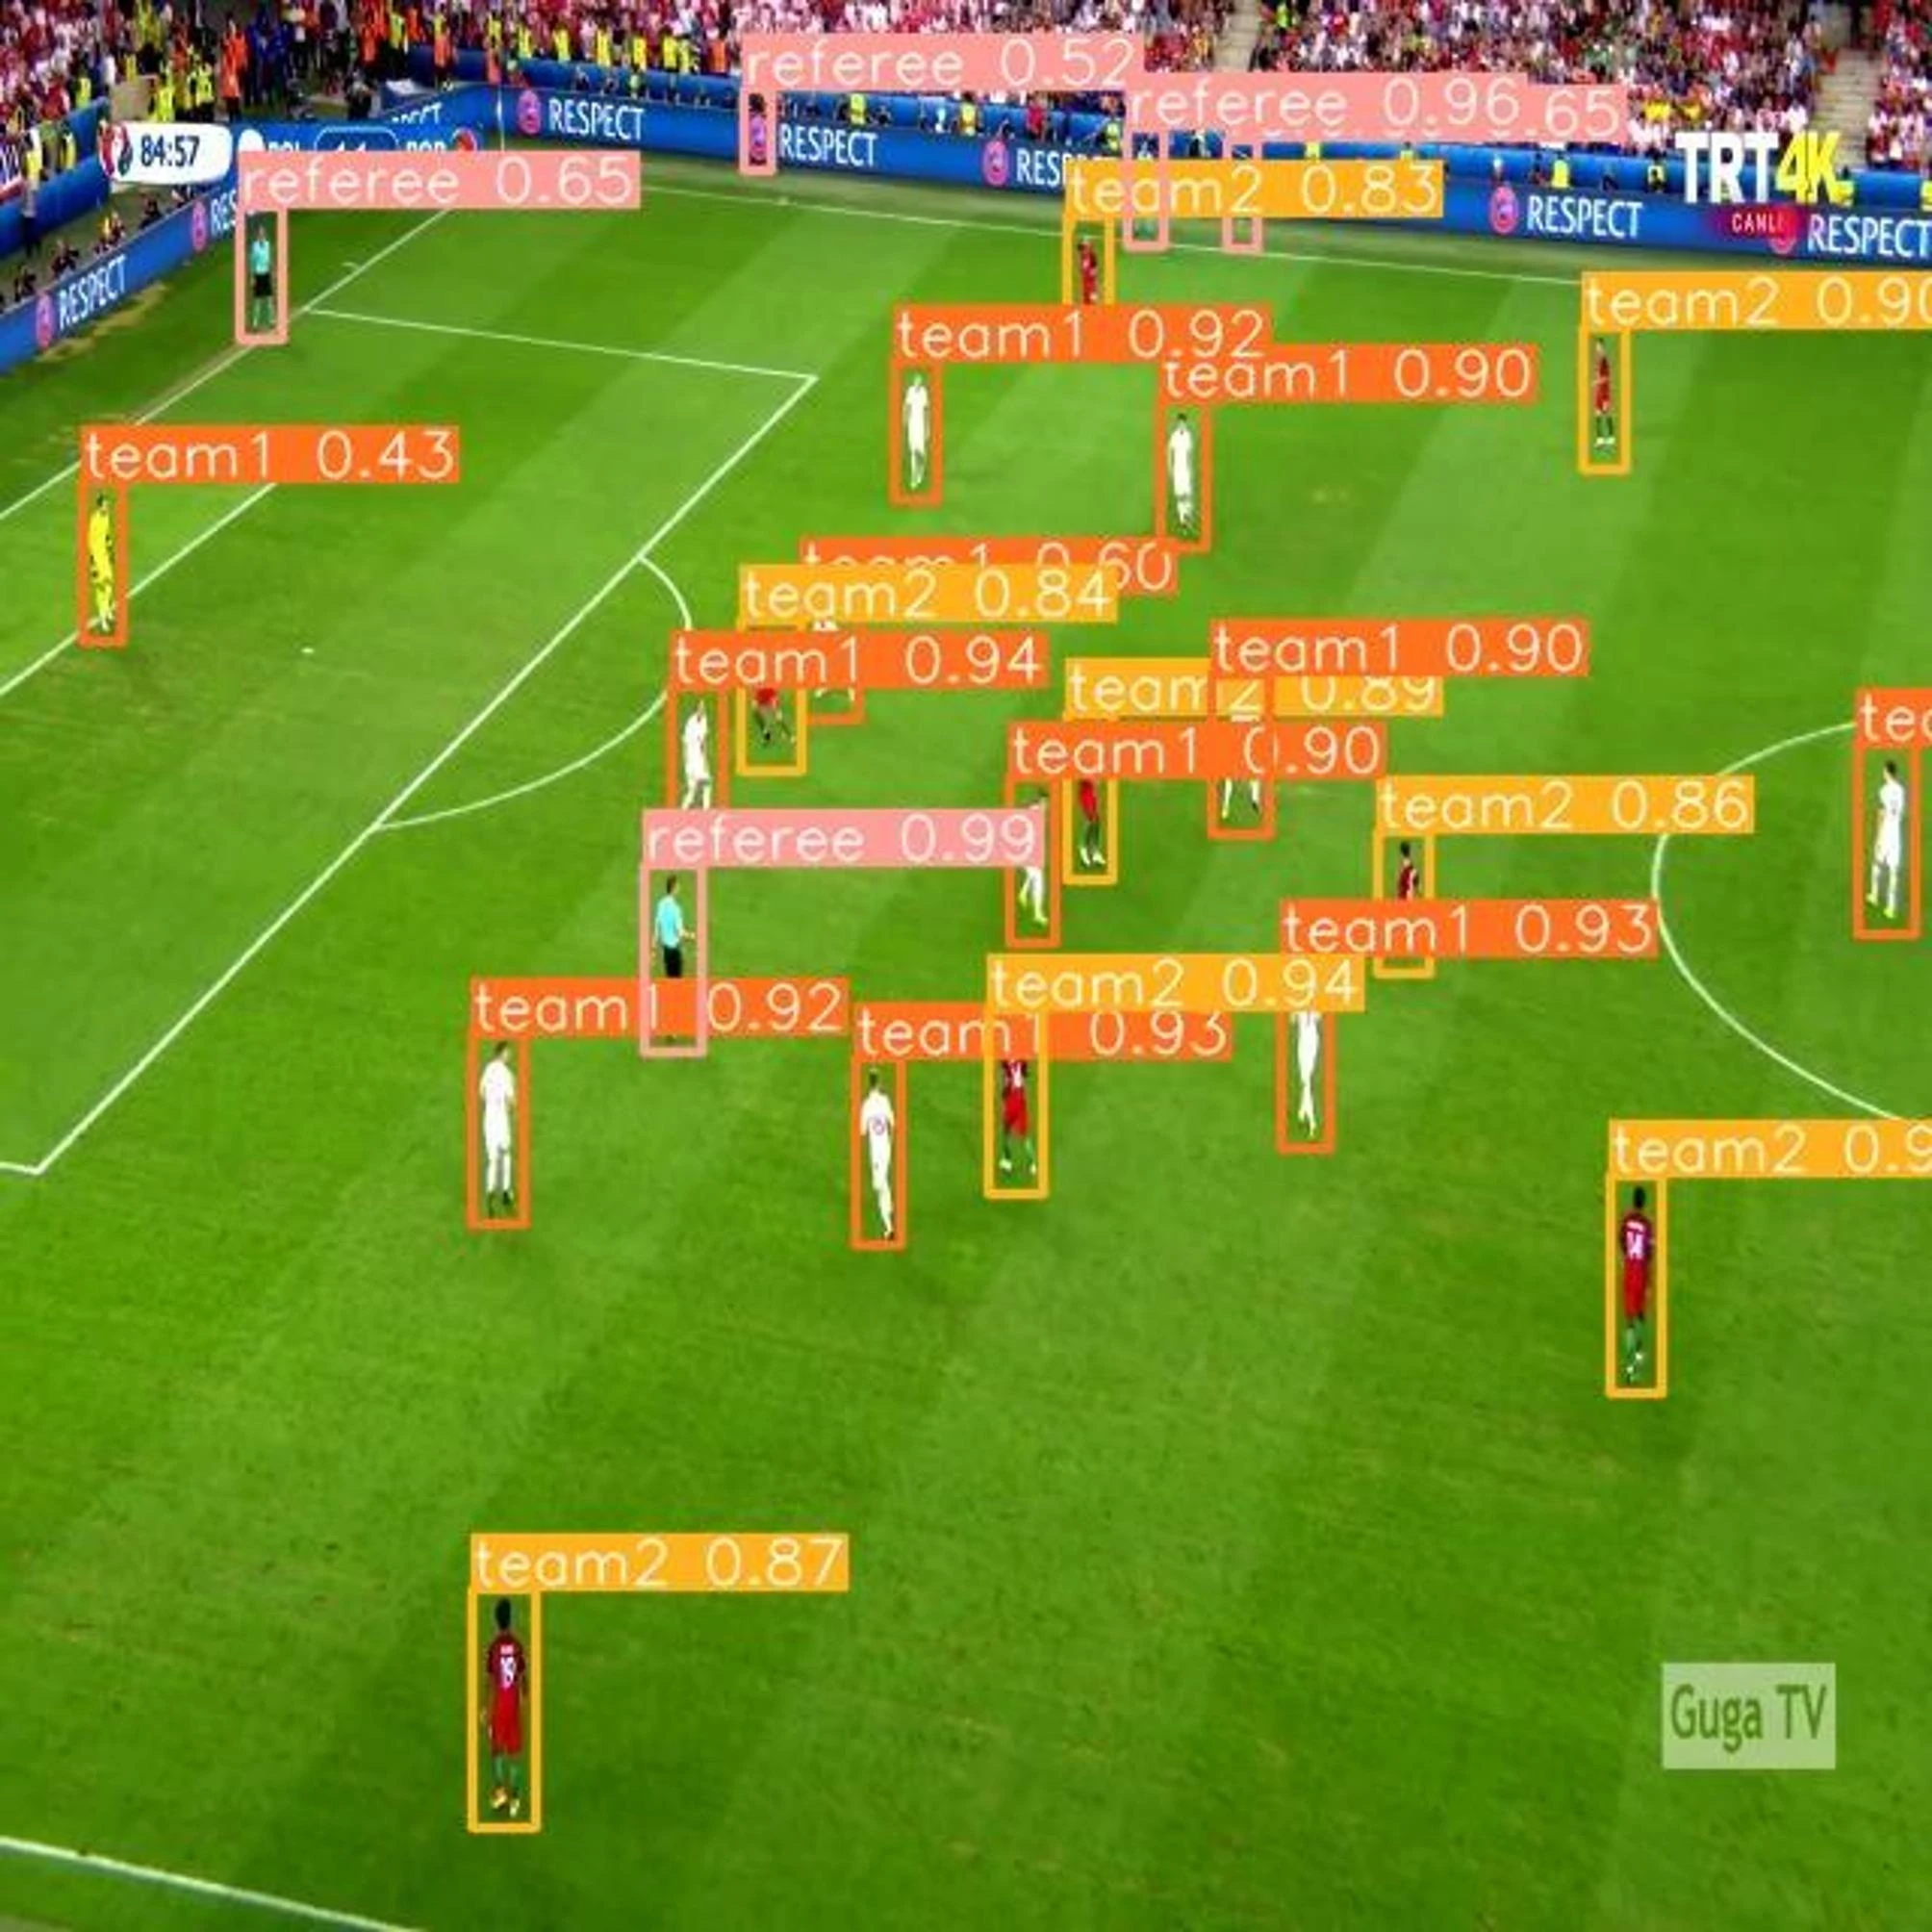
Sports analytics applies computer vision to automate officiating tasks from match footage. In this project, you'll build an offside detection system that uses YOLOv8 to identify players and the ball, determine player positions at the moment of a pass, and classify whether an attacking player is offside according to FIFA rules.
Recommended read: Scientific Reports (Nature Portfolio) — YOLOv8 Computer Vision for Automated Offside Detection in Professional Football Validated Through Supervised Learning by Abdel-Fattah et al.
Tools: Python, OpenCV, Ultralytics YOLOv8
Key concepts: YOLO object detection, HSV/K-means team classification, second-to-last-defender offside line
Prerequisites: Project 18, or experience running a pretrained detector
Skills: Multi-object detection, sports vision pipelines, spatial reasoning, real-time inference
Time estimate: A week of evenings
What You'll Build
A computer vision pipeline that processes football footage, detects players and the ball, approximates the second-to-last defender using player positions, and automatically determines whether an offside offense has occurred.
How to Build It
- Collect football images or video frames containing offside situations.
- Train or fine-tune a YOLOv8 model to detect players, referees, and the ball.
- Classify players by team using HSV color analysis and K-means clustering on jersey colors.
- Approximate the second-to-last defender, the reference point for offside, using the horizontally extreme player positions per team. This is the shortcut the paper uses to cut compute, and it breaks when the defensive line compresses centrally.
- Detect the moment the ball is played and compare attacker positions with that second-to-last defender.
- Display the final offside decision on the video feed.
What This Proves
You can combine object detection with rule-based reasoning to solve a real-world sports officiating problem, integrating multiple computer vision components into a single end-to-end application.
Wrong for you if you want something to clone and run. The paper describes a method rather than shipping code or data, so you'll be implementing from the write-up. It also reports 83% accuracy against a professional benchmark above 93%, and production systems like semi-automated offside technology rely on multiple synchronized cameras, precise calibration, and additional tracking infrastructure that go well beyond this project.
20. Augmented Reality with OpenCV

Augmented reality changes the real world by overlaying digital content onto physical objects. In this project, you'll use OpenCV to detect ArUco markers, estimate the target surface, and seamlessly project an image onto it, creating a simple marker-based AR experience.
Recommended tutorial: PyImageSearch — OpenCV Augmented Reality (AR) by Adrian Rosebrock.
Note: This tutorial predates OpenCV 4.7, where marker detection moved from a standalone function to a detector object's method. The tutorial's original calls will error out on a current install. Dictionary_get() and DetectorParameters_create() are gone too, so use getPredefinedDictionary() and DetectorParameters(), then build an ArucoDetector and call .detectMarkers() on it.
Tools: Python, OpenCV (ArUco module)
Key functions: cv2.aruco.ArucoDetector, cv2.findHomography, cv2.warpPerspective
Prerequisites: Basic Python, a printer for the markers
Skills: Marker detection, homography, perspective transformation, image warping
Time estimate: A weekend
What You'll Build
A Python application that detects a set of ArUco markers in a static image and replaces its surface with another image, creating a convincing augmented reality overlay.
How to Build It
- Print a set of ArUco markers.
- Detect the markers using OpenCV's ArUco module.
- Order the detected marker corners.
- Compute a homography between the source image and the detected surface.
- Warp the source image with a perspective transform.
- Blend the transformed image into the original scene to create the AR effect.
What This Proves
You understand how computer vision can estimate planar surfaces and use geometric transformations to place digital content accurately within a real-world scene.
Wrong for you if you're looking to build immersive AR experiences with 3D object tracking or markerless AR. This project focuses on the fundamentals of marker-based augmented reality using OpenCV and ArUco markers rather than full AR platforms like ARKit or ARCore.
21. Image Super Resolution
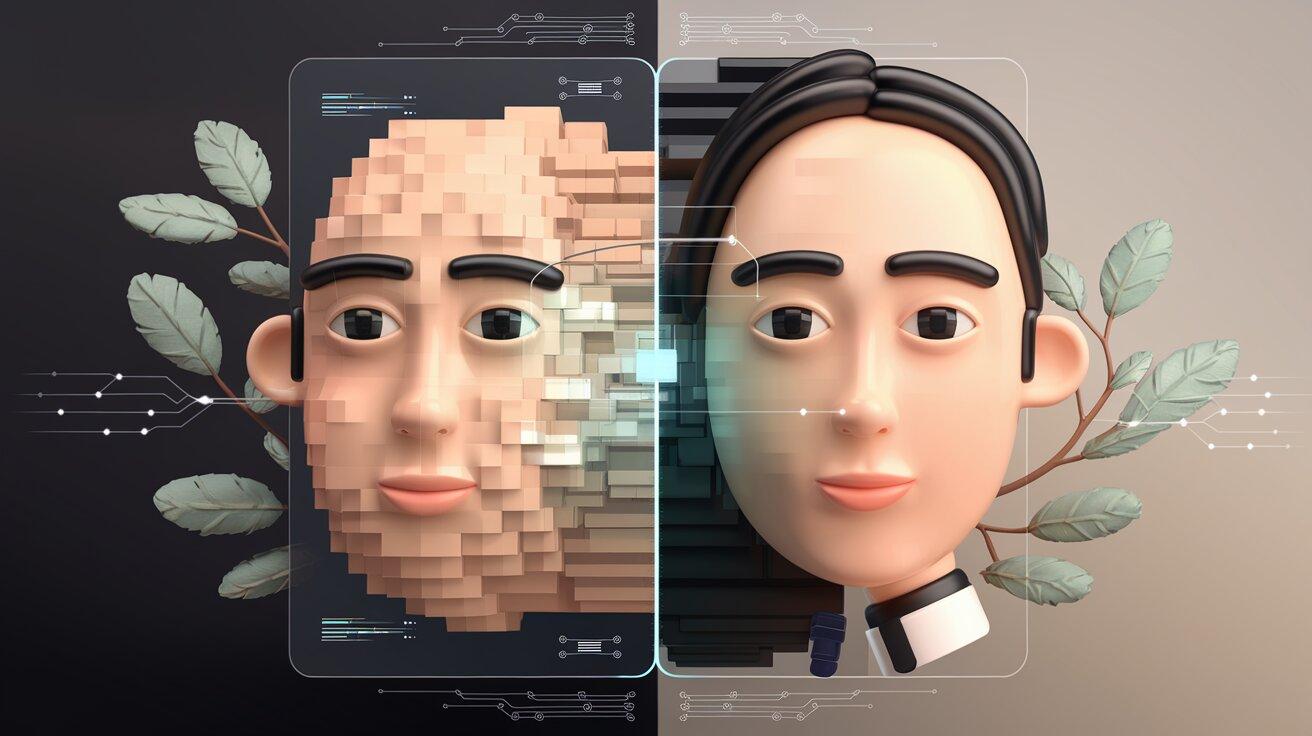
Image super resolution uses deep learning to increase an image's resolution while preserving details and reducing blurriness. In this project, you'll use OpenCV's DNN Super Resolution module with a pretrained model to upscale low-resolution images and compare the results with traditional interpolation methods.
Recommended tutorial: PyImageSearch — OpenCV Super Resolution with Deep Learning by Adrian Rosebrock.
Note: Written for OpenCV 4. The dnn_superres module still ships in OpenCV 5, but if the pretrained .pb models fail to load, pin to opencv-contrib-python below 5.
Tools: Python, OpenCV (DNN Super Resolution)
Key functions: cv2.dnn_superres.DnnSuperResImpl_create, readModel, setModel, upsample
Prerequisites: Basic Python, opencv-contrib-python installed
Skills: Image enhancement, deep learning inference, pretrained models, image quality evaluation
Time estimate: An evening
What You'll Build
A Python application that loads a low-resolution image, applies a pretrained super-resolution model such as EDSR or FSRCNN, and outputs a sharper, higher-resolution version for visual comparison.
How to Build It
- Install OpenCV with the DNN Super Resolution module.
- Download a pretrained model such as EDSR, ESPCN, FSRCNN, or LapSRN.
- Load a low-resolution image.
- Initialize the super-resolution model in OpenCV.
- Upscale the image using deep learning.
- Compare the enhanced result with the original image and standard interpolation methods.
What This Proves
You understand how to apply pretrained deep learning models for image enhancement and can integrate computer vision libraries to improve image quality without training a neural network from scratch.
Wrong for you if you want to build and train your own super-resolution neural network. This project focuses on using existing pretrained models through OpenCV rather than developing a custom deep learning architecture.
22. Style Transfer with Neural Networks
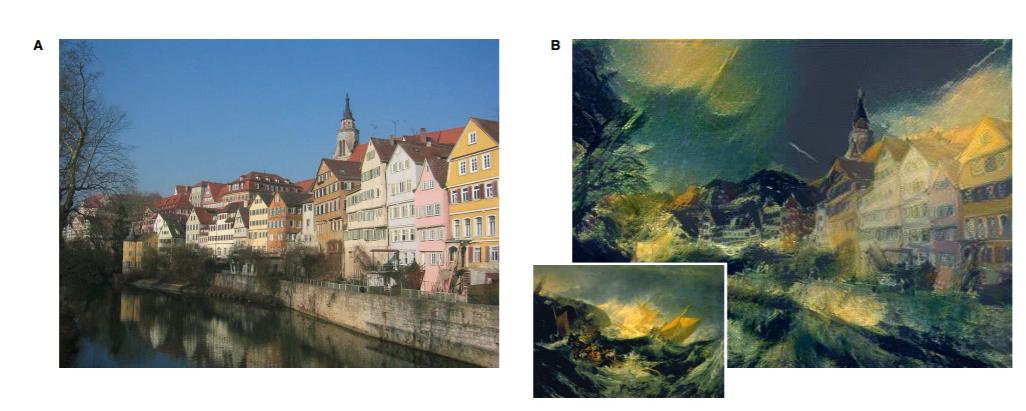
Neural style transfer uses deep learning to combine the content of one image with the artistic style of another. In this project, you'll use a pretrained VGG19 network in TensorFlow to generate a new image that preserves the original scene while adopting the colors, textures, and brushstrokes of a style reference image.
Recommended tutorial: GeeksforGeeks — Neural Style Transfer with TensorFlow.
Tools: Python, TensorFlow, Keras, Matplotlib
Key functions: VGG19, gram_matrix, tf.GradientTape
Prerequisites: Project 6, or TensorFlow installed and comfort with a training loop
Skills: Transfer learning, feature extraction, image generation, optimization
Time estimate: A weekend
What You'll Build
A TensorFlow application that accepts a content image and a style image, applies Neural Style Transfer using a pretrained VGG19 model, and generates a stylized output image.
How to Build It
- Load a content image and a style image.
- Preprocess both images for VGG19.
- Load the pretrained VGG19 model as a fixed feature extractor.
- Extract content and style features from selected convolutional layers.
- Optimize a generated image by minimizing content and style losses.
- Save and display the final stylized image.
What This Proves
You understand how pretrained convolutional neural networks can be used beyond classification, applying feature representations and optimization techniques to generate new images with artistic styles.
Wrong for you if you're looking to train a generative AI model or create images from text prompts. This project uses a pretrained VGG19 network to transfer the style from one image to another rather than training a new image generation model.
Advanced Computer Vision Projects
In these projects the modeling is rarely the hard part. Expect the difficulty to come from somewhere else: building an environment that actually compiles, getting access to a research dataset, fitting a model onto constrained hardware, or implementing an architecture yourself instead of calling one.
23. Deepfake Detection
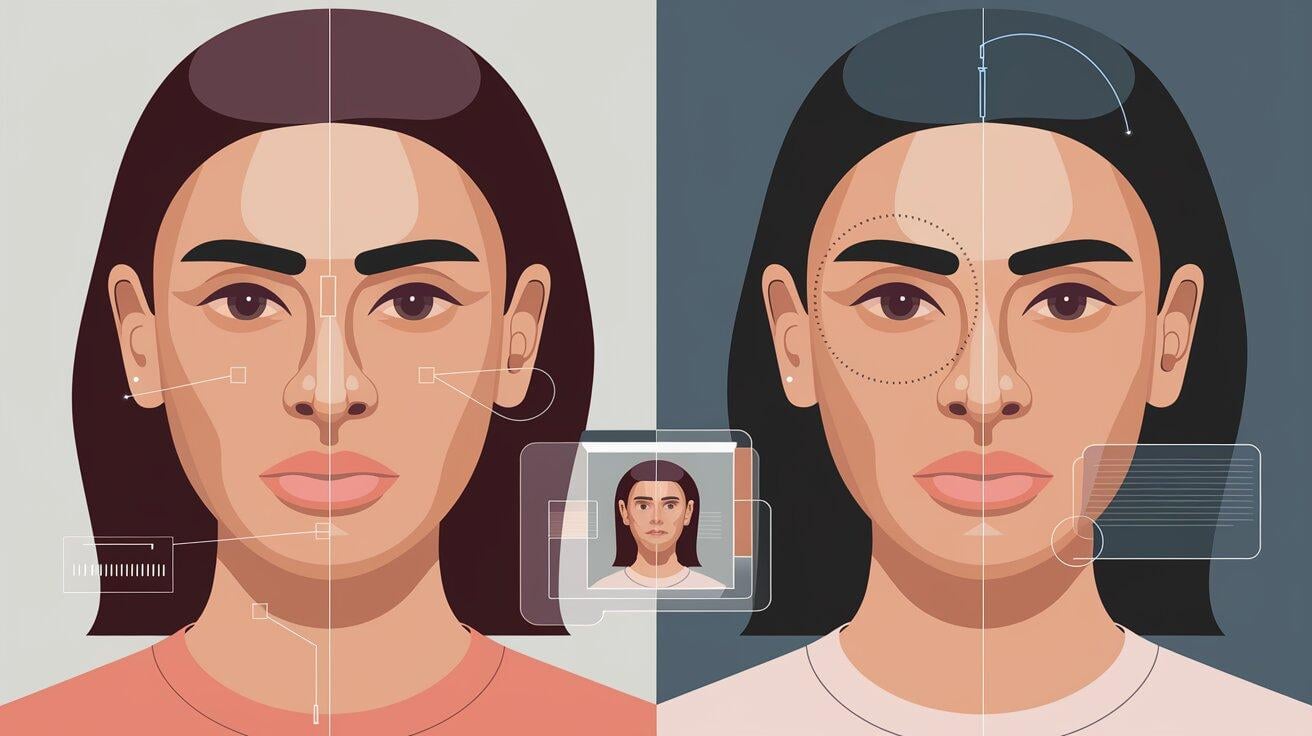
Deepfake detection uses deep learning to distinguish manipulated facial images and videos from authentic ones. In this project, you'll train a classifier on the FaceForensics++ dataset to identify whether a face has been digitally altered using common face manipulation techniques.
Recommended repo: GitHub — Deepfake-Detection (PyTorch) by HongguLiu.
Tools: Python, PyTorch, OpenCV
Dataset: FaceForensics++
Key functions: dlib.get_frontal_face_detector, model_selection (XceptionNet)
Prerequisites: Any of projects 6 through 9, a GPU, and dataset access requested about a week ahead
Skills: Deep learning, image classification, computer vision datasets, binary classification
Time estimate: Several weeks
What You'll Build
A deep learning model that analyzes face images or video frames and predicts whether they are authentic or manipulated, using the FaceForensics++ dataset for training and evaluation.
How to Build It
- Request access to the FaceForensics++ dataset via the linked Google Form (allow up to a week for approval).
- Run the repo's download-FaceForensics_v3.py script.
- Extract and preprocess face images or video frames.
- Split the data into training, validation, and test sets.
- Train a convolutional neural network or fine-tune a pretrained model.
- Evaluate performance using accuracy, precision, recall, and F1-score.
- Test the model on unseen manipulated and authentic images.
What This Proves
You can build an end-to-end computer vision classification pipeline, from preparing a large research dataset to training and evaluating a deep learning model for detecting manipulated media.
Wrong for you if you're looking to create deepfakes or perform face swapping. This project focuses on detecting manipulated media rather than generating it, and it requires a relatively large dataset and GPU resources for effective model training. Note too that the repo targets Python 3.6 and PyTorch 1.3.1, so expect to port it to a current environment before anything runs.
24. 3D Scene Reconstruction with Neural Radiance Fields (NeRF)
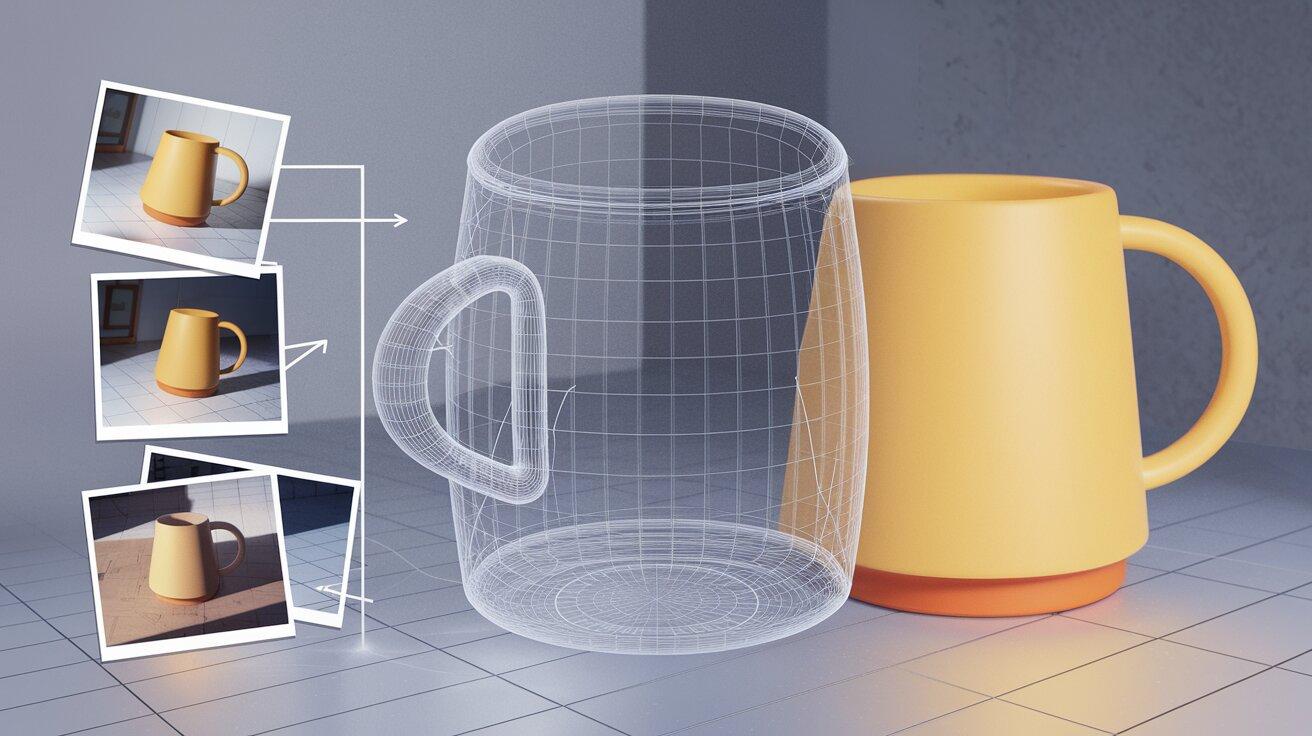
A Neural Radiance Field reconstructs a 3D scene from multiple 2D images by learning a continuous representation of its geometry and appearance. In this project, you'll train a NeRF model on images of a single scene and render realistic views from camera angles that were never captured.
Recommended repo: GitHub — Nerfstudio. PyTorch-based, well documented, with setup docs and tutorials built in.
Tools: Python, PyTorch, Nerfstudio
Dataset: Nerfstudio's built-in example captures, downloaded with ns-download-data
Key functions: ns-process-data, ns-train nerfacto, ns-viewer (built-in web viewer), ns-export
Prerequisites: An NVIDIA GPU, plus comfort matching CUDA versions and building from source
Skills: 3D reconstruction, neural rendering, deep learning, computer vision
Time estimate: A week of evenings
What You'll Build
A NeRF model that learns a 3D representation of a scene from multiple images and generates realistic novel viewpoints by rendering the scene from unseen camera positions.
How to Build It
- Download one of the example datasets or capture images of your own scene.
- Prepare the camera poses and scene data using Nerfstudio's built-in COLMAP-based processing tool (ns-process-data), or use one of its ready-to-download example captures.
- Train the NeRF model using the provided configuration.
- Monitor training in Nerfstudio's real-time web viewer, which shows the reconstruction improving live rather than through a separate logging dashboard.
- Render novel viewpoints from the trained model.
- Explore the reconstructed scene and extract a mesh if desired.
What This Proves
You understand how neural networks can learn continuous 3D scene representations from multiple images and use volumetric rendering to synthesize realistic new viewpoints.
Wrong for you if you're looking for a beginner-friendly project or want to avoid setup pain. Training itself is fast now (minutes, not hours), but getting there isn't: Nerfstudio needs matching PyTorch/CUDA versions and a from-source build of tiny-cuda-nn, and COLMAP-based pose estimation can quietly fail on textureless or reflective scenes. The difficulty here is debugging the pipeline, not sitting through training.
25. Real-Time Object Detection on an Edge Device

Edge AI brings computer vision directly onto devices such as the NVIDIA Jetson Nano, allowing object detection without relying on cloud processing. In this project, you'll train and optimize a YOLOv3 model, then benchmark it on an edge device to quantify the real trade-offs between inference speed and accuracy.
Note: The Jetson Nano has been discontinued. The current equivalent is the Jetson Orin Nano Super Developer Kit ($399 as of mid-2026, up from its $249 launch price). Concepts still apply, but setup steps will differ.
Recommended read: Stanford CS230 Course Project — Real-Time Object Detection on an Edge Device by Stein, Liu & Sun
Tools: Python, Darknet, ONNX, TensorRT, NVIDIA Jetson Nano
Dataset: PASCAL VOC (16.5k training / 5k validation images, 20 classes) and MS COCO (83k training / 5k validation images, 80 classes, 2014 split) for pretraining
Key functions: trt.OnnxParser, build_serialized_network, PreprocessYOLO/PostprocessYOLO
Prerequisites: A Jetson or similar device, plus Darknet and ONNX/TensorRT tooling
Skills: Model deployment, edge computing, deep learning optimization, benchmarking
Time estimate: Several weeks
What You'll Build
A YOLOv3 object detection pipeline pretrained on COCO and fine-tuned on VOC, optimized through ONNX and TensorRT (layer fusion, kernel tuning, FP16 quantization), and benchmarked for inference speed and mAP on both a desktop GPU and a Jetson Nano.
How to Build It
- Train YOLOv3 (Darknet-53 backbone) on the COCO dataset, or start from pretrained COCO weights.
- Preprocess images by normalizing and reshaping to a resolution that's a multiple of 32 (try 320×320, 416×416, and 608×608 to compare).
- Fine-tune the model on the VOC dataset via transfer learning, adjusting the output layer for VOC's 20 classes.
- Convert the trained model to ONNX format and build a TensorRT engine for optimized inference.
- Apply optimization techniques such as layer fusion, kernel tuning, and FP16 quantization.
- Benchmark inference time and mAP on both a desktop GPU and the Jetson Nano to measure the real speed-vs-accuracy trade-offs of edge deployment.
What This Proves
You can move beyond model training by optimizing and deploying a computer vision application on embedded hardware, and you understand the concrete trade-offs between inference speed and accuracy that different optimization techniques introduce.
Wrong for you if you want a literal live-camera-feed demo. This project benchmarks on static COCO/VOC validation images rather than a live camera stream, and it requires comfort with Darknet and ONNX/TensorRT rather than a pure PyTorch workflow.
26. Visual SLAM for Robot Navigation
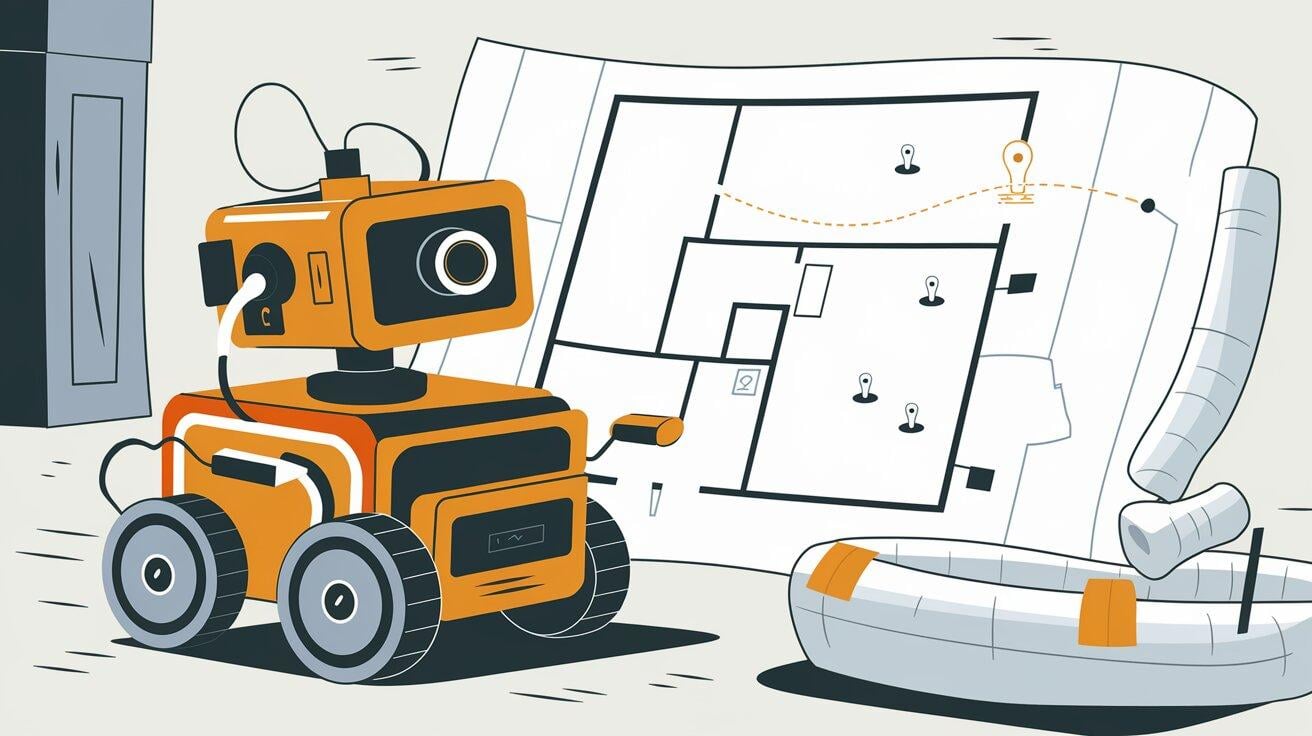
Visual Simultaneous Localization and Mapping (Visual SLAM) enables a robot to estimate its position while building a map of its surroundings using camera images. In this project, you'll use ORB-SLAM3 to process visual data, track camera movement in real time, and generate a map that allows a robot to navigate an unknown environment.
Recommended repo: GitHub (official) — ORB-SLAM3 by UZ-SLAMLab
Tools: C++, OpenCV, ORB-SLAM3, ROS (optional)
Dataset: EuRoC dataset, TUM-VI dataset
Key functions: System(), TrackMonocular, TrackStereo, TrackRGBD
Prerequisites: C++, and experience building a C++ project with dependencies
Skills: Feature extraction, camera tracking, map building, loop closure, pose estimation
Time estimate: Several weeks
What You'll Build
A Visual SLAM system that tracks a camera's position while constructing a map of its environment using monocular, stereo, or RGB-D camera data. The completed system can estimate camera trajectories and support robot navigation in real time.
How to Build It
- Install and build the ORB-SLAM3 library and its dependencies.
- Download a supported dataset or connect a compatible camera.
- Calibrate the camera and configure the project settings.
- Run ORB-SLAM3 to detect and track visual features across image frames.
- Build a map of the environment while continuously estimating the camera pose.
- Visualize the reconstructed map and evaluate the estimated trajectory.
What This Proves
You can implement a complete Visual SLAM pipeline that combines feature tracking, localization, mapping, and loop closure to estimate camera motion and reconstruct environments in real time.
Wrong for you if you're looking for a beginner-friendly computer vision project. Visual SLAM requires knowledge of computer vision, geometry, and C++, and involves configuring multiple libraries and camera calibration before running the system.
27. Visual Anomaly Detection for Manufacturing Quality Control
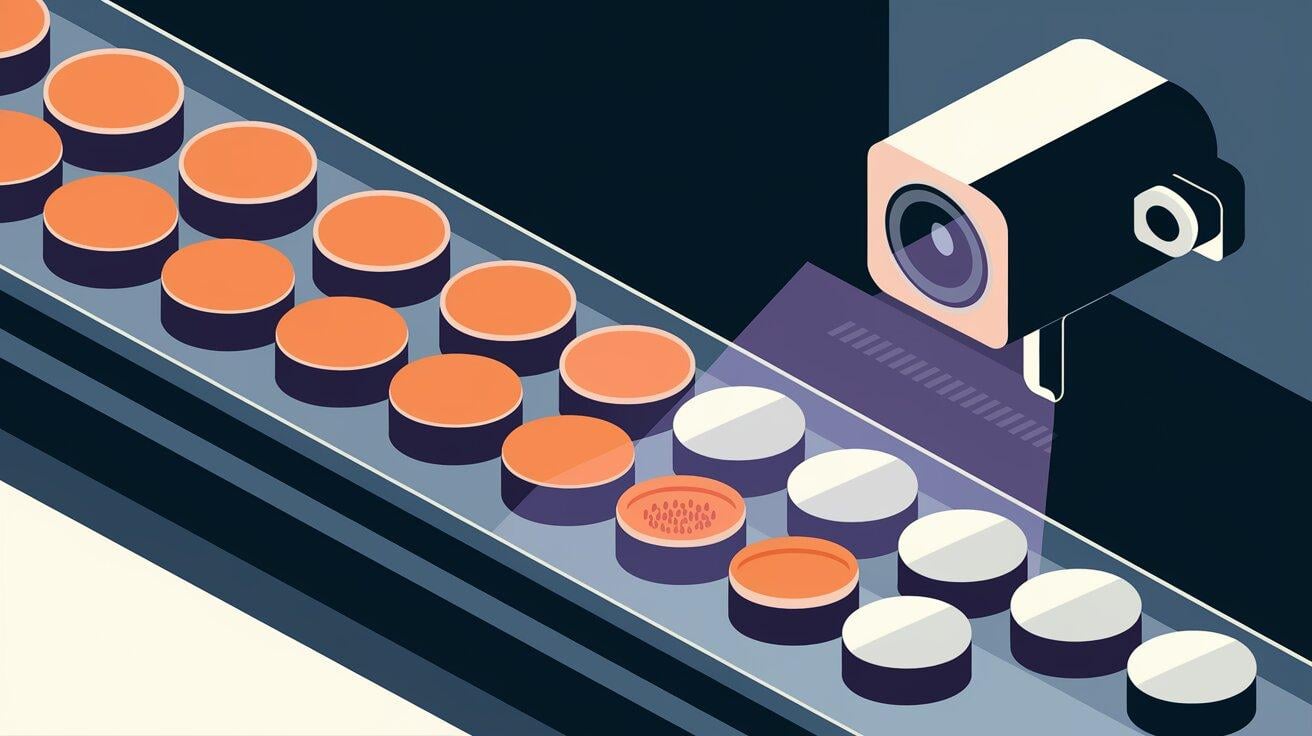
Visual anomaly detection identifies defective products by learning what normal products look like rather than learning every possible defect. In this project, you'll train an autoencoder on defect-free images and use reconstruction error to identify faulty products during manufacturing.
Recommended repo: GitHub — MVTec Anomaly Detection by Adnene Boumessouer
Note: The repo pins TensorFlow 2.1 and was last updated in 2022, so expect to port it to a current environment. MVTec AD also requires a request form and is licensed for non-commercial use only.
Tools: Python, TensorFlow/Keras, scikit-image
Dataset: MVTec AD
Key functions: AutoEncoder, Preprocessor, TensorImages, calculate_resmaps, predict_classes
Prerequisites: Any of projects 6 through 9
Skills: Unsupervised learning, industrial inspection, anomaly detection, deep learning
Time estimate: A week of evenings
What You'll Build
A visual inspection system that learns the appearance of defect-free products and automatically flags defective items by measuring reconstruction error on new images.
How to Build It
- Collect images of defect-free products.
- Preprocess and resize the images for training.
- Train an autoencoder to reconstruct normal product images.
- Compute reconstruction error for new inspection images.
- Define an anomaly threshold based on reconstruction loss.
- Flag products whose reconstruction error exceeds the threshold and visualize the detected defects.
What This Proves
You understand how unsupervised deep learning can detect manufacturing defects without requiring labeled examples of every possible defect, making it practical for industrial quality control.
Wrong for you if you're looking for a supervised image classification project. This approach assumes defects are rare and learns only from normal examples, making it less suitable when every defect type is already labelled.
28. Video Action Recognition
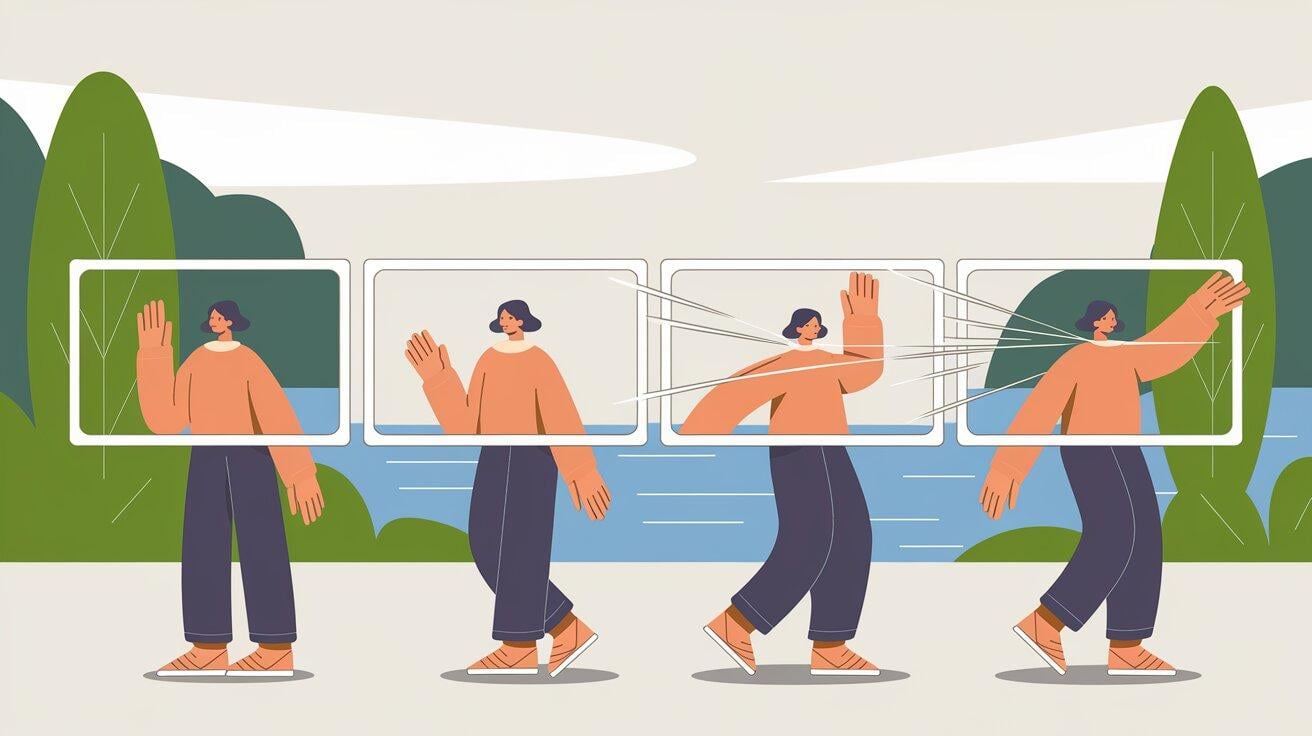
Action recognition classifies what is happening in a video clip, such as running, jumping, or waving, which requires reasoning across frames rather than classifying a single image. Unlike image classification, the model has to learn temporal patterns, not just spatial ones.
Recommended tutorial: Hugging Face — Video classification.
Tools: Python, Hugging Face Transformers, PyTorchVideo
Note: PyTorchVideo has not had a release since 2022. Install it before anything else so you can pin torch and torchvision to versions it tolerates.
Dataset: UCF101 (101 classes, ~13,000 clips)
Key function: VideoMAEForVideoClassification.from_pretrained, Trainer, evaluate.load
Prerequisites: Any of projects 6 through 9, plus a cloud GPU with at least 16GB
Skills: Temporal feature extraction, video data loaders, accuracy evaluation with Hugging Face evaluate
Time estimate: A week of evenings
What You'll Build
A classifier trained on a subset of UCF101 using a pretrained video transformer such as VideoMAE, fine-tuned on your chosen action classes.
How to Build It
- Download a subset of UCF101 covering the action classes you want.
- Set up video data loaders with a defined frame sampling strategy.
- Load a pretrained VideoMAE model using the Hugging Face Transformers library.
- Fine-tune the model on your subset of action classes.
- Evaluate accuracy on the held-out test set and run inference on a sample video.
- Inspect which action classes get confused most often.
What This Proves
You can extend image-based deep learning into the temporal dimension, a step most single-image projects on this list never require.
Wrong for you if your hardware cannot hold multiple video frames in memory at once. Video models are considerably more memory-hungry than image models; a cloud GPU with at least 16GB of memory makes this far less painful.
29. Multi-Camera Person Re-Identification
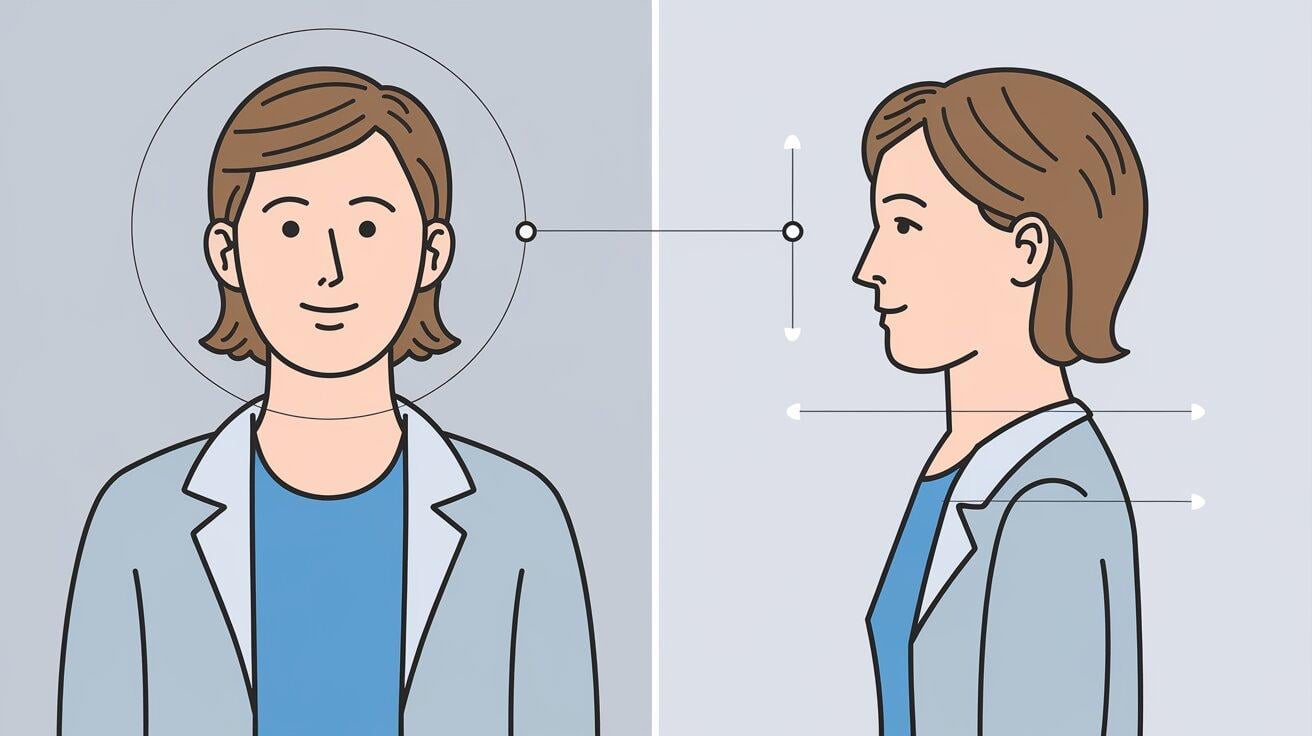
Person re-identification matches the same individual across different camera views that never overlap, using appearance alone since face recognition is usually unreliable at surveillance-camera resolution.
This project implements Spatial-Temporal Re-identification (ST-ReID), which combines visual features from a CNN with the spatio-temporal pattern of when and where cameras typically see the same person, to score matches more accurately than appearance alone.
Recommended repo: GitHub repo by SurajDonthi — Multi-Camera-Person-Re-Identification.
Tools: Python, PyTorch, PyTorch Lightning
Dataset: Market-1501 dataset
Key functions: PCB, ReIDDataModule, smooth_st_distribution, joint_scores, re_ranking, mAP
Prerequisites: Any of projects 6 through 9, plus PyTorch rather than TensorFlow
Skills: Part-based feature extraction, spatio-temporal modeling, mean Average Precision (mAP) and CMC evaluation
Time estimate: Several weeks
What You'll Build
A ResNet-50-based re-identification model trained on the Market-1501 dataset that combines visual feature matching with a learned spatio-temporal distribution to retrieve the closest matches for a query person from a gallery captured on different cameras.
How to Build It
- Load the Market-1501 dataset and organize it by identity and camera.
- Build a ResNet-50 backbone, splitting the final convolutional layer into 6 parts (PCB), each predicting the person's identity label.
- Train the model by summing the 6 part-classification losses for backpropagation.
- Compute a Gaussian-smoothed spatio-temporal distribution from camera IDs and frame numbers across the dataset.
- At evaluation time, extract L2-normalized visual features for query and gallery images, then combine them with the spatio-temporal scores into a joint score.
- Optionally re-rank the joint scores, then evaluate retrieval quality using mAP and CMC (Rank-1, Rank-5, Rank-10).
What This Proves
You can combine visual feature learning with an auxiliary structured signal (spatio-temporal patterns) to improve retrieval accuracy beyond appearance alone, a pattern that shows up in recommendation and retrieval systems generally whenever side information is available alongside raw features.
Wrong for you if you are uncomfortable with the surveillance use case. This is a legitimate research area, but it is worth being deliberate about whether you want it in a public portfolio.
30. Building a Custom Object Detector From Scratch
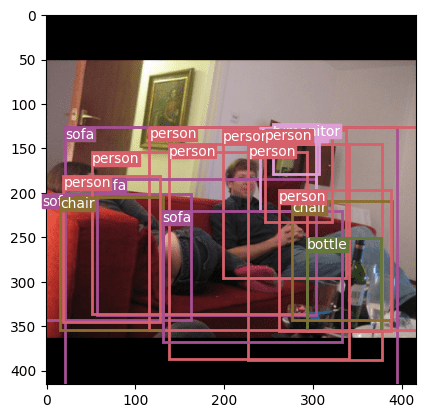
Every other detection project on this list fine-tunes an existing architecture. This one has you build the detection head yourself, including anchor box generation, intersection-over-union matching, and a combined classification-and-localization loss. It is the project that turns "I can use YOLO" into "I understand what YOLO is actually doing."
Recommended tutorial: GeeksforGeeks — YOLOv3 From Scratch Using PyTorch.
Tools: Python, PyTorch
Dataset: PASCAL VOC
Prerequisites: At least two of projects 13, 18, 19, or 25
Skills: Anchor box design, IoU-based matching, non-max suppression, combined loss functions
Time estimate: Several weeks
What You'll Build
A YOLOv3-style single-stage detector trained on Pascal VOC, with your own implementation of anchor boxes (9 total, across 3 scales), IoU-based ground-truth matching, non-max suppression, and a combined loss function (box, objectness, no-object, and class losses).
How to Build It
- Design a set of anchor boxes at different scales and aspect ratios.
- Build ground-truth assignment logic that matches anchors to objects using IoU.
- Design the detection head to output class scores and box offsets per anchor.
- Implement non-max suppression from first principles to clean up overlapping predictions.
- Train on the Pascal VOC dataset for a set number of epochs, tracking the combined loss (box + object + no-object + class) to confirm it's decreasing.
- Test the trained model on a sample image, applying your NMS implementation to the raw predictions, and visually inspect the output boxes.
What This Proves
You understand object detection at the architecture level, not just at the "call this library" level, which is the clearest signal of depth you can put in a portfolio.
Wrong for you if you need a detector to actually use. Fine-tuning a current pretrained model in an afternoon will beat a from-scratch YOLOv3 on VOC. The value here is understanding, not the weights you end up with.
What Skills Do Computer Vision Projects Build?
Working through even one computer vision project gives you hands-on experience with several connected skills.
- Image preprocessing. Resizing, normalizing, and augmenting images before feeding them to a model.
- Model selection. Choosing between a convolutional neural network (CNN), a pre-trained model like ResNet, or a simpler OpenCV-based approach.
- Evaluation. Reading metrics like accuracy, precision, and recall to understand whether your model actually works.
- Deployment basics. Wrapping your model in a simple app or API so others can use it.
These skills transfer directly to broader machine learning projects and AI applications across industries.
How to Choose the Right Project
Choose a computer vision project based on your current skill level, the tools you already know, and the kind of problem you actually want to solve.
Picking the wrong difficulty level is the most common reason people abandon projects before finishing them.
Here is a simple way to think about it.
Your Starting Point
Be honest about where you are. A beginner who has never used OpenCV will struggle with a real-time object detection system on day one. That struggle is not productive, it is just discouraging.
Use this table as a rough guide before you commit to anything.
| Skill Level | You can already... | Good starting point |
|---|---|---|
| Beginner | Write basic Python, install libraries | Color detection, image filters |
| Intermediate | Use NumPy, understand ML basics | Object tracking, facial emotion recognition |
| Advanced | Train custom models, use GPUs | Deepfake detection, custom object detector from scratch |
The table shows a progression. Each level builds on the one before it.
Measuring a Project's Complexity
Four factors determine how complex a computer vision project actually is.
- Data availability. Does a clean dataset already exist, or do you need to collect and label your own images?
- Model requirements. Can you use a pretrained model, or do you need to train from scratch?
- Real-time processing. Does the system need to work live, like a webcam feed, or can it process images offline?
- Output type. Classifying an image as "cat or dog" is simpler than drawing bounding boxes around multiple objects in a video.
The more of these factors that require original work from you, the harder the project.
Is The Project Actually Interesting to You?
This matters more than people admit. A face recognition project you care nothing about will stall in week two. A license plate reader for your building's parking lot, or a plant disease detector for your garden, will keep you going longer.
Pick a domain you find genuinely interesting, then find the computer vision application that fits inside it. The AI application is the tool. The problem is the motivation.
Final Thoughts
Projects teach you that something works. They don't always teach you why it works, and that gap is usually where people get stuck.
If you keep hitting "I can follow the code, but I don't really get what's happening underneath it," pair this list with two of Dataquest's learning paths.
- Machine Learning Using Python covers the algorithms behind most of the beginner and intermediate projects here.
- Deep Learning in TensorFlow covers what's underneath the CNN-heavy projects, building from a basic neural network up to transfer learning, with a project detecting pneumonia in X-rays that looks a lot like the plant disease and face mask projects on this list.
Neither path replaces building the projects. Finishing one proves you can get a result. Understanding the algorithm is what lets you fix the next one when it breaks, and somewhere past project 20, something will break.
Resources
- OpenCV documentation. The reference for every classical image processing function used across these projects.
- PyTorch and TensorFlow tutorials. Both frameworks publish official beginner-to-intermediate guides that cover the training loop patterns these projects assume.
- Kaggle. Hosts most of the datasets referenced above (MNIST, GTSRB, FER-2013, PlantVillage, Market-1501) in ready-to-download form, often with example notebooks alongside them.
- Hugging Face. Hosts the same class of datasets through its Datasets hub, and its Papers section is a good place to find current implementations and discussion tied to recent research, useful for techniques like NeRF, SLAM, or re-identification.
- Google Colab. Free GPU access, which covers the compute needs of every beginner and most intermediate projects on this list.
FAQs
Do I need a powerful GPU to start?
No. Beginner and most intermediate projects run fine on a free Google Colab GPU or even a CPU, since they either use classical image processing or fine-tune a small pretrained model. A local GPU starts to matter once you reach training-from-scratch projects like custom object detection or NeRF.
Which project should I build first if I want a job in computer vision?
Skip straight to whichever intermediate project best matches the industry you want to work in. Autonomous driving points to traffic sign recognition, agtech points to plant disease detection, and AR or robotics points to gesture recognition. A finished, explainable project in your target domain matters more than working through every project on this list in order.
Do I need to know deep learning math before starting?
No, not for the beginner and most intermediate projects. You need to understand what a loss function is measuring and roughly how gradient descent updates weights, not derive backpropagation by hand. The math matters more once you get to projects like building a detector from scratch or working through NeRF's volumetric rendering.
Are computer vision projects good for a machine learning portfolio?
Yes, though it depends on the project and how far you take it. Beginner projects mostly prove you can follow a tutorial, not stand alone as portfolio pieces. Intermediate and advanced projects become legitimate portfolio work once you add a short write-up explaining what you built, what you'd improve, and where it fails.
Should I use PyTorch or TensorFlow for computer vision?
Either. This list uses both on purpose. TensorFlow/Keras carries the beginner and intermediate projects, since its higher level API stays approachable early on. PyTorch shows up where projects need more control over training or lean into research territory, deepfake detection, NeRF, person re-identification, and building a detector from scratch.
If this is your first project here, stick with whichever framework its tutorial uses. Once you've finished one end to end, picking up the other is a smaller jump than starting from zero, since tensors and the training loop carry over almost directly.
