Tutorial: Installing Python on Windows
Python is a popular open-source, high-level programming language. It's intuitive, and it offers many helpful tools and libraries — Python is a powerful data science asset to have in your toolkit. To start working with Python, we first need to download it and install it on our operating system (in this case, Windows). If you're using macOS, check out our sister tutorial on installing Python on Mac.
How to install Python on Windows
There are two main ways of installing Python on Windows: installation from the official Python website or from Anaconda, a convenient distribution of Python and R programming languages. Choose the first option if you are a programmer using Python for various purposes: creating websites, network programming, developing software applications. If instead, your work is focused on data science and machine learning, then Anaconda is the best choice for you. Essentially, Anaconda is a powerful data science platform that provides more than 1500 built-in Python and R data science packages — and also the most popular Python IDEs. With Anaconda, you can choose to use the graphical user interface (GUI) instead of the command line. Also, it is adapted for processing large amounts of data, easily working with different environments and applications, and managing the package versions.
Check if Python is already installed
Before starting the installation process, we want to check if Python is already installed on your computer (e.g., by a previous user), and if so, which version of Python. To do so, open the command line application Command Prompt (in Windows search, type cmd and press Enter) or Windows PowerShell (right-click on the Start button and select Windows PowerShell) and type there python -V. If you found that Python is already installed on your computer and want to check the path of the installation, run where.exe python in the command line application.
Install Python on Windows from the official Python website
If you see that Python isn't installed, you can use the official Python website to install it.
Step 1. Open the Python Releases for Windows page, select Python version, and download Python executable installer

Here you can choose whether to download Python 2 or Python 3 (or both). Later, we will discuss in more detail the technical steps of downloading and installing both Python 2 and Python 3, but first, let's determine which of them (or both) you really need.
Python 3 is a more recent version of Python released in 2008 and designed to fix the issues in Python 2. In comparison to Python 2, Python 3 has a simpler and more intuitive syntax, it offers a wide range of useful libraries (especially for data science), and a large community of Python developers maintain it. In contrast, Python 2 is no longer supported. Hence, downloading the latest Python 3 release is generally the best choice if you aren't certain which version to use. You will most likely need only Python 3 if you're going to work with new projects.
However, in some cases, you may also need Python 2. For example, if some of your company’s projects are written in Python 2, which is incompatible with Python 3, you might have to run older scripts. Also, sometimes, you may want to use a Python package that hasn't been updated in Python 3. In such situations, You'll need Python 2.
If you select the latest Python 2 release to download, choose Windows x86-64 MSI installer, which will identify your Windows version (32-bit or 64-bit) automatically:
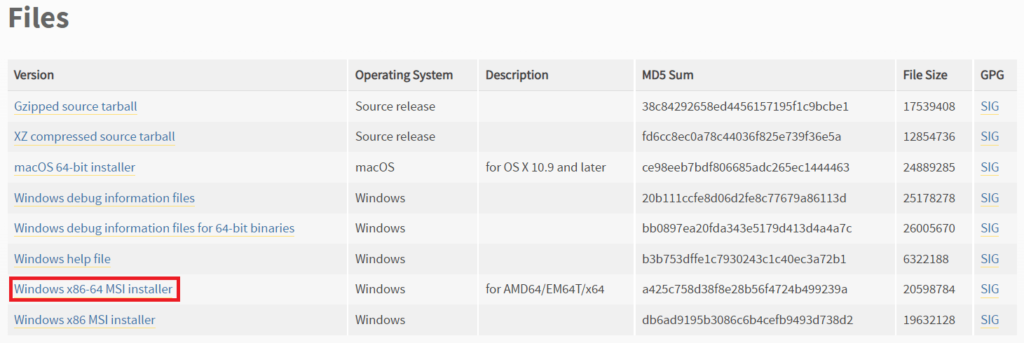
To download the latest Python 3 release, you have to manually choose the installer that suits your Windows version:

Step 2. Run the installer
Let's follow this process step-by-step separately for Python 2 and Python 3. Remember that, depending on your needs, you can install either one of them or both of them. It will cause no issues, and you will always be able to choose which Python version to work in.
Python 2.
Run the downloaded executable file for Python 2 that you will find in your Downloads folder. Select at each step the following options:
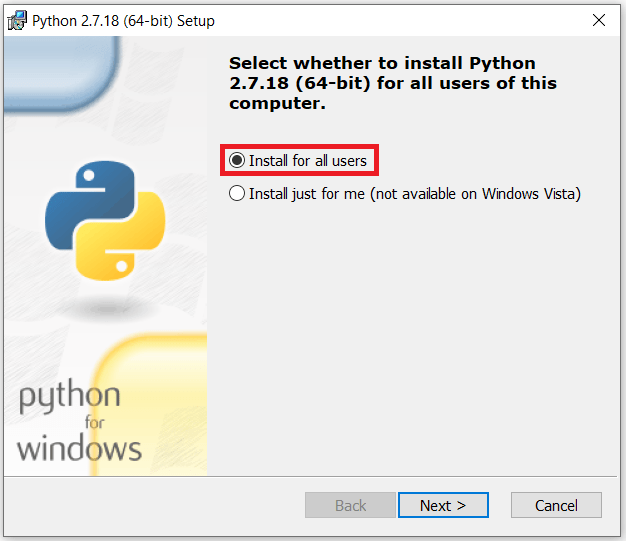
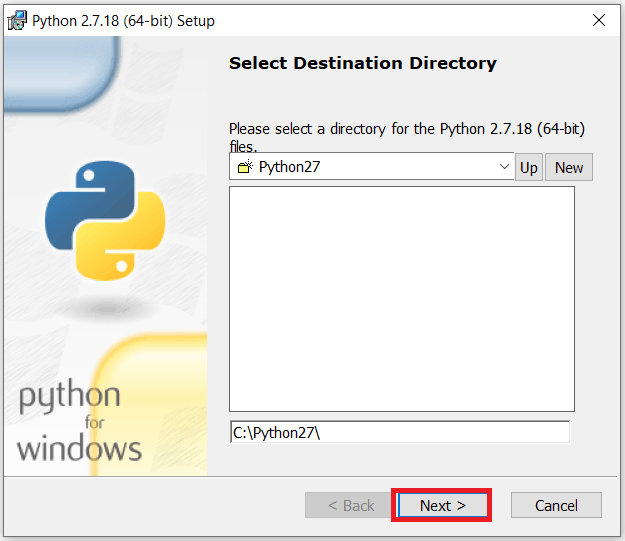

After that, just confirm everything at each pop-up window to complete the installation.
Now you have the latest Python 2 release successfully installed.
Python 3.
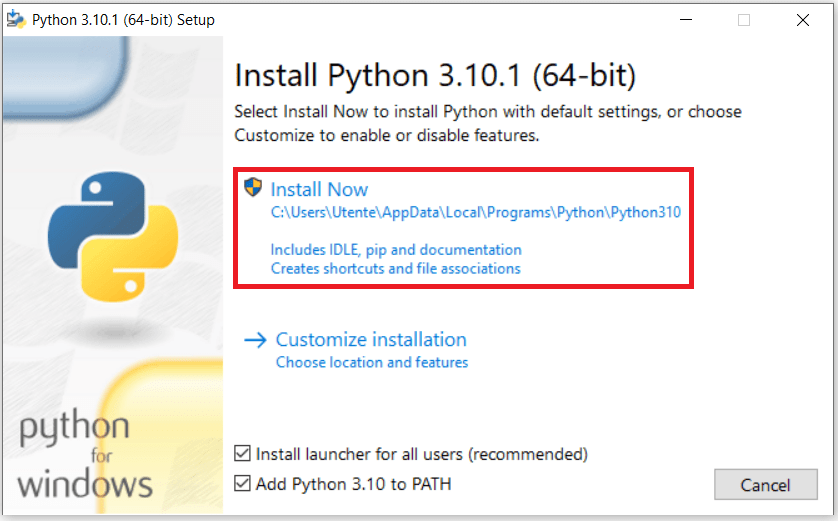
Download installer for Python 3, and find it in your Downloads folder. On the first pop-up window, select both checkboxes at the bottom to enable adding Python to your path in Windows automatically. Then select Install Now:

The installation process can take a few minutes. Then, in the next window, select Disable path length limit to avoid potential issues with long path names in the future:

The latest Python 3 release has been installed on your computer.
Step 3. Verify if Python was successfully installed on Windows
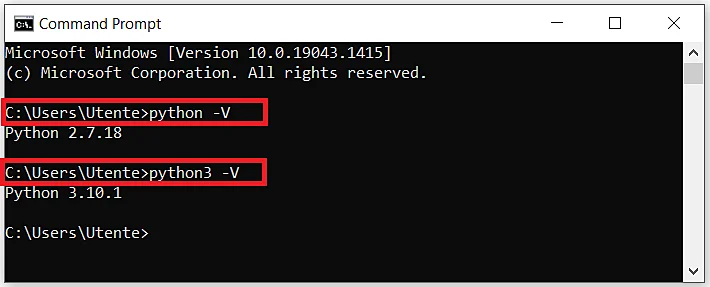
If you installed only one version of Python, open the command line and run python -V. If you installed both Python 2 and Python 3, you have to make a small adjustment that we will discuss in the following (optional) step.
Step 4 (only if you installed both Python 2 and Python 3). Reassign system variables
This step is necessary for being able to easily access both Python versions from the command line.
If you now run python in the command line, you will see only the version of Python 2 (in our case, Python 2.7.18). It happened because, even though you enabled the system path for both Python versions, the installers were saved as the variable sets of different levels of the path: system level (Python 2) and user level (Python 3). In such cases, priority is given to the system path, hence to Python 2. You can verify it by exploring the environment variables of Windows: in Windows search, type advanced system settings, select View advanced system settings, open the Advanced tab, click the Environment Variables button. In the pop-up window, you will see that Python 3 is related to the user variables, while Python 2 is related to the system variables:

To fix this issue, you can assign different access to Python 3: python3 instead of just python:
- Open the
File Explorerapp in Windows search, and find the folder where you installed Python 3. By default, the path should be the following: C:\Users\username\AppData\Local\Programs\Python\Python310 - Make a copy of the
python.exefile, and rename this copy aspython3.exe:

- Re-open the command line.
- Now, you can return to Step 3 and verify the Python version for both Python 2 and Python 3:
Install Python on Windows from Anaconda Navigator
Instead of the full installer from the official Python website, you can use open-source Anaconda Navigator, a popular Python and R distribution for data science and machine learning tasks.
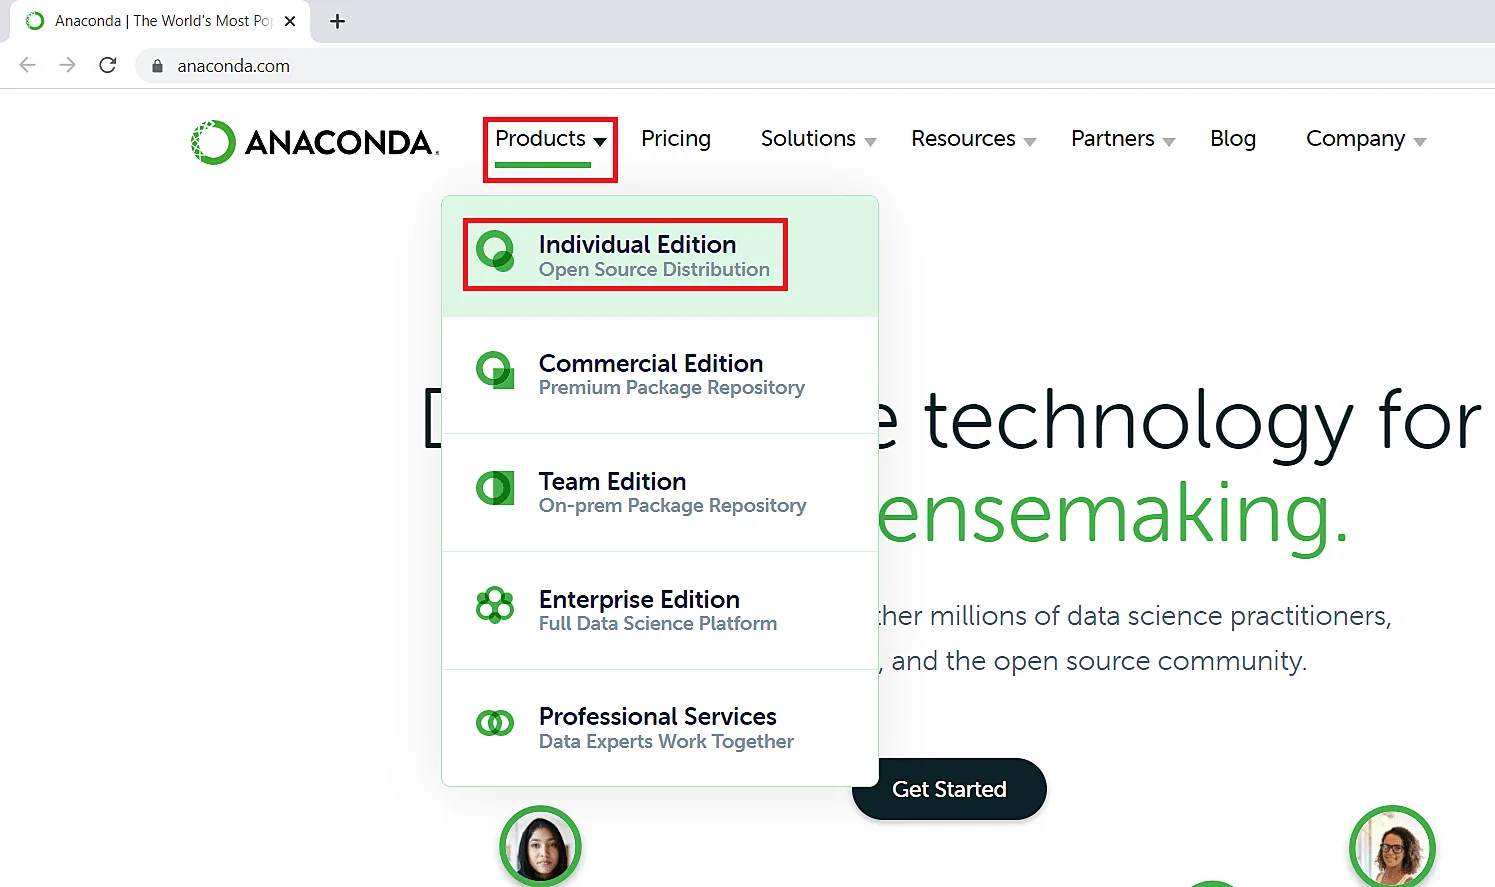
Step 1. Open the official Anaconda website, and select Individual Edition in the menu of Products
Step 2. Download the installer
The system will automatically suggest the most suitable package for your operating system (Windows):

Step 3. Run the installer
Find the downloaded installer for Anaconda in your Downloads folder, and run it:

During the installation process leave all the options as default on all the screens. In one of the windows, though, you can decide to change the installation location, but it is generally best to leave it as it is:

The installation process can take a few minutes.
Now Anaconda has been successfully installed on your computer.
How to run your first Python code on Windows
Now that you have installed Python, whether from the official Python website or using Anaconda Navigator, you're ready to run your first Python code.
If you installed Python from the official Python website
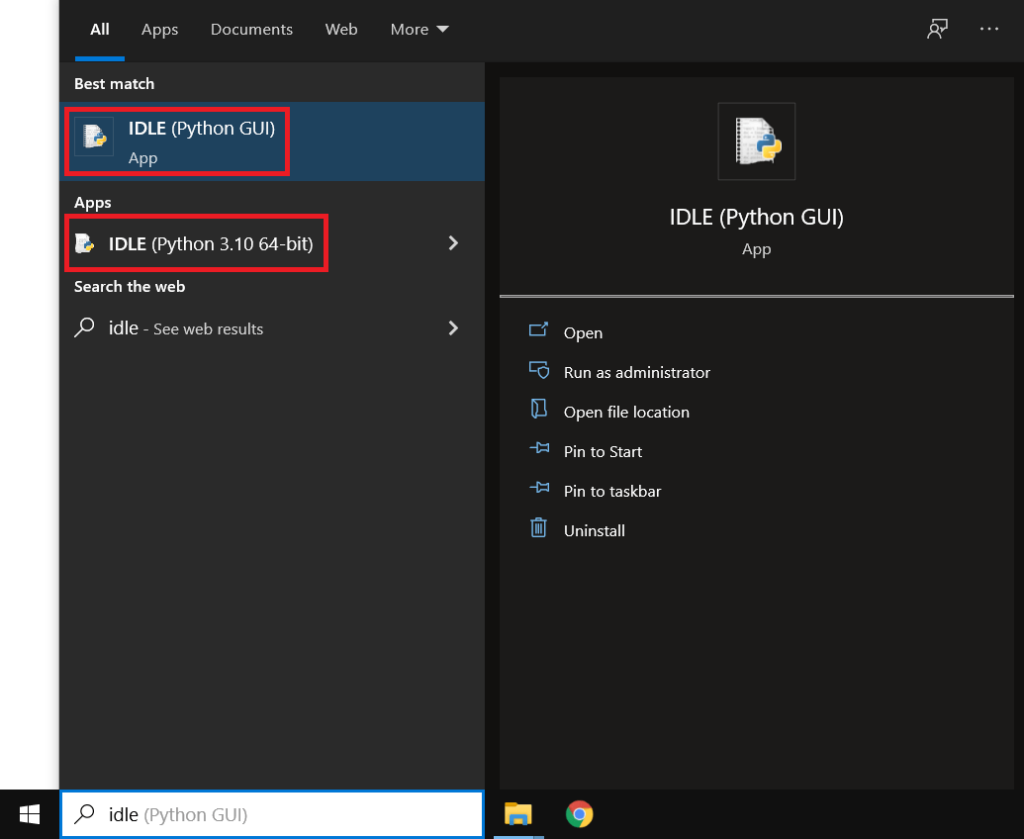
Type idle in Windows search, and select the necessary version of IDLE (in the case you installed different Python versions, there will be corresponding versions of IDLE):
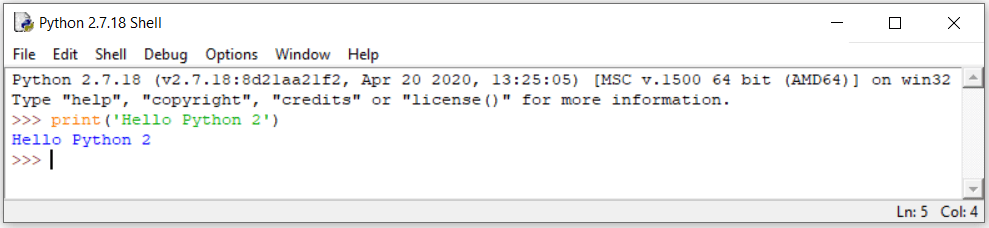
Now you can start coding, even in parallel in different Python versions:

If you installed Python from Anaconda Individual Edition
- Type
anacondain Windows search, and openAnaconda Navigator:

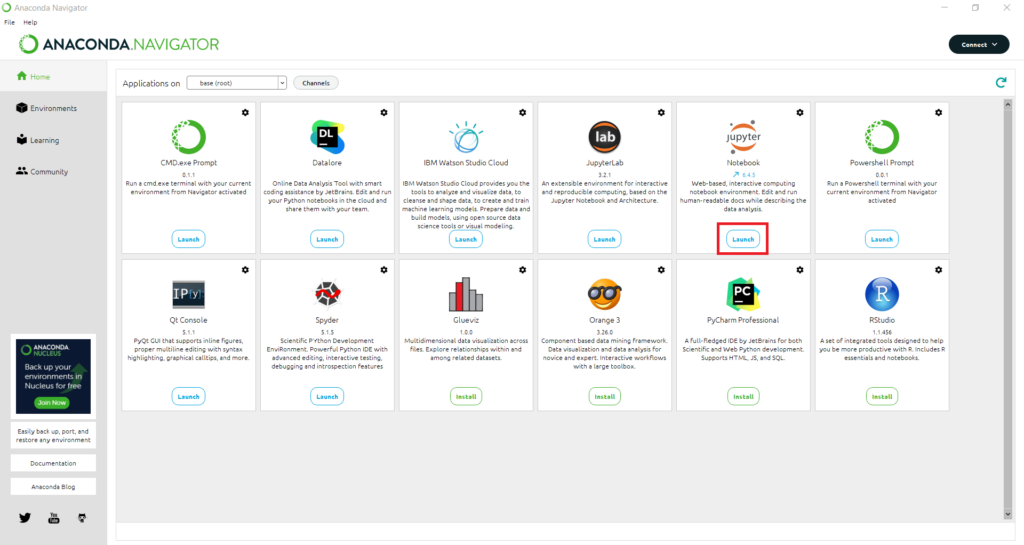
- Choose from many applications the most suitable one for your purposes. For example, you can opt for Jupyter Notebook, a popular data science application for creating and sharing documents combining code, charts, and storytelling:
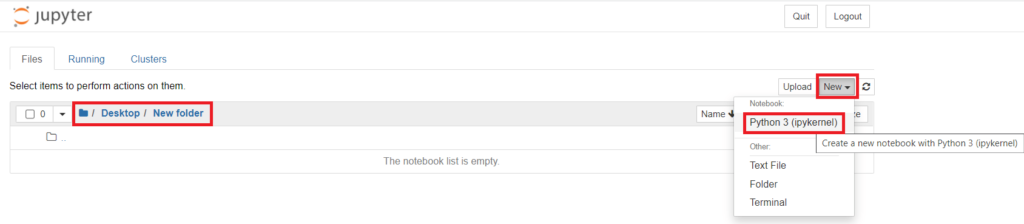
- Navigate to the folder where you are going to save your code, and create a new Python notebook:
- Start coding:

How to update Python to the latest version on Windows
If you installed Python from the official Python website
Just as you did when initially installing Python, open the Python Releases for Windows page, select the latest Python release, download and run the suitable installer.
If the latest release is just a new Python patch of the same major version as your current version (e.g., 3.9.8 and 3.9.9), you will see the following option in the pop-up window:

In this case, the latest Python version will be installed on your computer, and the previous version will be removed. You need to restart your machine afterward.
If the latest release is a new major version of Python with respect to your current version (e.g., 3.9 and 3.10), you will see the same option as on the initial installation:
In this case, the latest Python release will be installed on your computer but also the previous version will remain. If necessary, you can uninstall it manually using the Control Panel.
If you installed Python from Anaconda Individual Edition
Type anaconda in Windows search, and open Anaconda Prompt. To update the Python version for the base (root) environment to the latest Python version available for the current Anaconda release, run conda update python.
(Side note: You may need first to update Anaconda itself to the latest version, by running conda update conda.)
In the snapshot below, you can see that after updating the Python version on Anaconda to the latest version, nothing actually changed: the version remained 3.9.7, instead of being updated to the latest (currently) Python version 3.10.1:
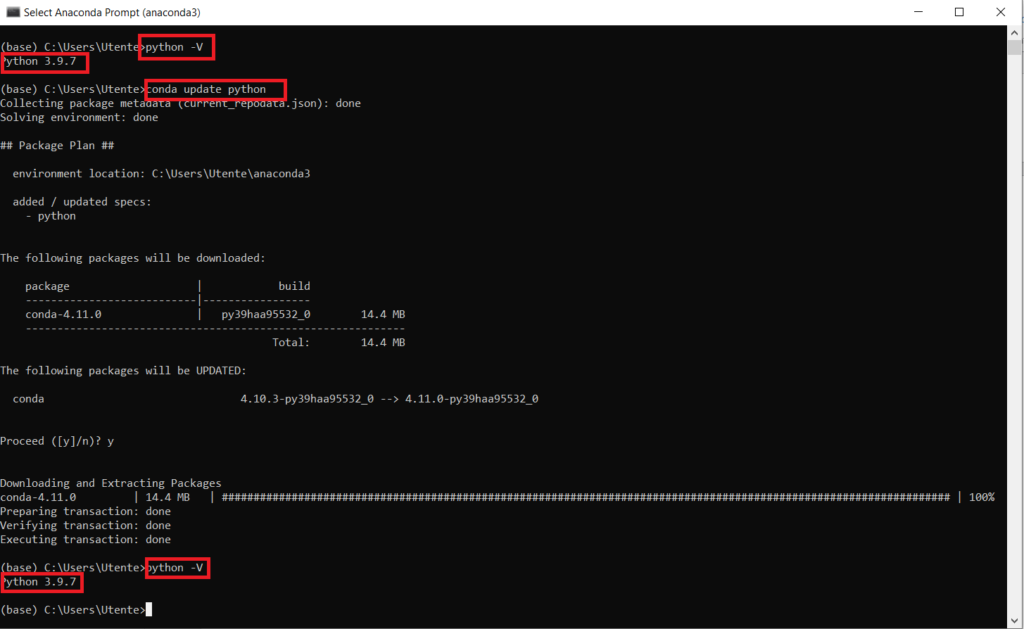
This happened because Python 3.9.7 is the latest possible Python version available for the current Anaconda release.
You can wait for the next Anaconda release, or consider creating a new virtual environment on Anaconda:
conda create -n python10 python=3.10
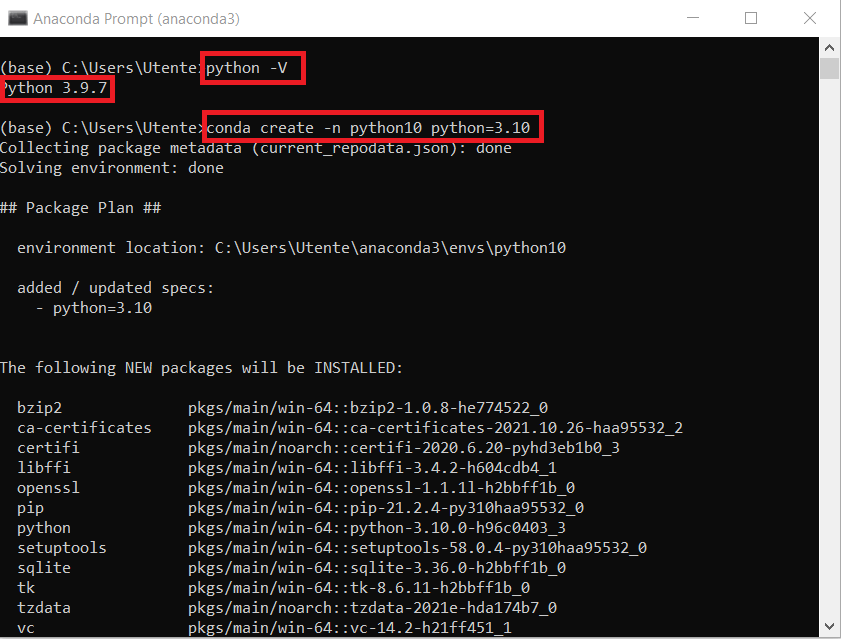
Above, you created a virtual Anaconda environment called python10 (feel free to give it any other name), with the official latest version Python 3.10.
Now, to be able to work in this environment, you have to activate it, running conda activate python10:

Notice how the name of the active environment changed from base to python10. Also, notice that if you check the Python version, you will see that it has been updated to Python 3.10.0.
Unfortunately, it isn't possible to specify the exact patch of the latest version when creating a new virtual environment (meaning that you can only write python=3.10 and not python=3.10.1).
You can continue coding in Python 3.10.0 in the created virtual environment from the command line. Alternatively, since Anaconda is, first of all, a convenient GUI Interface, you can go again to Anaconda Navigator, select the new environment, install any applications you need (if they are available for that environment), and start working there.
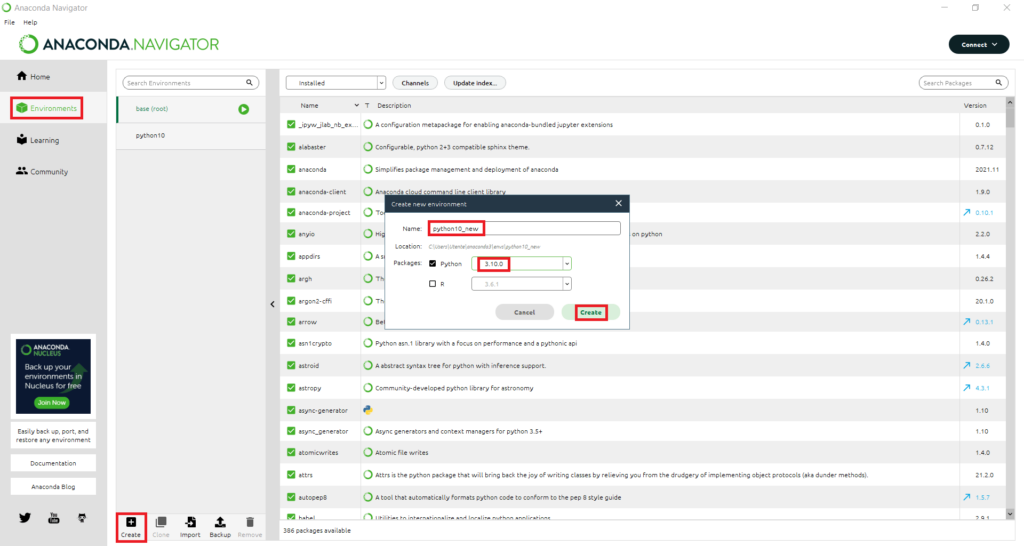
You can also easily create a new virtual environment with a necessary Python version directly from Anaconda Navigator:
- Open the
Environmentstab of Anaconda Navigator. - Press the
Createbutton at the bottom of the screen. - Give a name to the new environment, and select the version of Python.
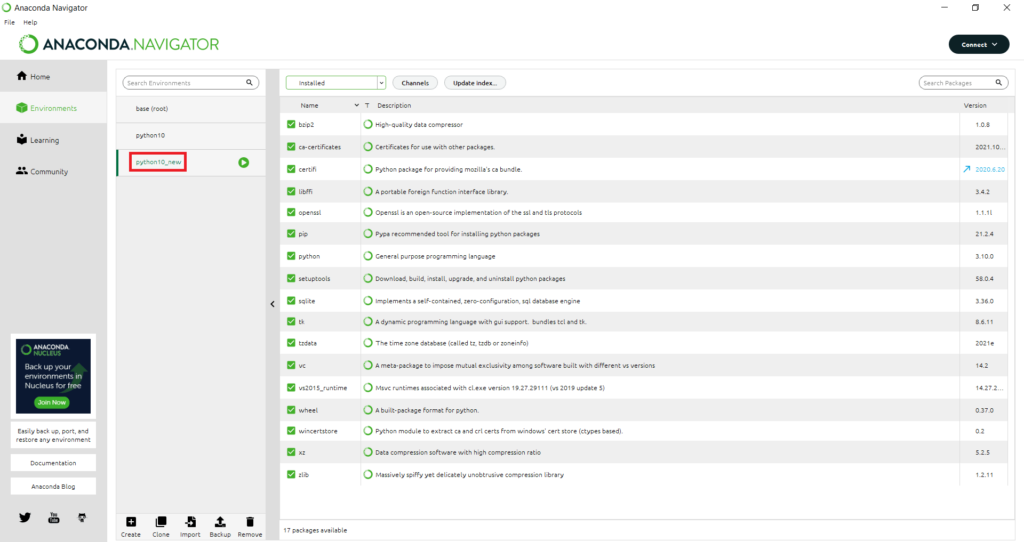
A new environment called python10_new has been created:
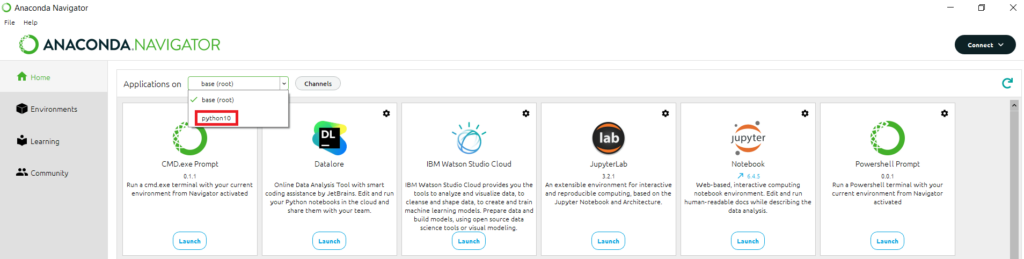
- Go to the Home tab, where the new environment will be already selected automatically.
- Install any available applications you need and start coding.
Conclusion
In this tutorial, you have learned how to correctly download and install Python both from the official website and Anaconda, update it to the latest version if necessary, and run Python scripts on Windows. Now you have all the necessary tools and settings to start working in Python.