Tutorial: Install Linux on Windows with Windows Subsystem for Linux
Learning the UNIX command line is an important skill for programmers and data scientists of all kinds, but if you're a Windows user, using your command line skills on your machine means you'll need to install Linux on Windows. In this tutorial, we'll walk you through getting Windows Subsystem for Linux set up on your Windows machine so that you can make full use of your UNIX command line skills.
(At Dataquest, we’ve released an interactive course on using the command line as well as an interactive course for processing text using the command line. Users on any system will be able to practice on our interactive web platform. However, if you want to practice these command line skills on your own machine and you're using Windows, you'll need to do a little setup before you can access a UNIX command line, because Windows is not Unix-based.)
In this tutorial, we'll install Windows Subsystem for Linux (WSL) and a Linux distribution to work with WSL, which will enable you to use the UNIX command line interface.
Installing WSL is fairly straightforward, but it isn't possible on every version of Windows, so the first step is to ensure your machine is compatible.
Step 1: Ensuring Compatibility
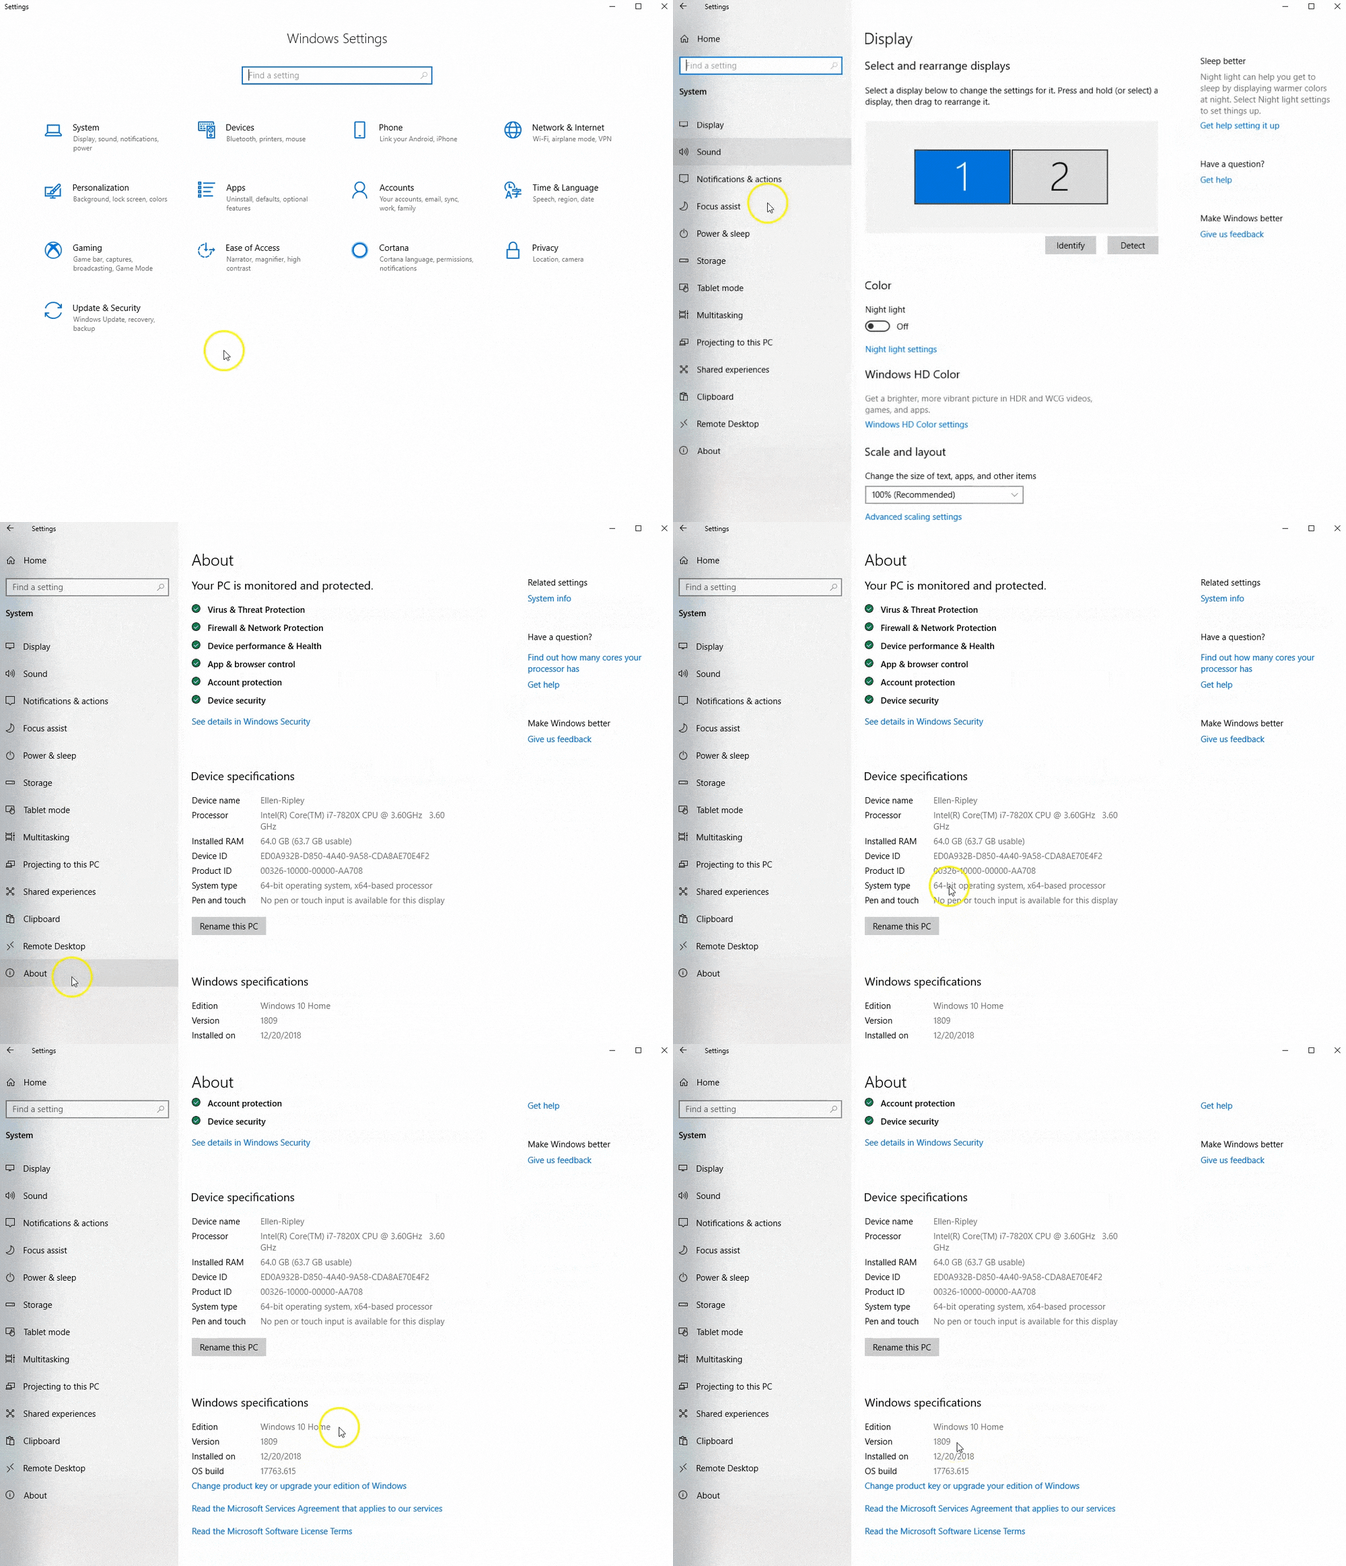
To install WSL, your machine must have the 64-bit version of Windows 10 version 1607 (or higher) installed. If you don't know which version you have, you can go to Settings > System > About and look for the Version and System Type fields.

If you have 64-bit Windows 10 but your version is lower than 1607, you'll have to update Windows before proceeding with this installation. To update Windows, follow these instructions.
If you don't have 64-bit architecture or if you have an earlier version of Windows, you will not be able to run WSL. But don't worry! You can still use the UNIX command line on your machine by installing Cygwin. You can find instructions for installing Cygwin here. If your machine supports it, though, it's best to install WSL, so let's move on to the next step!
Step 2: Enable WSL Optional Component
Windows Subsystem for Linux is a built-in feature of Windows 10, but it has to be manually enabled. Because it's disabled by default, the first thing we need to do is enable it.
The way to do this is to navigate to Control Panel > Programs > Turn Windows Features On or Off and then scroll down in the popup window until we see Windows Subsystem for Linux. We'll tick the box next to this and then click "OK" to enable the feature. Then, after a short progress bar wait while Windows searches for files and applies changes, we'll be prompted to restart the computer so the changes can take effect.

For a bit of a shortcut, we can also simply search for "turn w" in the Windows 10 search bar. Clicking the top result for this search will take us directly to Control Panel > Programs > Turn Windows Features On or Off, after which we can follow the same steps described above to enable Windows Subsystem for Linux.
Remember that before proceeding to the next step, we'll have to restart our machine for the changes to take effect.
Step 3: Installing Linux on Windows
Once the machine has restarted, our next step will be to install a Linux distribution. We'll open the Microsoft Store — search for "Microsoft Store" in the Windows search bar or navigate to it in the Start menu. In the store app, search for "Linux", and then click "Get the Apps" to see available Linux distributions (or click directly on your preferred distribution if you see it below). Click here to learn more about each Linux distribution, but if you're not sure what you need, Ubuntu is a common choice.
For our purposes in this tutorial, we'll select Ubuntu, but the process for installing any other Linux distribution would be the same. On the Ubuntu page, click "Get", and then select "No Thanks" in the popup message. Ubuntu will begin downloading automatically, and when it's finished, the Launch button will appear.

Step 4: Launch and Create Your Account
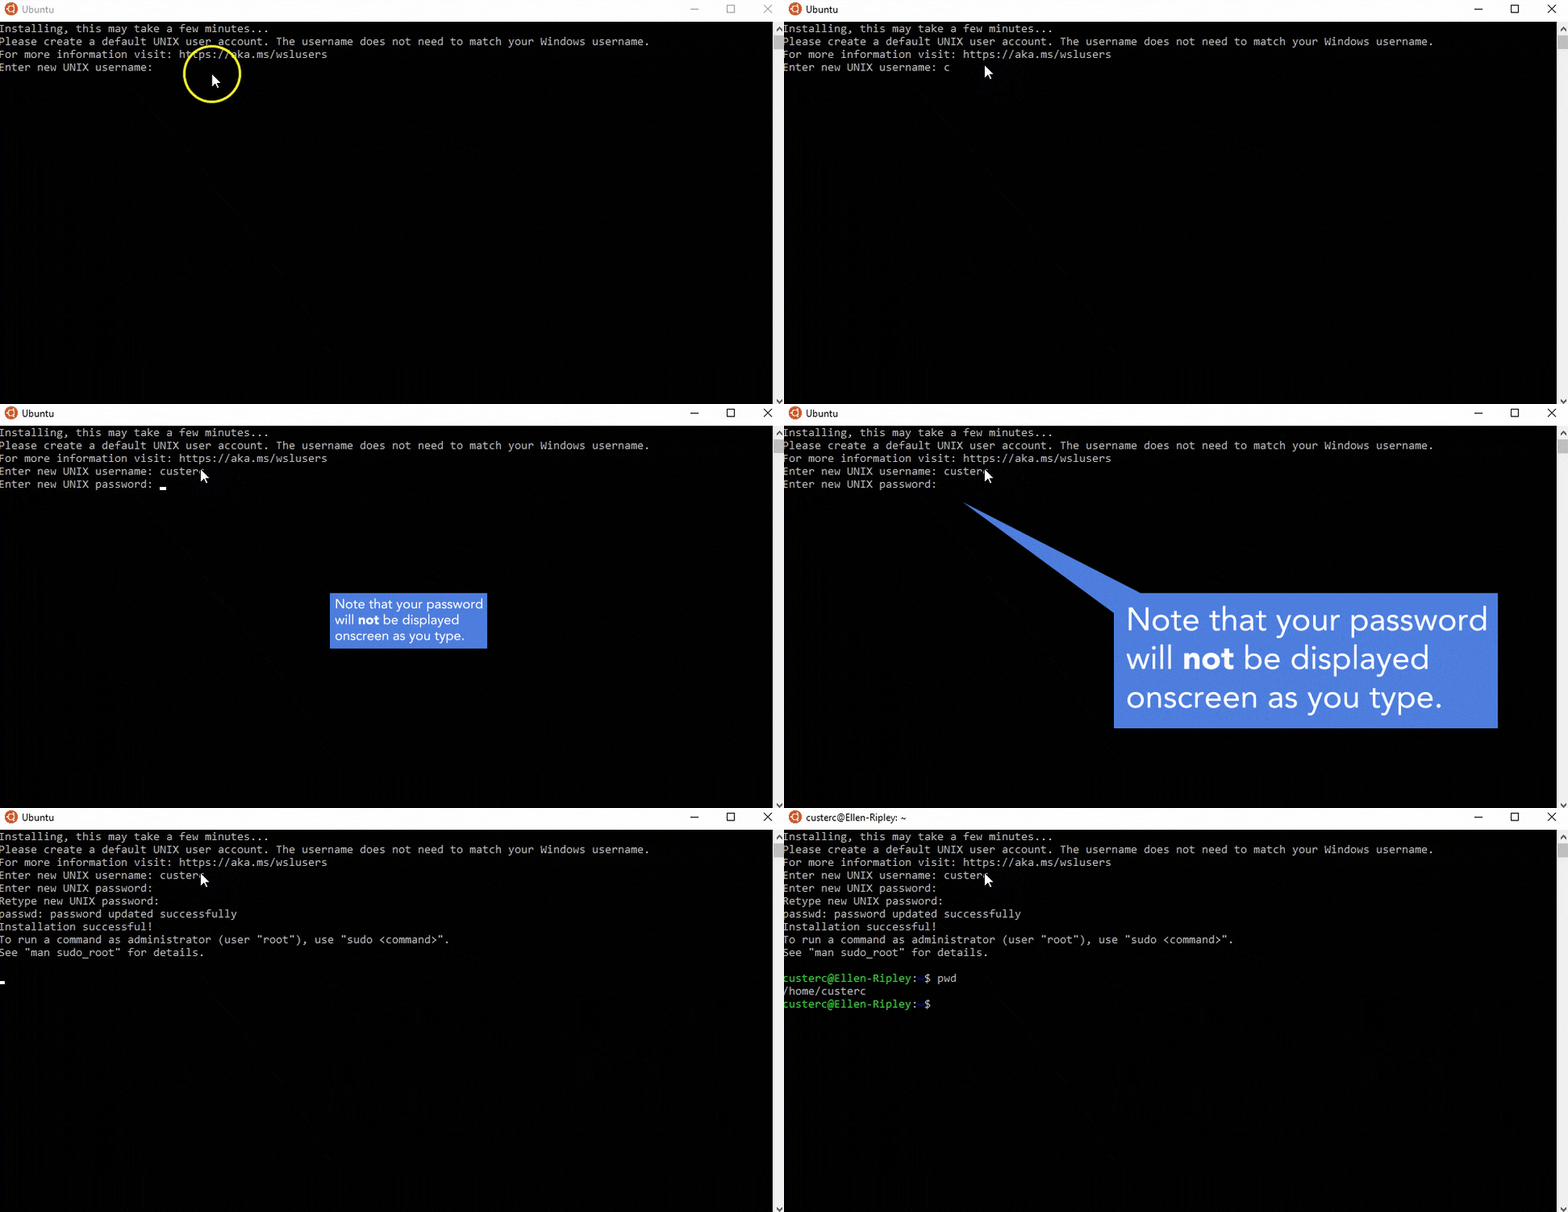
Once Ubuntu app has finished downloading, click Launch and wait for it to install. It will open a new Window, and we'll know that it's finished installing when we're prompted to create a user account.

Once it's ready, enter your preferred username and password. This can be anything you'd like; it does not need to be the same as your Windows username or password. Note that you'll be prompted to enter your password twice, and that your password will not be displayed onscreen as you type it.

Once you've gotten your account created, you can test that everything's working using the pwd command to display the current working directory. You'll note that the default directory may not be convenient for working with files in your Windows file system, so an optional quick fifth step would be to change the default directory so that we don't have to navigate to a different directory before starting work every time we fire up the command line.
Step 5 (Optional): Change Your Default Working Directory
To change the default working directory, we can edit the .bashrc. .bashrc is a file that contains all of the settings and aliases that the shell pays attention to when we start up the shell. What we're going to do is insert a command into this file that will run each time the shell is started to change the working directory to our preferred default directory, so that we don't have to do this manually.
For the purposes of this tutorial, we'll be setting the default directory to the Windows filepath C:/Users/Charlie/Desktop, but you can replace this with whatever file path leads to the directory you'd like to make your default.
To get started, enter edit ~/.bashrc into the command line. This command will open .bashrc.
When it's open, scroll all the way to the bottom and press i to enter insertion mode. Insertion mode will allow us to "insert" changes to the .bashrc.
In insertion mode, type cd followed by the directory you'd like to change to. Note that from Ubuntu, your Windows C: drive is located inside the /mnt/ folder, so you should enter cd /mnt/c/your_file_path. In the case of our example filepath above, we'd want to enter cd /mnt/c/Users/Charlie/Desktop into our .bashrc.
It's also a good idea to add a comment to the .bashrc with a short message explaining what our new command is doing. We'll add a comment using # to explain that this command changes the default directory.
Once finished, press Esc to exit insertion mode, and then type :wq to save the changes and exit to the command line. From the command line, we can enter cat ~/.bashrc to view the edited bashrc file and confirm our changes were saved. Then, we can type source ~/.bashrc to restart the command line, and it will restart with our new default directory as the working directory. We'll only have to do that this one time — every time we open the command line from now on, the default directory we just added will be our working directory.
Here's what it looks like:

Congratulations! You've now got Linux set up on your machine and you're ready to start flexing your UNIX command line skills on your local Windows machine. Plus, you know how to install Linux on Windows machines, which could be useful for a variety of tasks, like helping coworkers get set up for data science work.
