A Simple Guide to Azure Synapse Analytics
Businesses today are collecting more data than ever before. The challenge has become managing and making sense of all this data. That's where Azure Synapse Analytics comes in. Azure Synapse Analytics is a cloud-based platform that allows you to store and manage your data, as well as run analytics on it. It is a fully-managed service that is scalable, highly available, and secure. Azure Synapse Analytics integrates with other Azure services, such as HDInsight, Databricks, and Power BI, to provide a complete data platform solution.
In this tutorial, we'll introduce you to Azure Synapse Analytics and discuss the steps to create the platform in Azure.
Components of Azure Synapse Analytics
Azure Synapse Analytics works by first ingesting data from various data sources, such as social media, IoT devices, and web applications. It then uses a massively parallel processing (MPP) architecture to process data in parallel across multiple nodes. This allows it to handle very large data sets quickly and efficiently. The data is then transformed and stored in an optimized format for analysis. Finally, the data is analyzed to gain insights that can be used to improve business operations.
The main components of the Azure Synapse Analytics workflow include the following:
-
Azure Synapse Analytics Studio: this is a web-based interface that allows users to develop and run analytics jobs.
-
Azure Synapse Analytics Databases: these are databases that are used to store data for processing by the Azure Synapse Analytics service.
-
Azure Synapse Analytics Jobs: these are jobs that are submitted to the Azure Synapse Analytics service for processing. Jobs can be created using the Azure Synapse Analytics Studio or the Azure Portal.
-
Azure Monitor: this is a monitoring service that helps users to track the performance of their Azure Synapse Analytics jobs.
-
Azure Active Directory: this is used to authenticate users and authorize access to the Azure Synapse Analytics service.
Benefits of Azure Synapse Analytics
There are many benefits of using Azure Synapse Analytics, including the following:
-
It's a fully-managed service, so there's no need to worry about patching or upgrading software.
-
It's scalable, so it can grow as your business grows.
-
It integrates with other Azure services to provide a complete data platform solution.
-
It offers two different storage options, depending on your needs.
-
It's secure, so you can be confident that your data is safe and protected.
Azure Synapse Analytics also supports real-time analytics that make it possible to analyze data as it is being collected, which can be useful for detecting patterns and trends.
Setting up Azure Snapse Analytics
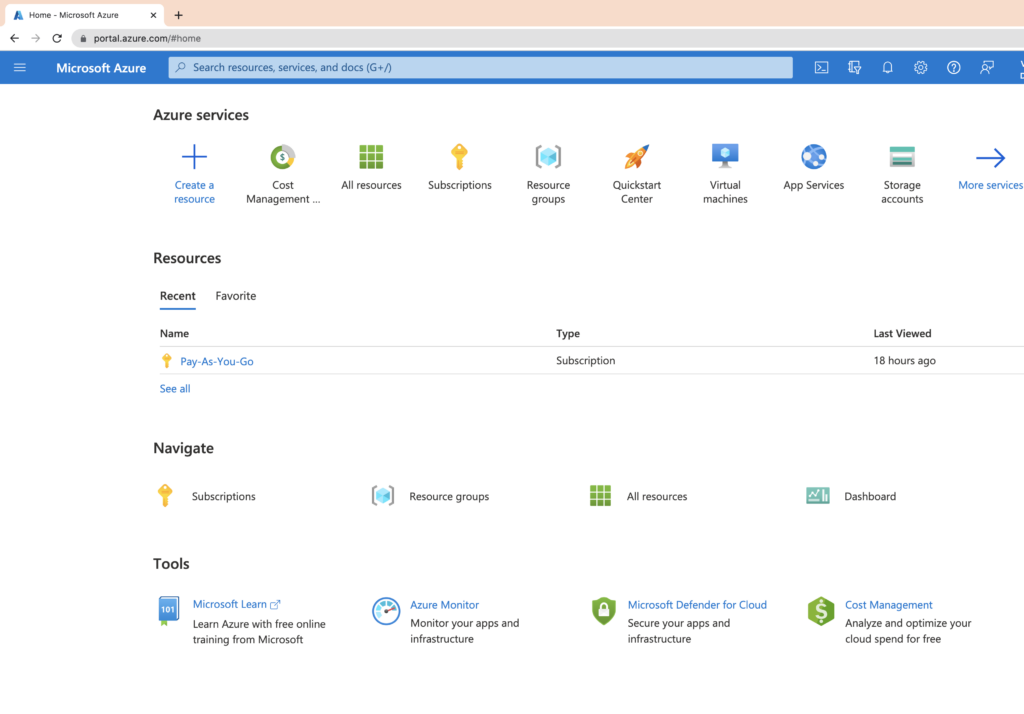
Setting up Azure Synapse Analytics is a simple process that can be completed in just a few clicks. The first step is to navigate to the Azure portal and sign in with your Azure account credentials. Once you are signed in, you'll see the following page:
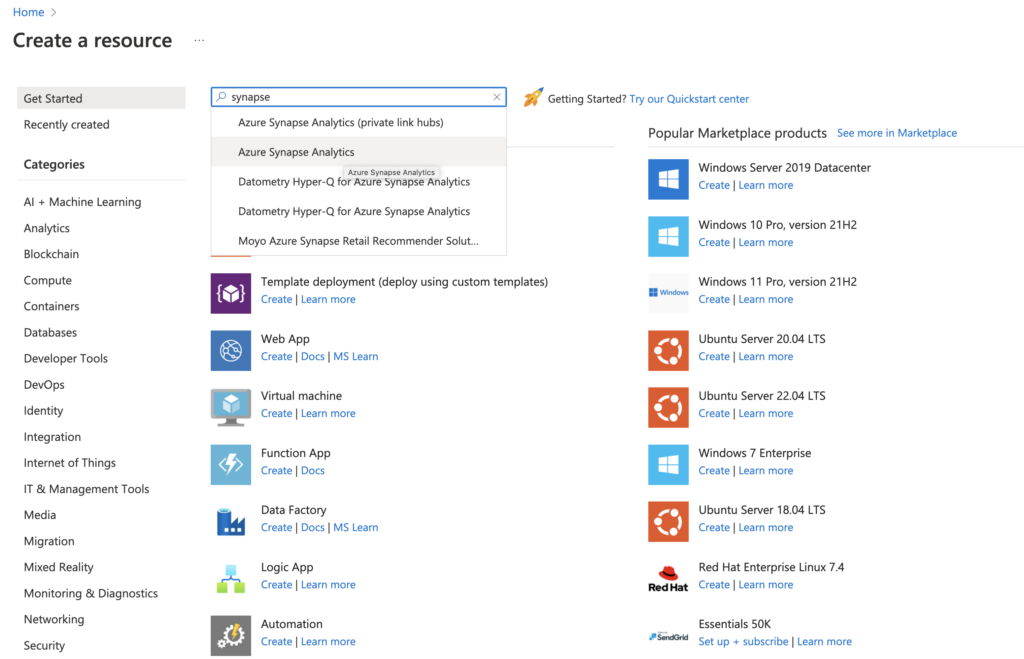
Click on the + Create new resource button located on the left-hand side of the screen. This will open up the Create a resource blade. Under the search bar, type synapse, and from the options, click on Azure Synapse Analytics.
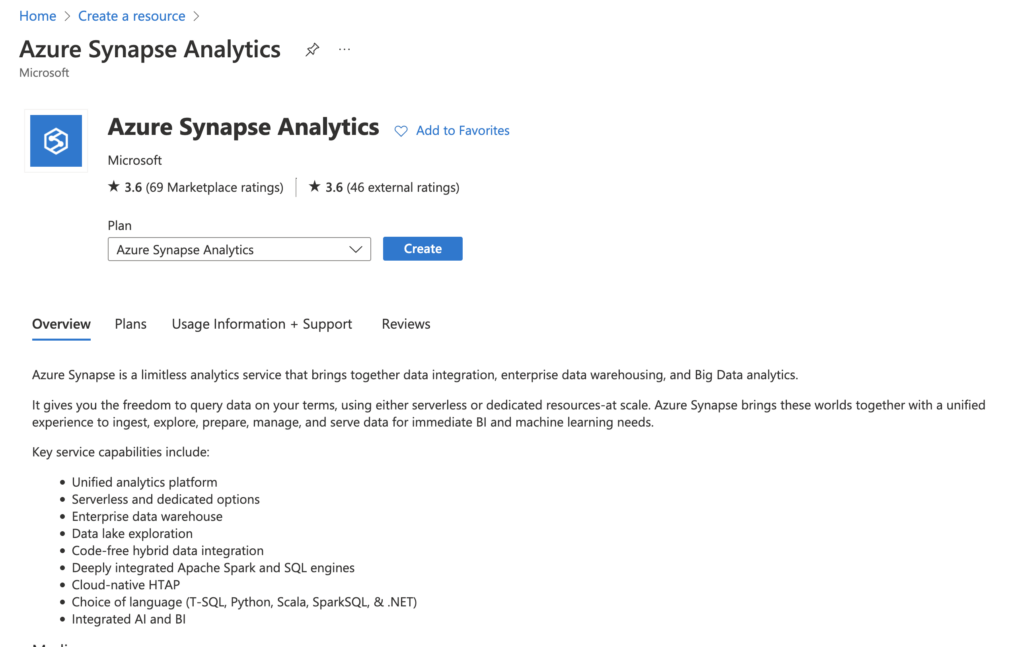
Click on the Create button on the page that opens.
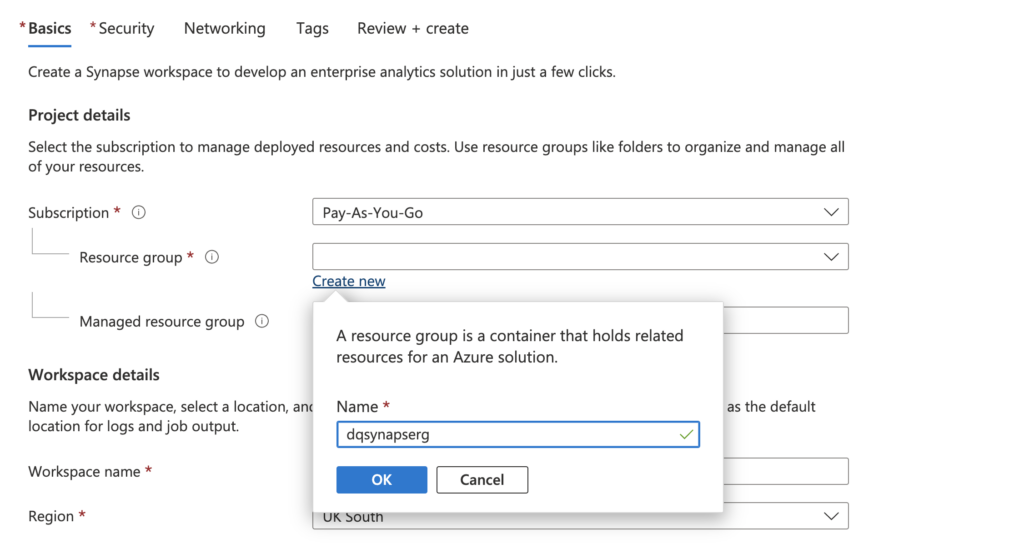
This will open up the blade, where you'll specify details to set up Azure Synapse Analytics. First, you'll select the subscription that you want to use. After that, you'll need to choose the resource group that you want to deploy your service into. If you do not have a resource group, you can create one by clicking on the Create new link. In this tutorial, we've specified dqsynapserg as the name of resource group, but you'll have to specify a unique name for it.
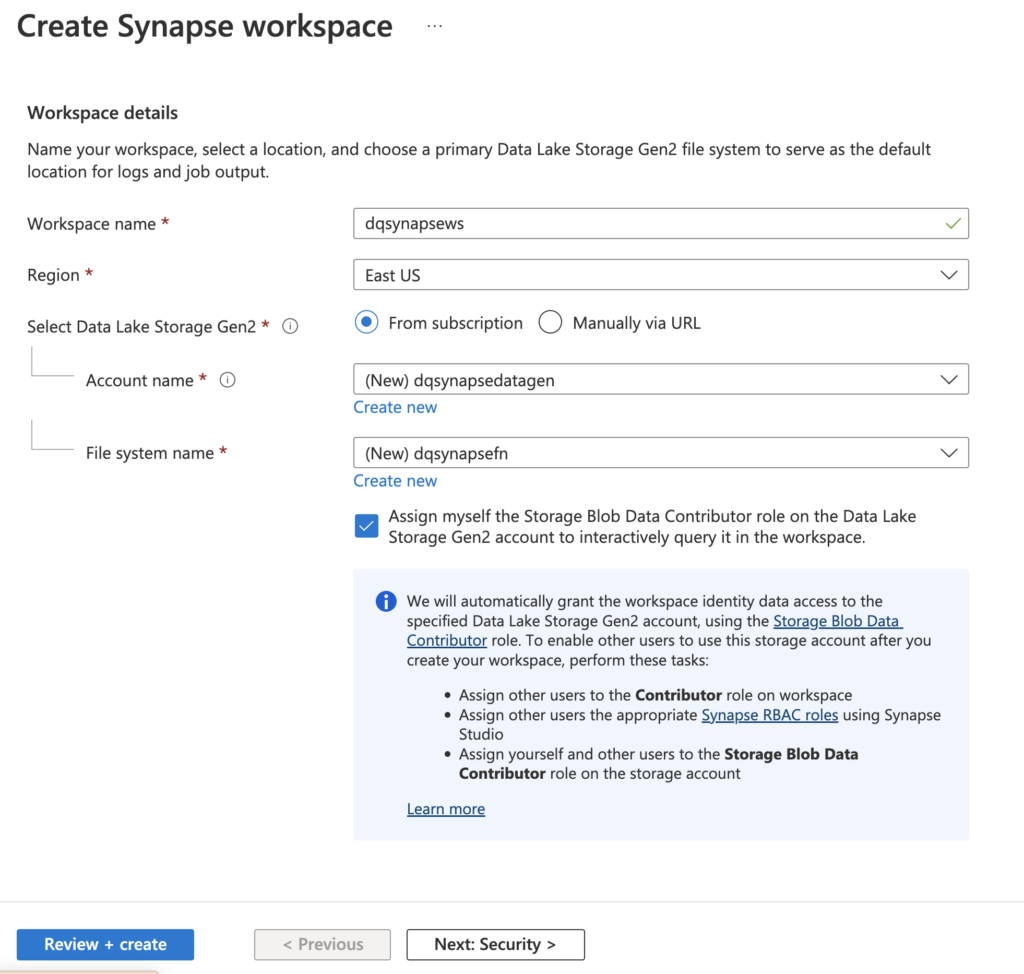
The next step is to specify the name for your workspace. In this tutorial, we've specified dqsynapsews as the name, but you'll have to specify a unique name for it. For Region, it's specified as East US in the tutorial, but you can choose the region closest to you. Under Select Data Lake Storage Gen 2, and within Account name, provide a unique name. In this tutorial, we've specified it as dqsynapsedatagen.
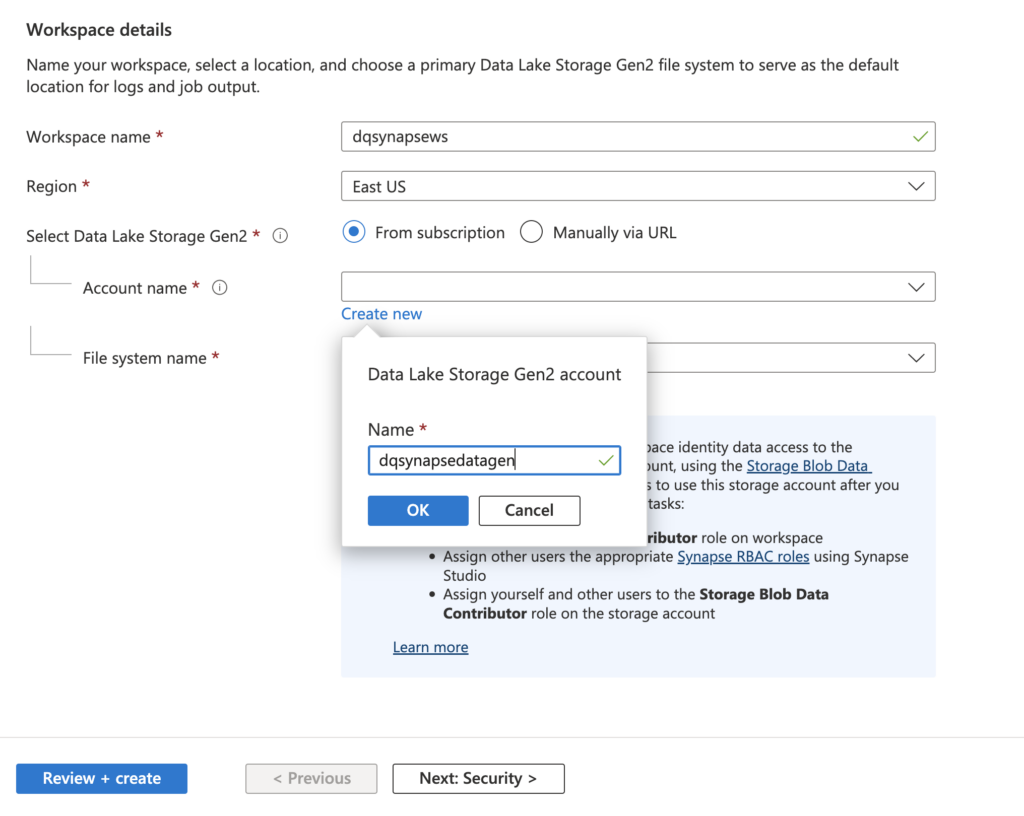
The next step is to specify the File system name. In this tutorial, we've specified dqsynapsefn as the file name, but you'll have to specify a unique name for it.
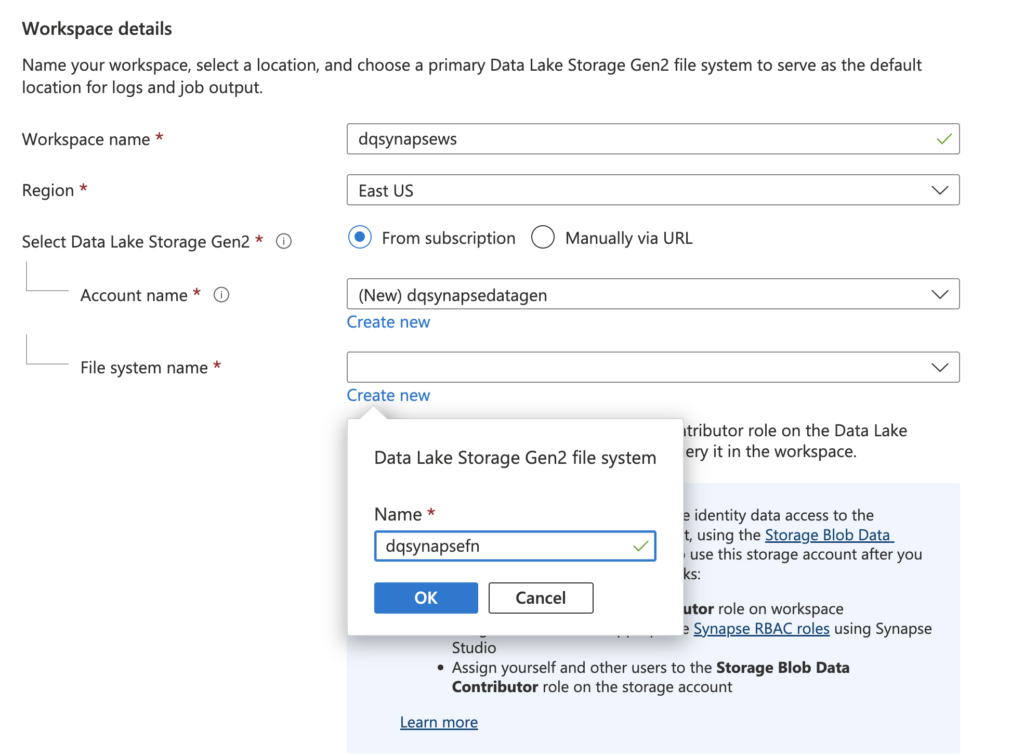
Keep the default check option for Assign myself the Storage Blob Data Contributor role on the Data Lake Storage Gen2 account box, and click on Review + create
This will open the page where you'll see the message Validation succeeded. You can review your configurations and go back to edit, if needed. You can also see the estimated cost per month in your currency.
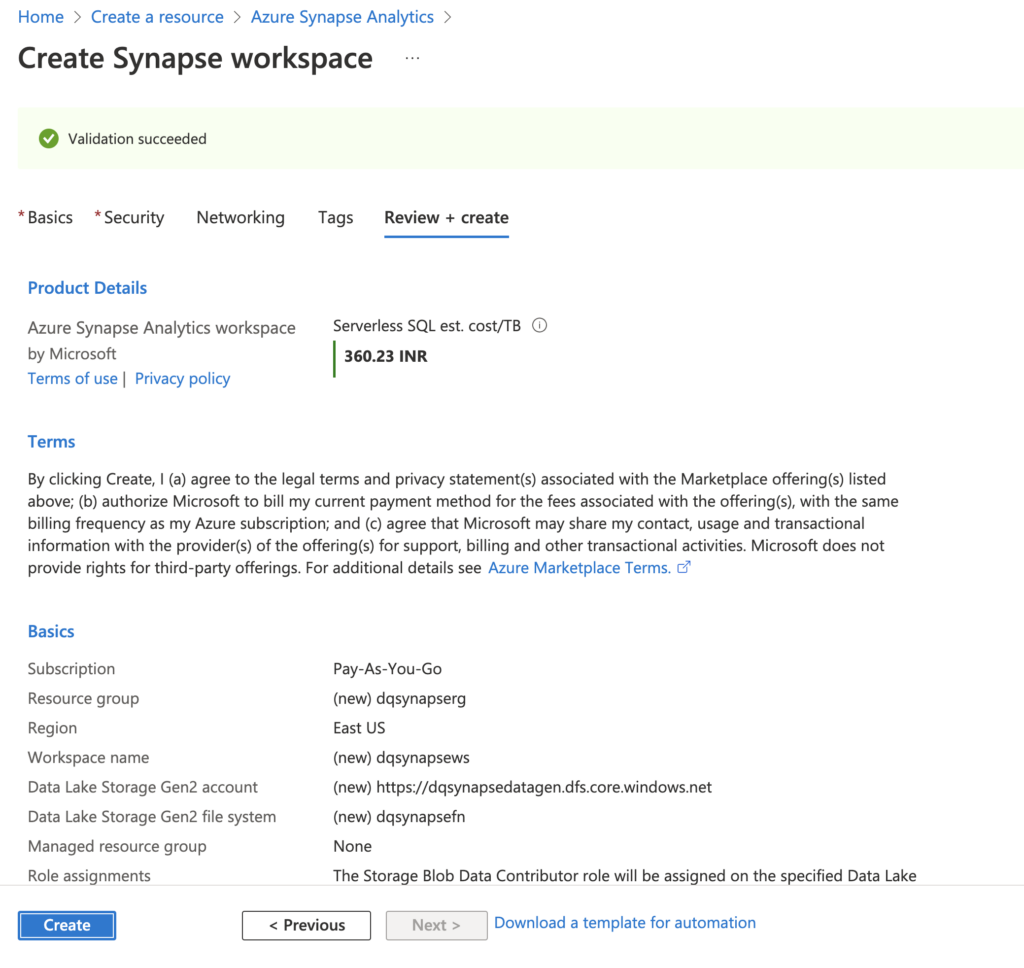
Once you're satisfied with the above configurations, click on the Create button to deploy your database. It can take few minutes to complete the deployment, and the deployment pane will show the status.

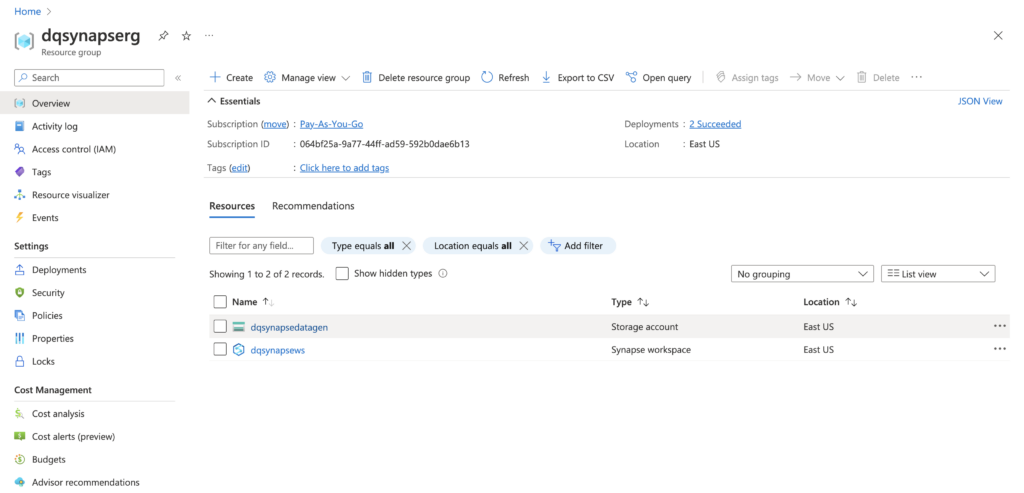
Click on Go to resource group to open the following page, where you can view information about the synapse analytics resource group you've just created, such as synapse workspace and the associated storage account.
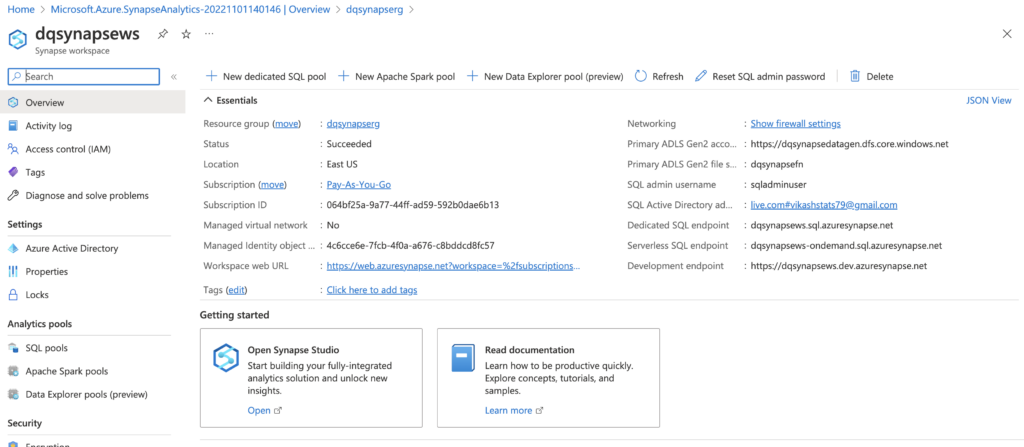
You can now open the Synapse Studio by clicking on the synapse workspace, then selecting Open in the Open Synapse Studio box.

Completing the above steps will open the Synapse Analytics Studio, as shown below. On the left-hand side, you can explore tabs for Data, Develop, Integrate, Monitor, and Manage.

Creating an Azure Synapse Analytics workspace is a simple process that only takes a few clicks. By following the steps above, you'll have it up and running in no time.
Deleting the Resource
When you've finished your work with Azure Synpase Analytics, it's important to delete the resources to avoid unnecessary costs. This is easy to do, and the first step is to go to the Azure portal, where you can have a look at list of the resource groups.
Click on the Delete resource group button at the top of the page. Confirm the deletion by typing in the name of the resource group and clicking on the Delete button. It may take few minutes before the resource group is deleted.

Conclusion
In this tutorial, you learned about Azure Synapse Analytics, its components, and its benefits. It's a powerful tool that can help businesses transform their data into actionable insights. It's fully managed, scalable, and integrates with other Azure services to provide a complete solution. If you're looking for a cloud-based data warehouse solution, then Azure Synapse Analytics should be on your radar.