A Gentle Introduction to Databricks in Azure
Azure Databricks is a powerful platform for data science and machine learning. It provides you with the ability to clean, prepare, and process data quickly and easily. Additionally, it offers scalable computing resources that allow you to train and deploy your models at scale. Azure Databricks isn't limited to data science and machine learning — it also provides powerful data engineering capabilities.
Its cloud-based data processing platform includes all the components necessary for building and running data pipelines. It's fully managed and offers a variety of features, such as integration with Azure Active Directory and role-based access control, to help you secure your data.
Databricks also provides an interactive workspace that makes it easy to collaborate on data projects. In addition, it offers a variety of tools to help you optimize your pipelines and improve performance. Overall, Azure Databricks is an excellent choice for anyone looking to build or run data pipelines in the cloud.
In this post, you will learn how to build, train and evaluate a machine learning model in Azure Databricks.
Log in to Azure Databricks
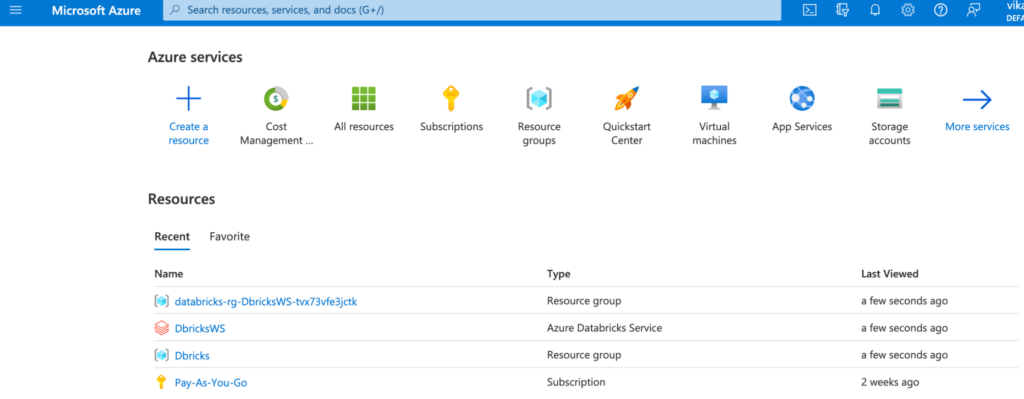
The first step is to create an account with Azure. You can go to this Azure portal link.
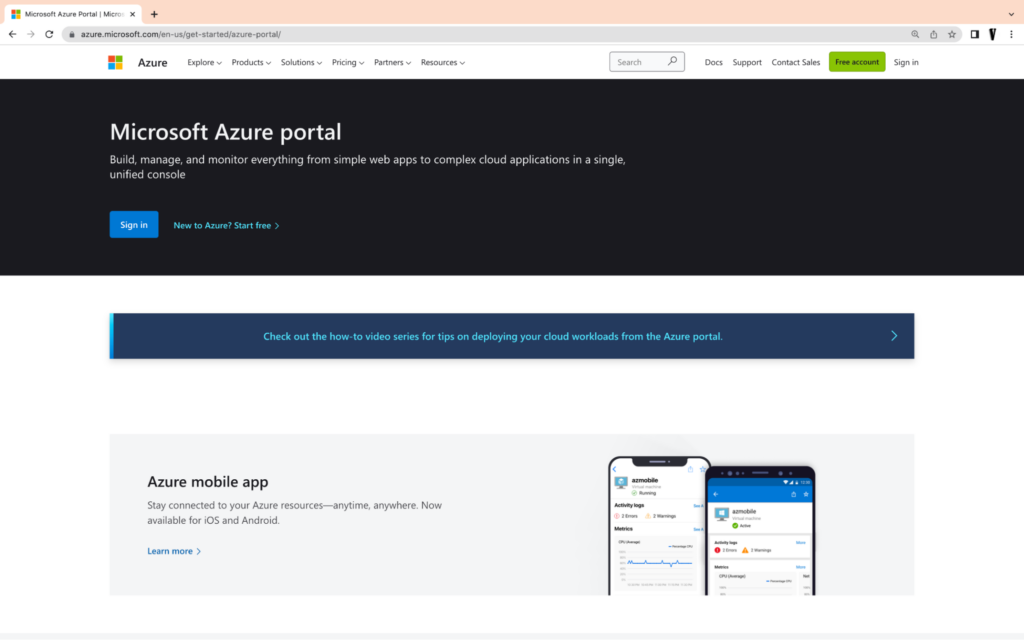
Once you have created an account and logged in, you'll see the following page:

You can see the subscription, which in this case is Pay-As-You-Go. You also see the option Create a resource, which will create Databricks resources within Azure. Click on it, and type Azure Databricks in the search bar, and you'll see the following:
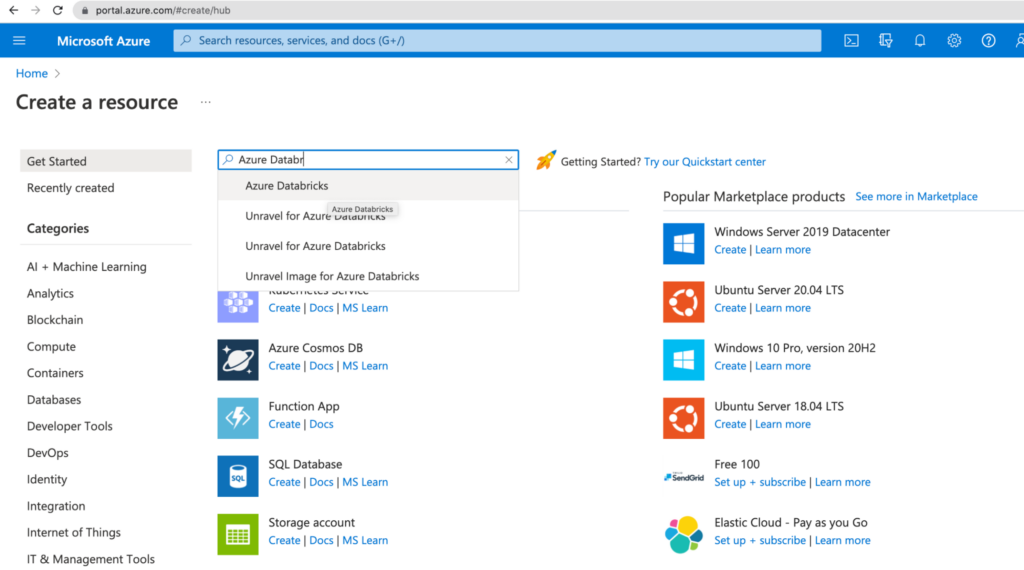
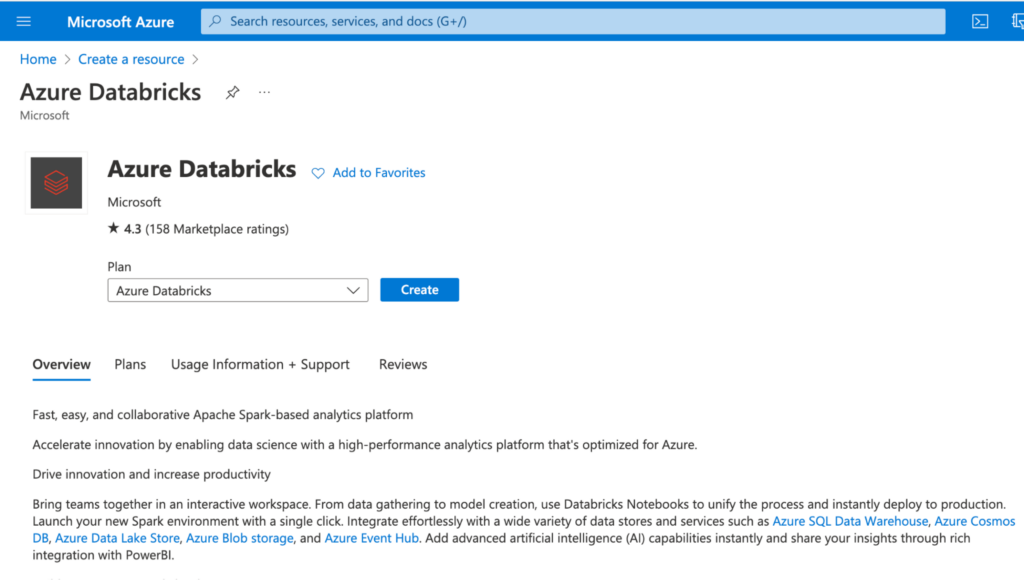
Click on the Create button for Databricks.
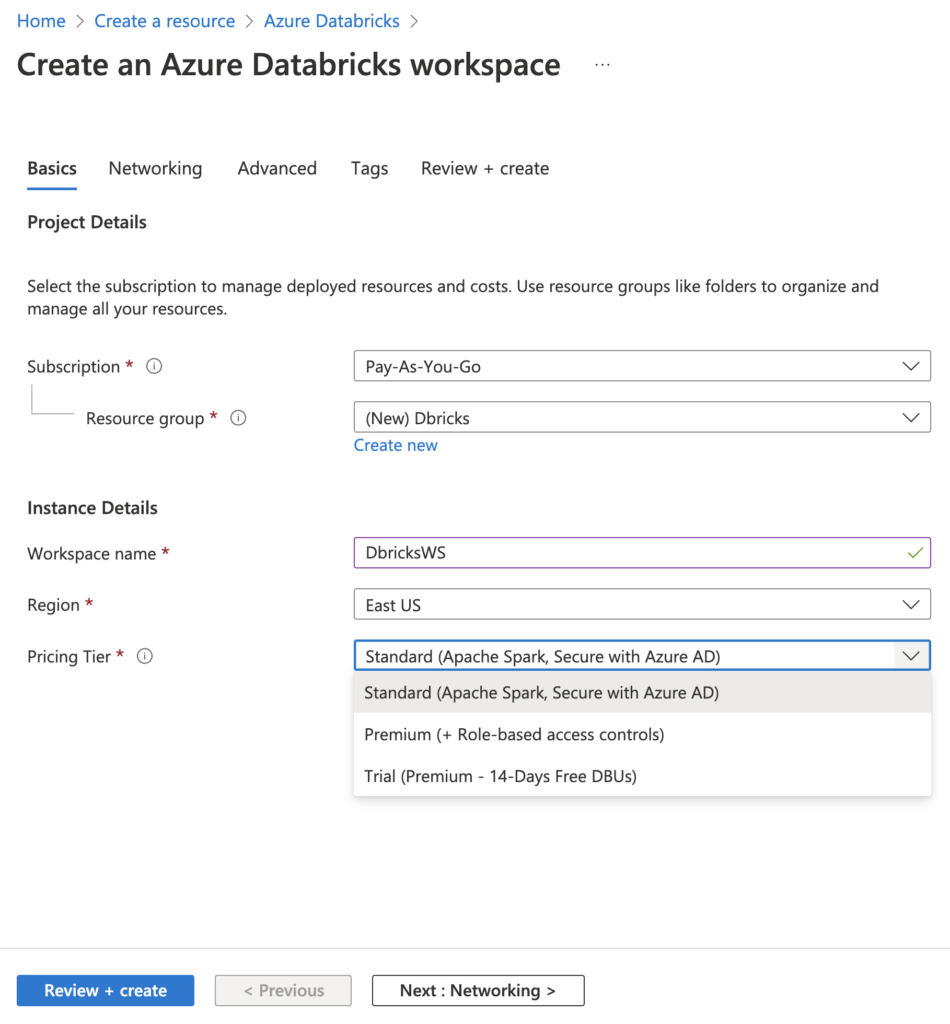
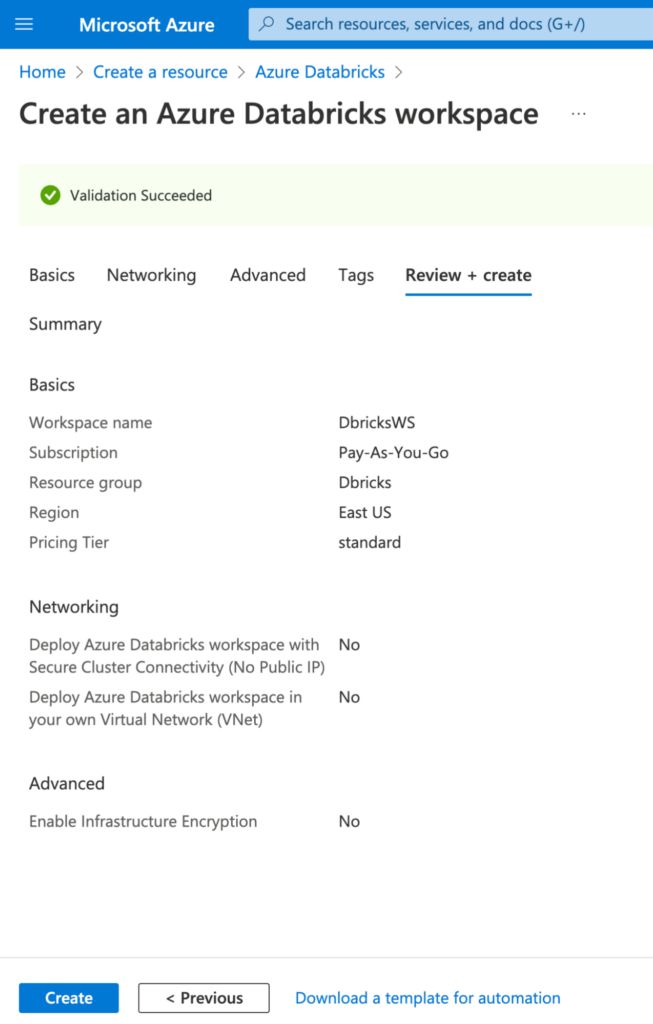
Fill out the required fields such as subscription, region, resource group, etc. Then, click Review + create. You have to give a unique name to the resource group and the Databricks workspace.
Lastly, click Create to start the process of creating your Databricks resource! Please note that this may take up to a few minutes to complete.
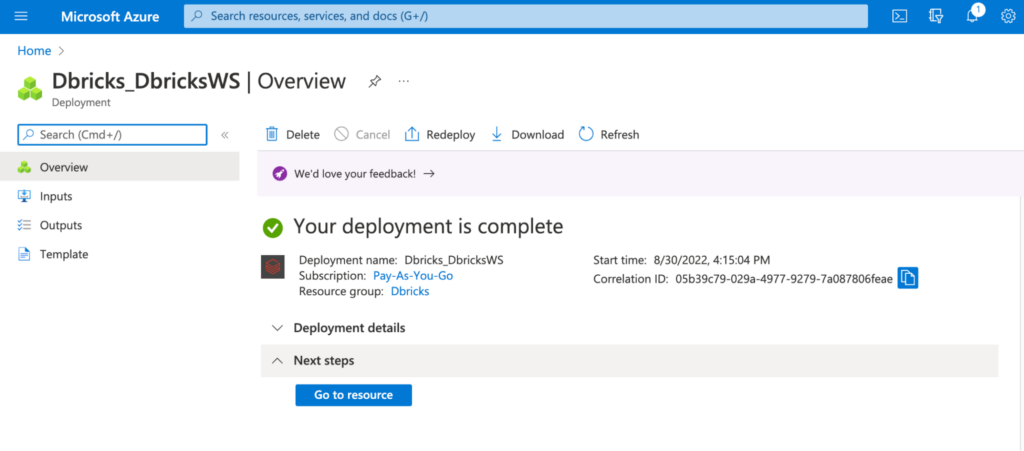
Once the resource is created, you can click on Go to resource to take you to the resource.
The Databricks page will look like this:
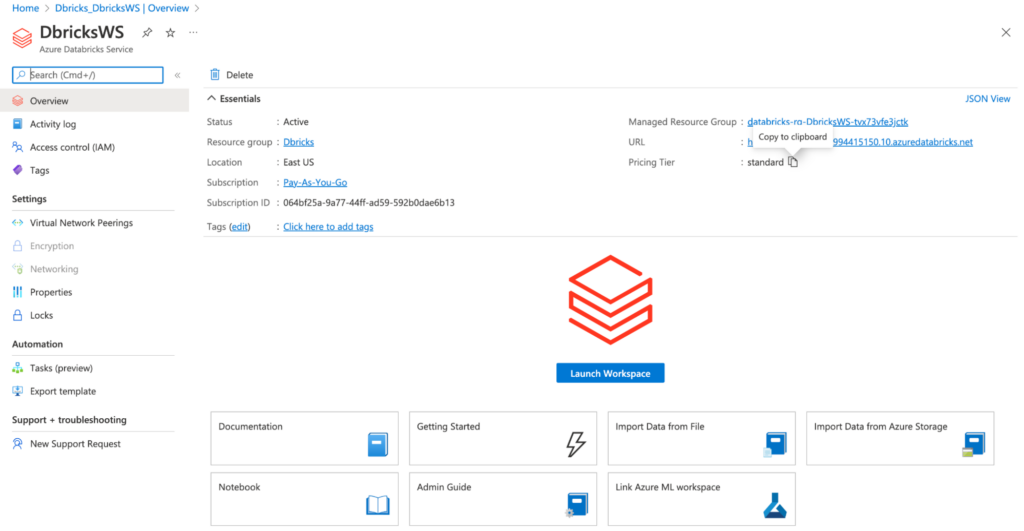
Click on Launch Workspace to go to the Azure Databricks environment.
Create Cluster
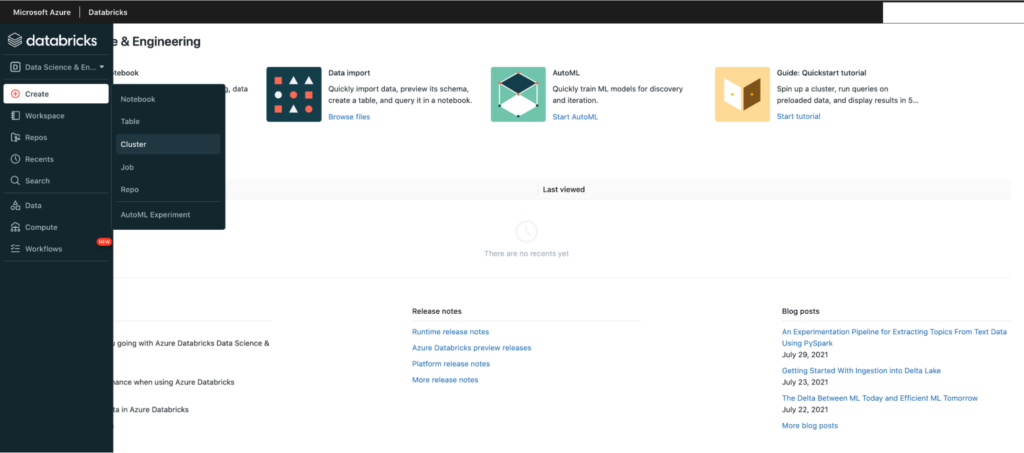
The next step is to create a new Databricks cluster. To do this, click on Create, then select the Cluster button in the left panel of the Azure Databricks workspace.
On the next page, specify the configuration for your new cluster. For example, you can specify the number of users within Access mode, and you can also define node type and the runtime version. Note that in this tutorial, we have specified Single node, but you are free to accept the default setting as well.
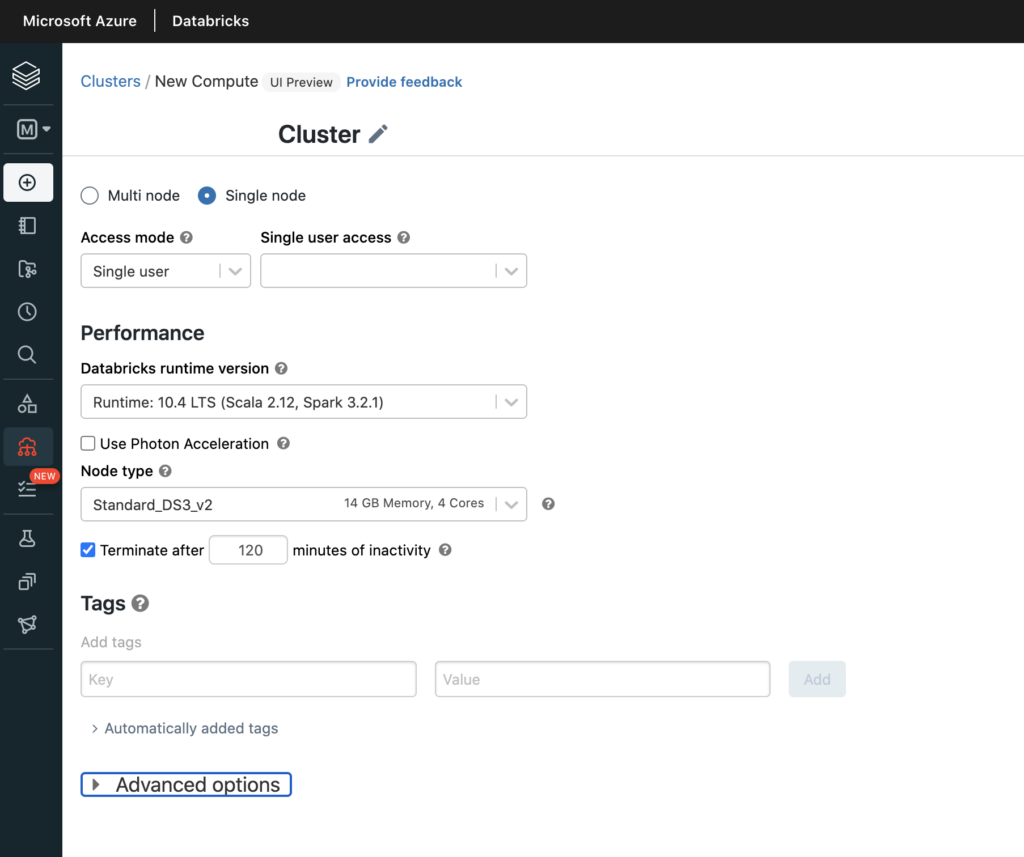
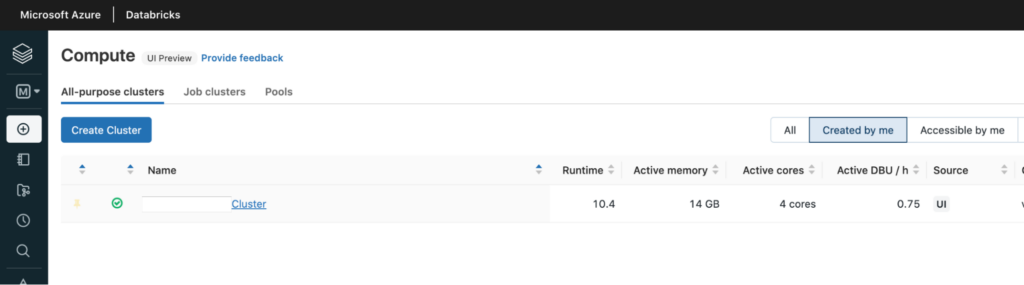
Once you have specified the configuration for your new cluster, click on the Create Cluster button. This will create the cluster and the following page will display. Please note that this may take up a few minutes to complete.
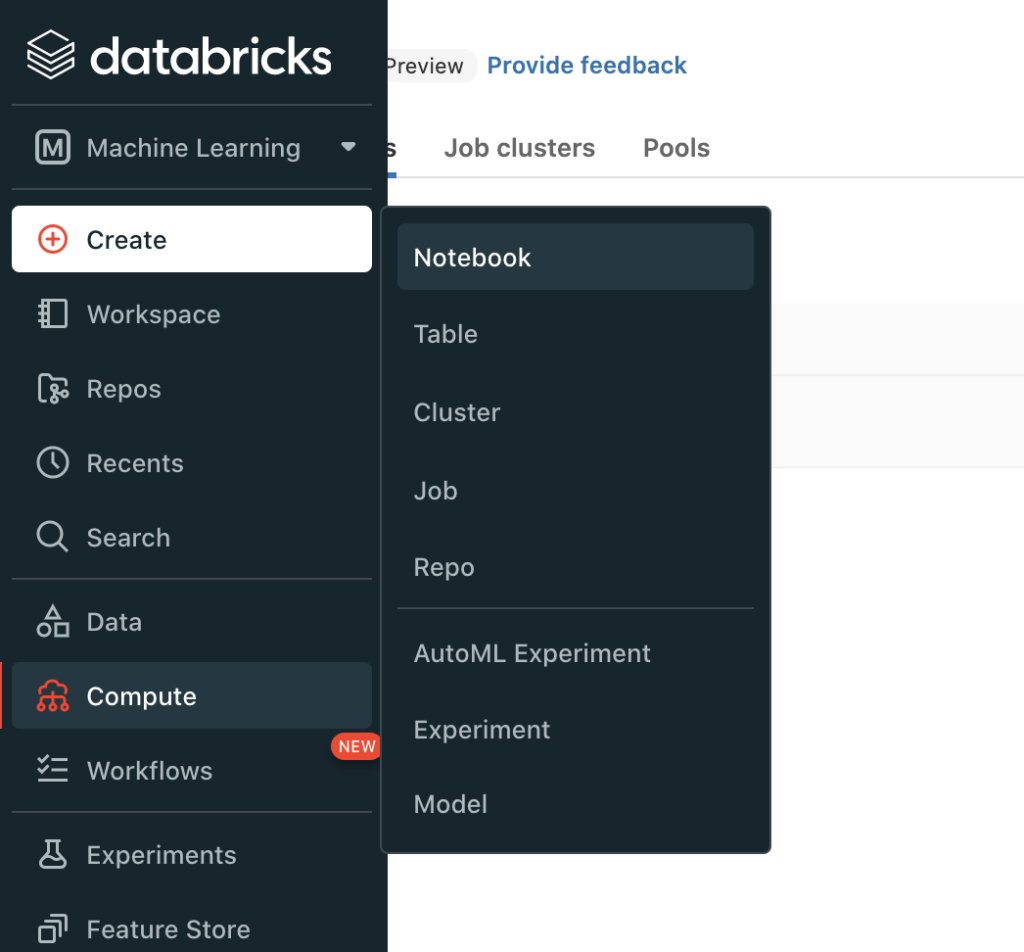
Launch Notebook
You'll be running your machine learning code within the Python notebook inside the Databricks workspace. To launch a notebook, click on Create, then select the Notebook icon in the left-hand sidebar from within your Databricks workspace.
You will now be prompted to give your new notebook a name and select its language. For our purposes, give your notebook a unique name and choose Python as the language.
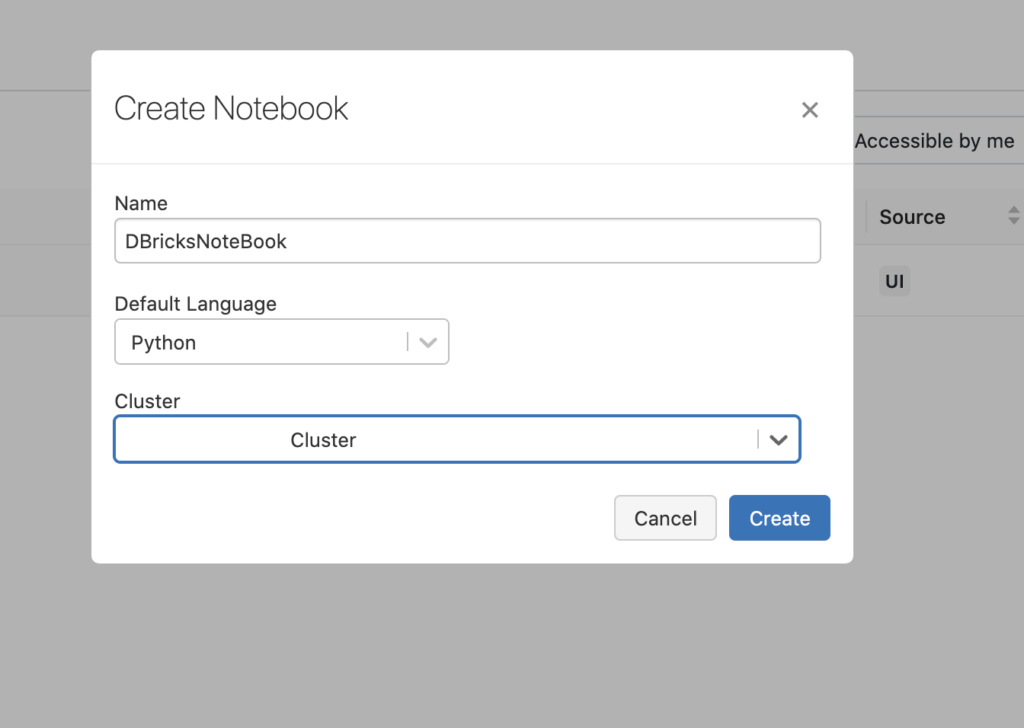
Click on Create, and you'll be able to see the notebook you just created.

After you have created your notebook, you will be taken to the notebook's editor page where you can start writing and running your code! Now let's get started with some machine learning!
Loading Data
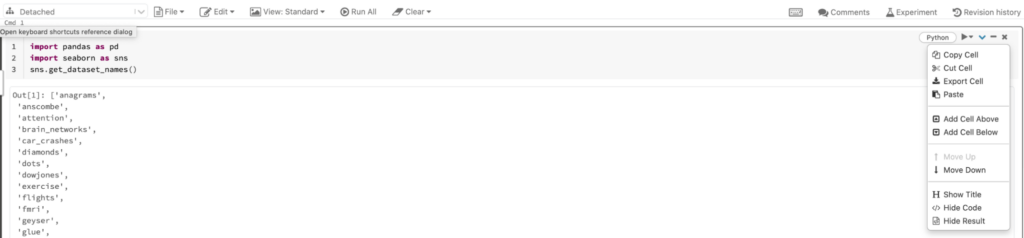
Before building the machine learning model, we need to load the data. We'll use one of the inbuilt datasets provided by the seaborn library. Seaborn comes with a number of important datasets in its library. When installed, these are automatically downloaded and ready for use! The following commands import the library and provide the list of datasets available from the seaborn library.
import pandas as pd
import seaborn as sns
sns.get_dataset_names()
This will return the list of datasets available in seaborn as shown below:
Out[1]: ['anagrams', 'anscombe', 'attention', 'brain_networks', 'car_crashes', 'diamonds', 'dots', 'dowjones', 'exercise', 'flights', 'fmri', 'geyser', 'glue', 'healthexp', 'iris', 'mpg', 'penguins', 'planets', 'seaice', 'taxis', 'tips',...]We can load the dataset with the load_dataset() function. In this article, we will use the Iris dataset. This dataset contains information about different types of flowers. You can create a new code block easily by clicking on the downward arrow and click on Add Cell Below, or Add Cell Above, depending on the need.
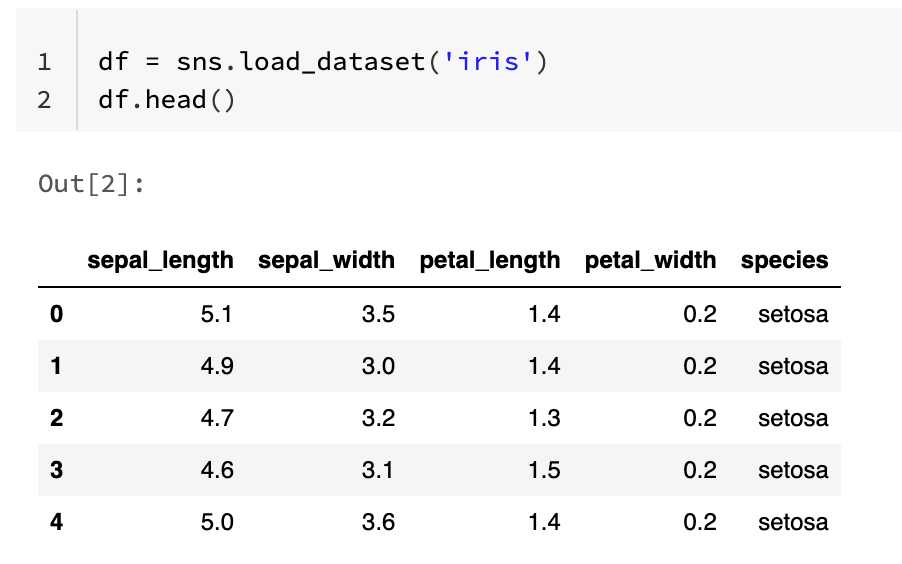
In the new code block, load the dataset and look at the first five rows with the following commands:
df = sns.load_dataset('iris')
df.head()
This will produce the output below:
| | sepal_length | sepal_width | petal_length | petal_width | species |
|--:|-------------:|------------:|-------------:|------------:|--------:|
| 0 | 5.1 | 3.5 | 1.4 | 0.2 | setosa |
| 1 | 4.9 | 3.0 | 1.4 | 0.2 | setosa |
| 2 | 4.7 | 3.2 | 1.3 | 0.2 | setosa |
| 3 | 4.6 | 3.1 | 1.5 | 0.2 | setosa |
| 4 | 5.0 | 3.6 | 1.4 | 0.2 | setosa |
After downloading the dataset, we will need to split it into training and test sets. The training set is used to train our machine learning model while the test set is used to evaluate the performance of our model. We can use the `train_test_split()` function from `scikit-learn` to split our dataset into training and test sets. This is also the right time to import all the required libraries.
The code to reproduce the above result is below:
# Import other required libraries
import sklearn
import numpy as np

# Import necessary modules
from sklearn.linear_model import LogisticRegression
from sklearn.model_selection import train_test_split
from sklearn.metrics import confusion_matrix, classification_report

# Create arrays for the features and the response variable
y = df['species'].values
X = df.drop('species', axis=1).values

# Create training and test sets
X_train, X_test, y_train, y_test = train_test_split(X, y, test_size = 0.4, random_state=10)
X_train.shape, X_test.shape
Out[3]: ((90, 4), (60, 4))Build and Evaluate Machine Learning Model
Now that we have our training and test sets, we can start building our machine learning model. We will use the `LogisticRegression` class from `scikit-learn` to build our model.
To train our model, we will call the fit function on our LogisticRegression object and pass in our training set as a parameter. After training our model, we can now make predictions using our test set. To do this, we will call the predict function on our LogisticRegression object and pass in our test set as a parameter. This function will return a list of predictions for each of the samples in our test set.
Evaluating the performance of your machine learning model is important to ensure that your model is working as expected. There are many different metrics that you can use to evaluate the performance of your machine learning model. In this article, we will use accuracy as our metric.
To calculate the accuracy of our model, we will need to compare our predictions with the actual labels in our test set. We can use the `confusion_matrix` function to calculate the accuracy of our predictions.
logreg = LogisticRegression()
logreg.fit(X_train, y_train)
y_pred = logreg.predict(X_test)
print(confusion_matrix(y_test, y_pred))
print(classification_report(y_test, y_pred))
The above command will produce the following output:
precision recall f1-score support
setosa 1.00 1.00 1.00 18
versicolor 1.00 0.96 0.98 24
virginica 0.95 1.00 0.97 18

accuracy 0.98 60
macro avg 0.98 0.99 0.98 60
weighted avg 0.98 0.98 0.98 60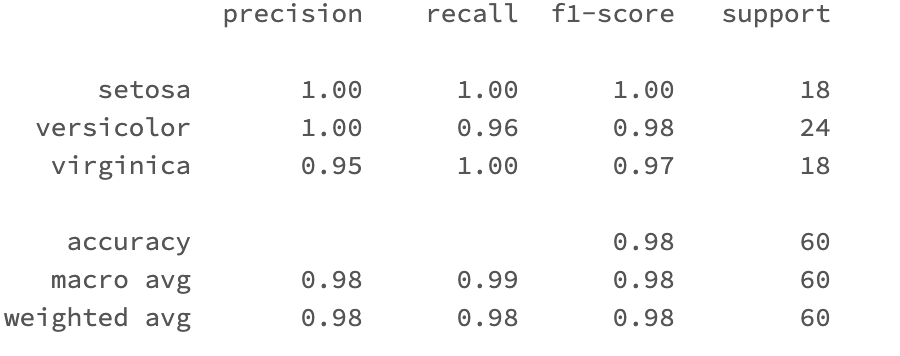
The output above shows that the model accuracy is 98% which is a great result.
Conclusion
In this tutorial, you learned about the popular data science and machine learning unified analytics platform, Azure Databricks. You learned how to launch the Databricks workspace and how to build and evaluate a machine learning model using the Databricks notebook. You are now ready to start your machine learning journey with Azure Databricks!
The last step would be to delete the resources you have created if you don’t intend to use them in the future. This is easy to do. The first step is to go to the Azure portal, where you can look at a list of the resource groups.
Locate the resource group you want to delete, and click on it.
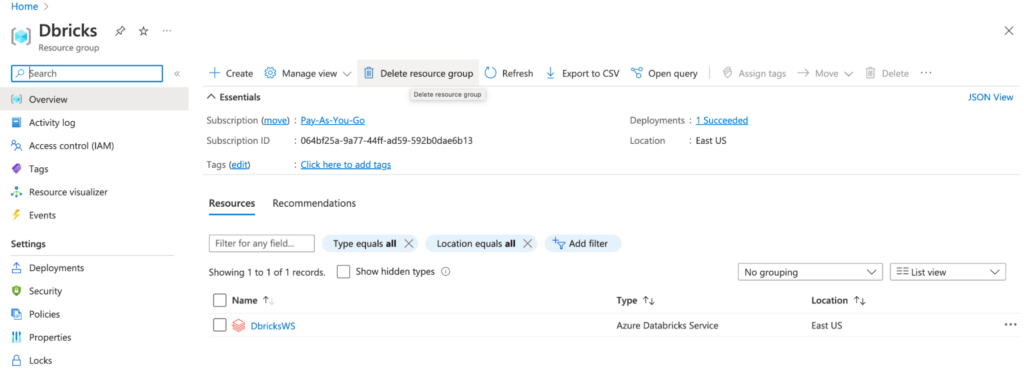
Click on the Delete resource group button at the top of the page.
Finally, confirm the deletion by typing in the name of the resource group and clicking on the Delete button.