How to Set Up Visual Studio Code (The Easy Way)
Visual Studio Code is a powerful, extensible, and lightweight code editor that has become one of the preferred code editors in the Python community.
In this tutorial, we'll learn how to install Visual Studio Code and set it up for Python development, as well as how to become more productive with VS Code.
Let’s dive in!
Installing Visual Studio Code
This section will cover how to install VS Code on macOS step by step. Let’s get started.
NOTE
Due to the essential differences between Windows and macOS, the Windows users need to do minor modifications to install VS Code. However, installing VS Code on Windows is straightforward and similar to installing other Windows applications.
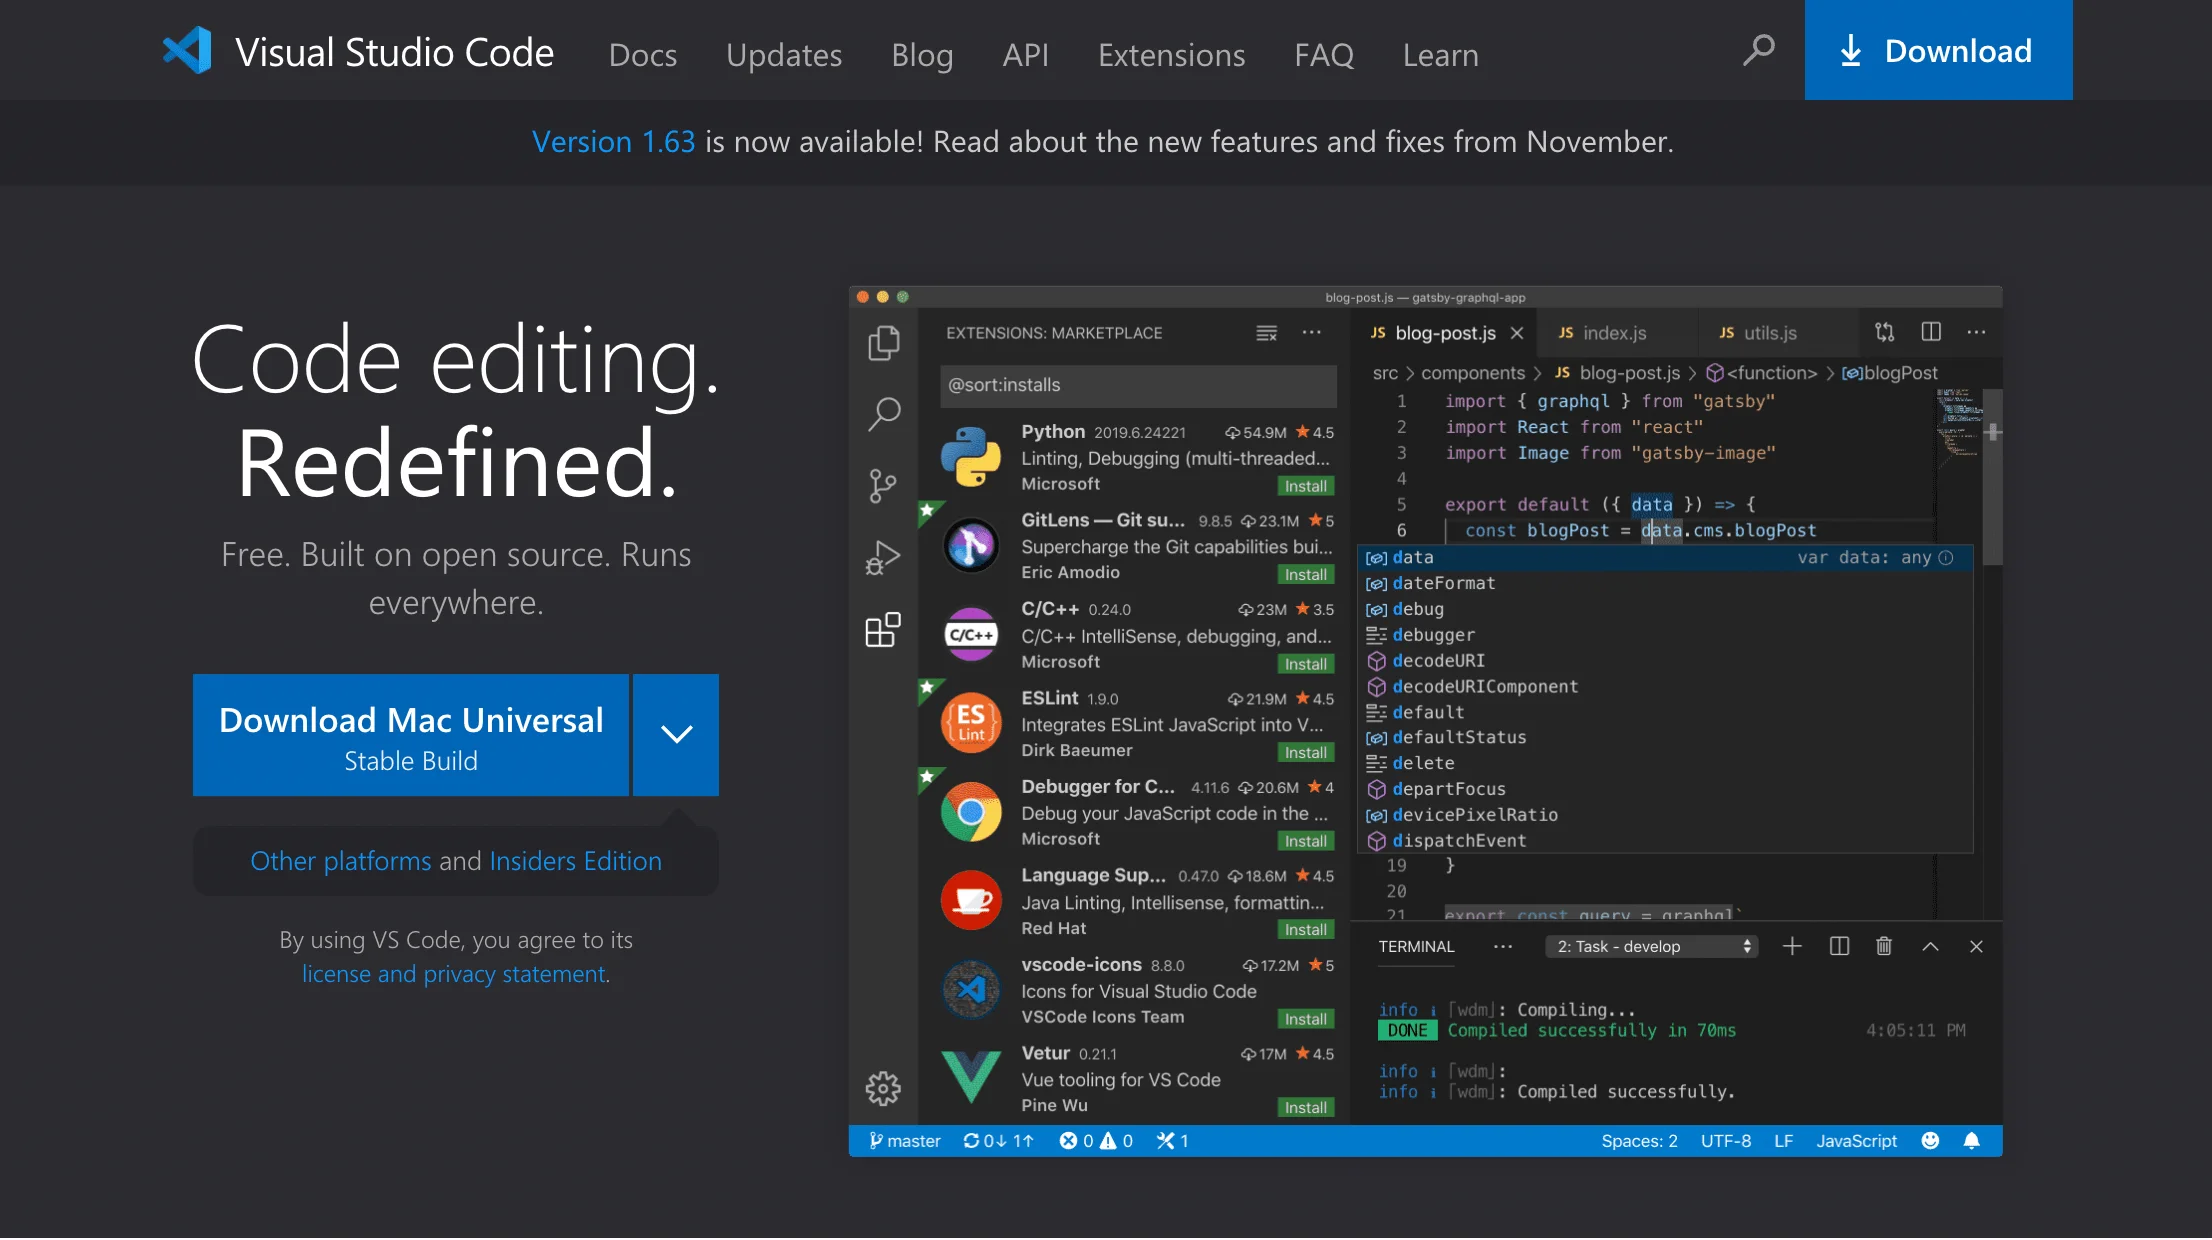
- First, download Visual Studio Code for macOS or Windows from its official website. The download page detects your operating system automatically and displays a big button for downloading the latest version of the Python installer on your computer. If it doesn’t, click the arrow down button and choose the stable VS Code release that matches the operating system installed on your computer:
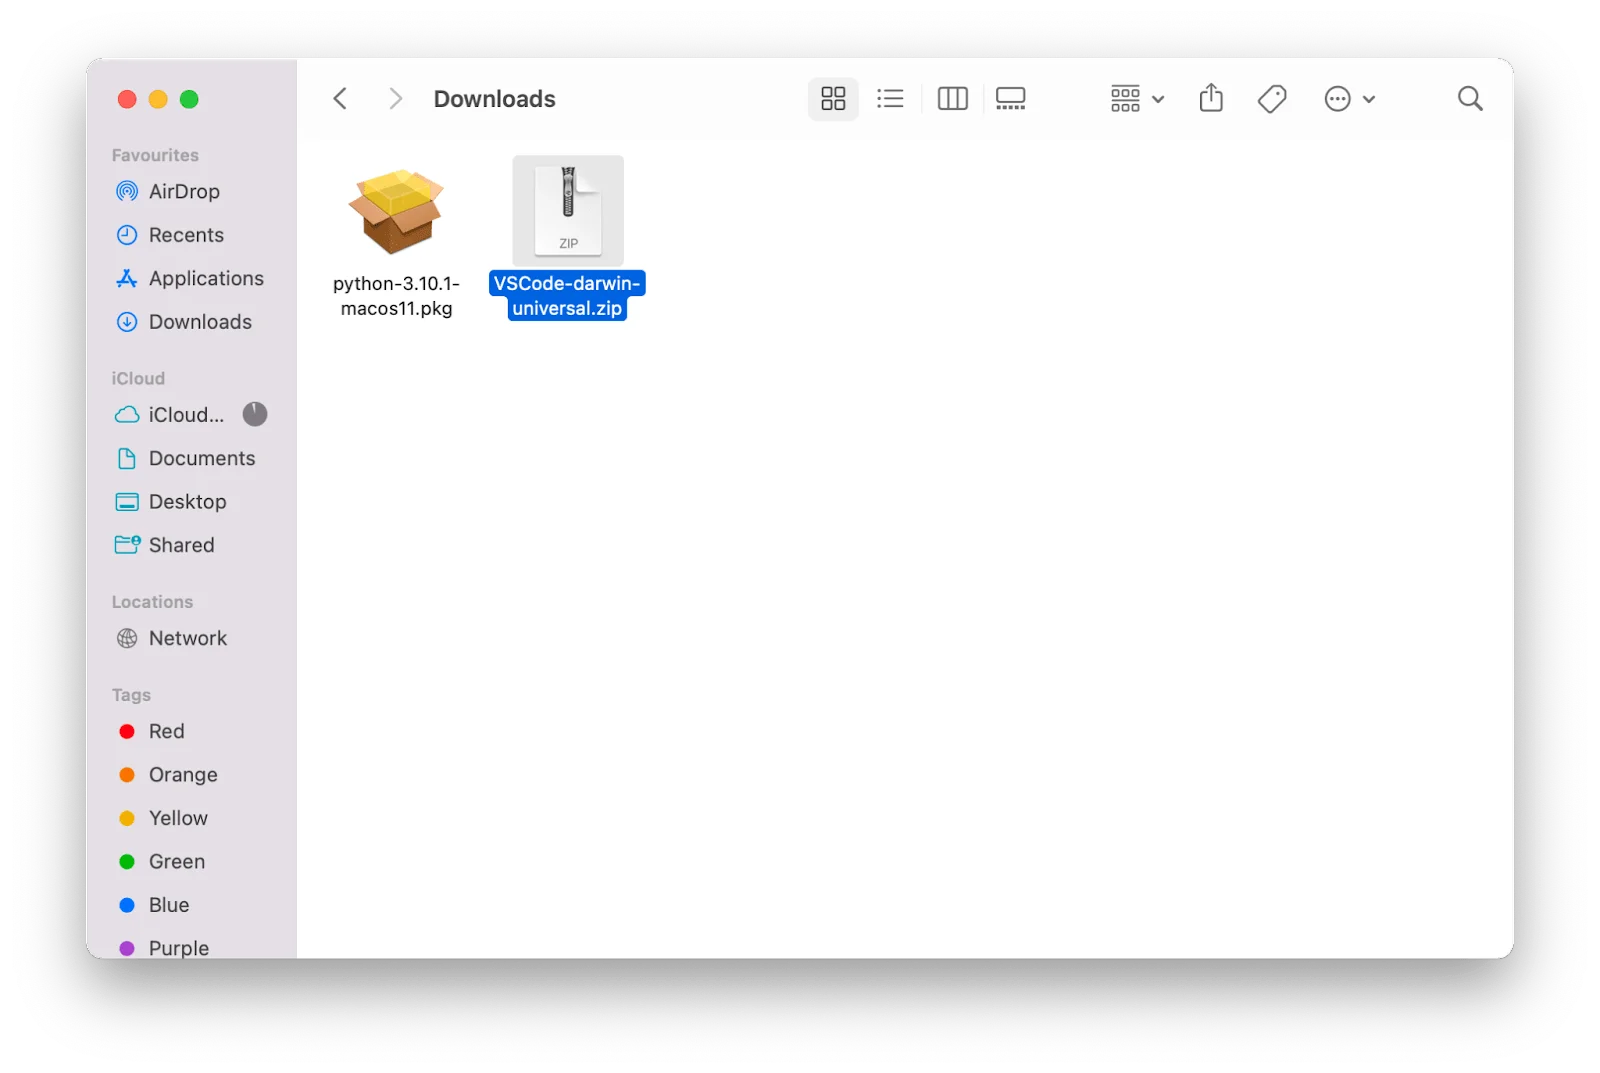
- Double-click the downloaded file to extract the archived contents:

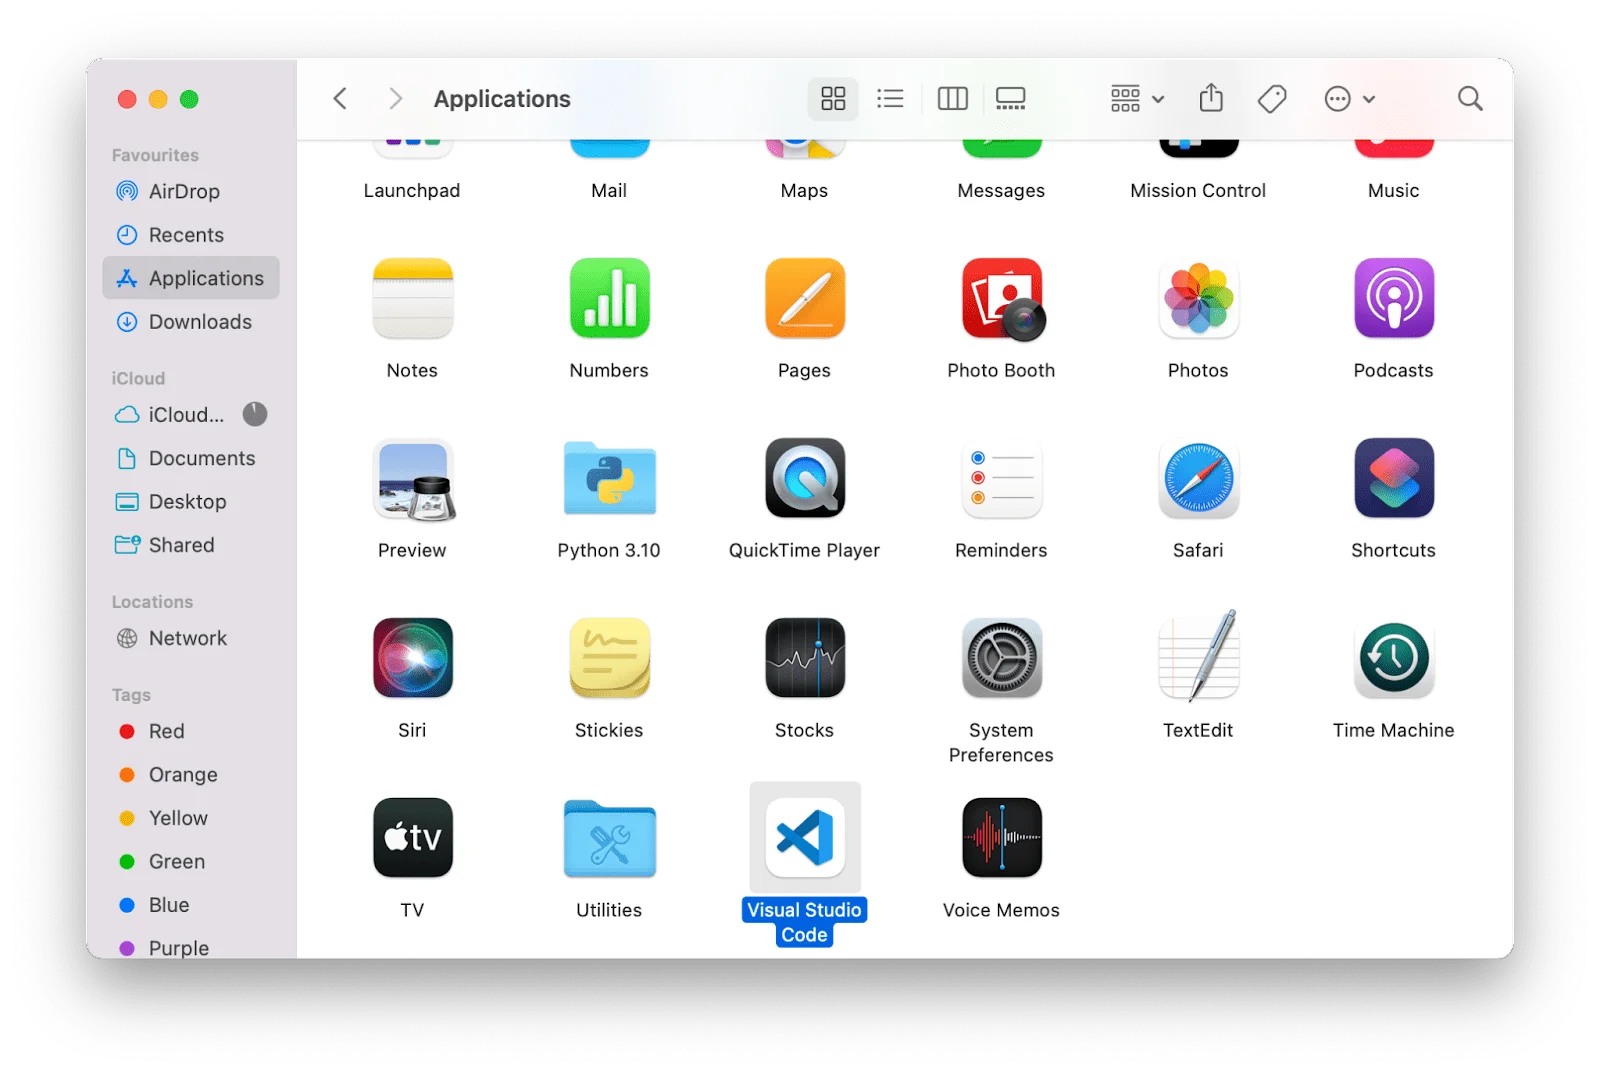
- Move the Visual Studio Code application to the Application folder to make it available in the macOS launchpad:
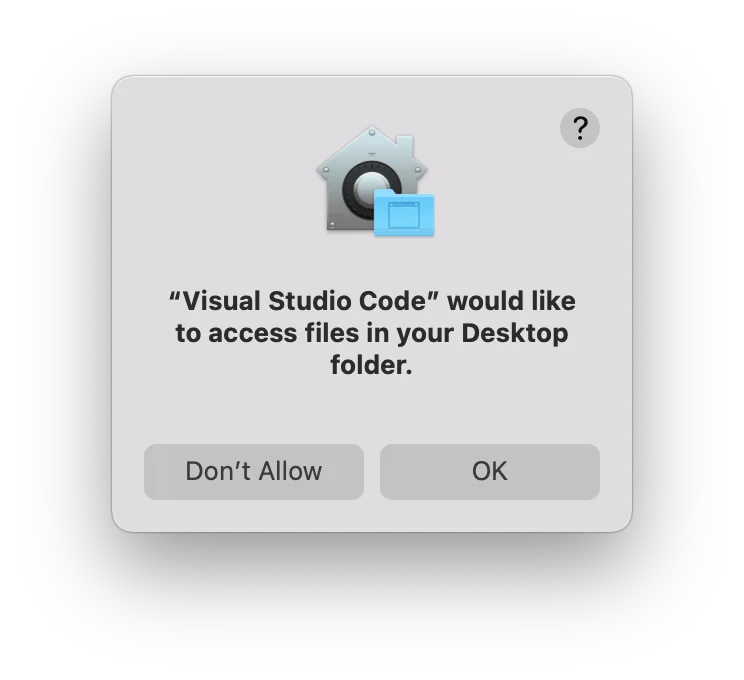
- Launch Visual Studio Code, and then open a folder where your Python scripts exist or create a new one. For example, create a new folder on your Desktop, and name it
py_scripts, then try to open the folder on VS Code.
Usually, VS Code needs your permission to access files in your Desktop folder; click OK:

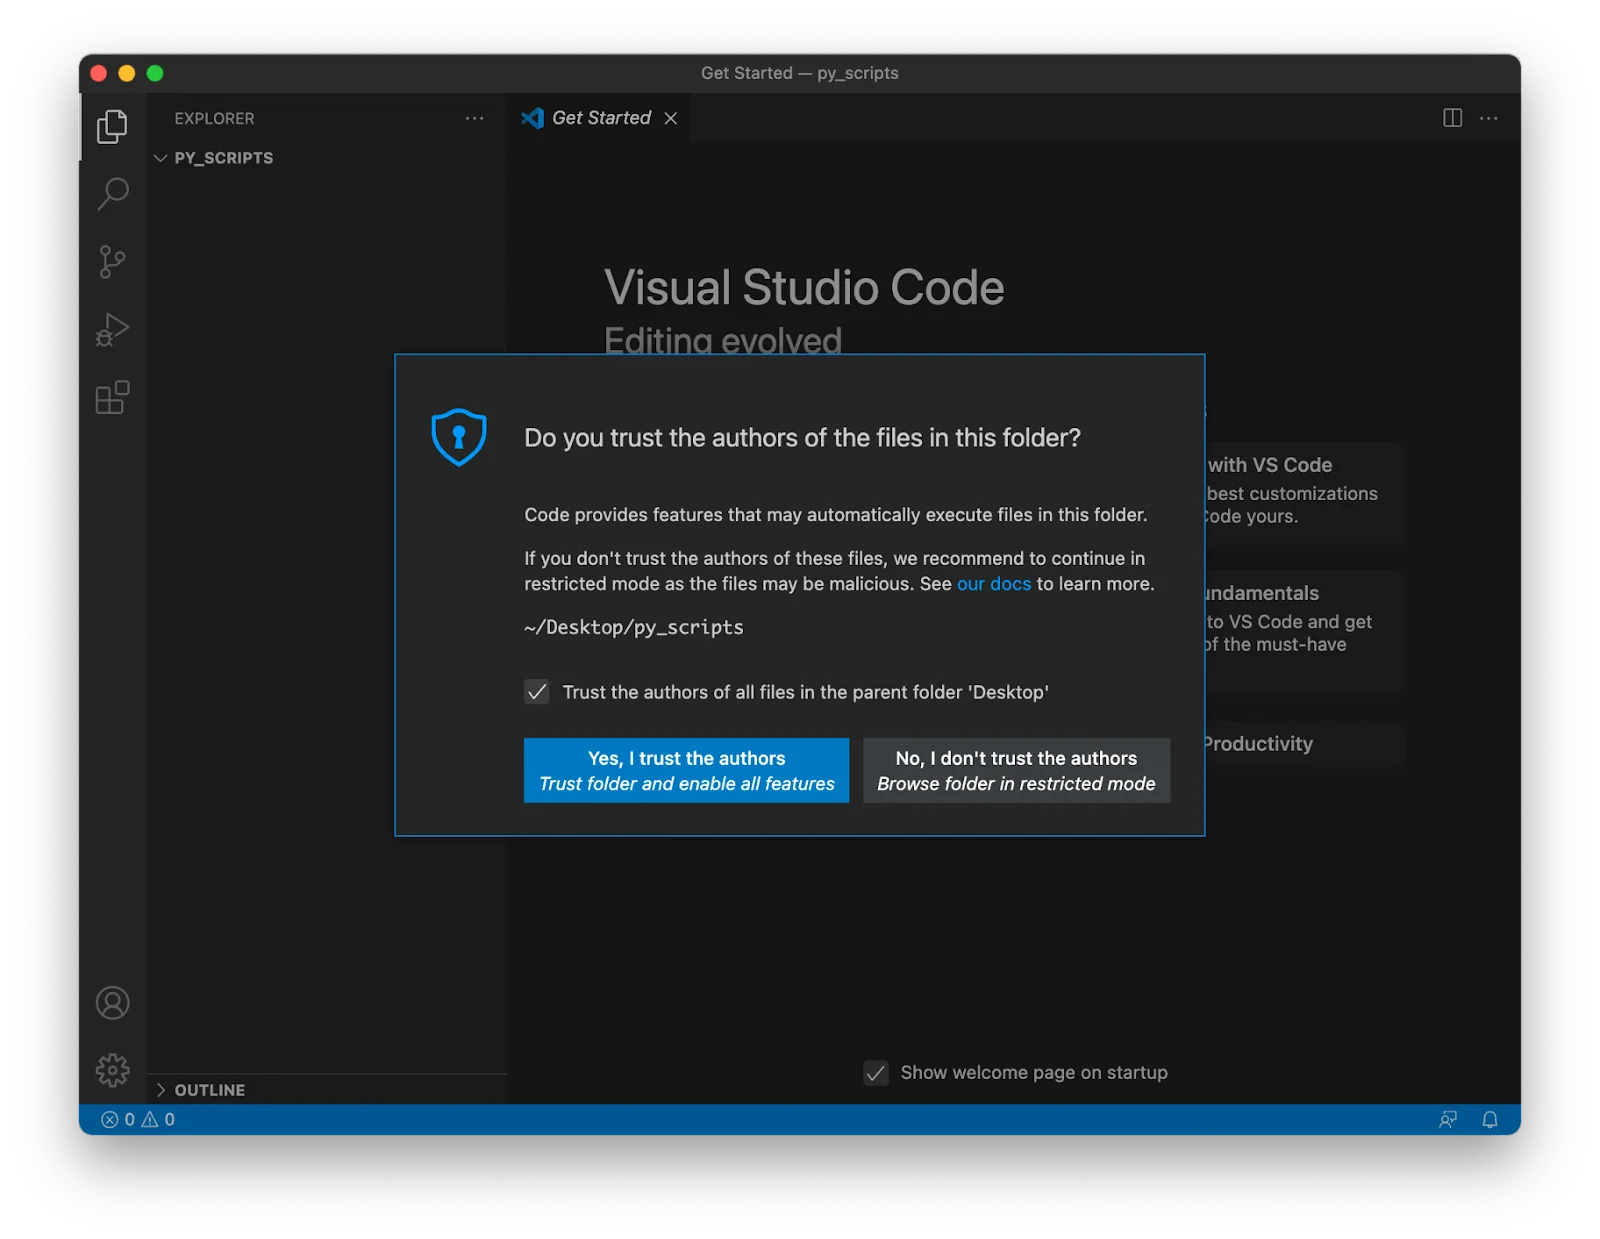
Also, you may need to declare that you trust the authors of the files stored in your Desktop folder:

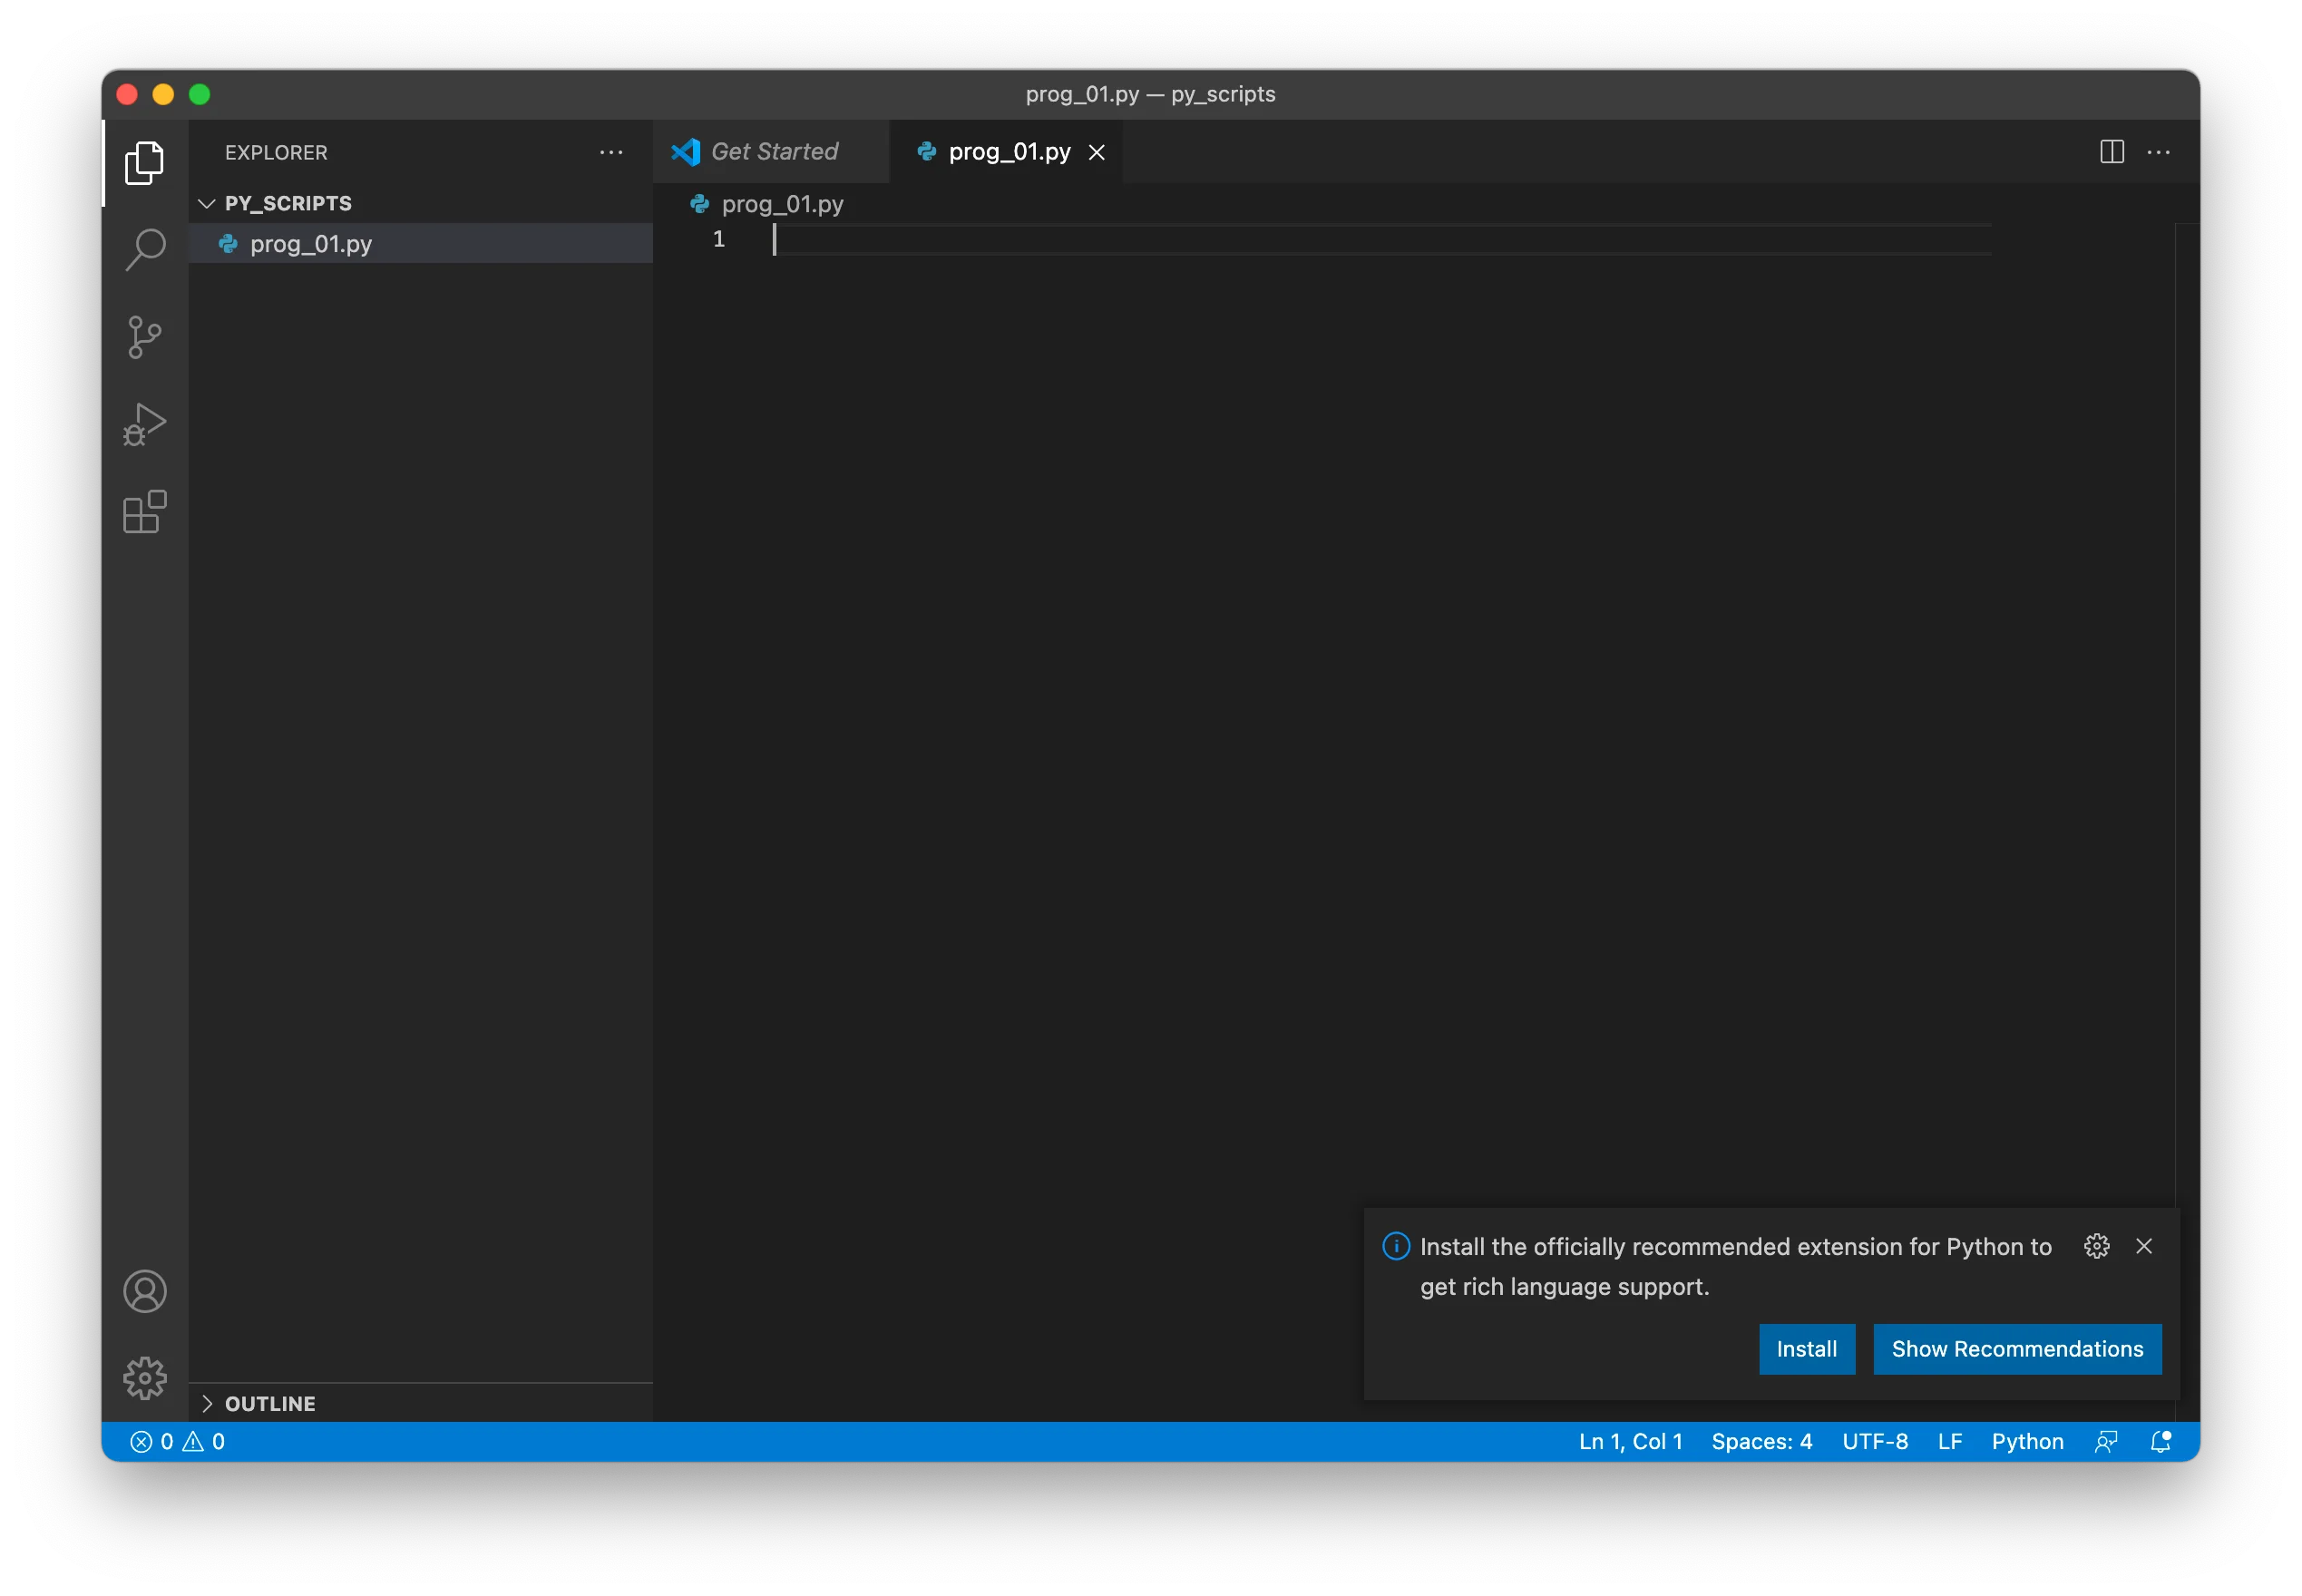
- Create a new file with a
.pyextension. For example, create a new file and name itprog_01.py. VS Code detects the.pyextension and wants to install a Python extension:

To work with Python inside VS Code, we need to use the Python extension, which brings many useful features, such as code completion with IntelliSense, debugging, unit testing support, etc:
Click on Install:
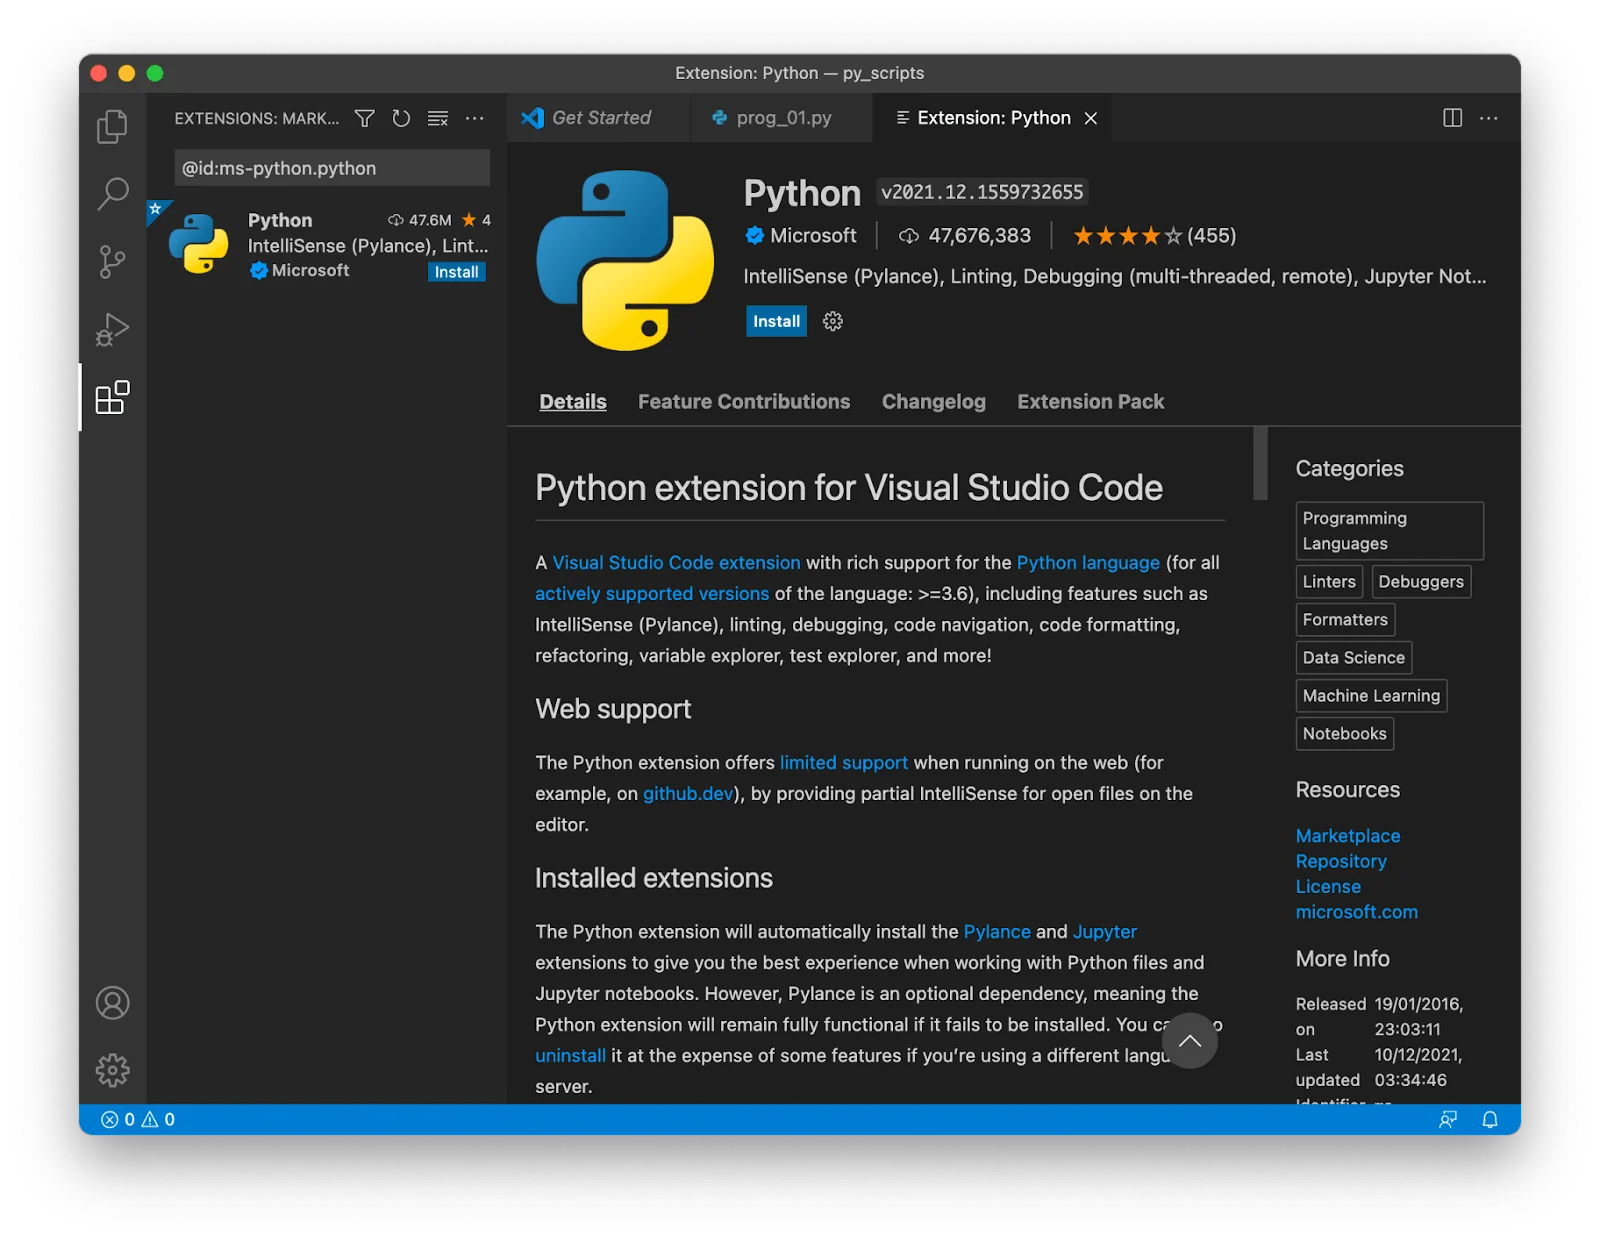
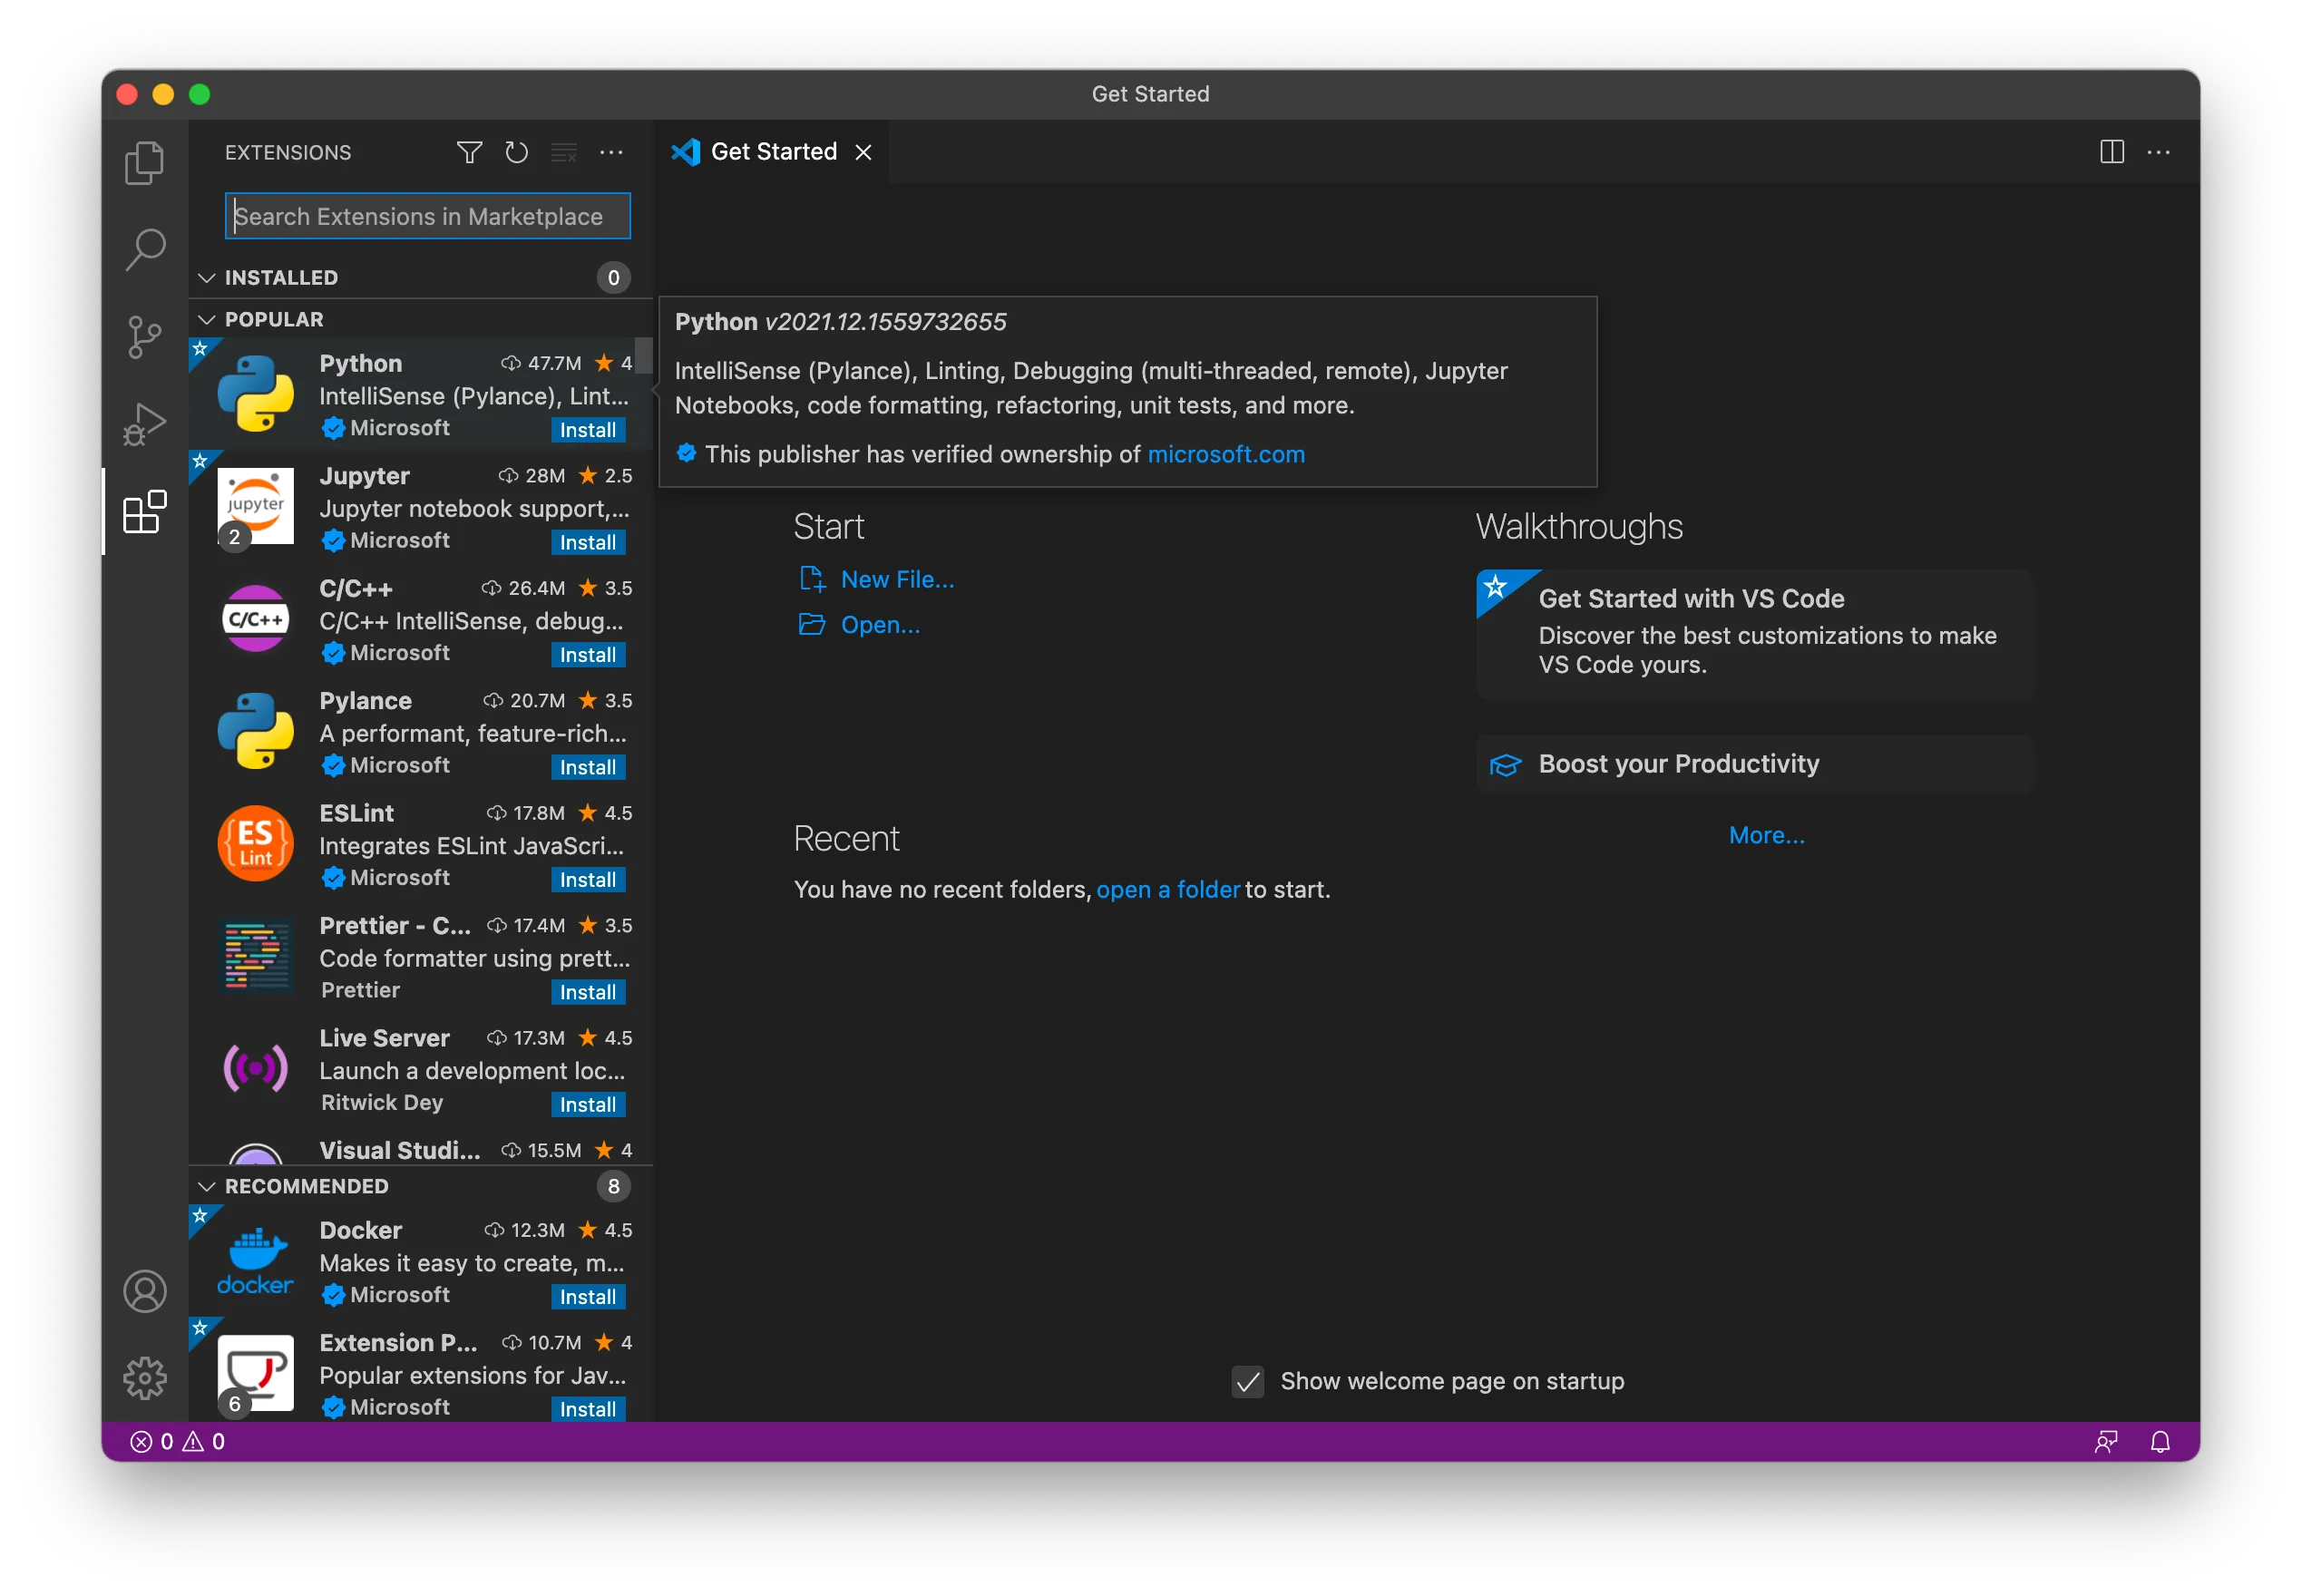
We can also install the Python extension by browsing extensions. Click on the Extensions icon on the left side of VS Code:
![]()
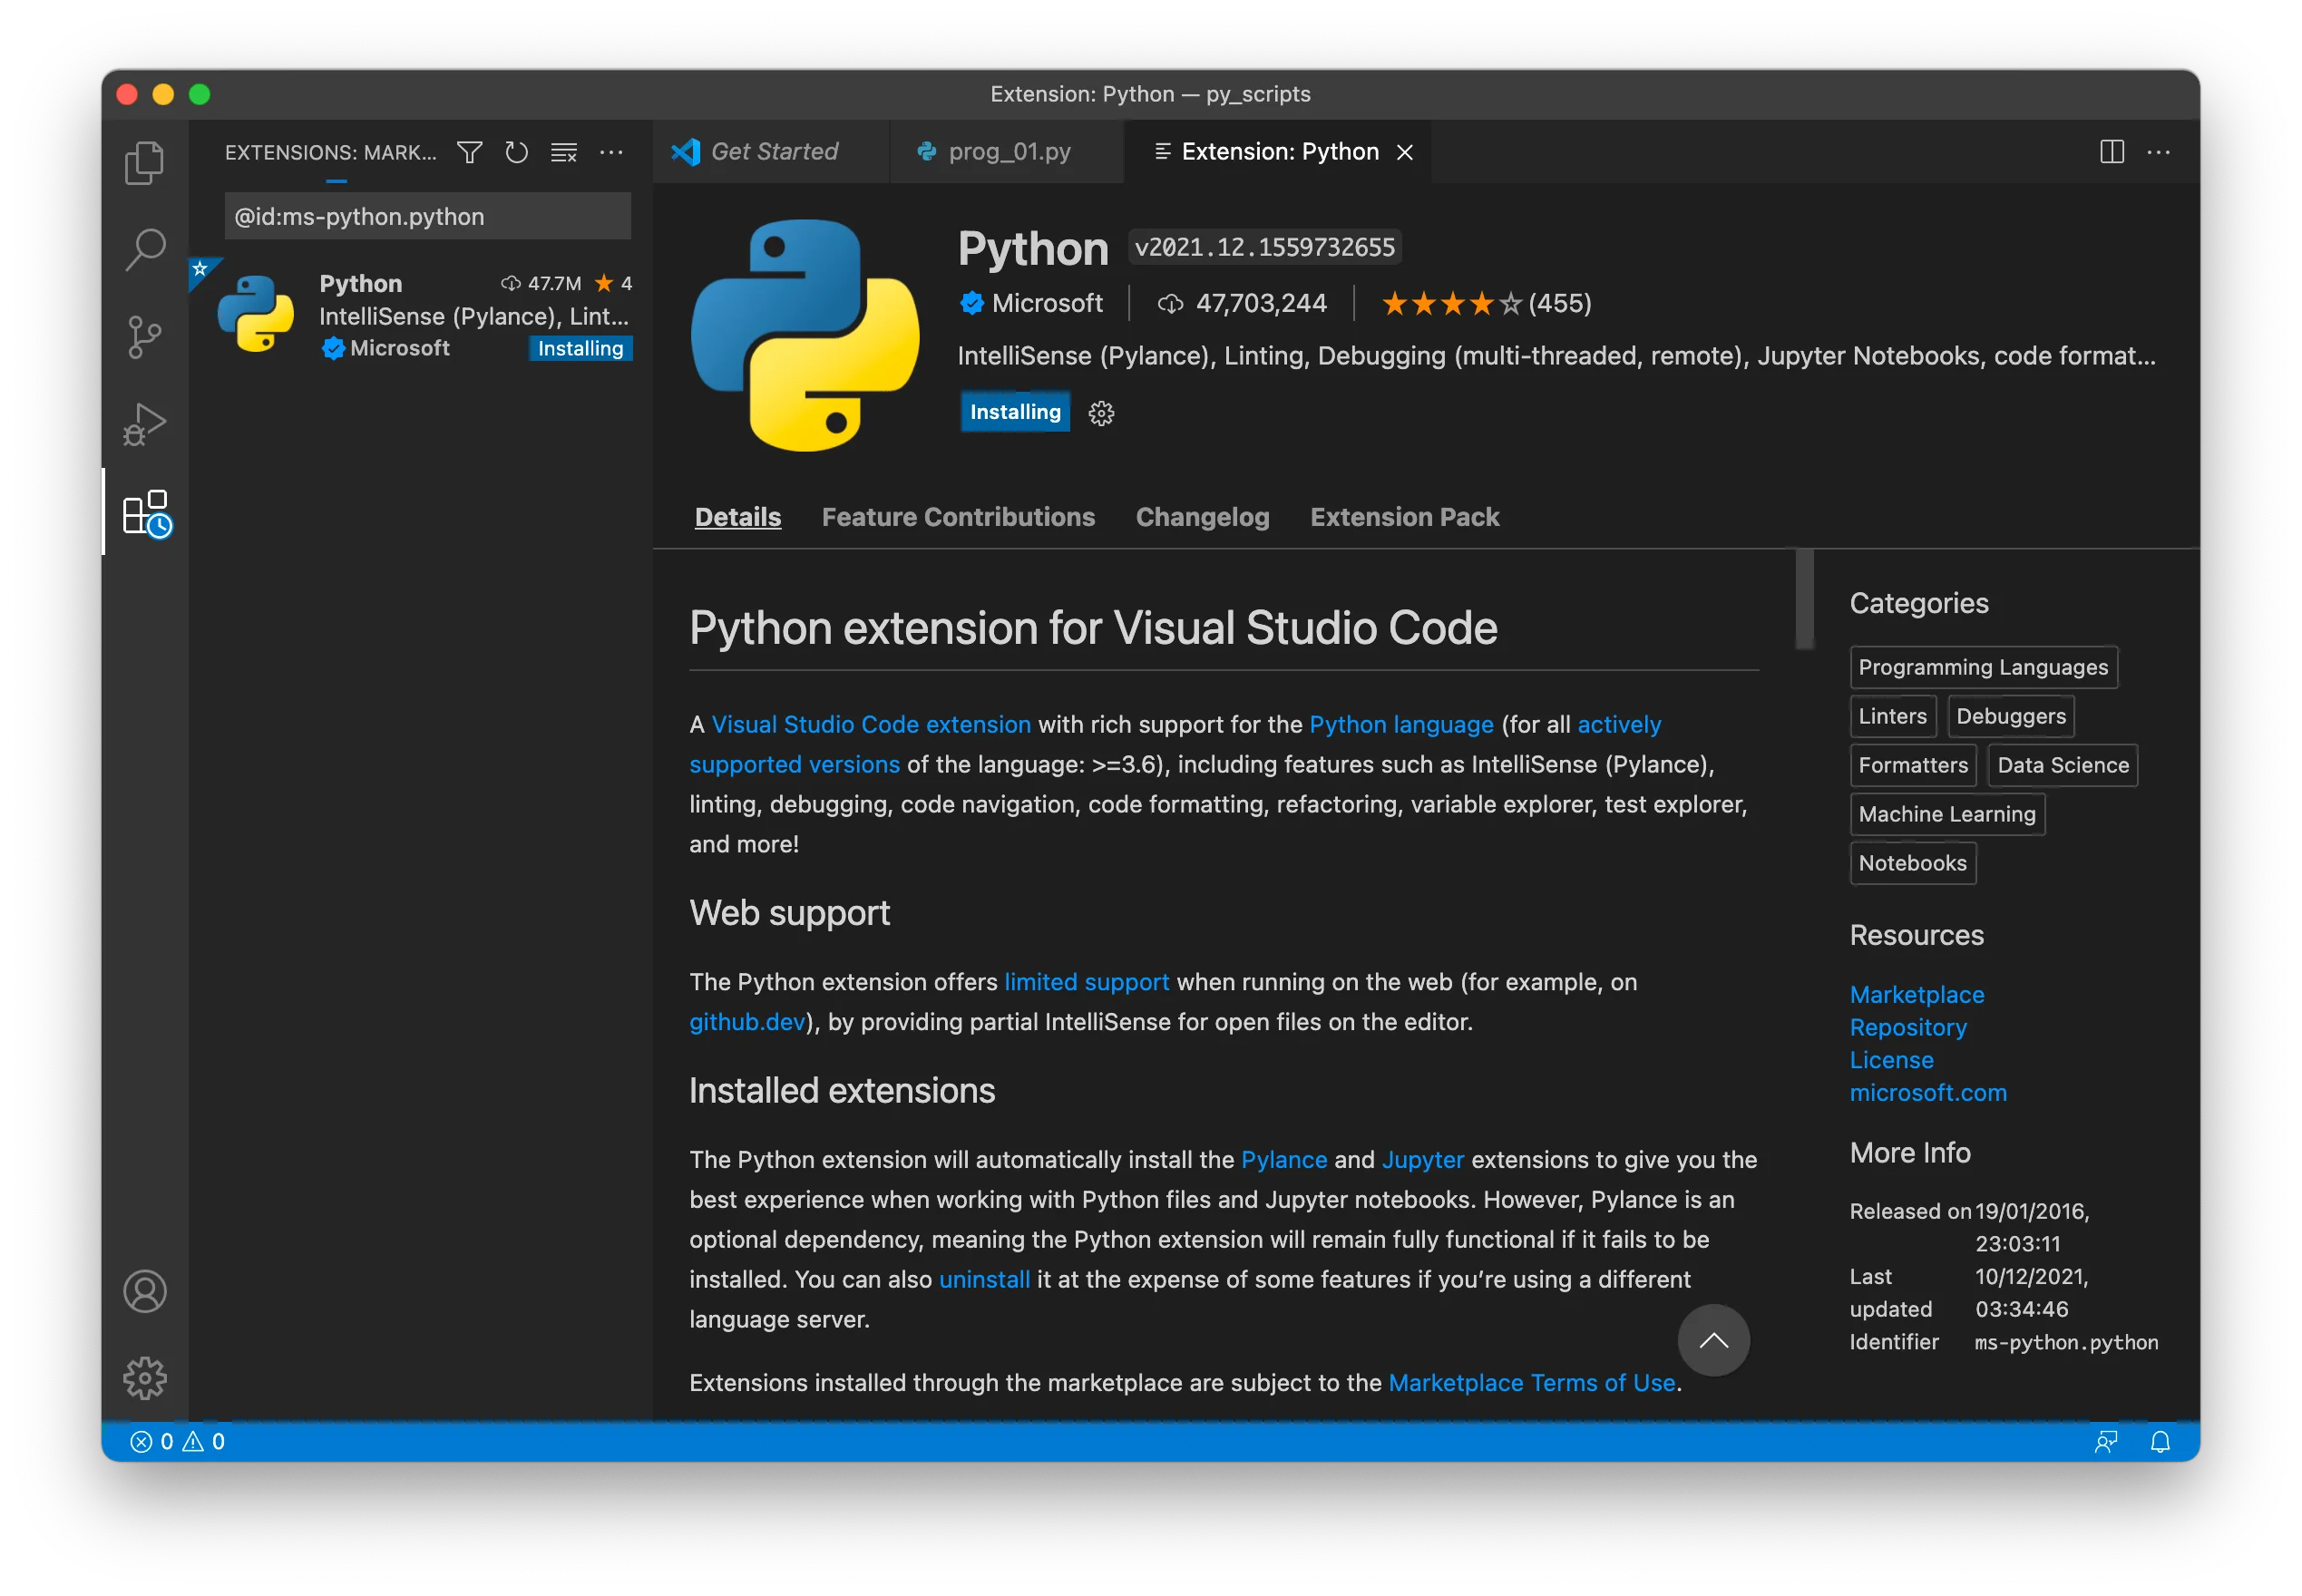
This will show you a list of the most popular VS Code extensions on the VS Code Marketplace. Now, we can select the Python extension and install it:
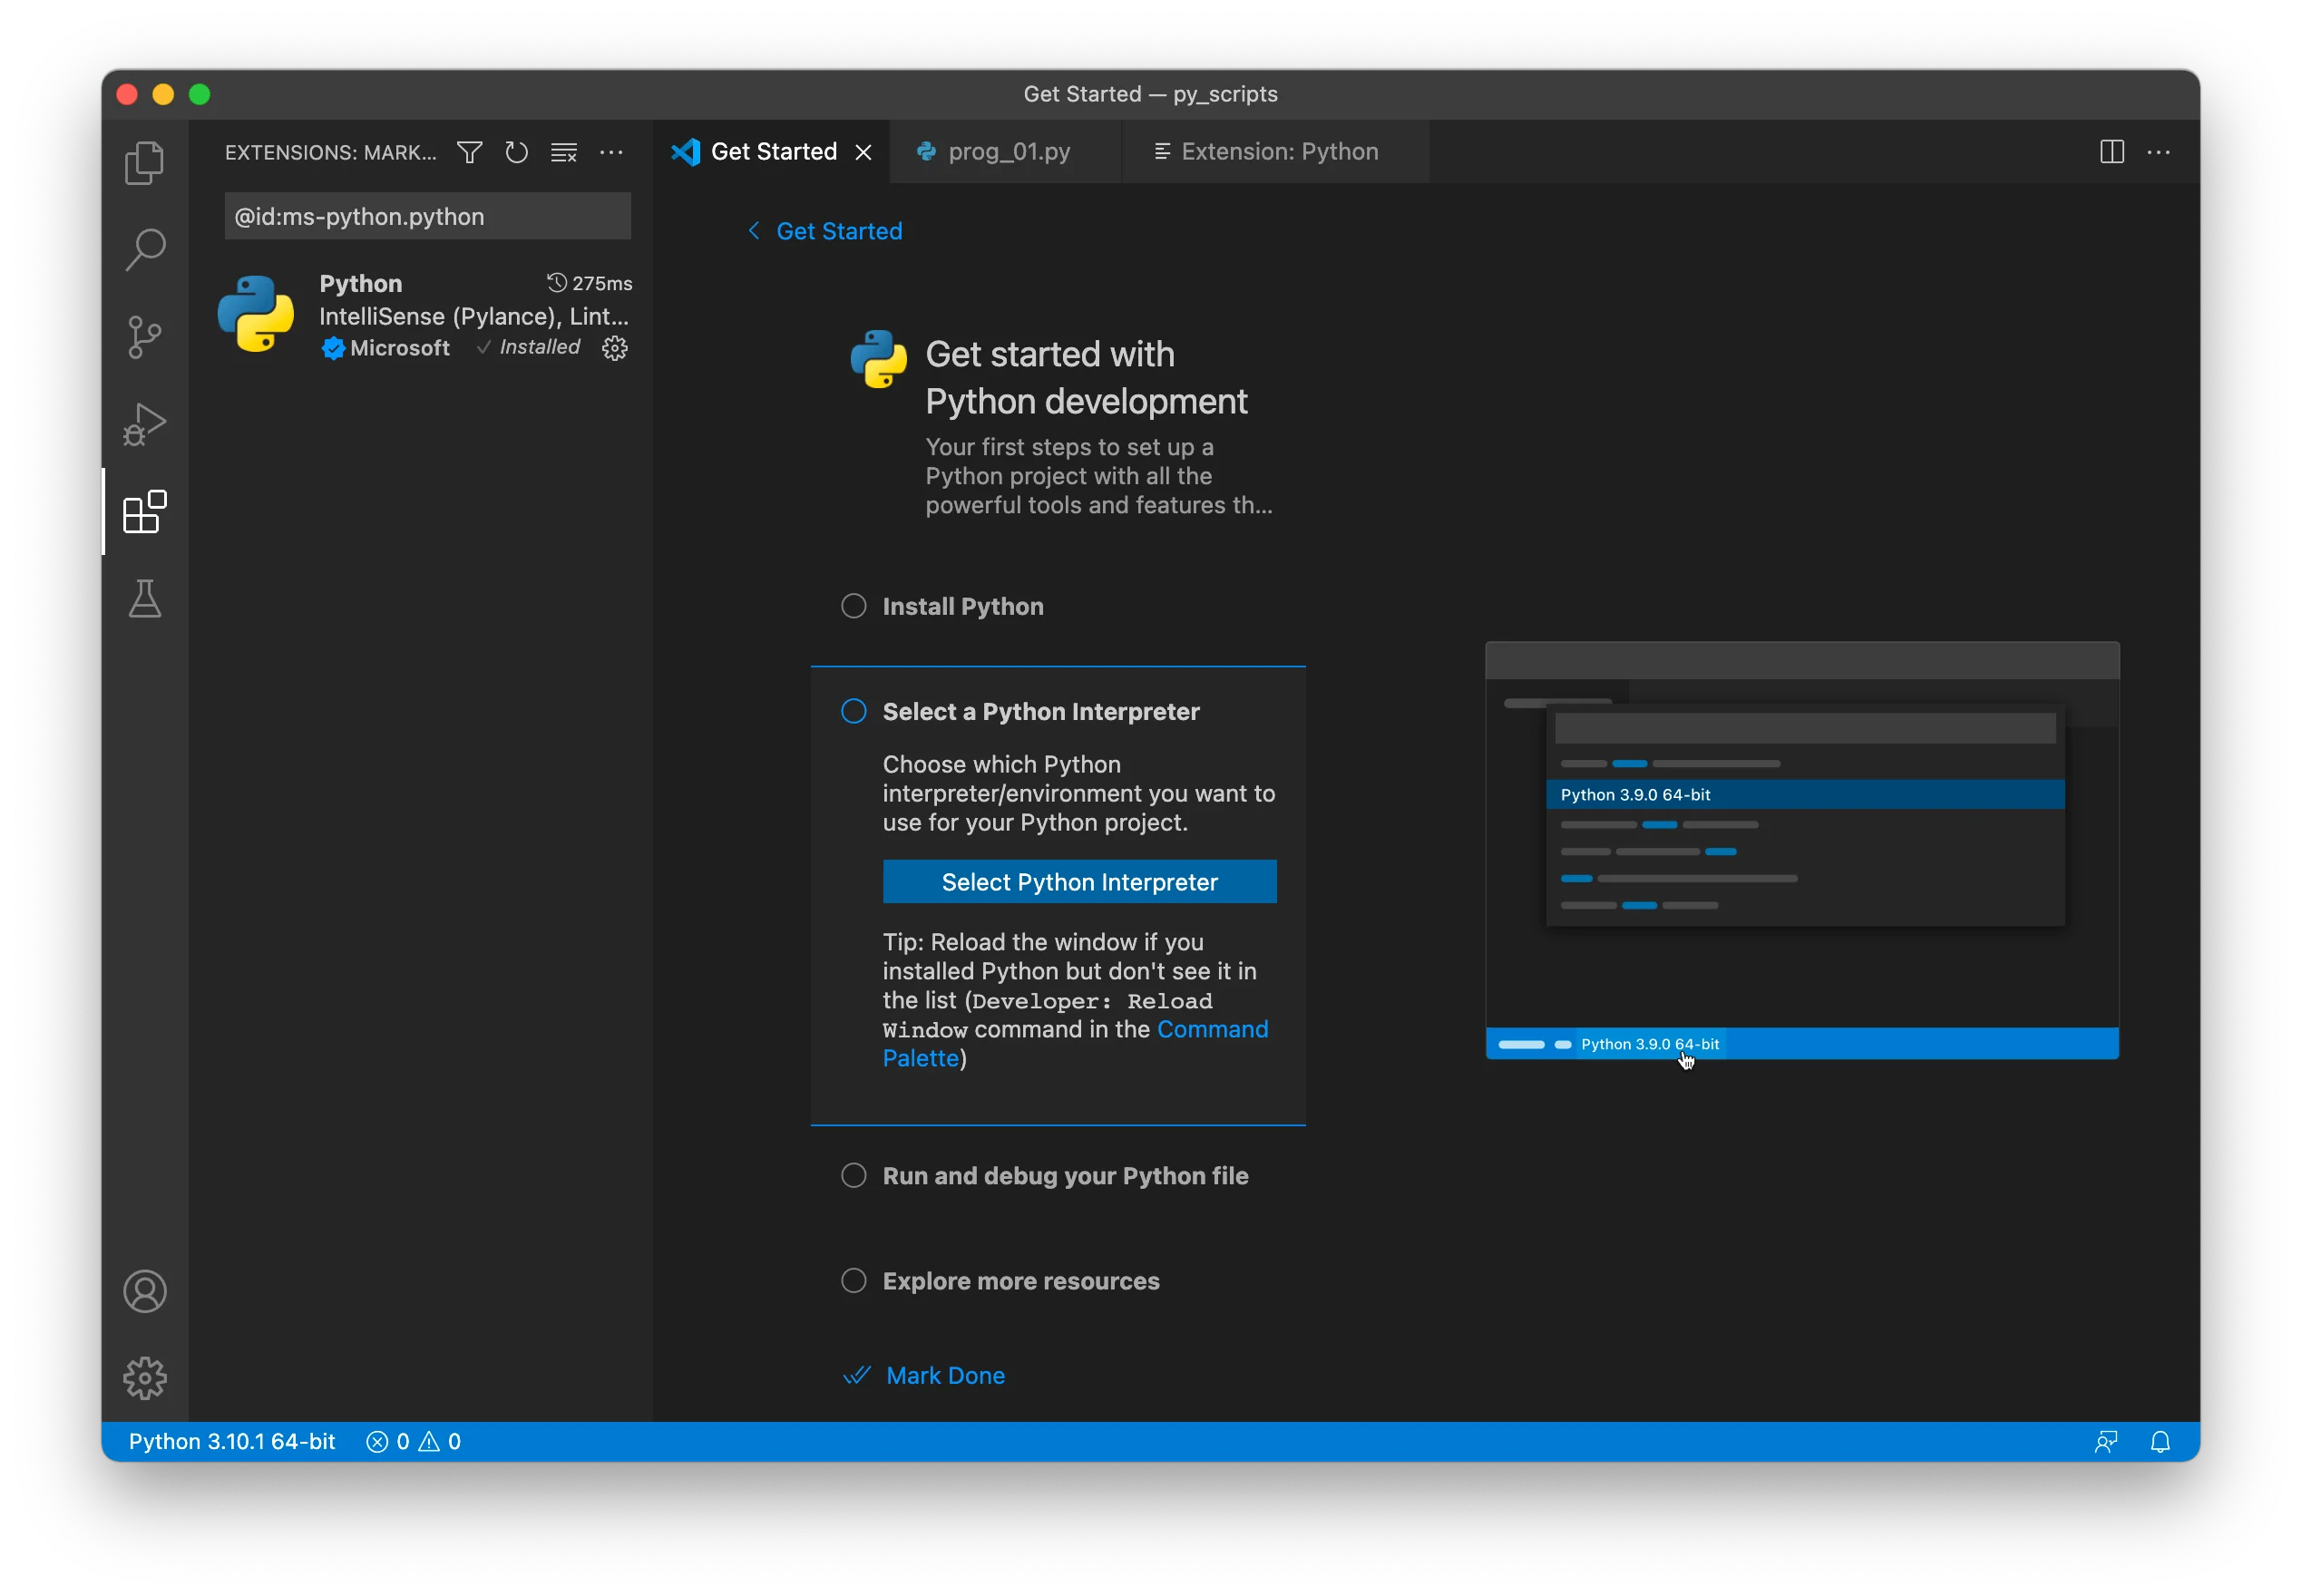
- Once the extension is installed, you have to select a Python interpreter. Click on Select Python Interpreter:
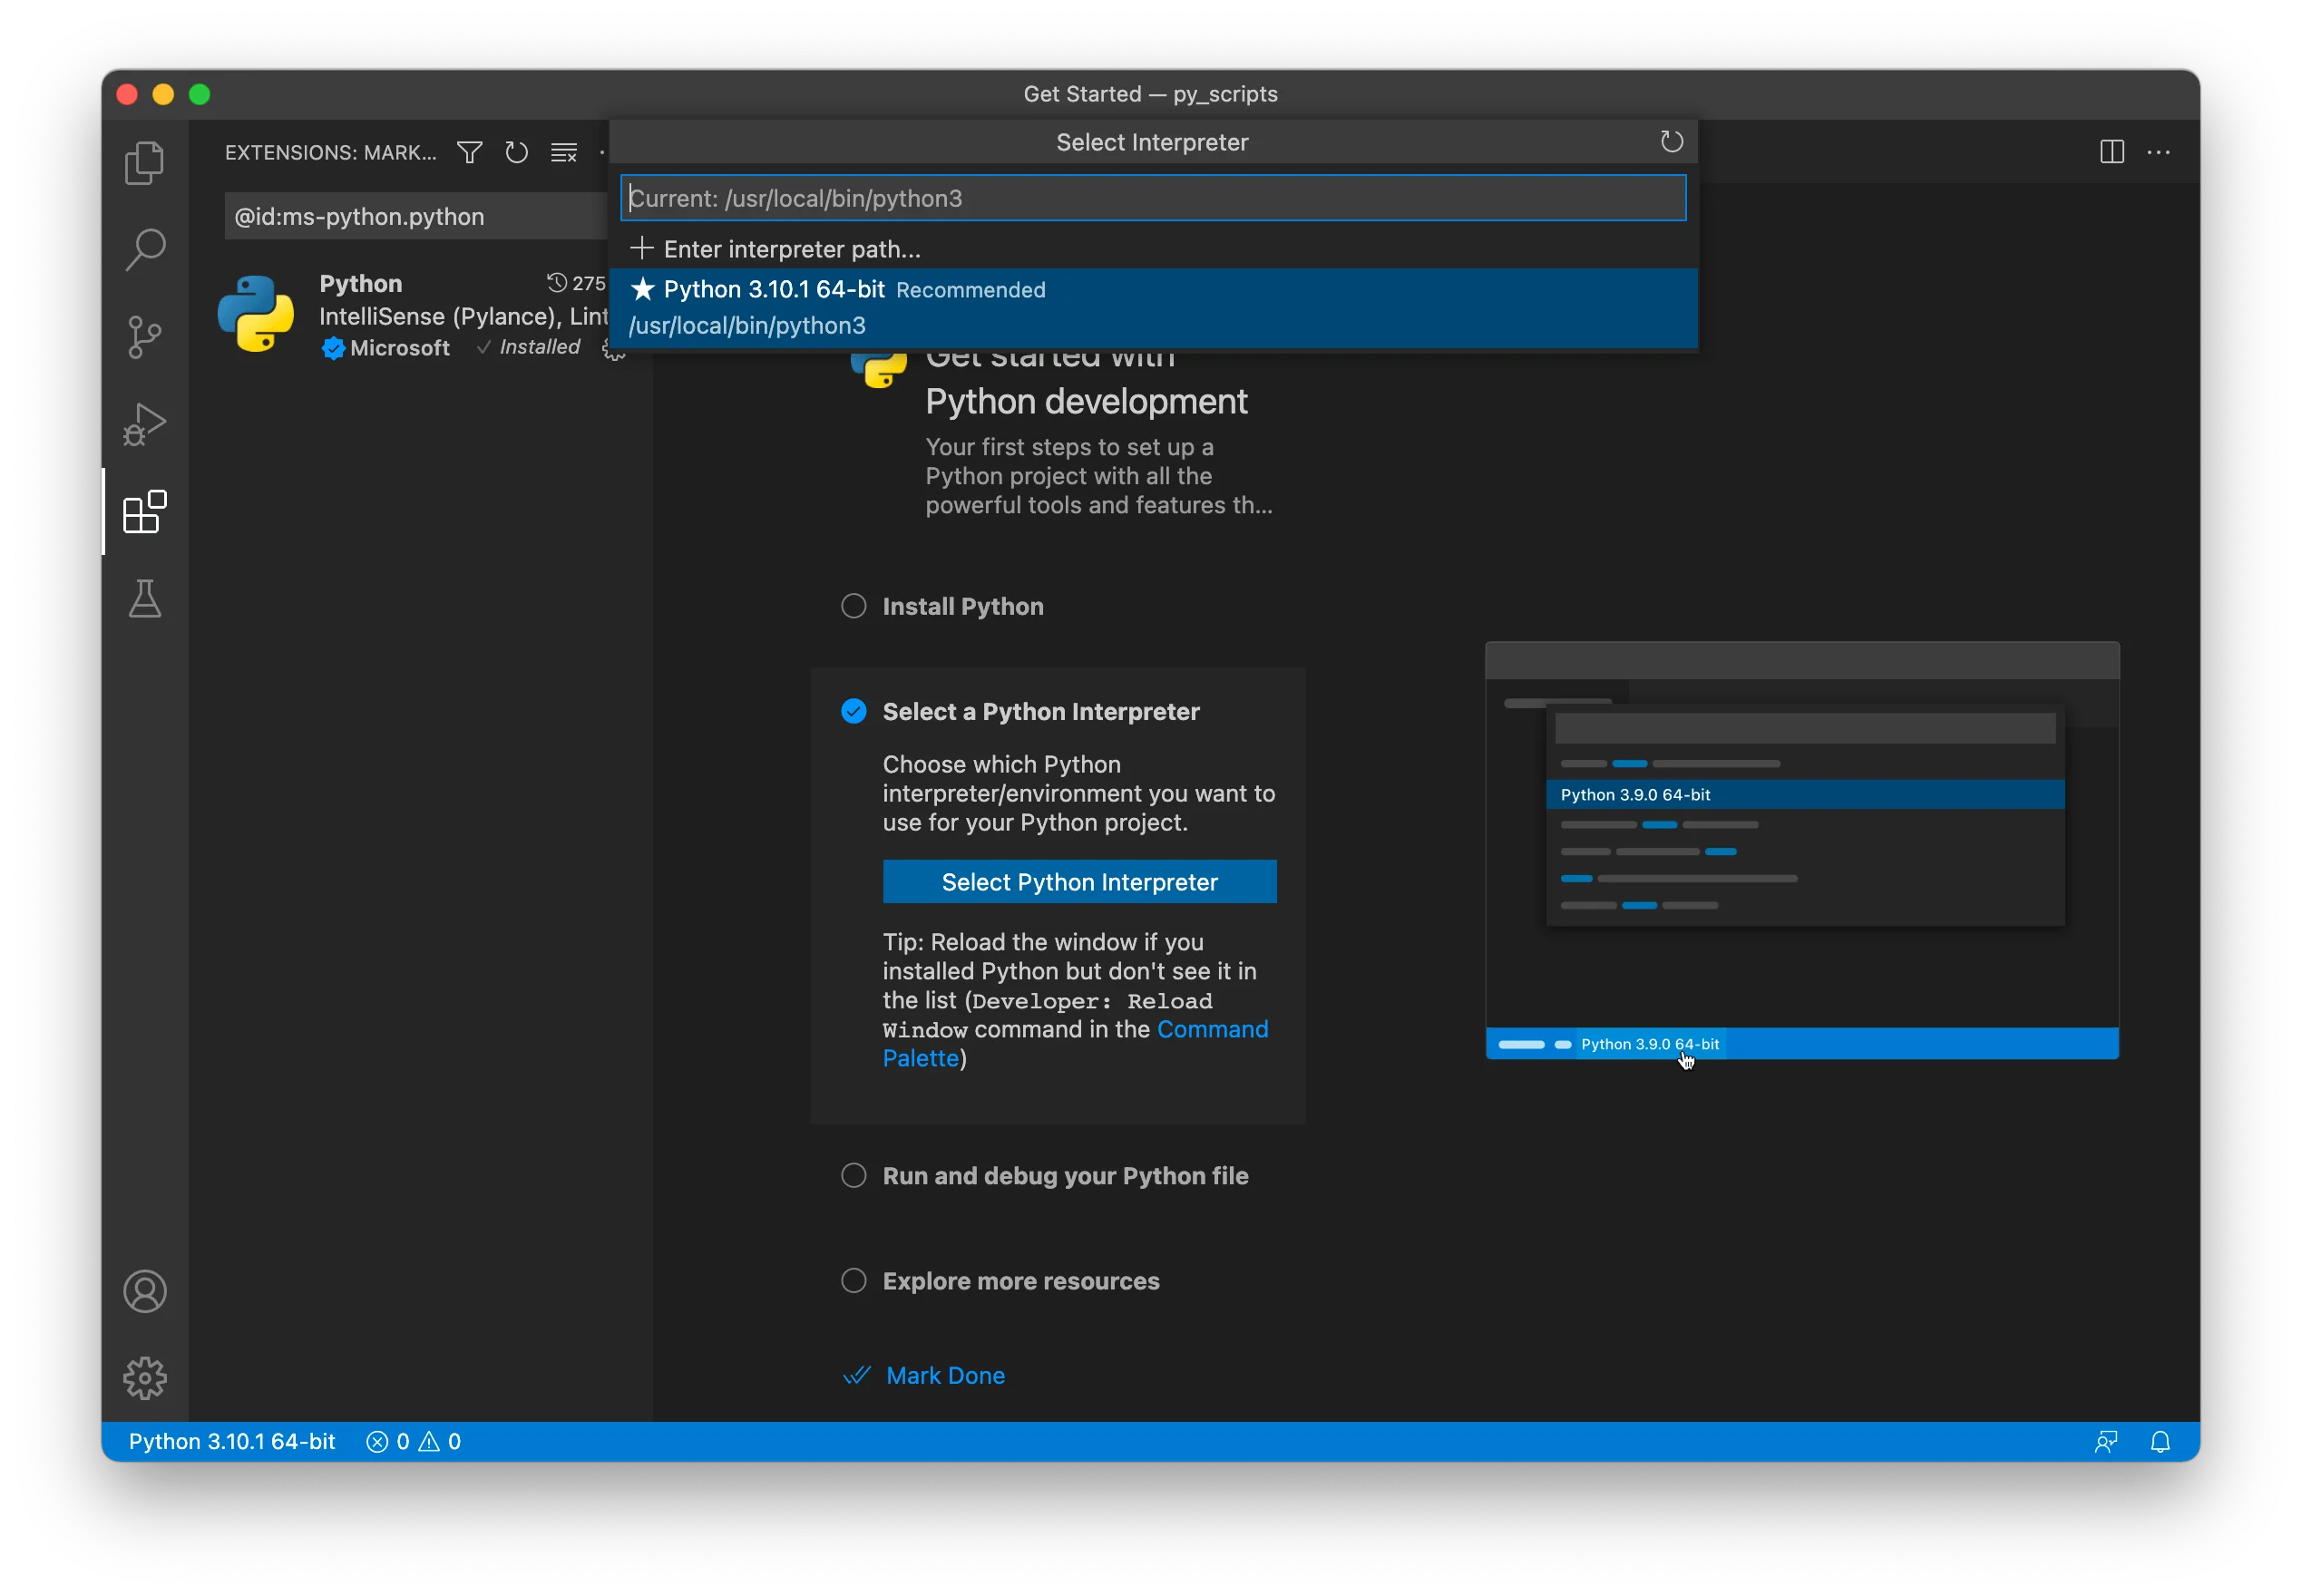
Then select the recommended Python interpreter on the list:
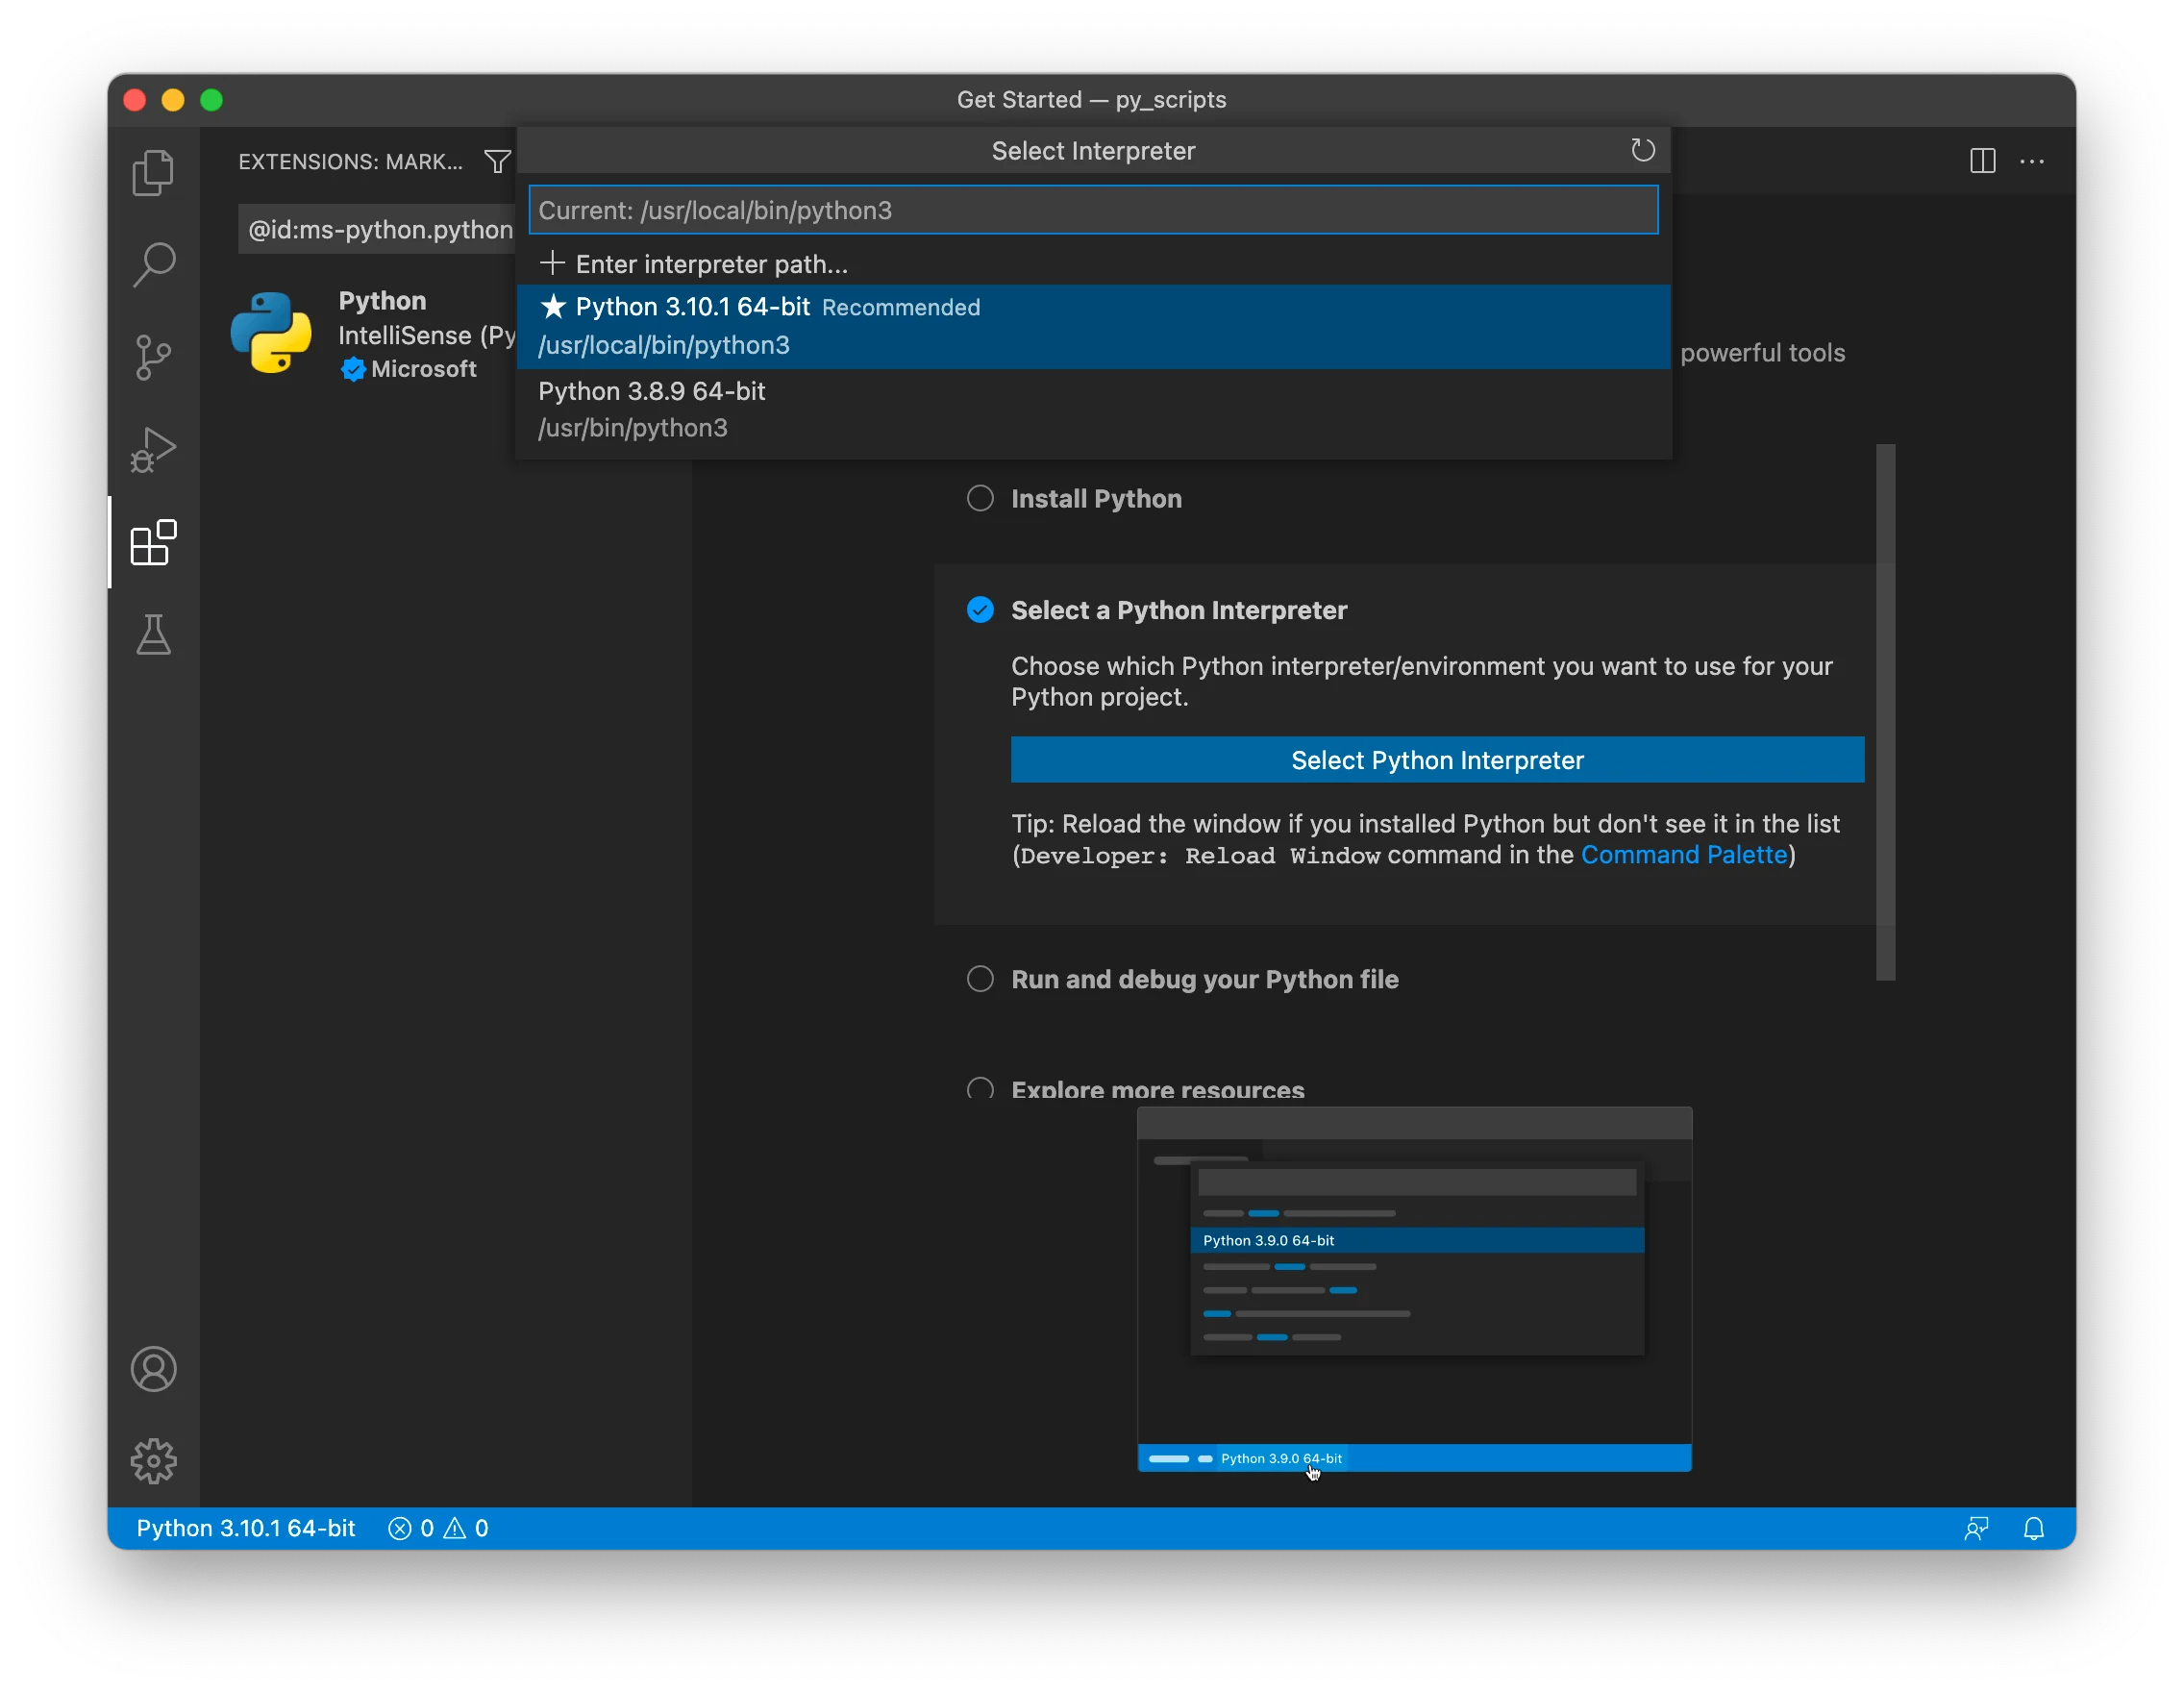
If you have multiple Python versions installed on your Mac, choose the latest version:

You can also select a Python interpreter using the Python: Select Interpreter command from the Command Palette. To do so, press CMD + SHIFT + P, type Python, and choose Select Interpreter.
Creating and Running a Python File in VS Code
Excellent. We have everything we need to write and run our Python code inside VS Code. Let's write the following code in VS Code and then run it.
def palindrome(a):
a = a.upper()
return a == a[::-1]
name = input("Enter a name: ")
if palindrome(name):
print("It's a palindrome name.")
else:
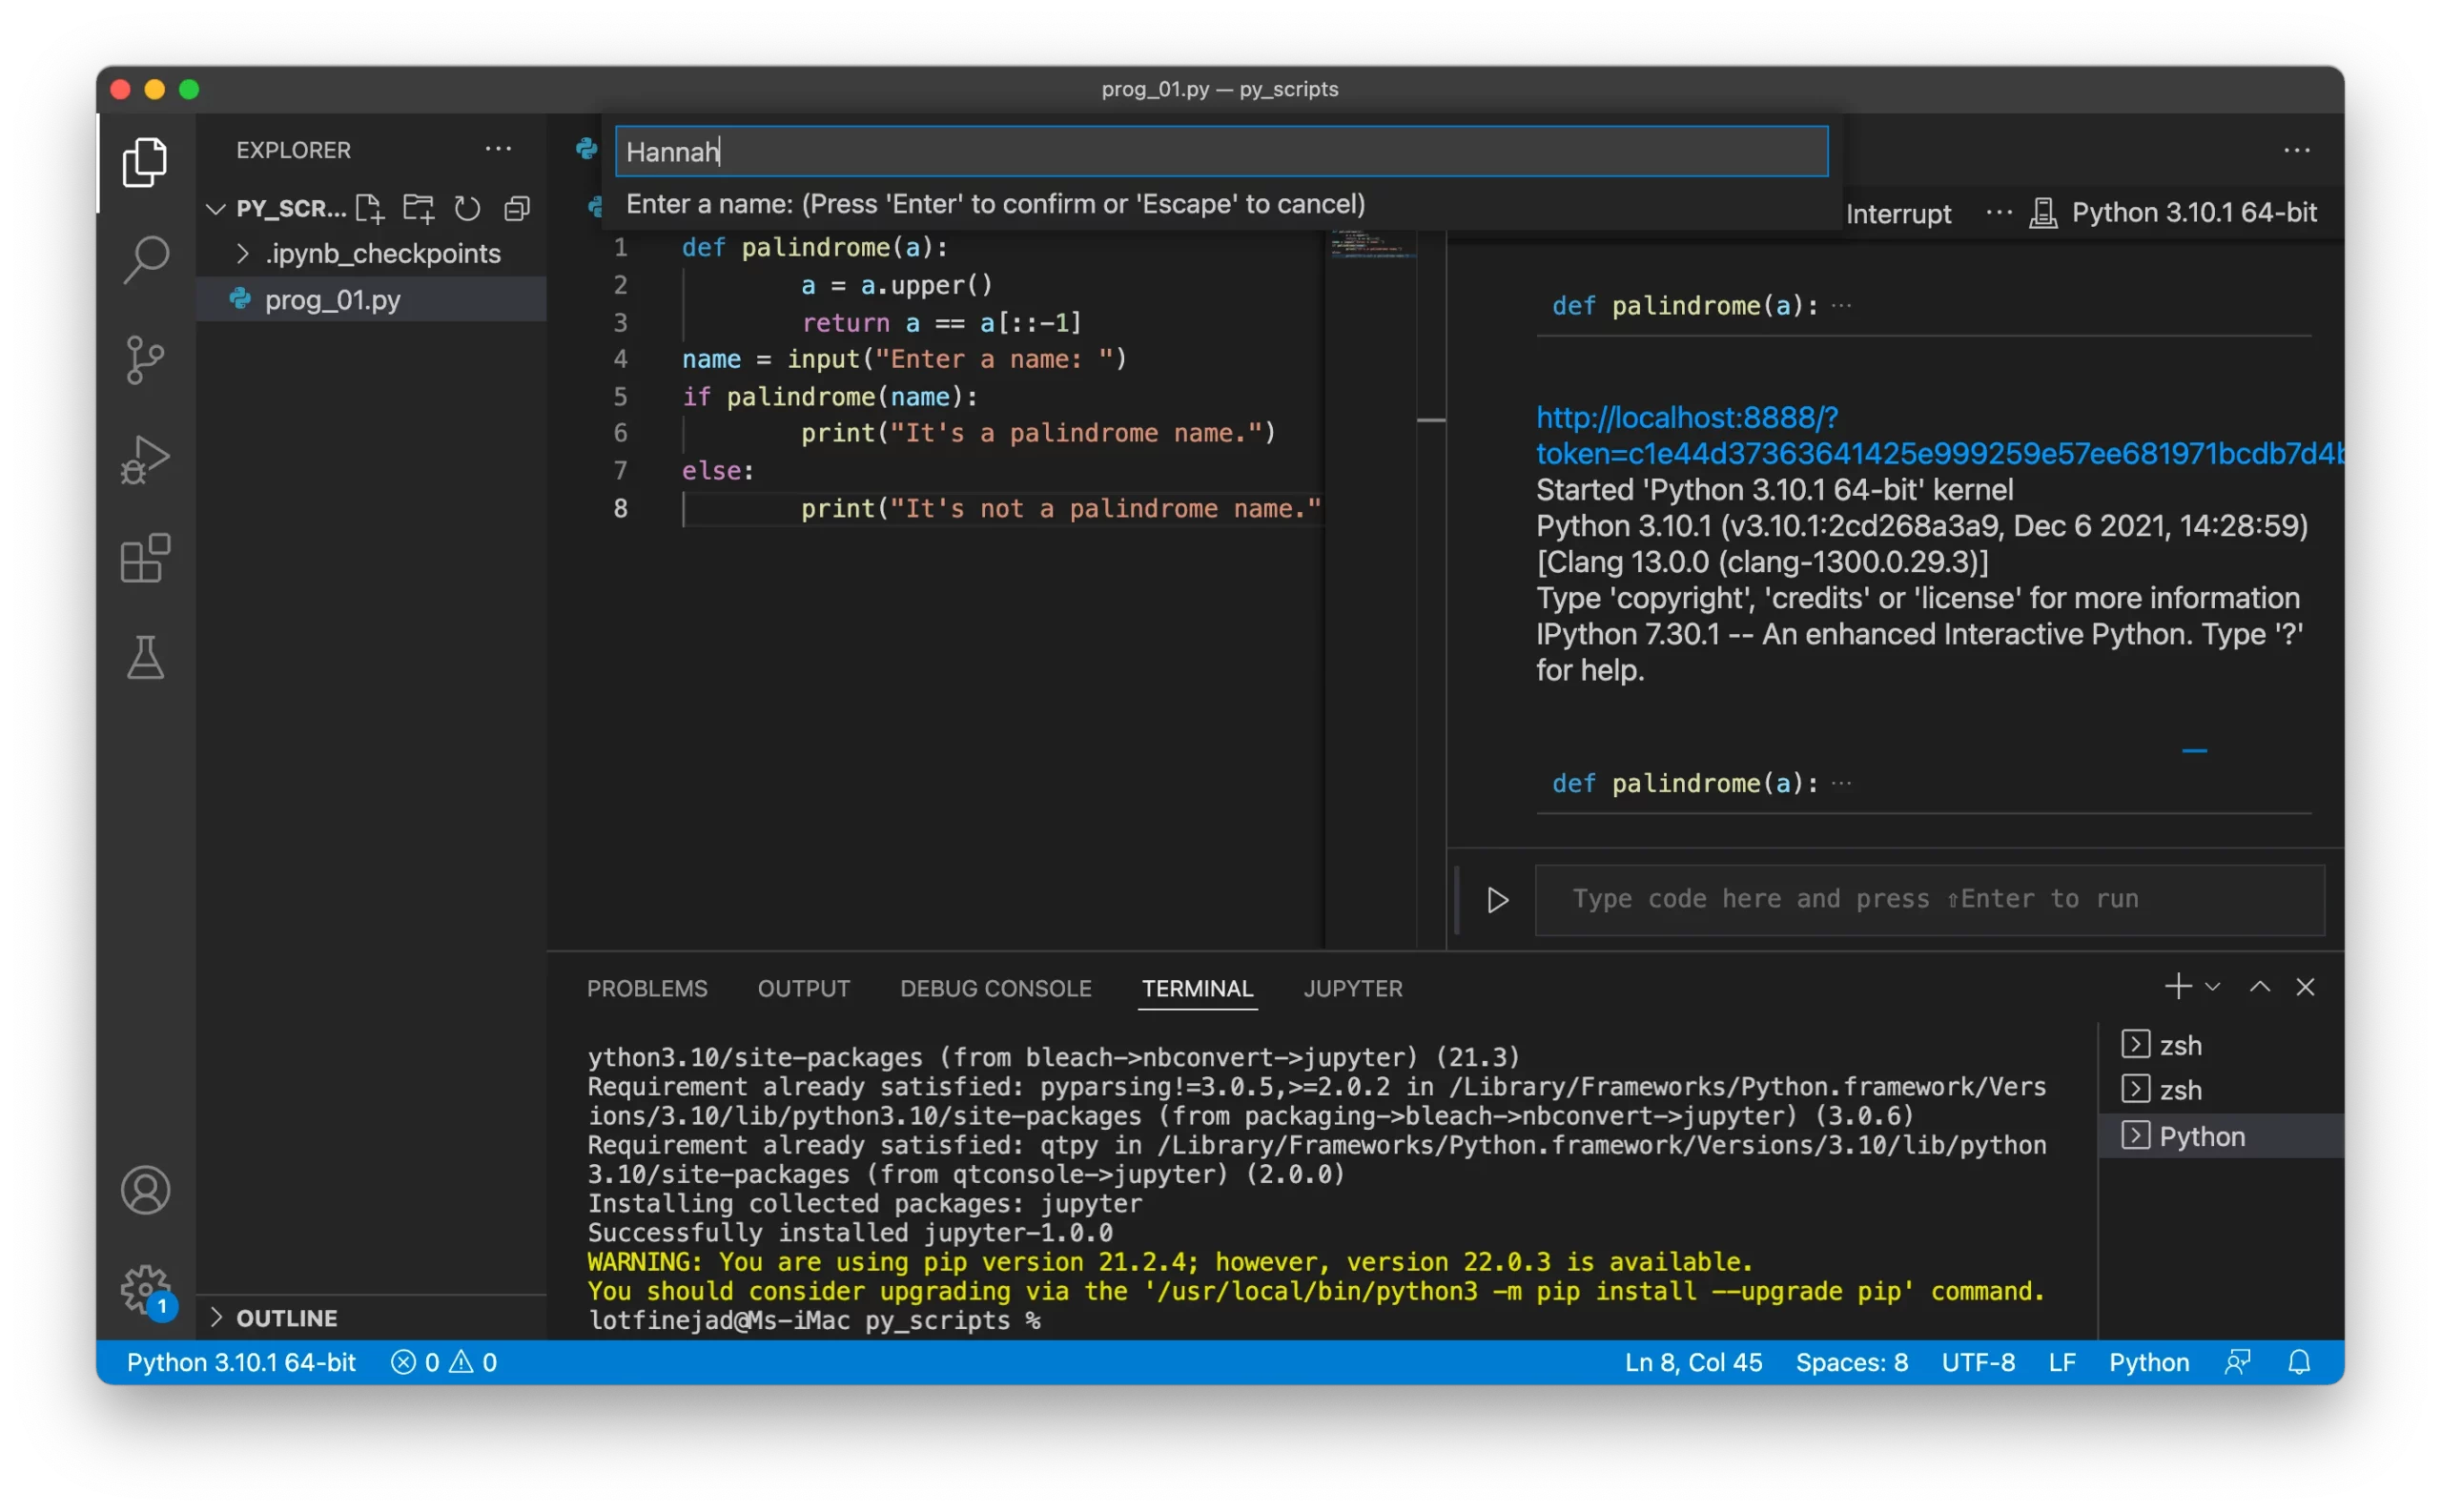
print("It's not a palindrome name.")Run the code by clicking on the ▶️ button in the top-right corner of VS Code. First, it asks for a name in the integrated terminal; enter a name, and hit return. It outputs It's a palindrome name. if the entered name is a palindrome, otherwise it outputs It's not a palindrome name..
A palindrome word is a sequence of letters that reads the same backward as forward, such as Hannah, Anna, and Bob.
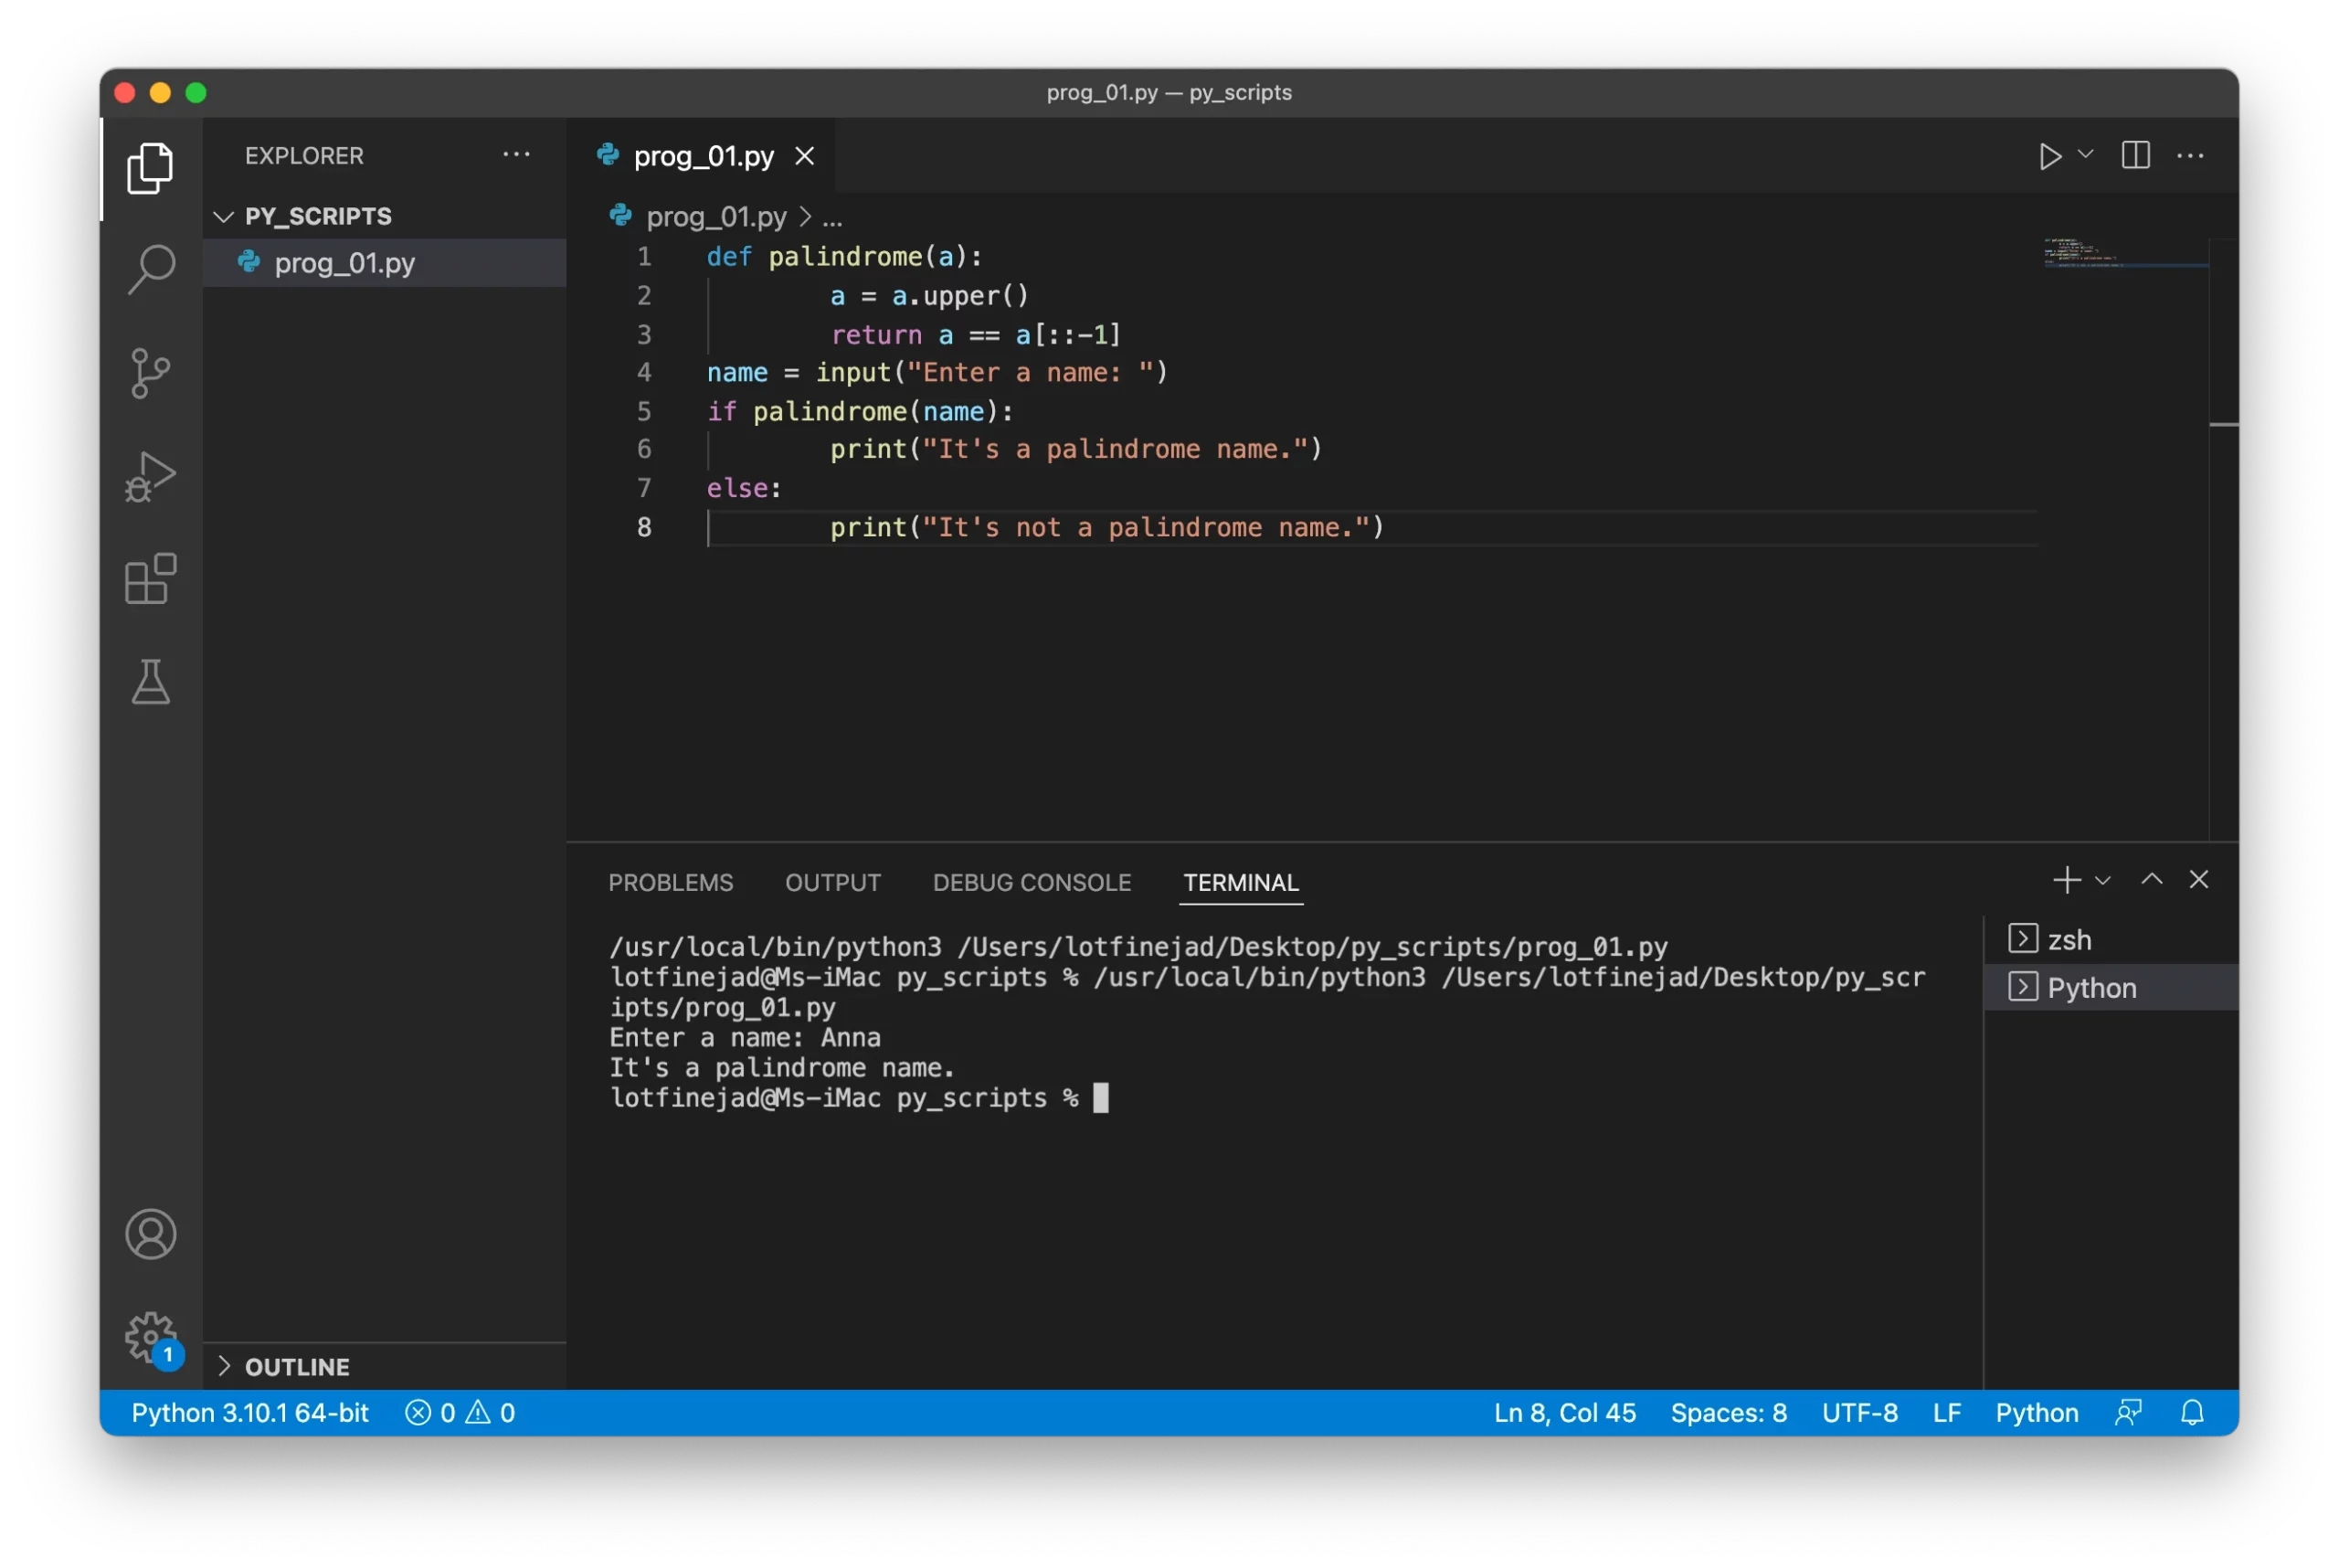
As you’ve seen, all the outputs appear in the integrated terminal. Let’s talk a little more about this fantastic feature.
VS Code brings great convenience for developers by embedding this nice feature into the IDE because executing terminal commands is almost an integral part of writing code. To view a terminal, you can type Ctrl + ` on macOS or Windows machines, or use the View > Terminal menu command. Also, if you want to kill an integrated terminal, click on the bin icon on the top-right of the terminal window. Technically, the integrated terminal uses the installed shells on your computer — for example, PowerShell or Command Prompt on Windows, and bash or zsh on macOS and Linux.
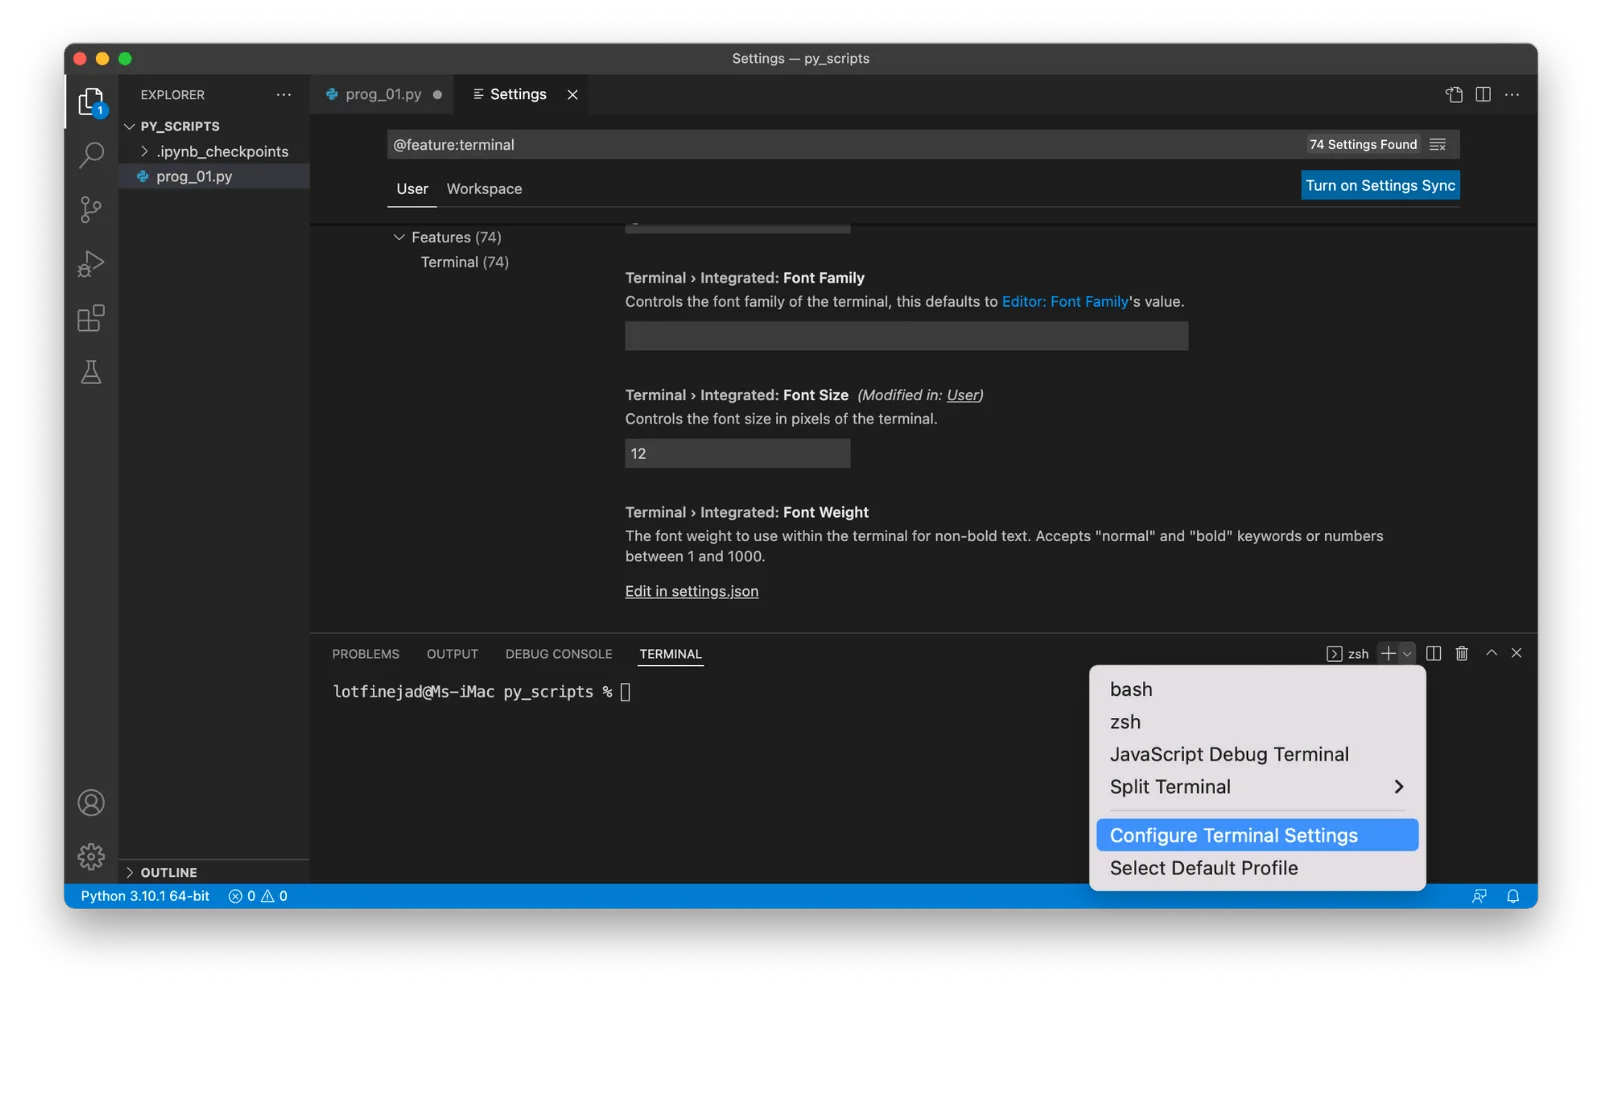
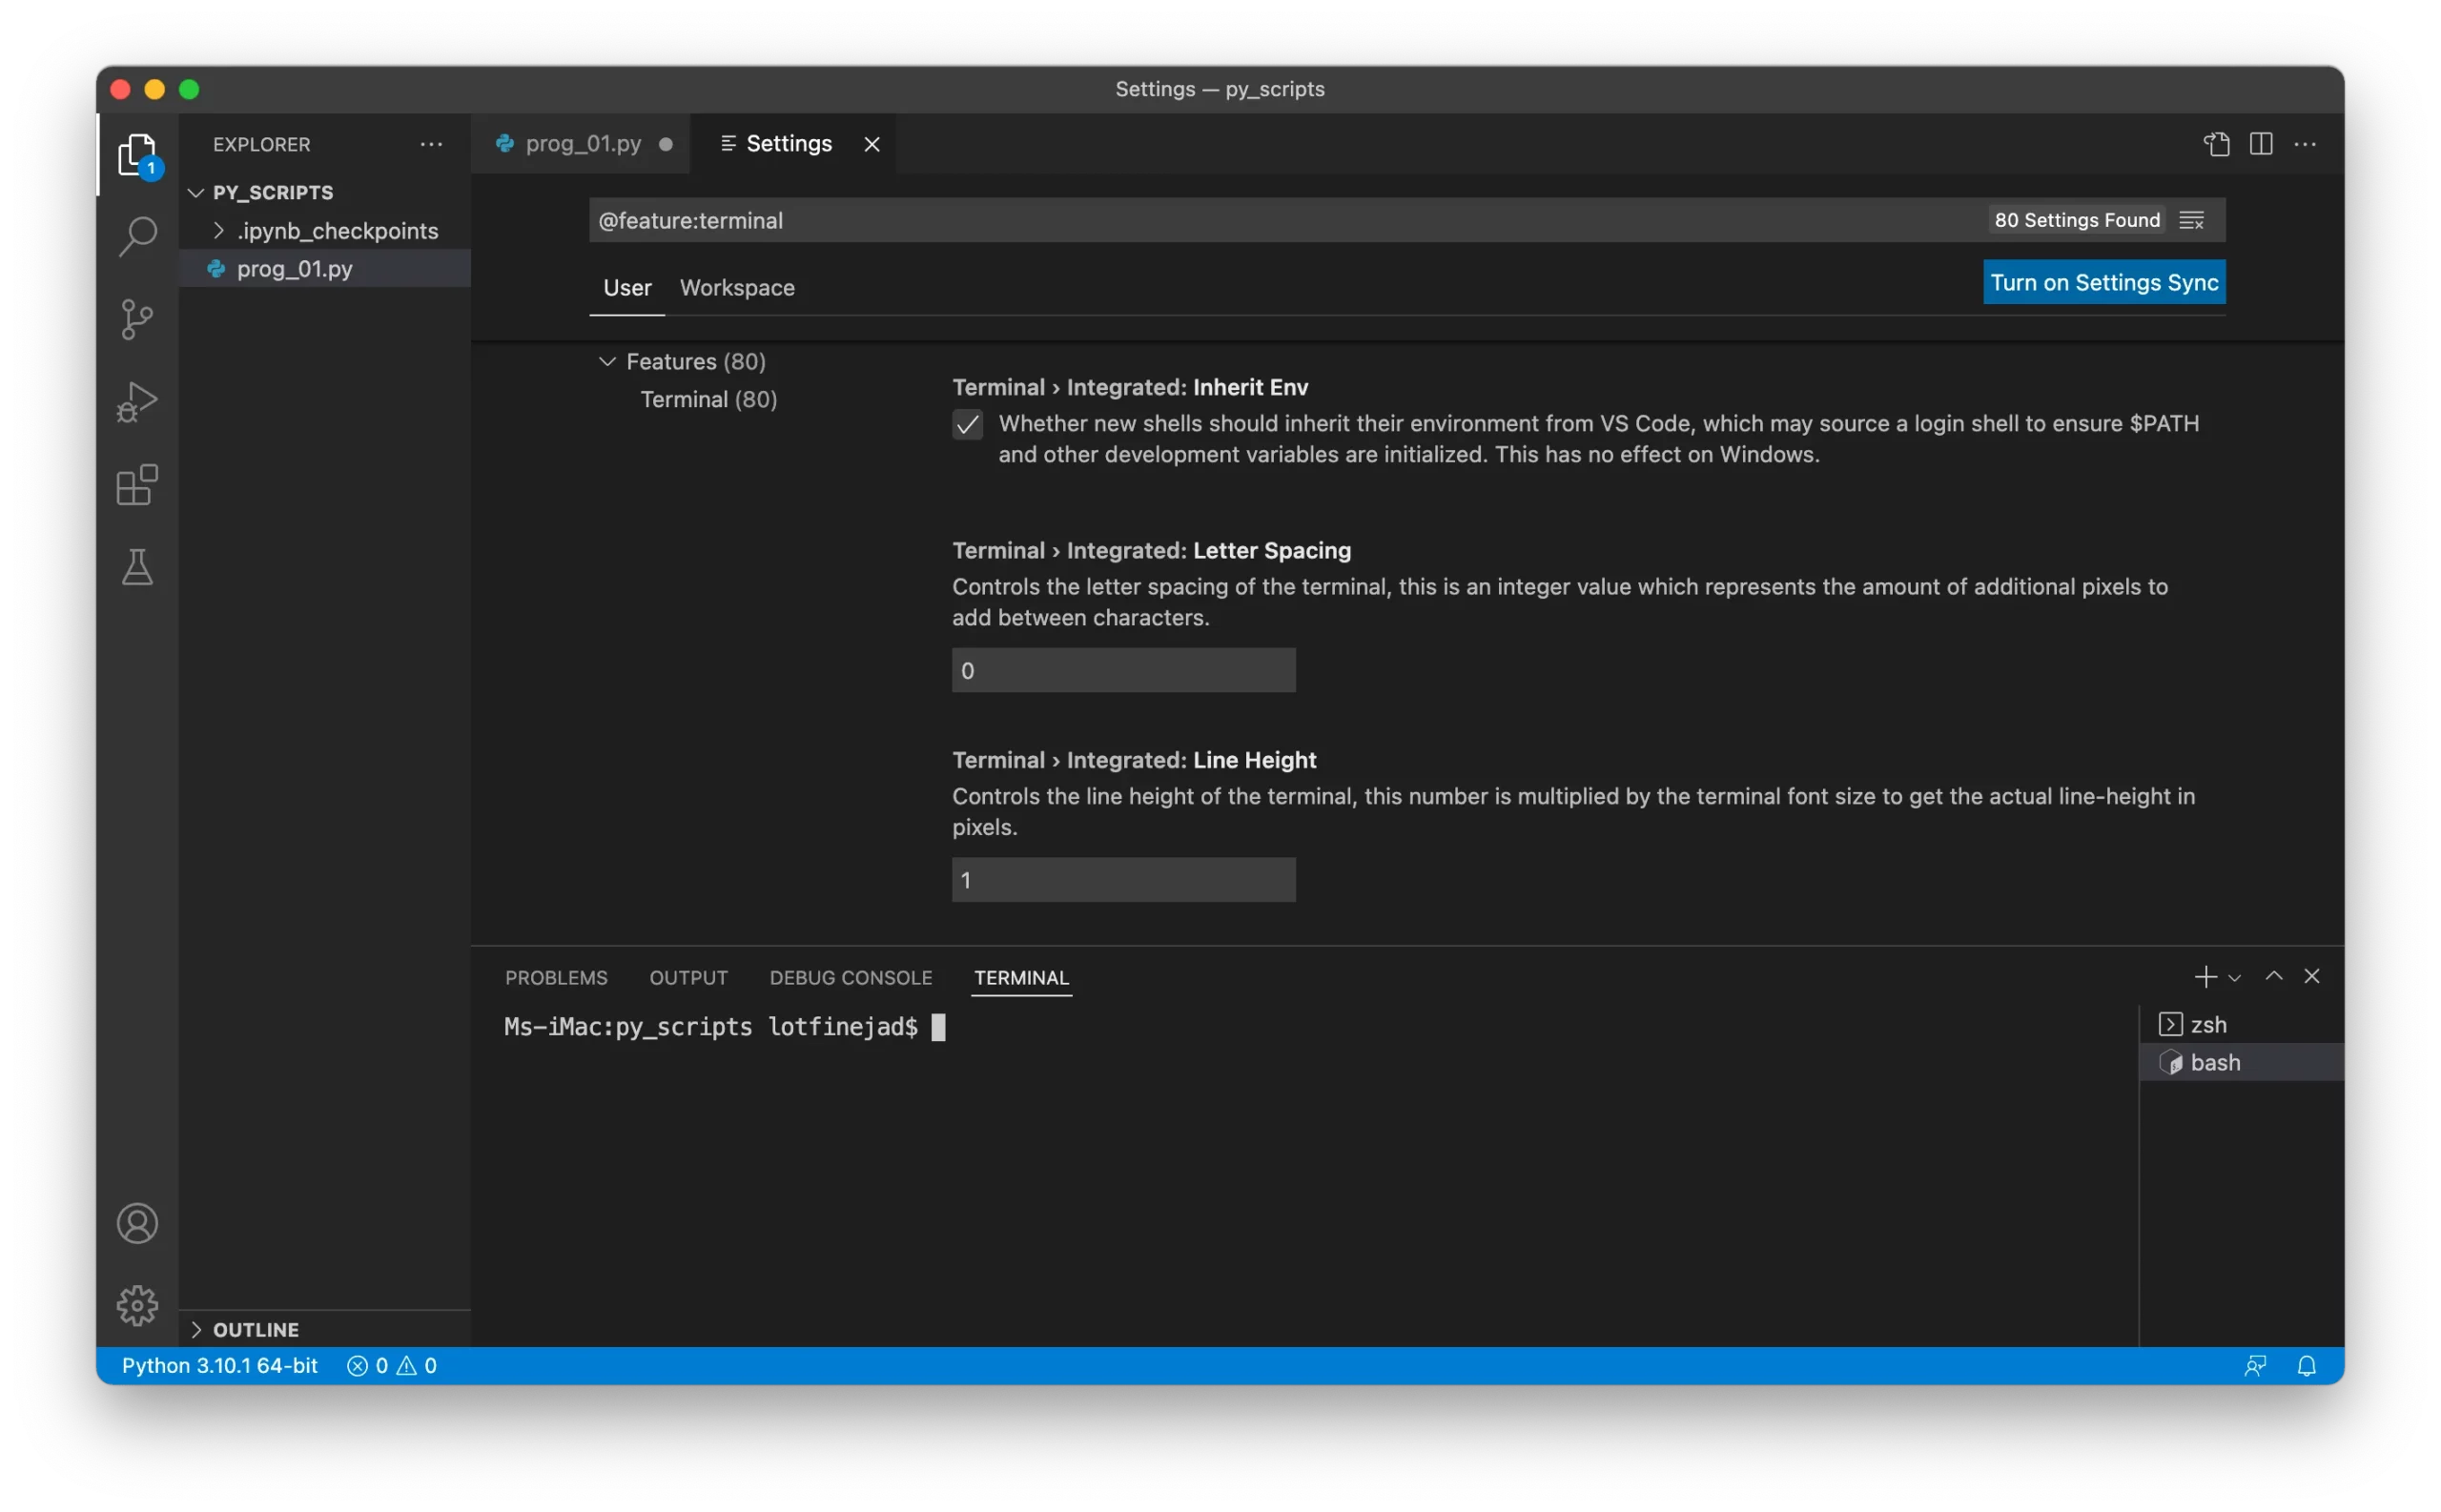
Visual Studio Code lets us customize the appearance of the terminal using the terminal settings. To do that, open up the terminal setting page, click on the arrow down button at the top right of the terminal window, and select the Configure Terminal Settings option; you can easily customize font, spacing, and cursor style:
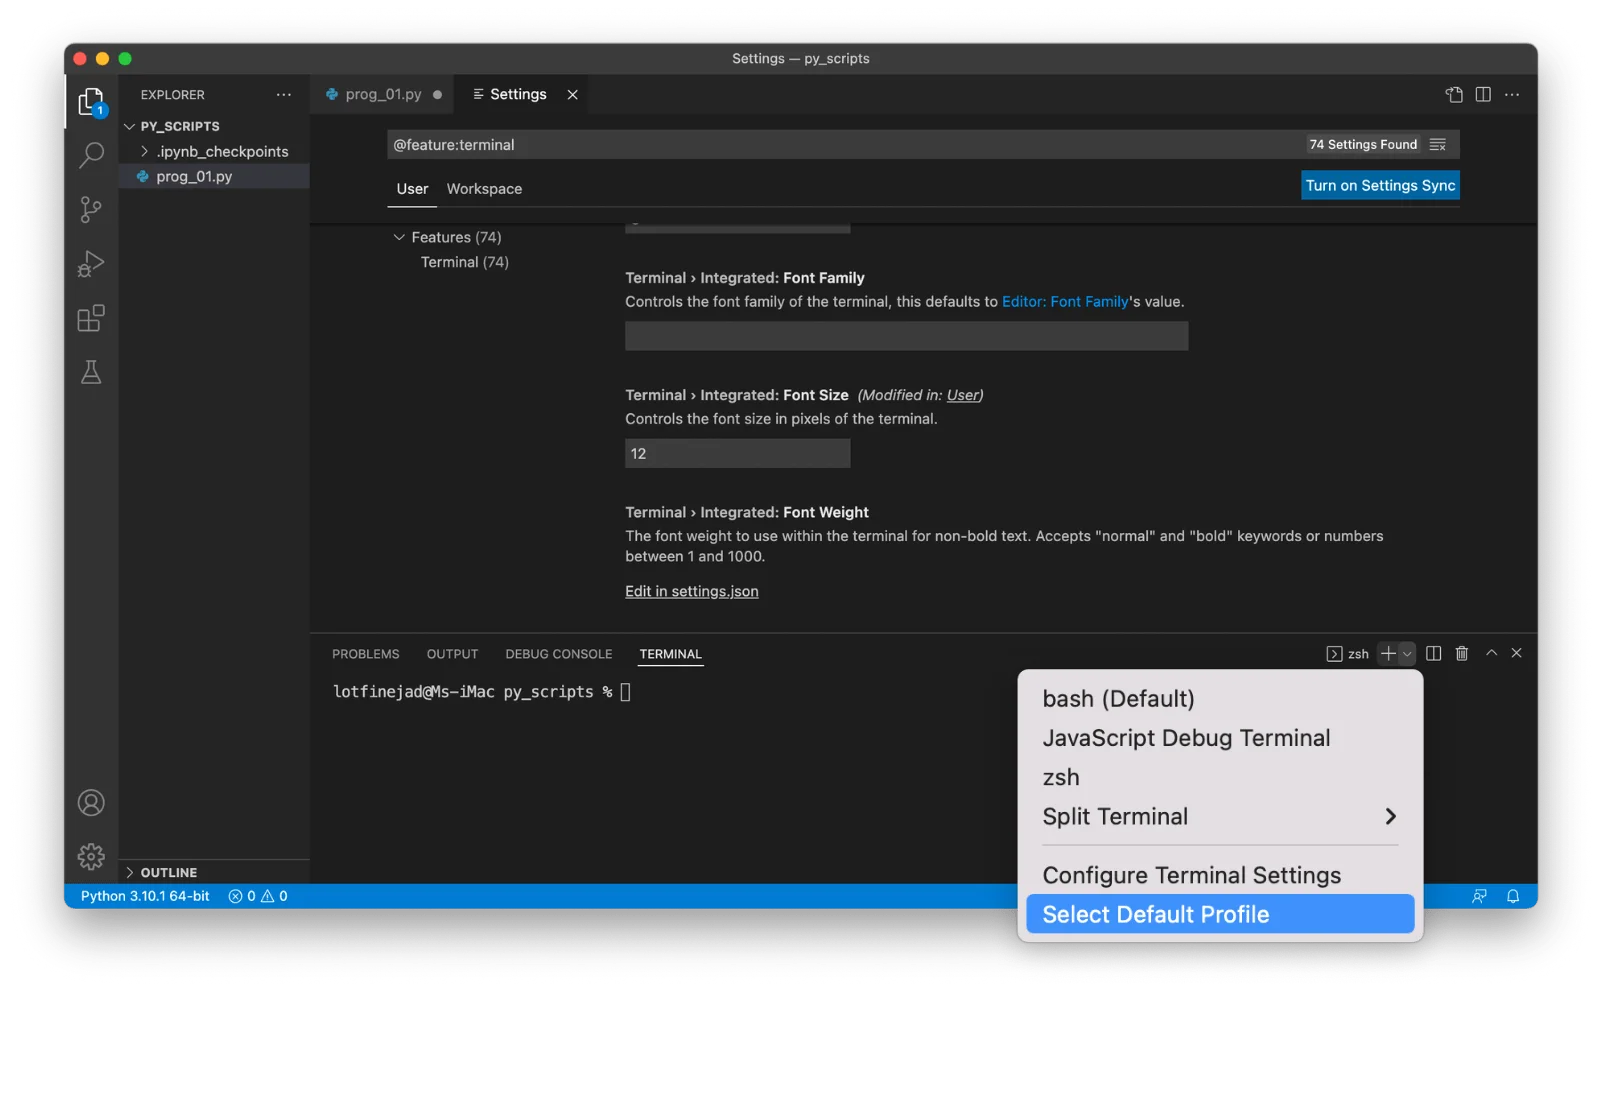
The other nice feature of VS Code is that you can easily switch between multiple shells or even change the default shell used in the integrated terminal. To do this, click on the arrow down button at the top-right of the terminal window, and select the Select Default Profile option:
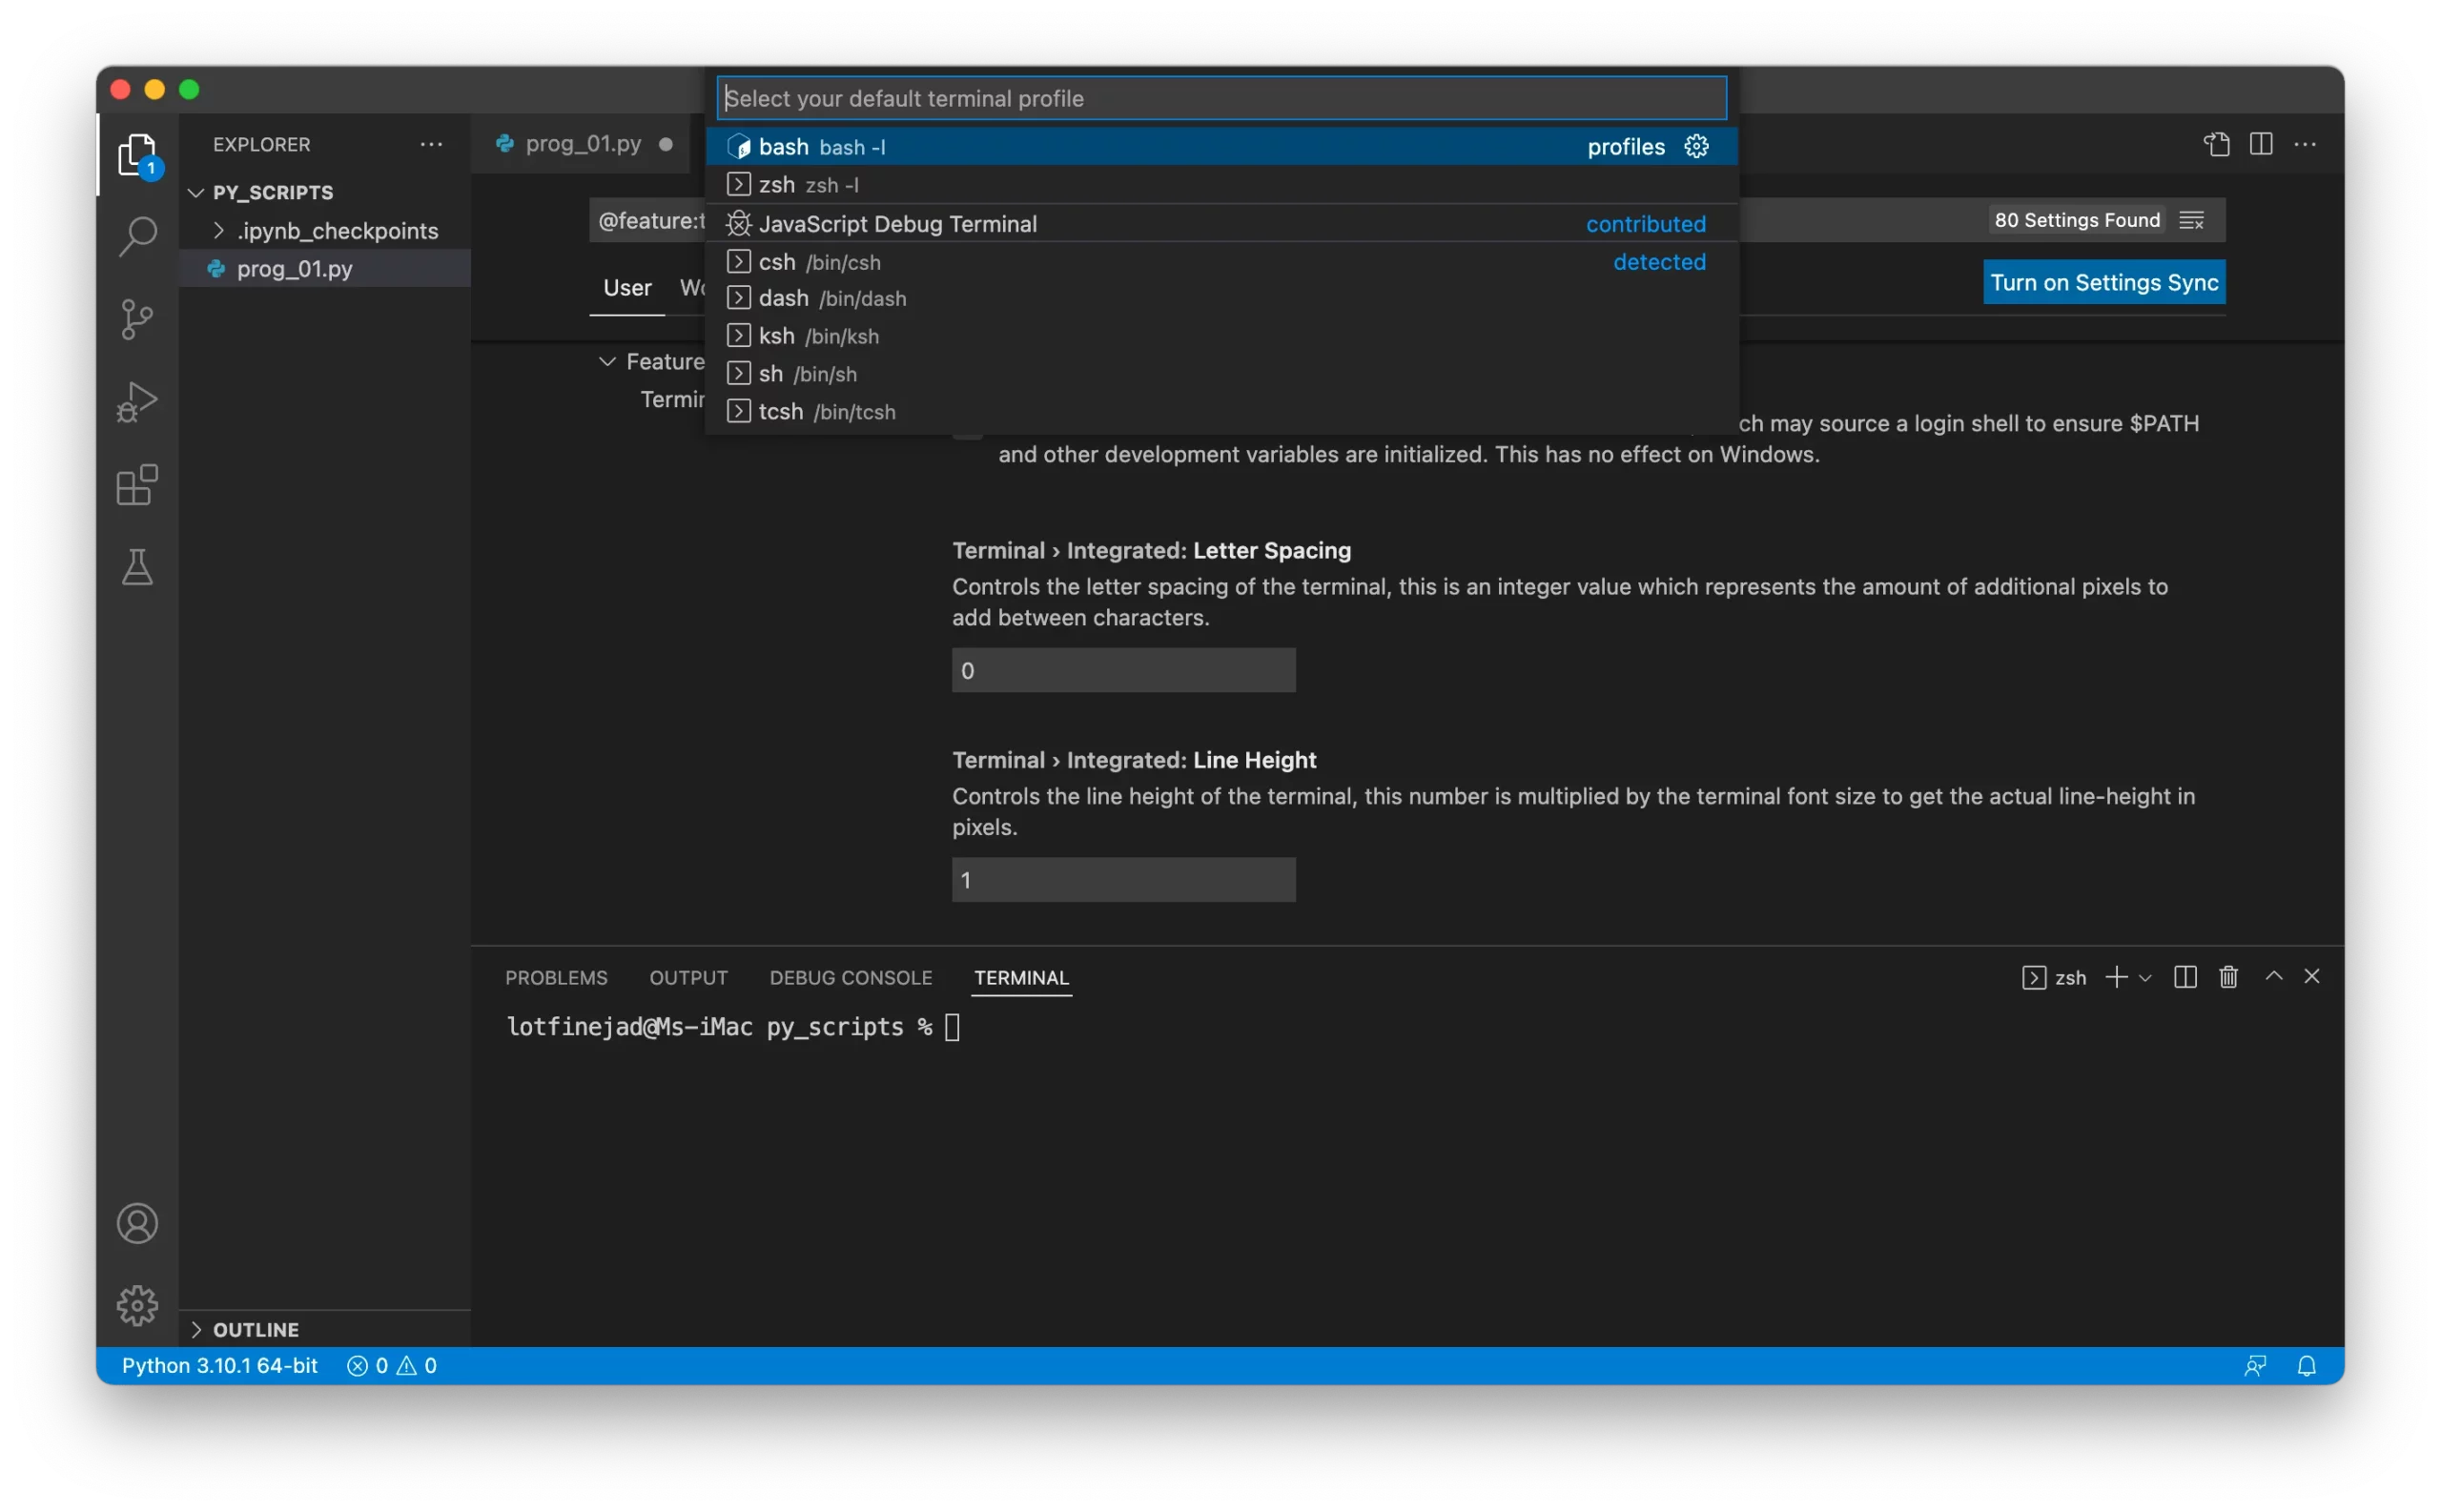
A pre-populated list of available shells will appear, and you can select one of them as a default terminal shell. Let’s choose the bash shell:
As soon as you create a new terminal by clicking on the plus icon at the top right of the terminal windows, it will be using the bash shell, as follows:
Using the REPL
The other useful feature in VS Code is running single or multiple lines of code just by selecting them and choosing the Run Selection/Line in Python Terminal option from the context menu. Let’s try it.
In the same Python file, write the following statement:
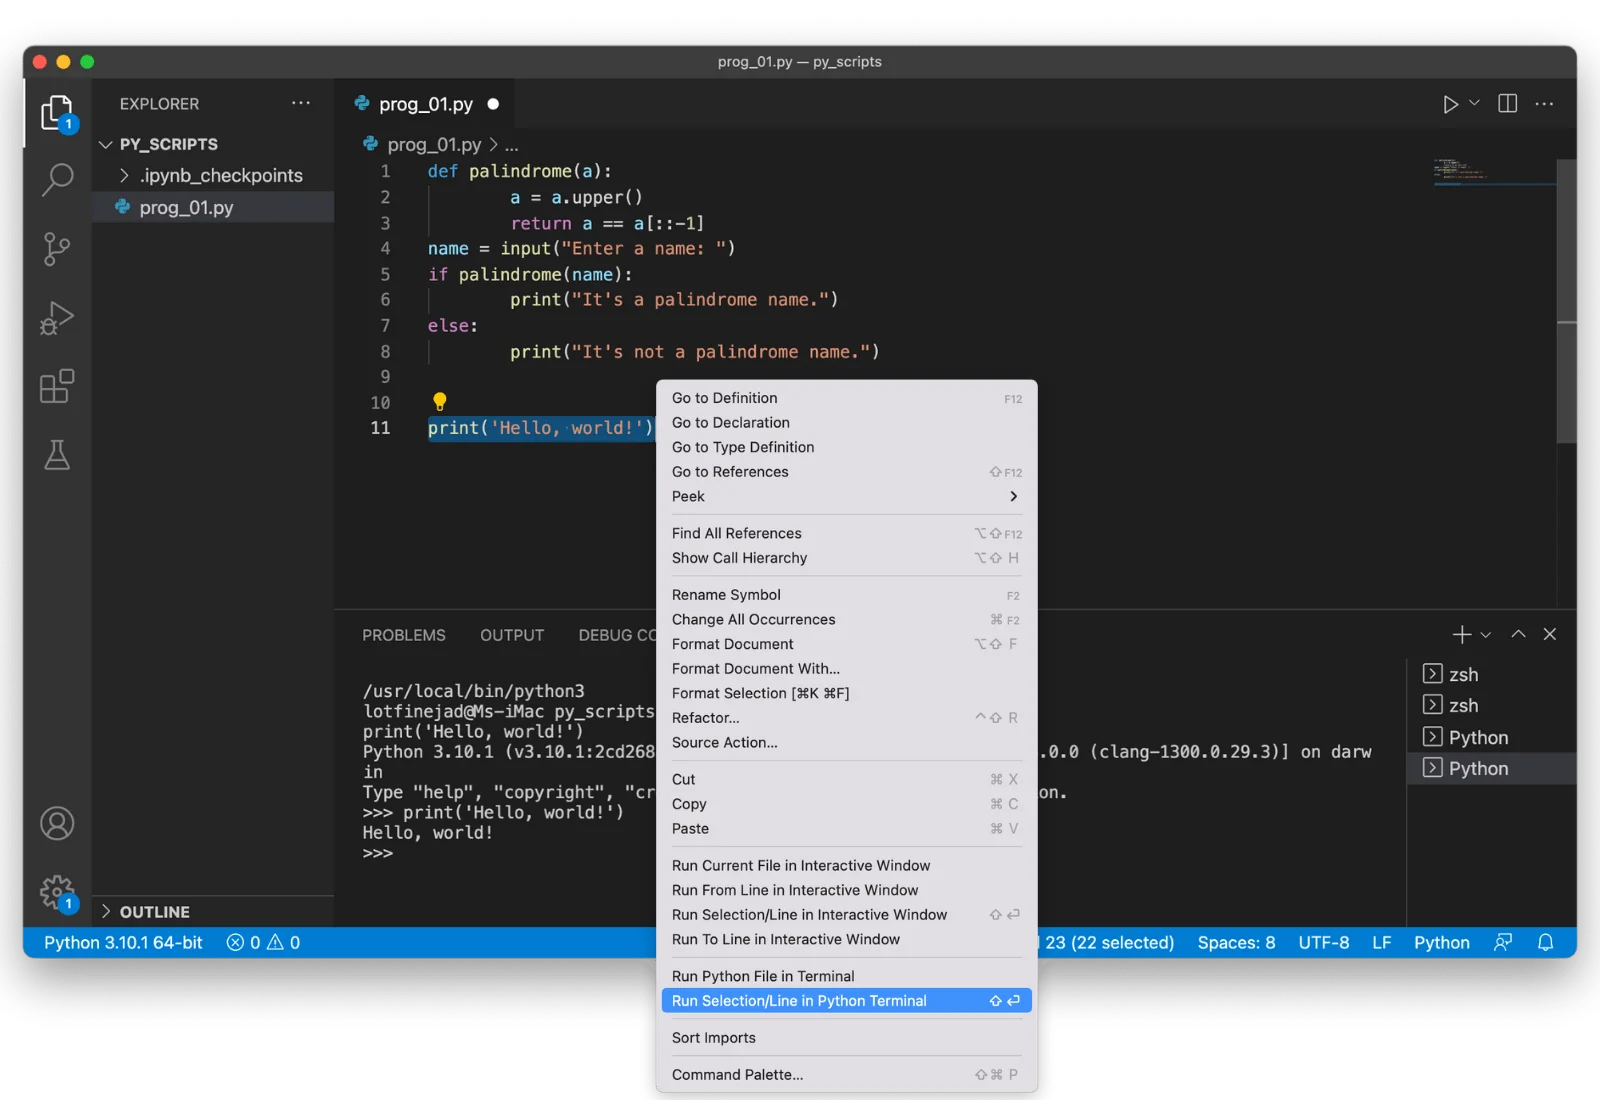
print("Hello, world!")Then select the statement, and right-click and choose the Run Selection/Line in Python Terminal option, as follows:
The output appears in the integrated terminal but in a different form called REPL. Let’s get to know REPL and its advantages.
REPL stands for Read, Evaluate, Print, Loop. It's an interactive way of working with the Python interpreter and running the command directly within the terminal. In REPL, the three right arrows symbol indicates an input line.
Another way to start REPL in VS Code is as follows:
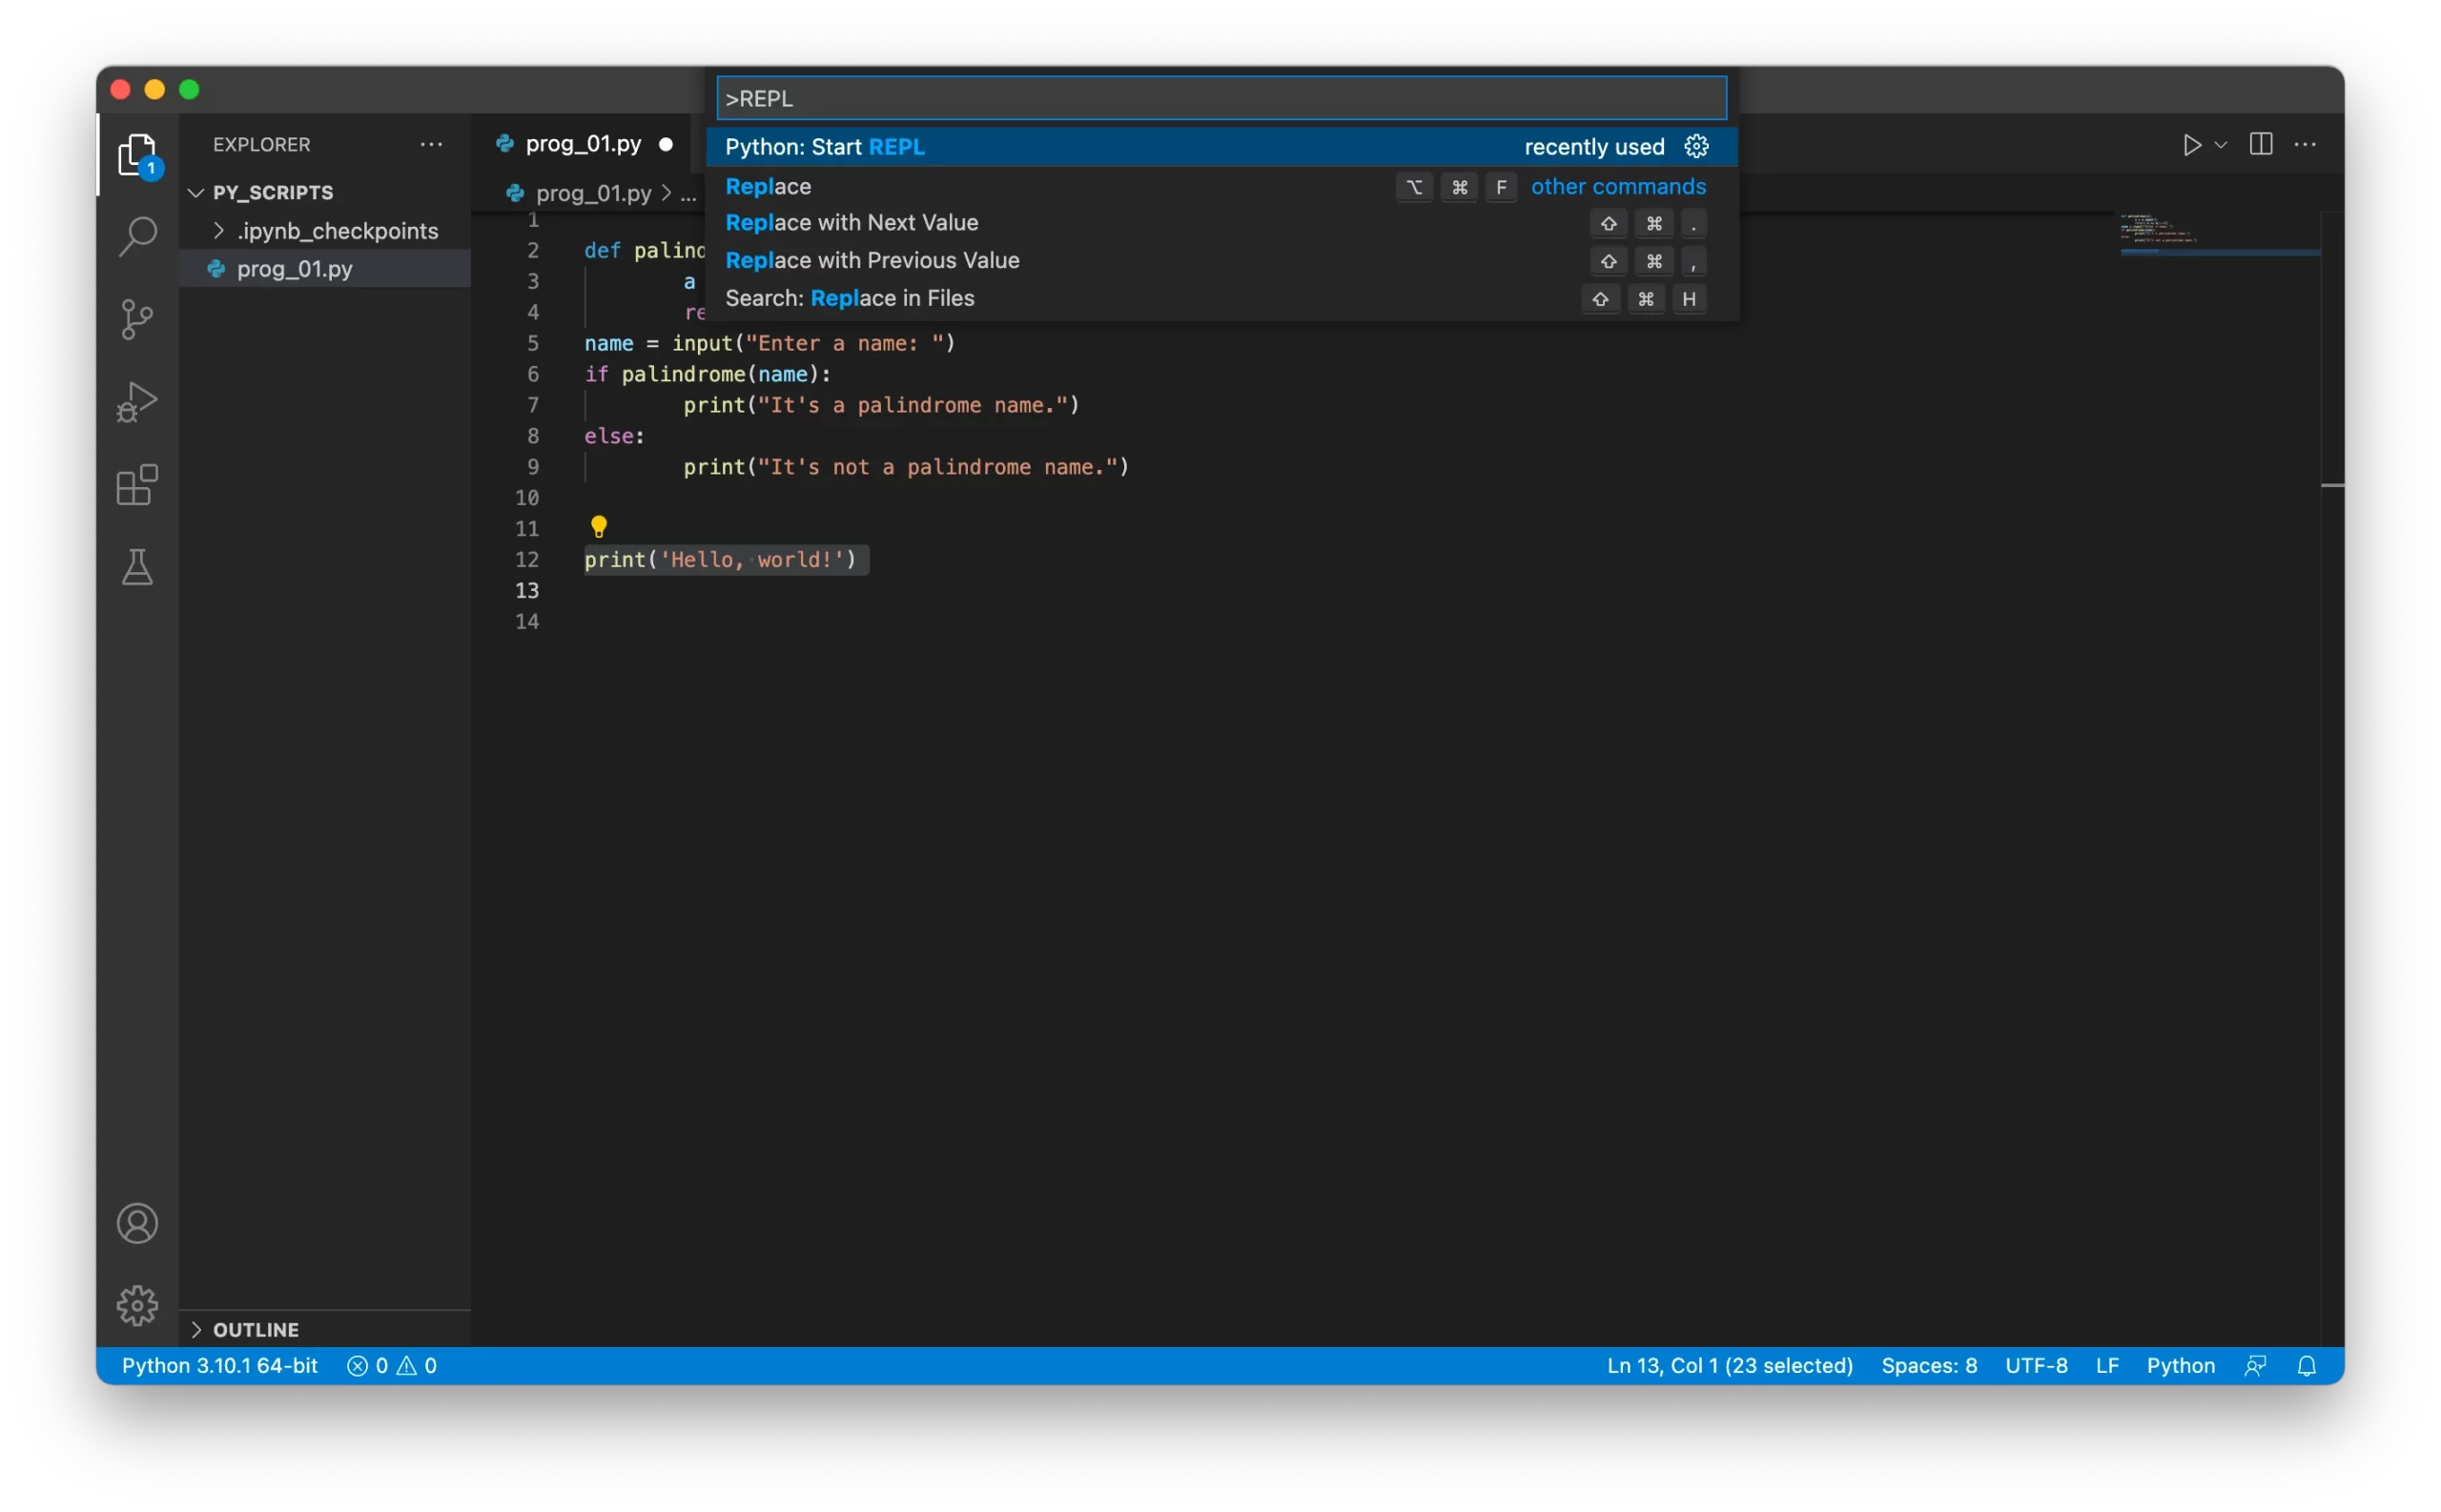
Open the Command Palette, search for REPL, and click on Python: Start REPL:
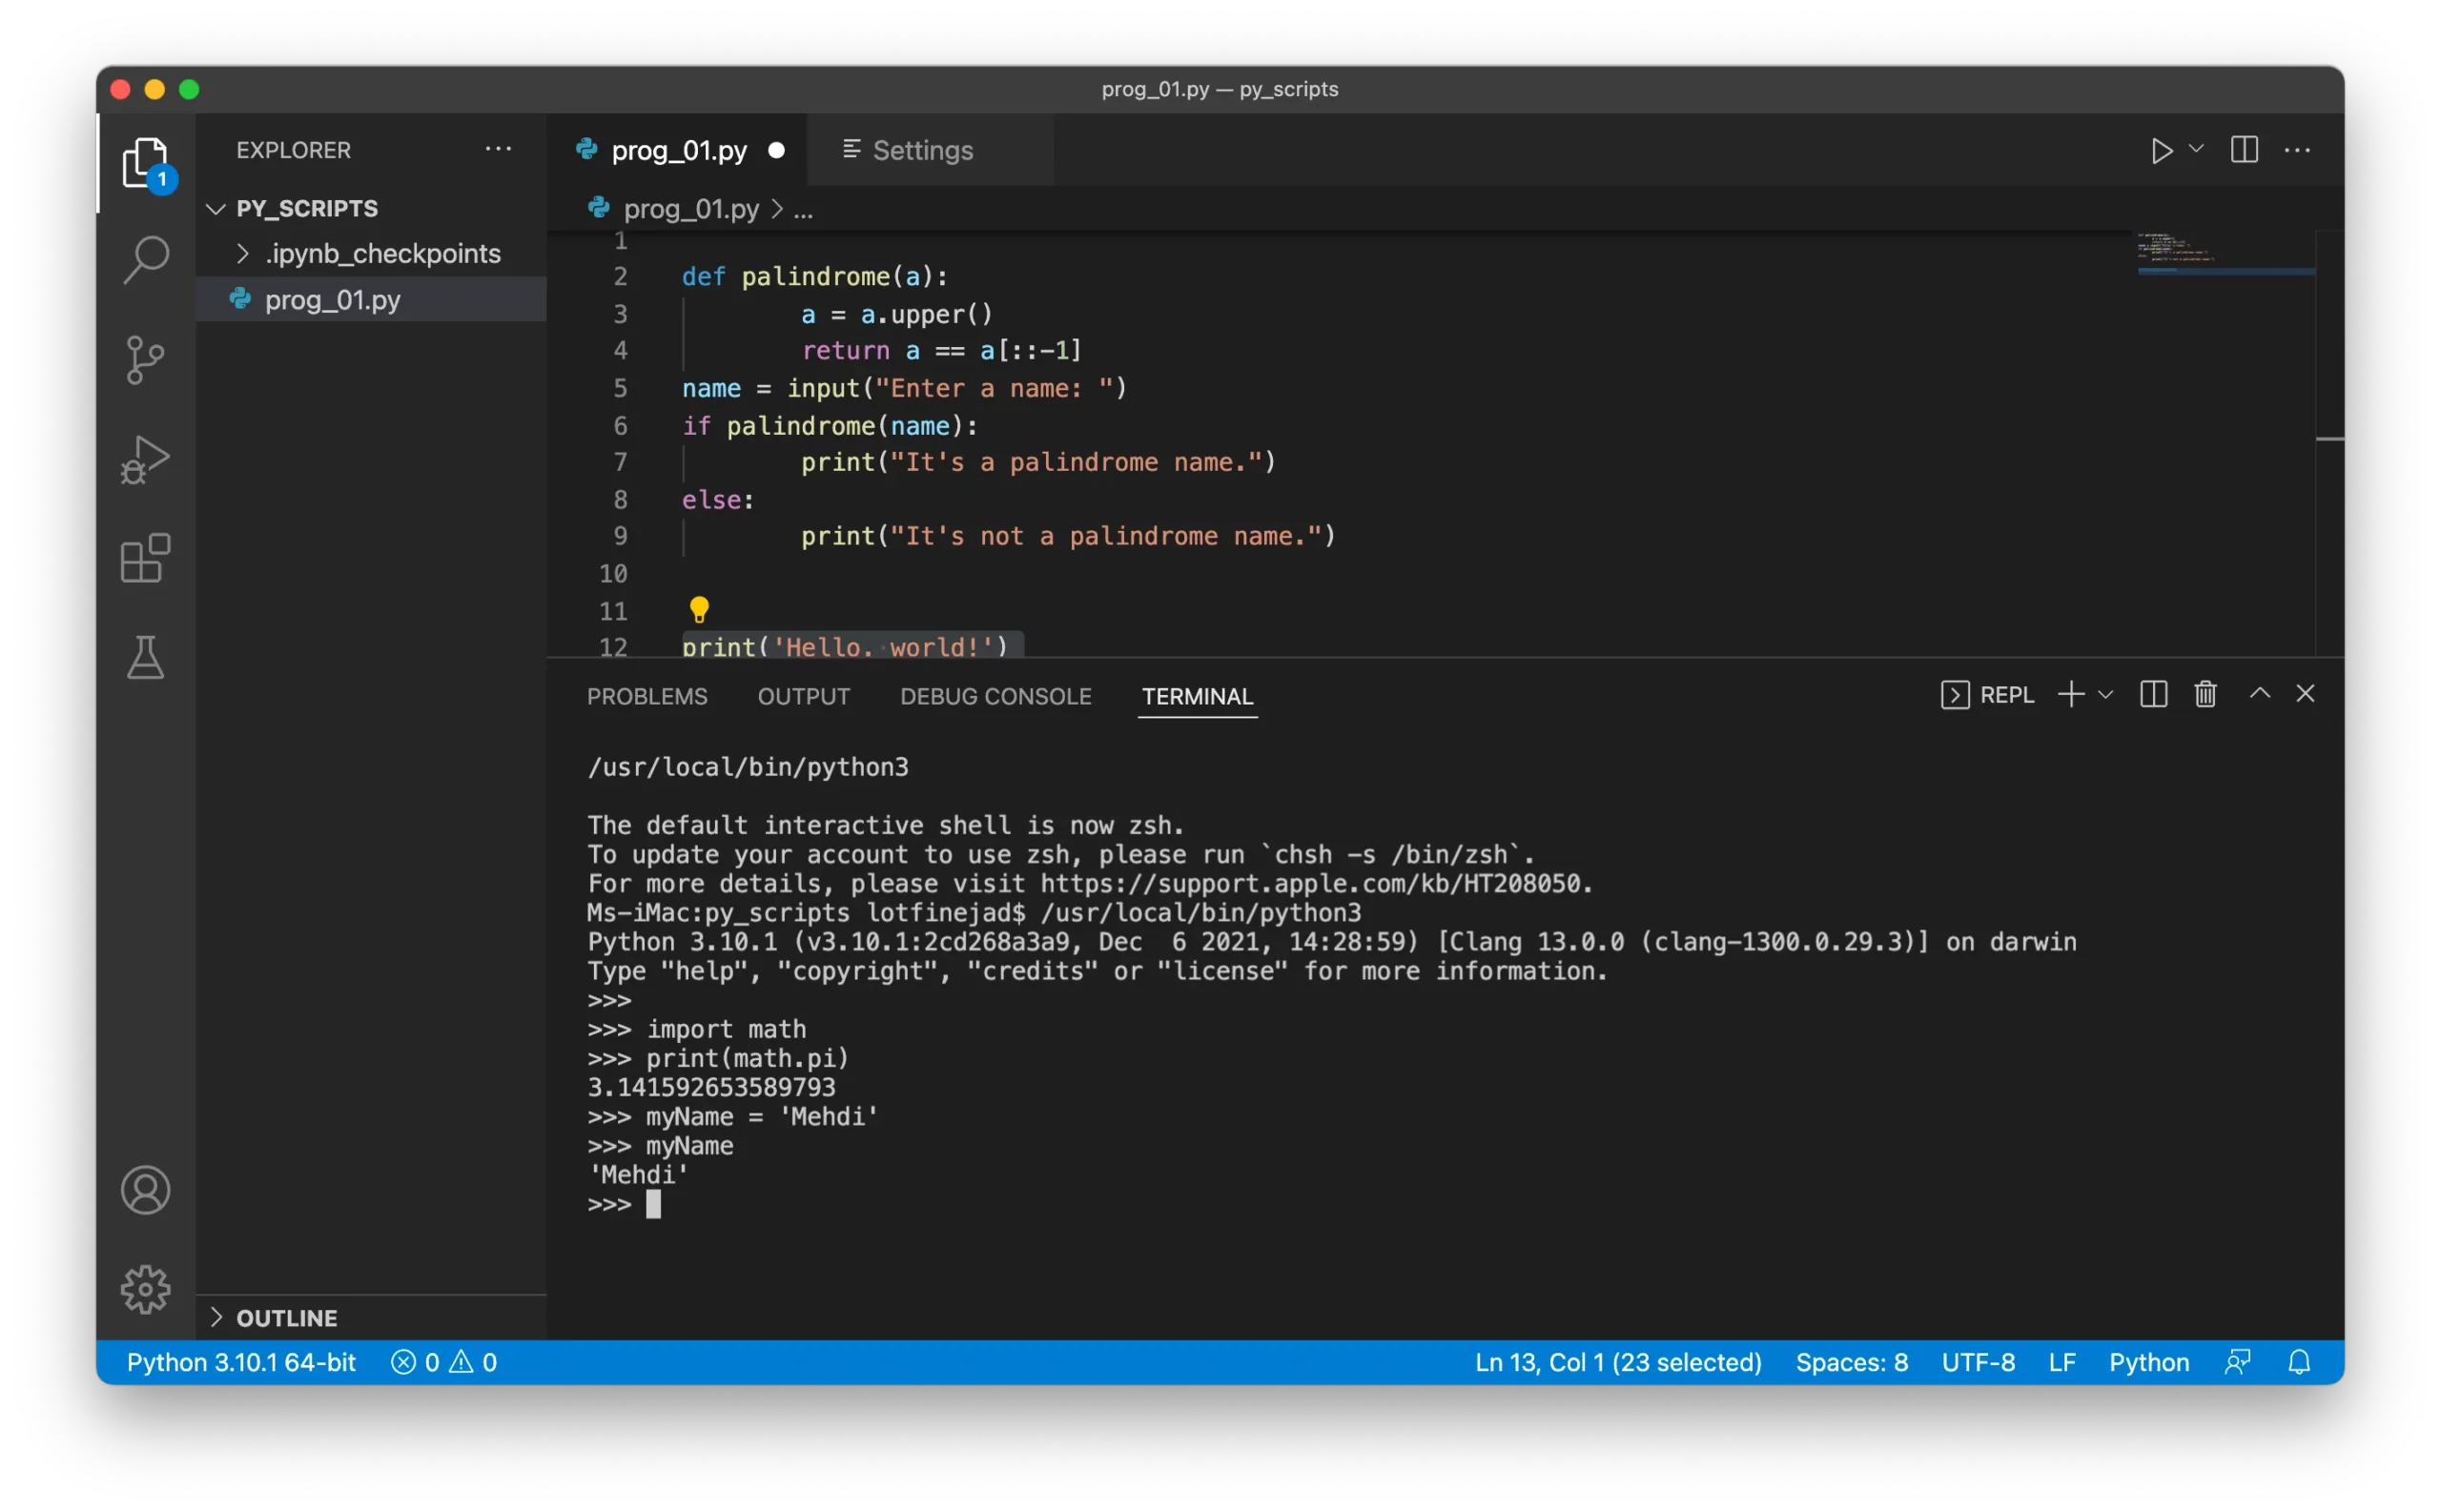
The interactive Python shell will appear, and we can enter our commands at the >>> prompts then execute them by just pressing the Enter or return key, as follows:
A great feature of REPL is that we can instantly see the results of running commands. So, if you want to try out some lines of code or experiment with APIs, the REPL is an excellent way to do that.
Formatting Python Code
You should get in the habit of writing code in a proper format as soon as you start writing programs. Python has a well-known style guide for Python code called PEP 8, which makes your code easy to read and comprehend. You can find the style guide on the official Python website at PEP 8 — Style Guide for Python Code | Python.org.
In this section, we'll learn how to automatically apply formatting to our code using the Autopep8 package. This package, which can be installed using the pip command, automatically formats Python code to conform to the PEP 8 style guide. The good news is that VS Code supports automatic code formatting using the Autopep8 package.
Let’s see how to install the package and enable it in VS Code.
First, execute the following command in the integrated terminal to install the Autopep8 package:
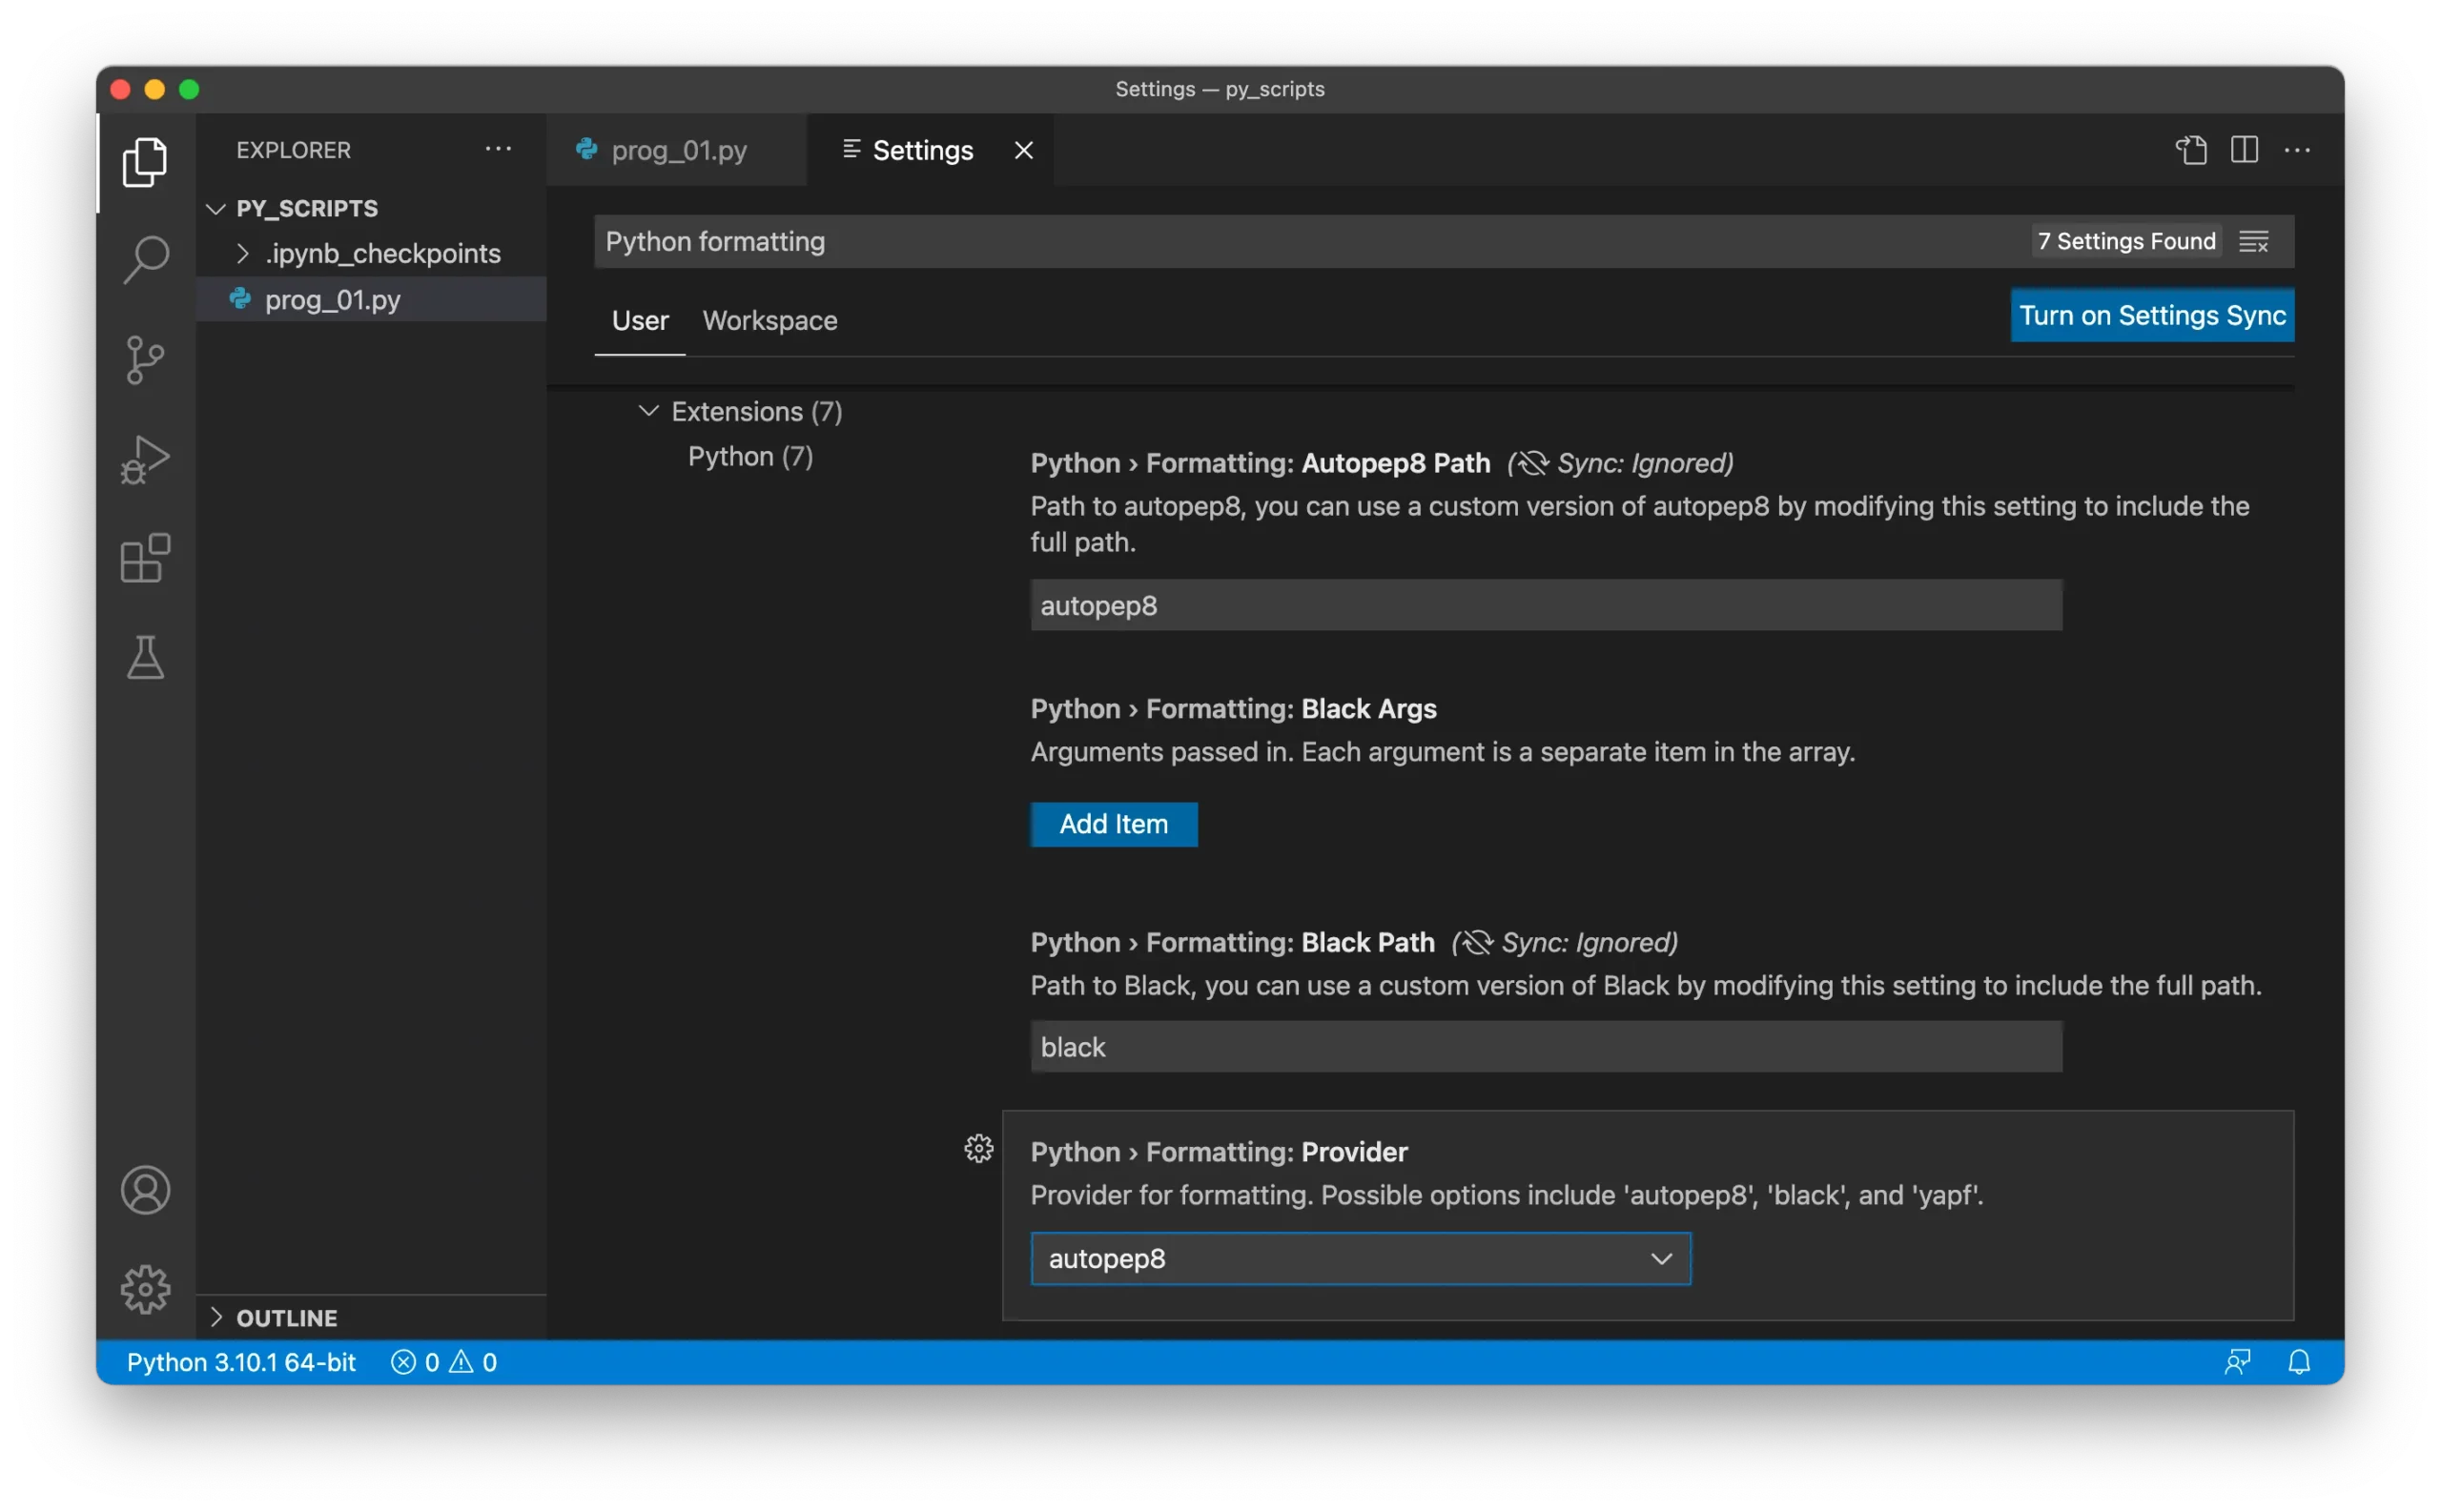
pip3 install autopep8After the installation is done, close the terminal. Now open the setting for VS Code, search for Python formatting, both Autopep8 Path and Provider fields need to be filled with autopep8 as follows:
The last step is enabling automatic formatting on save. To do that, search for format on save, and check the Format On Save option:

Enabling this feature applies all the PEP 8 rules on the Python source file when we save the file.
The PEP 8 style guide provides some dos and don’ts. We really encourage you to learn the PEP 8 rules and apply them automatically on your source code with the Autopep8 formatting package.
Refactoring Python Code
Before discussing refactoring Python code in VS Code, let’s define it:
Code refactoring is the process of restructuring existing computer code — changing the factoring — without changing its external behavior to make it easier to read and maintain — Wikipedia.
The Python extension provides basic refactoring functionalities such as Rename Symbol, Extract Method, Extract Variable, etc.
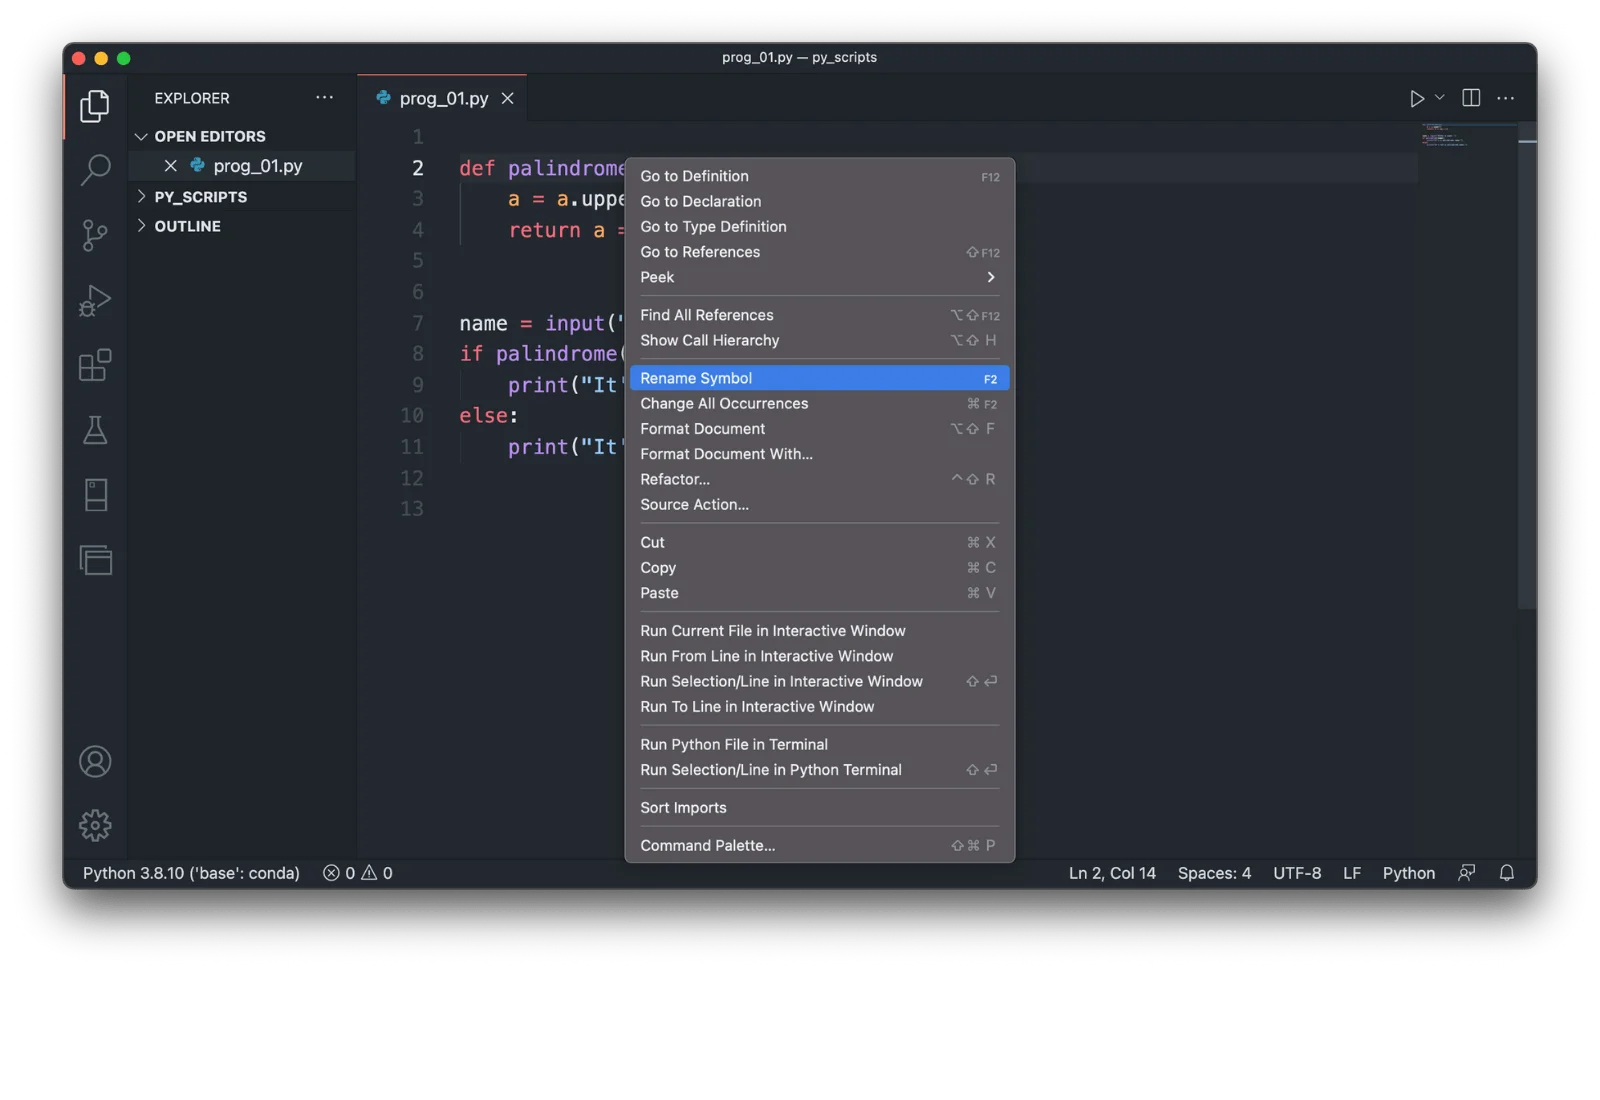
For instance, to change thepalindrome()method name tocheck_palindrome(), right-click on the method name, and choose the Rename Symbol option:
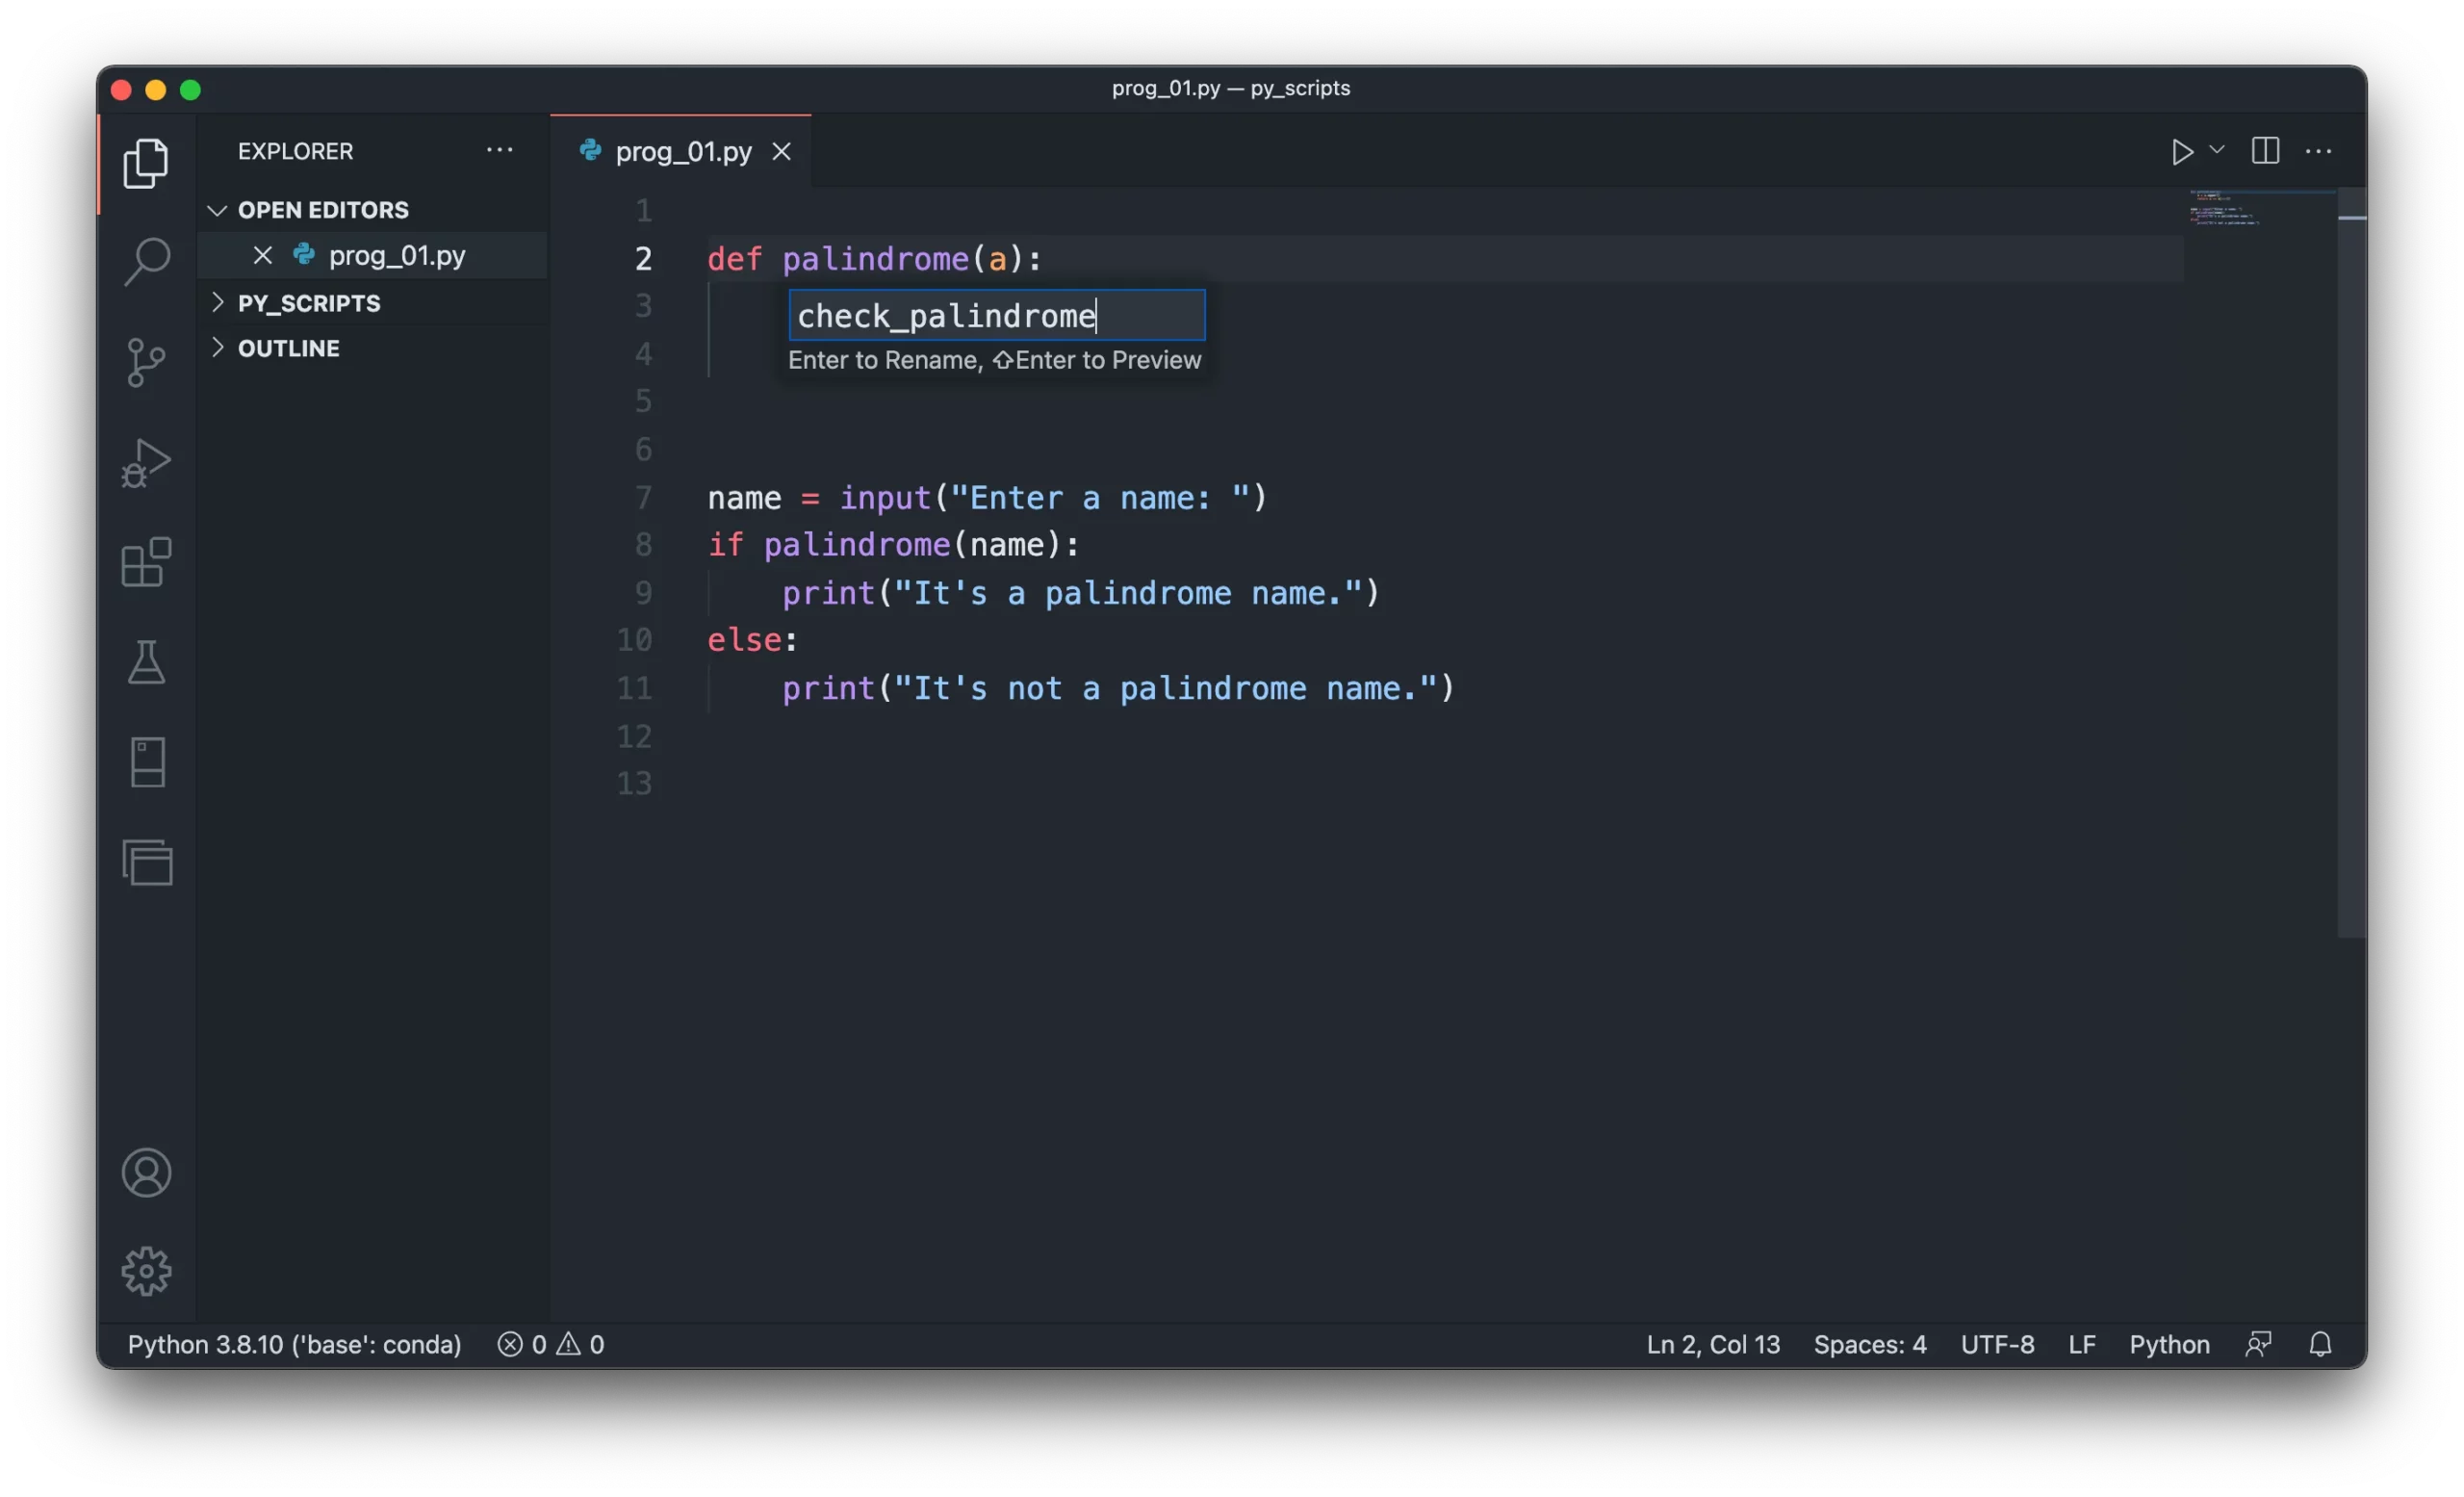
Enter the new name, check_palindrome, in the text box, then press Enter to rename:
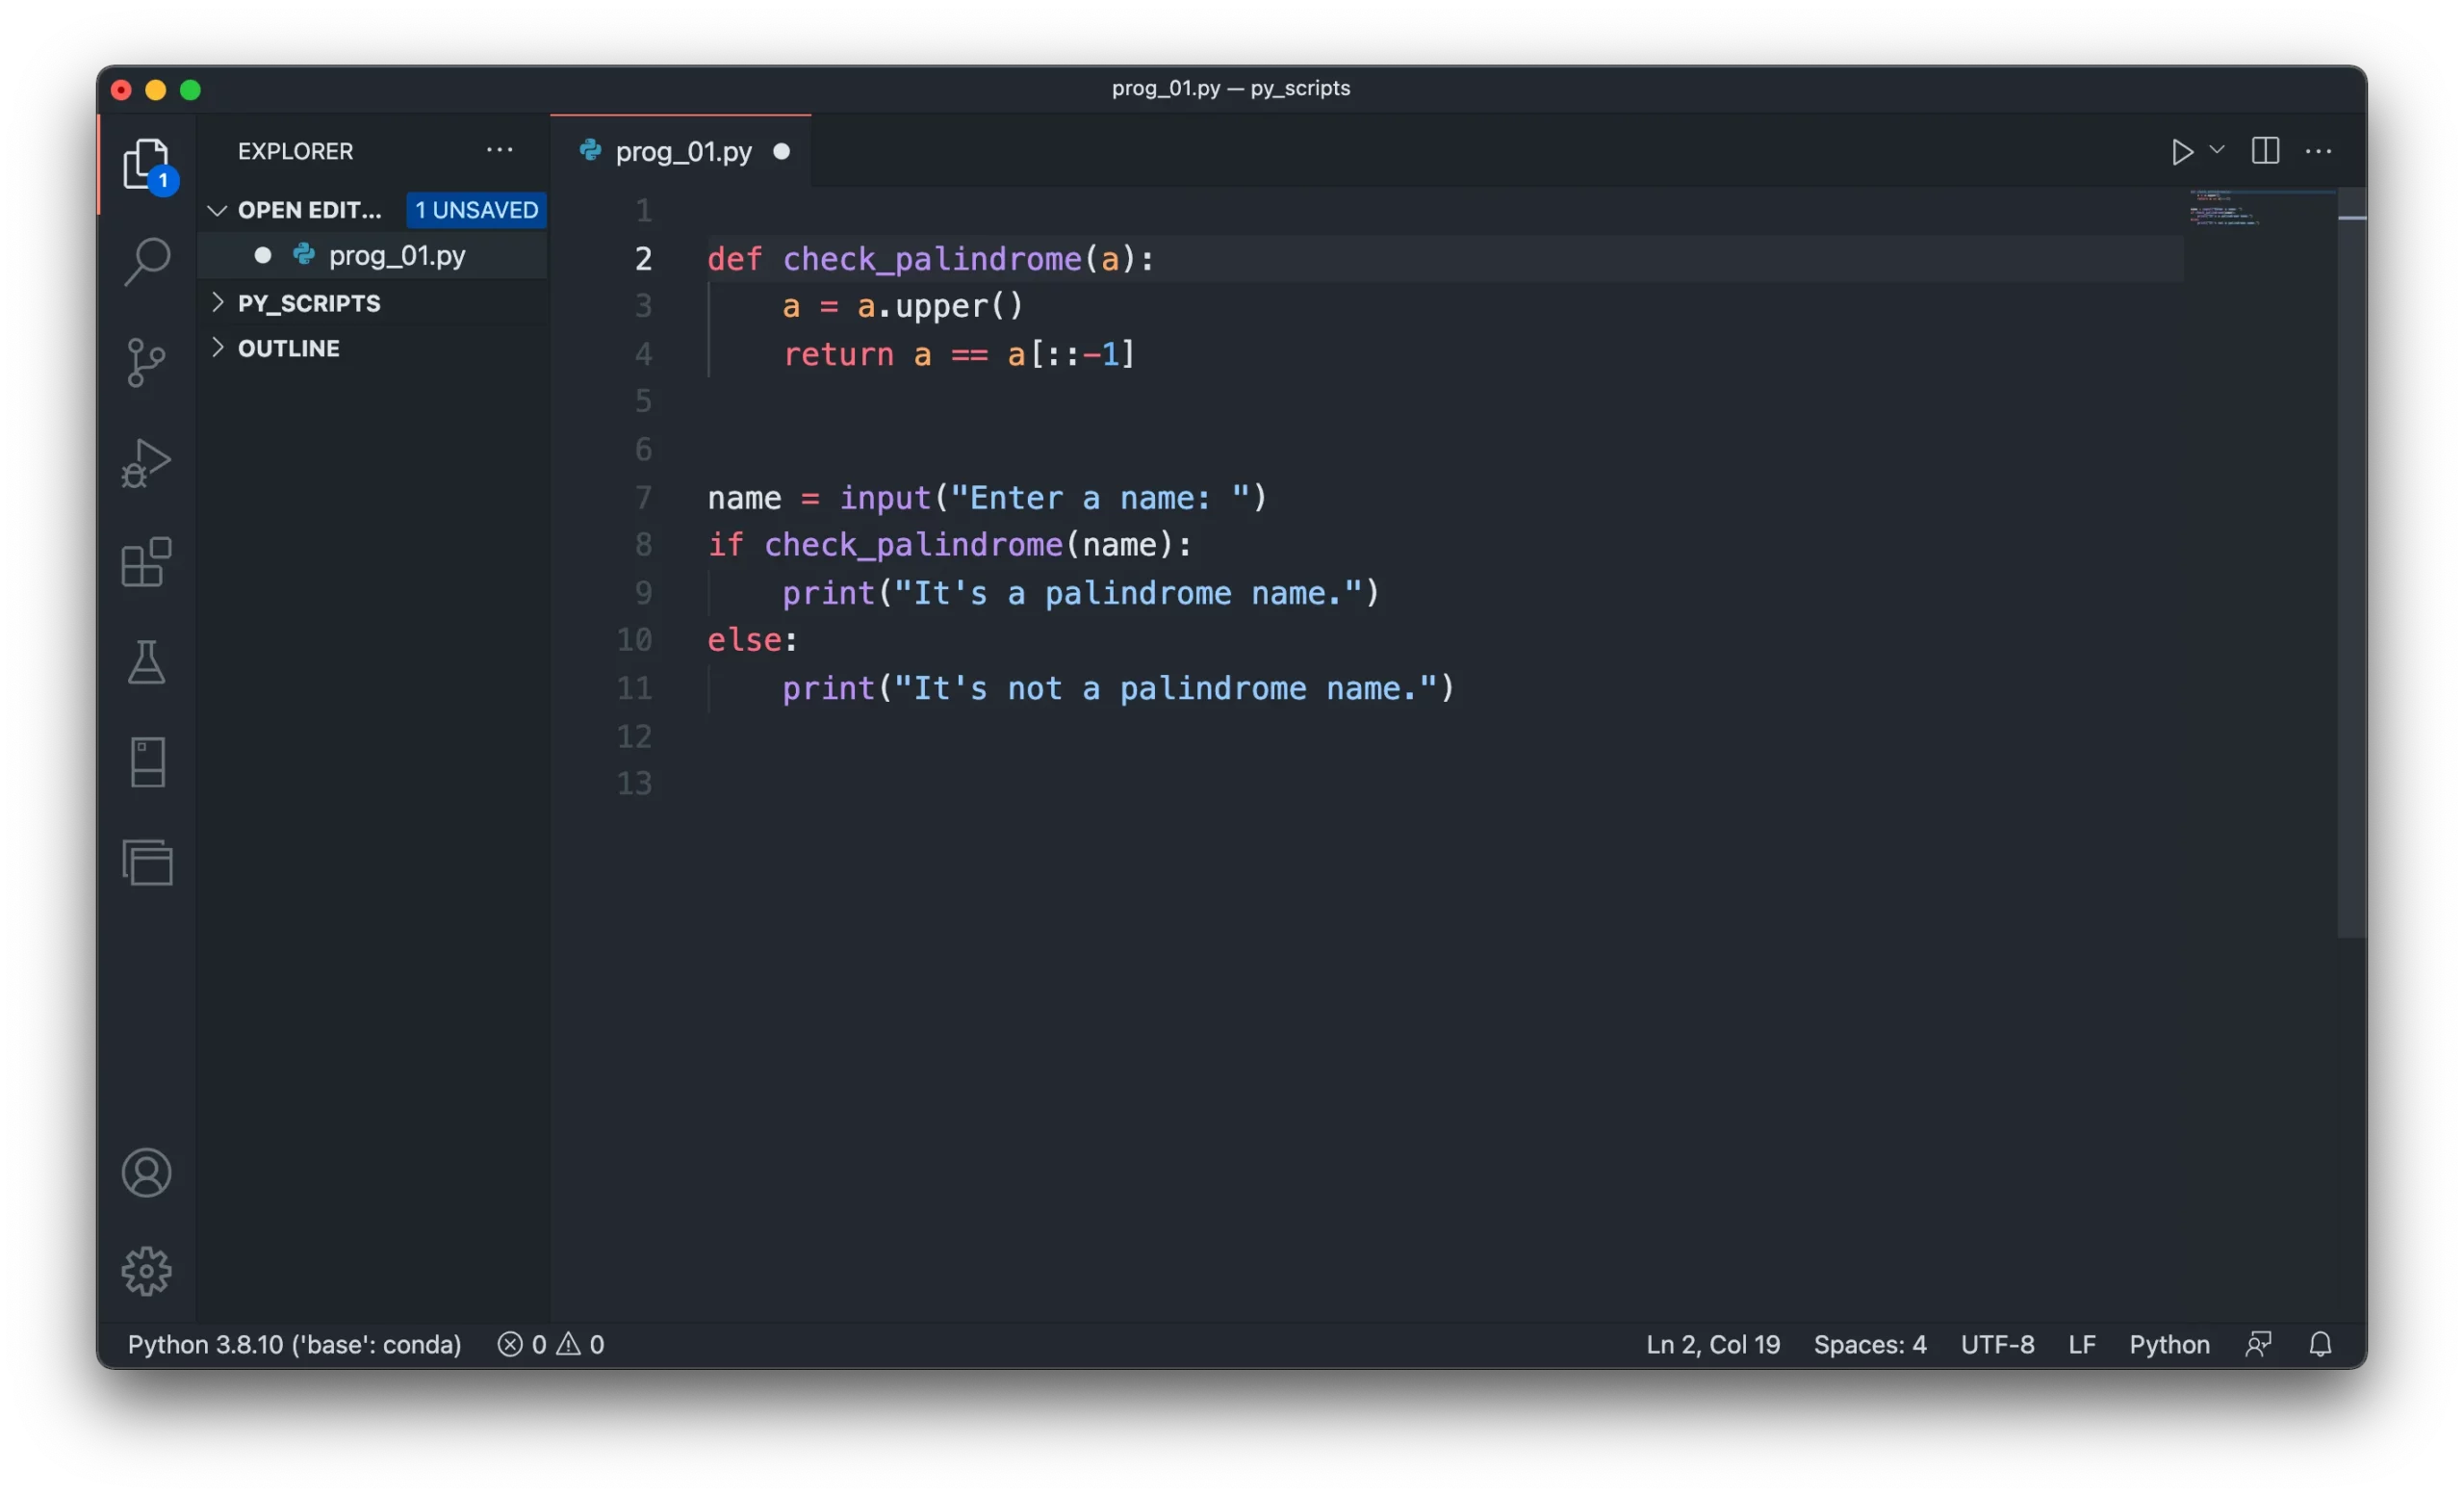
Now, you can see that all the palindrome occurrences have been changed to check_palindrome:
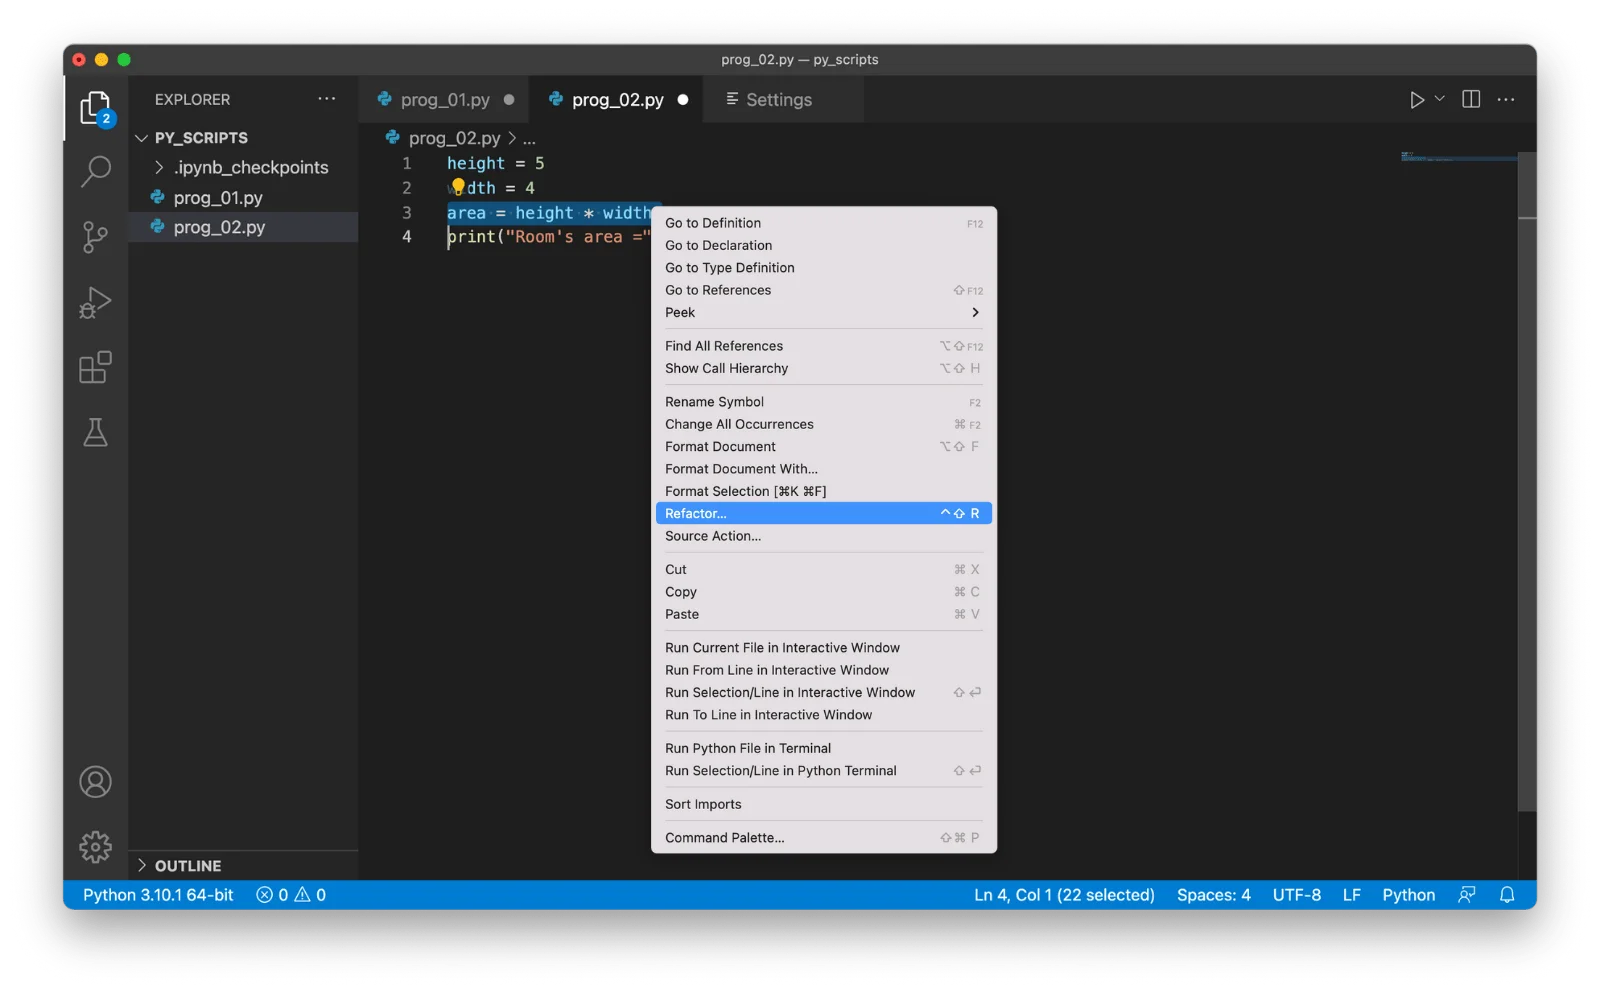
Let’s try the extract method feature before closing this section. Create a new Python file and paste the following piece of code into it.
height = 5
width = 4
area = height * width
print("Room's area =", area, "square meters")
Select the third line, right-click, and select the refactoring option from the context menu:
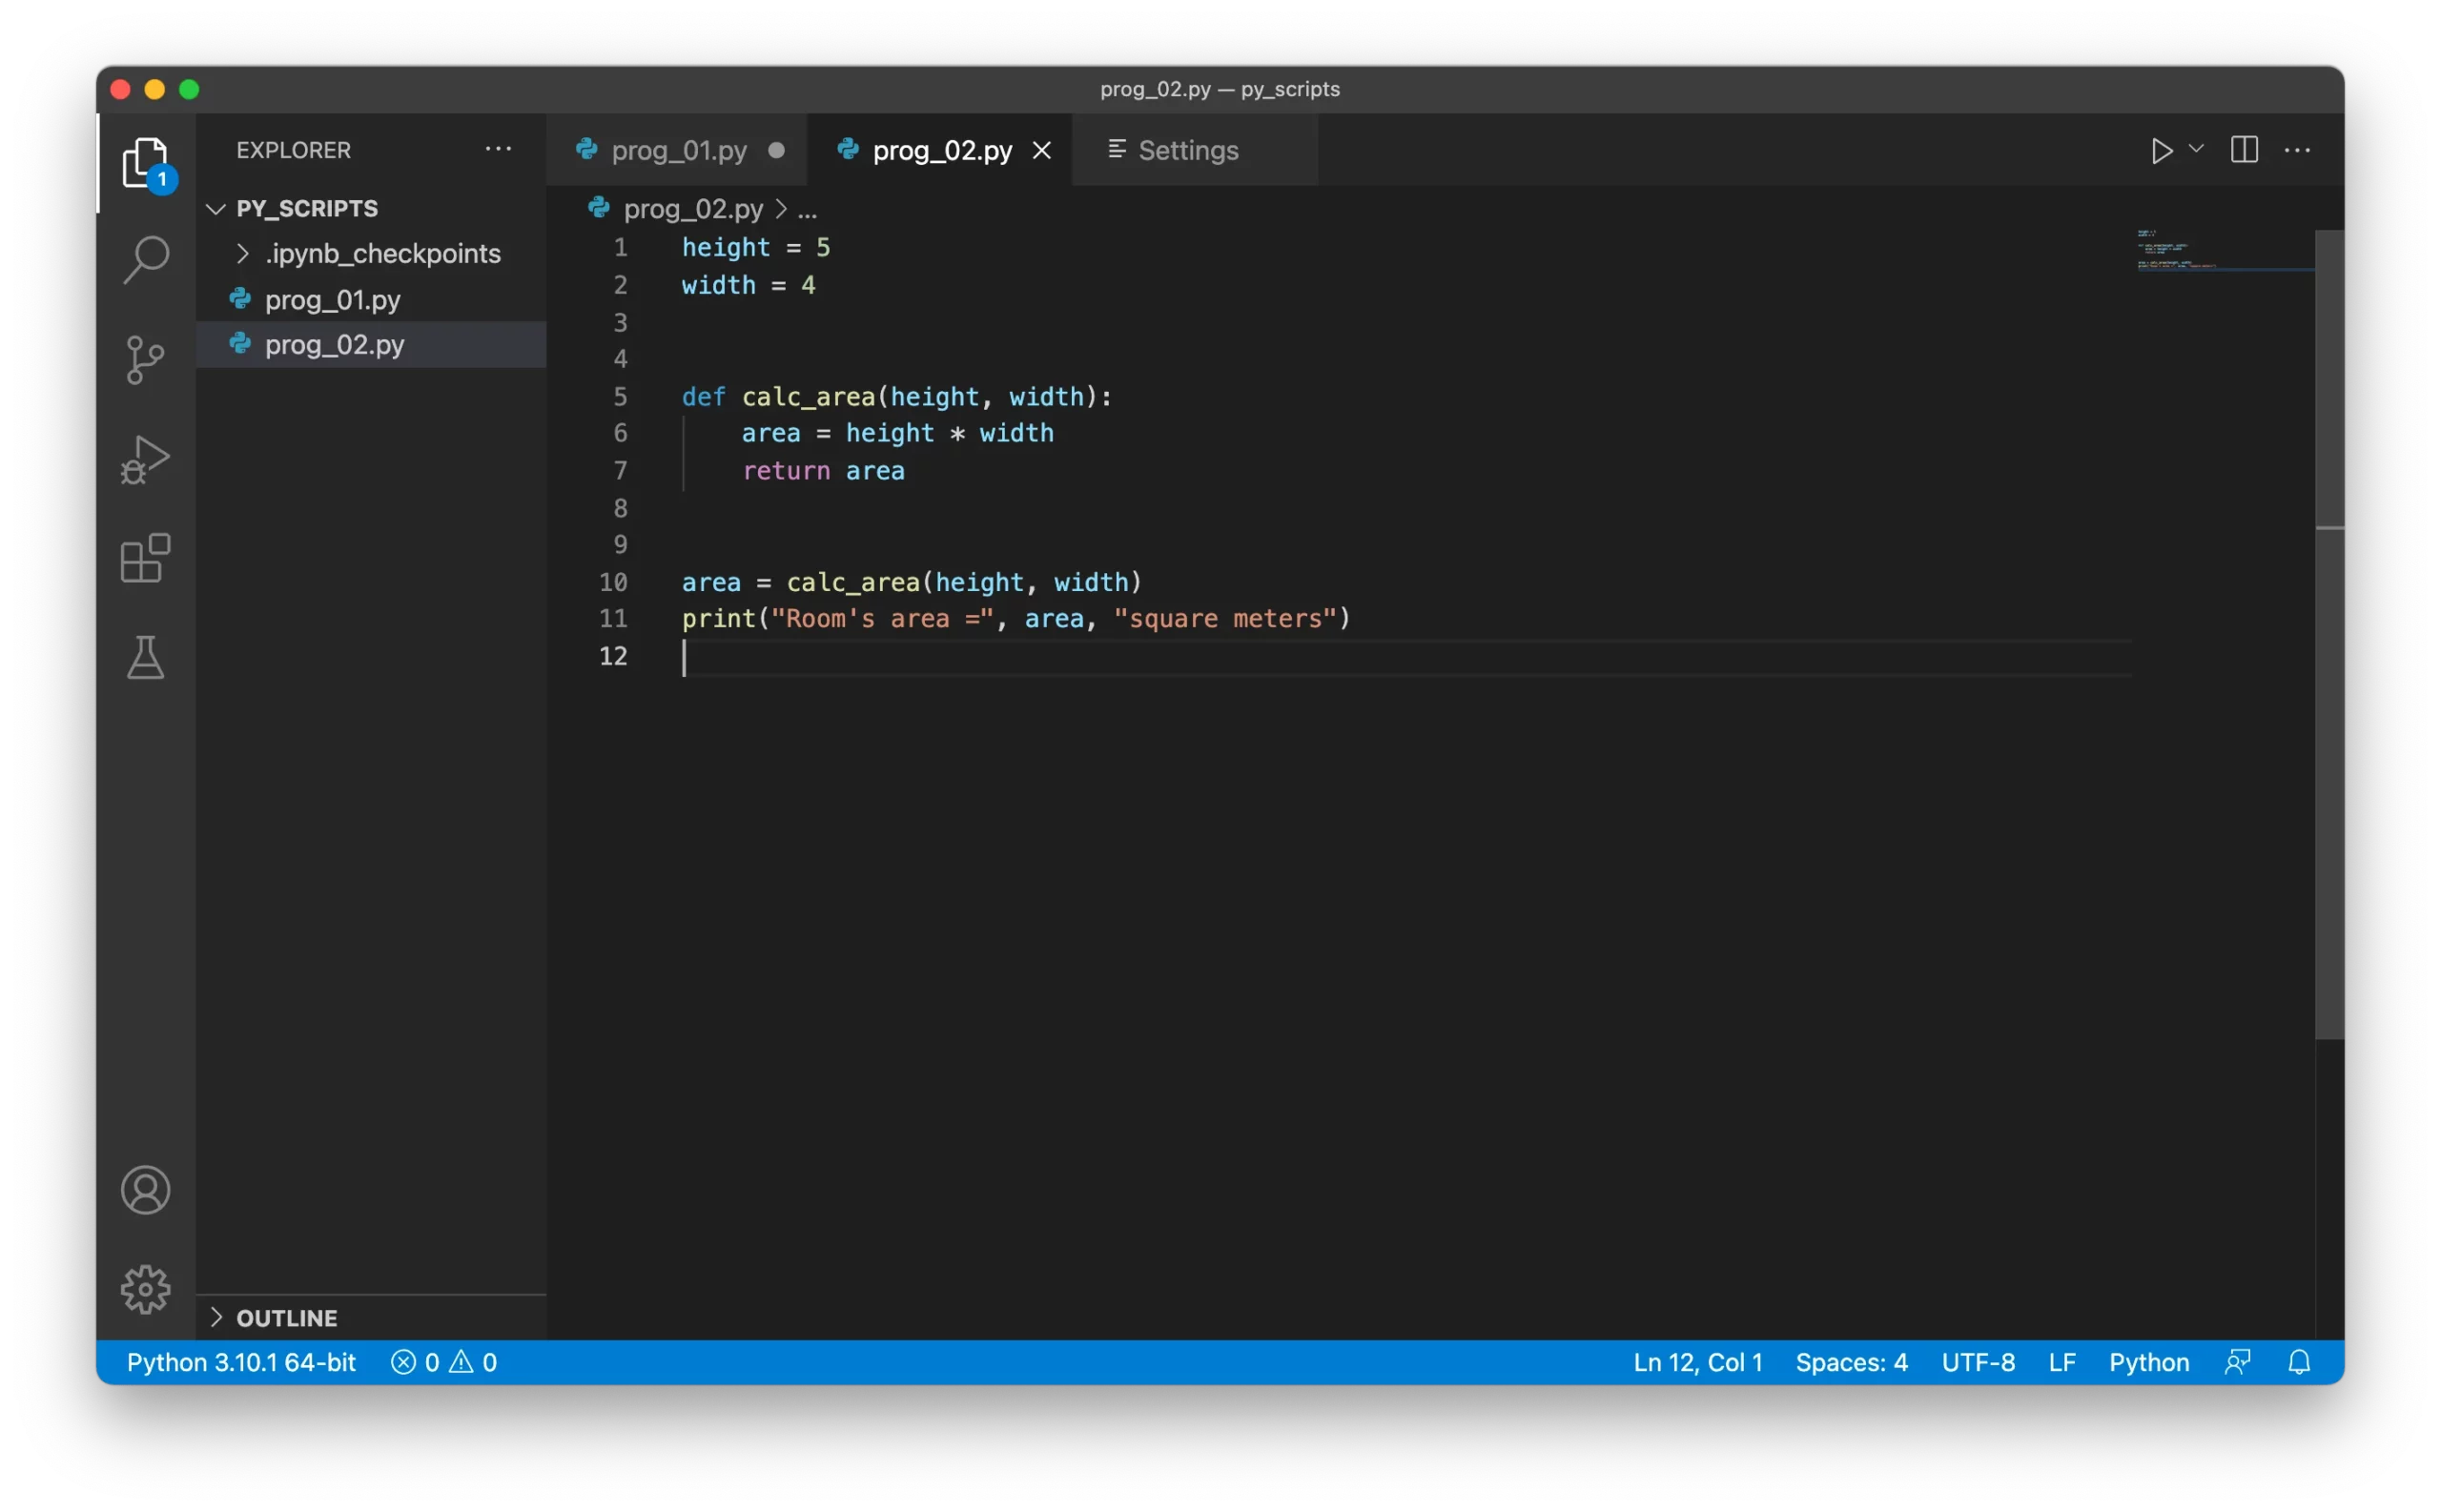
Then click on the Extract method button, enter the new name, calc_area, in the text box that appears, then press Enter to rename:
Python Interactive Window
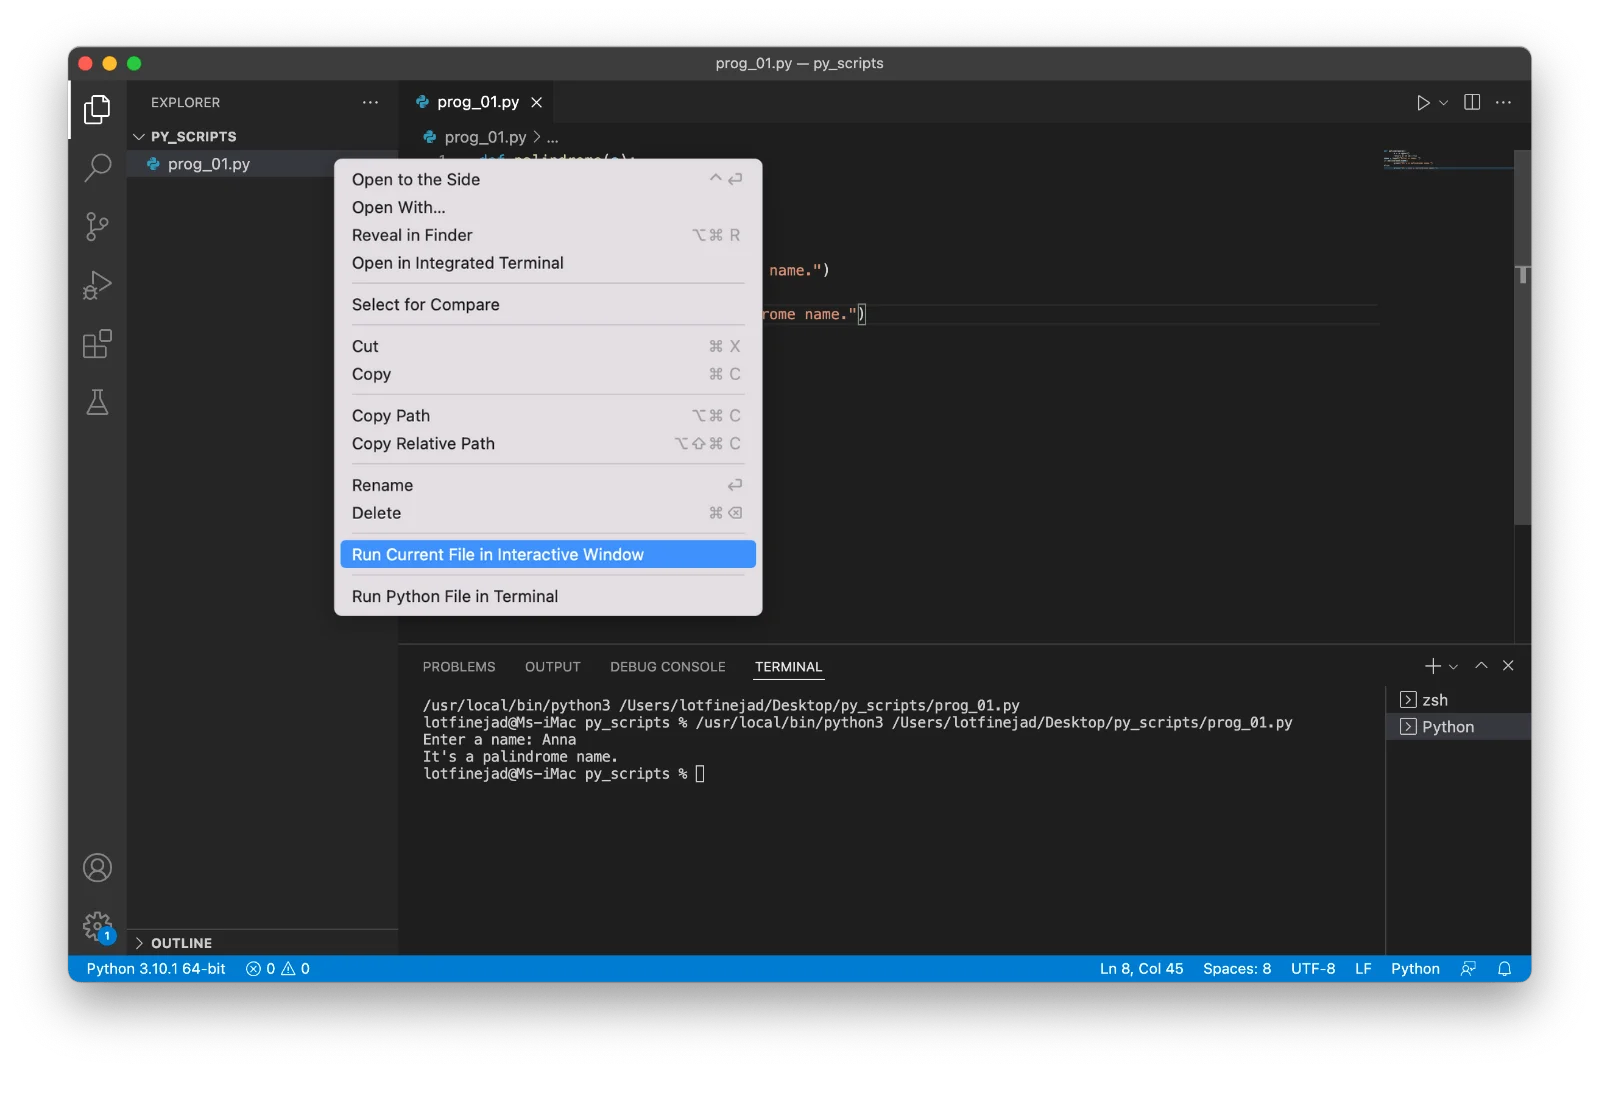
The good news is that Visual Studio Code supports working with Jupyter Notebooks. To run the current file in an interactive window, right-click on the file name in the explorer pane, and select the Run Current File in Interactive Window option from the context menu, as follows:
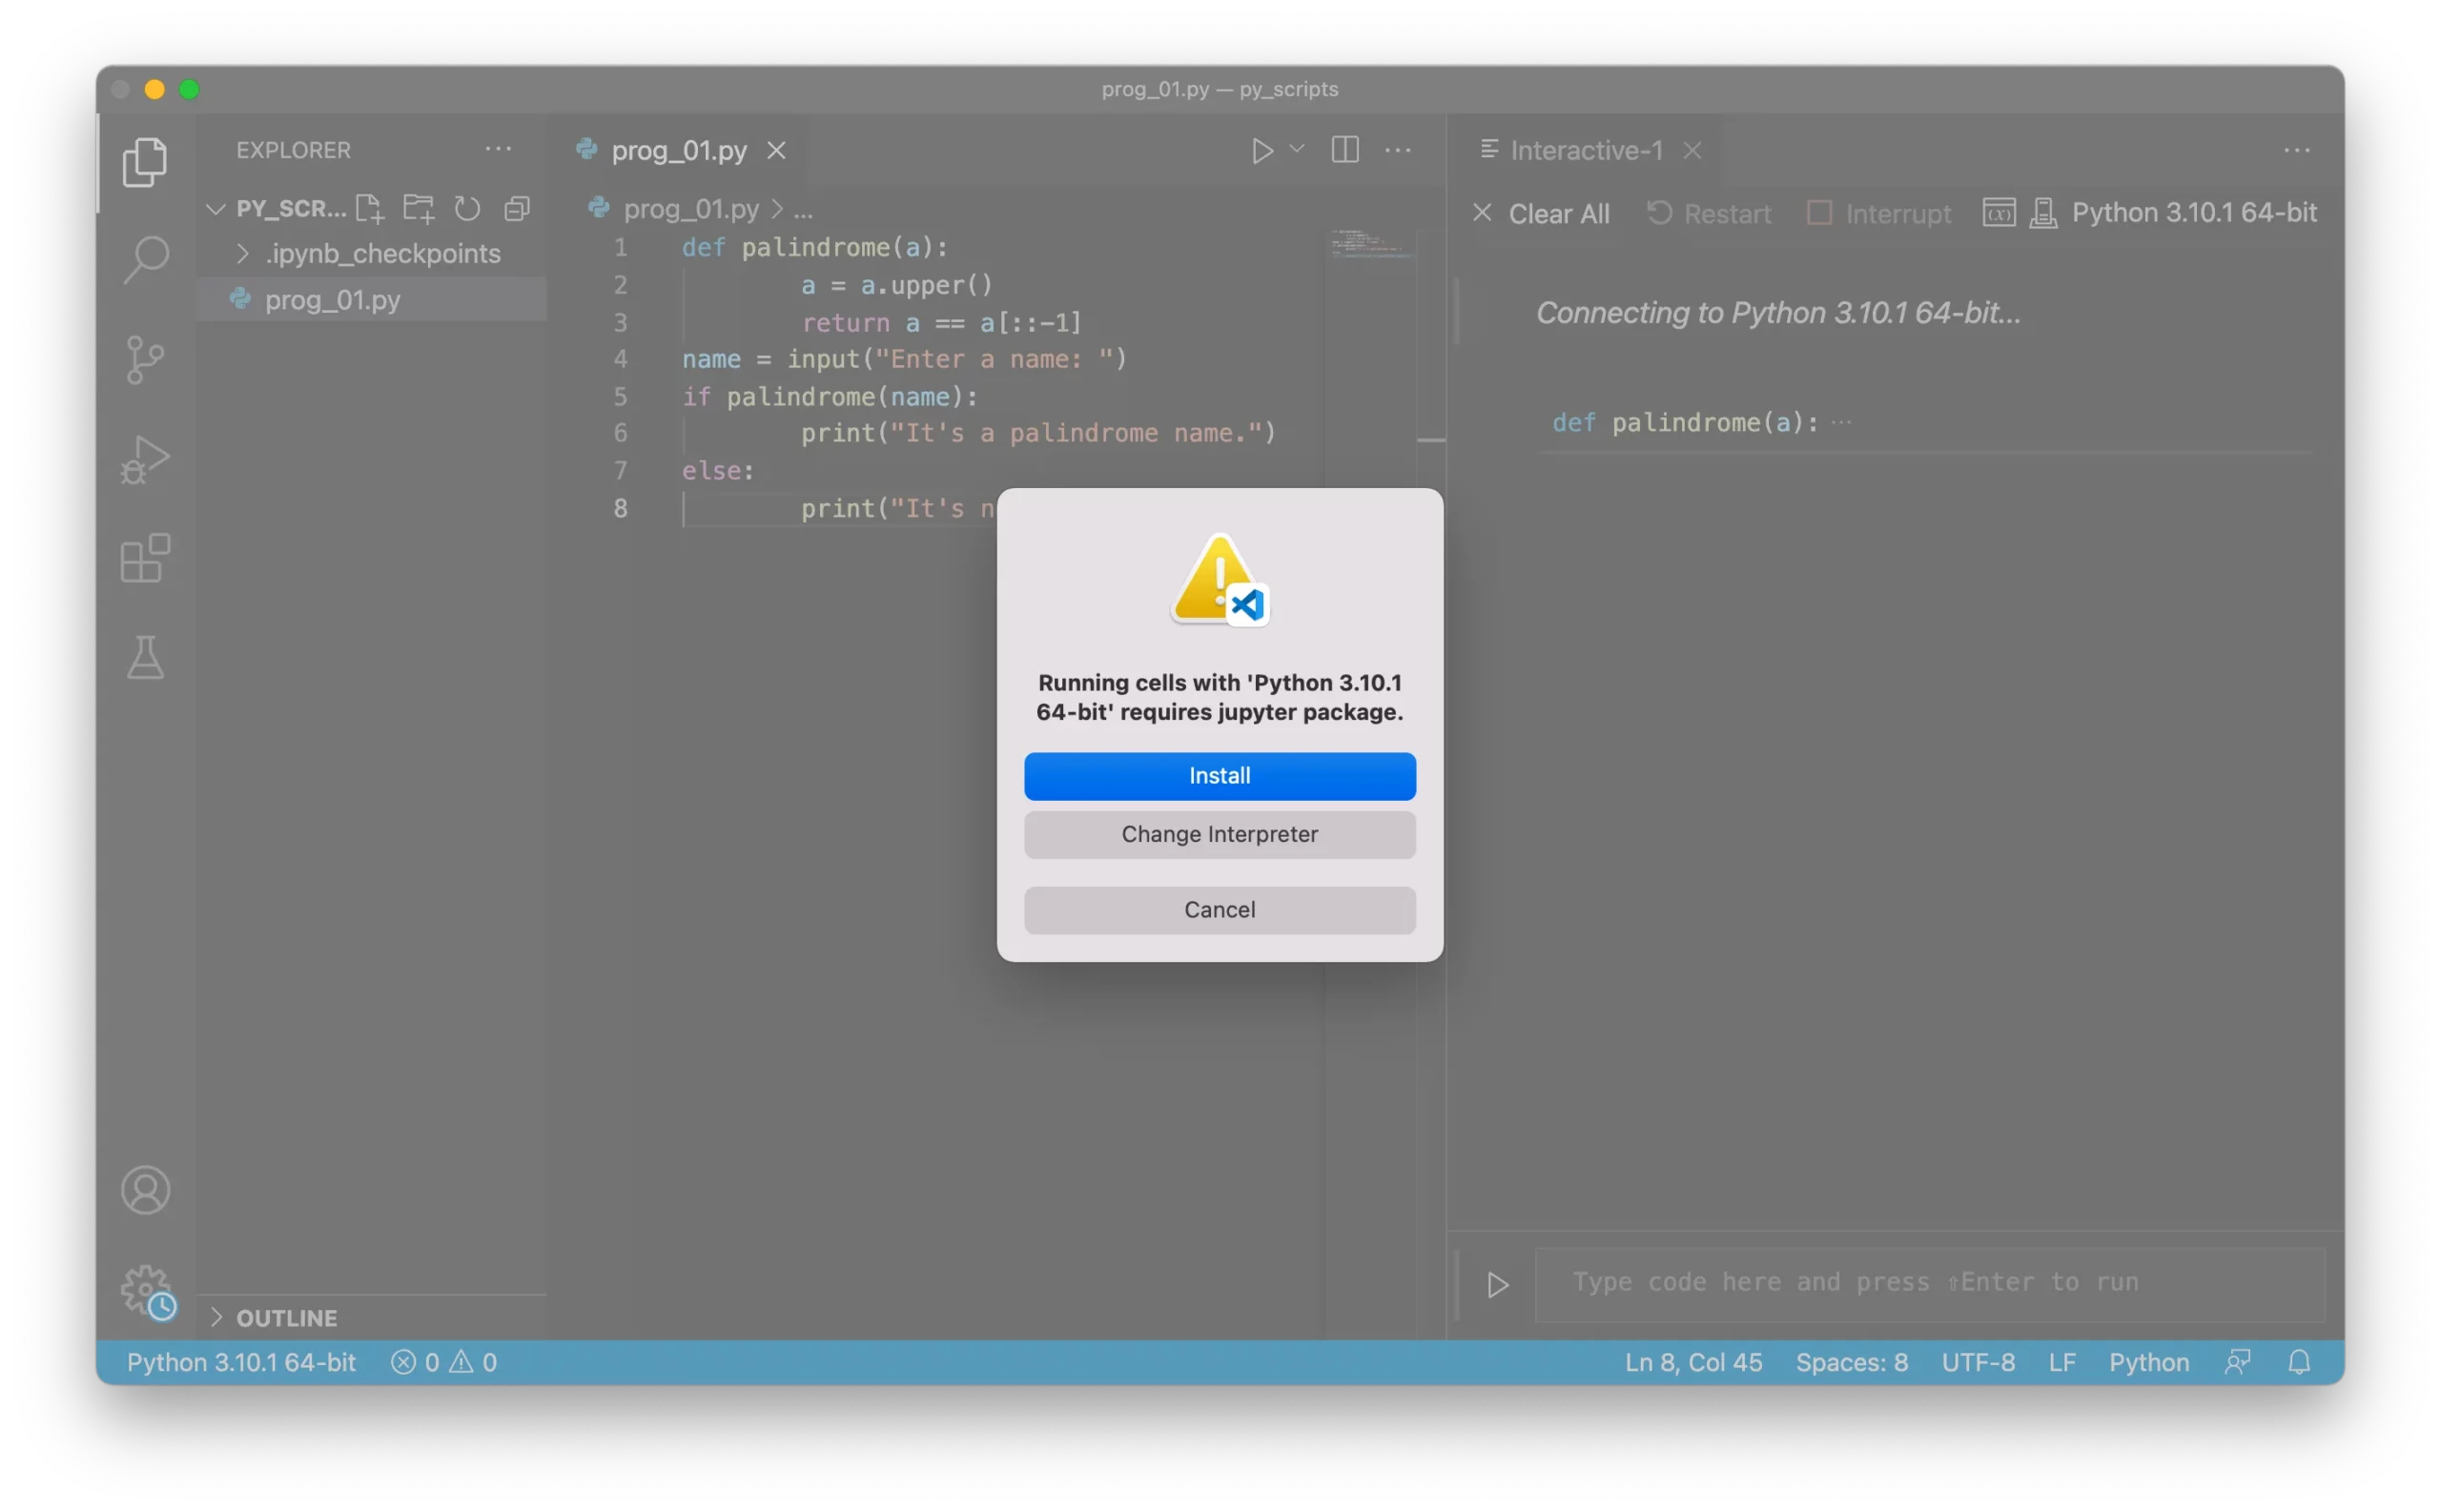
If the Jupyter package hasn't been installed yet, it displays a dialog box and asks you to install it:
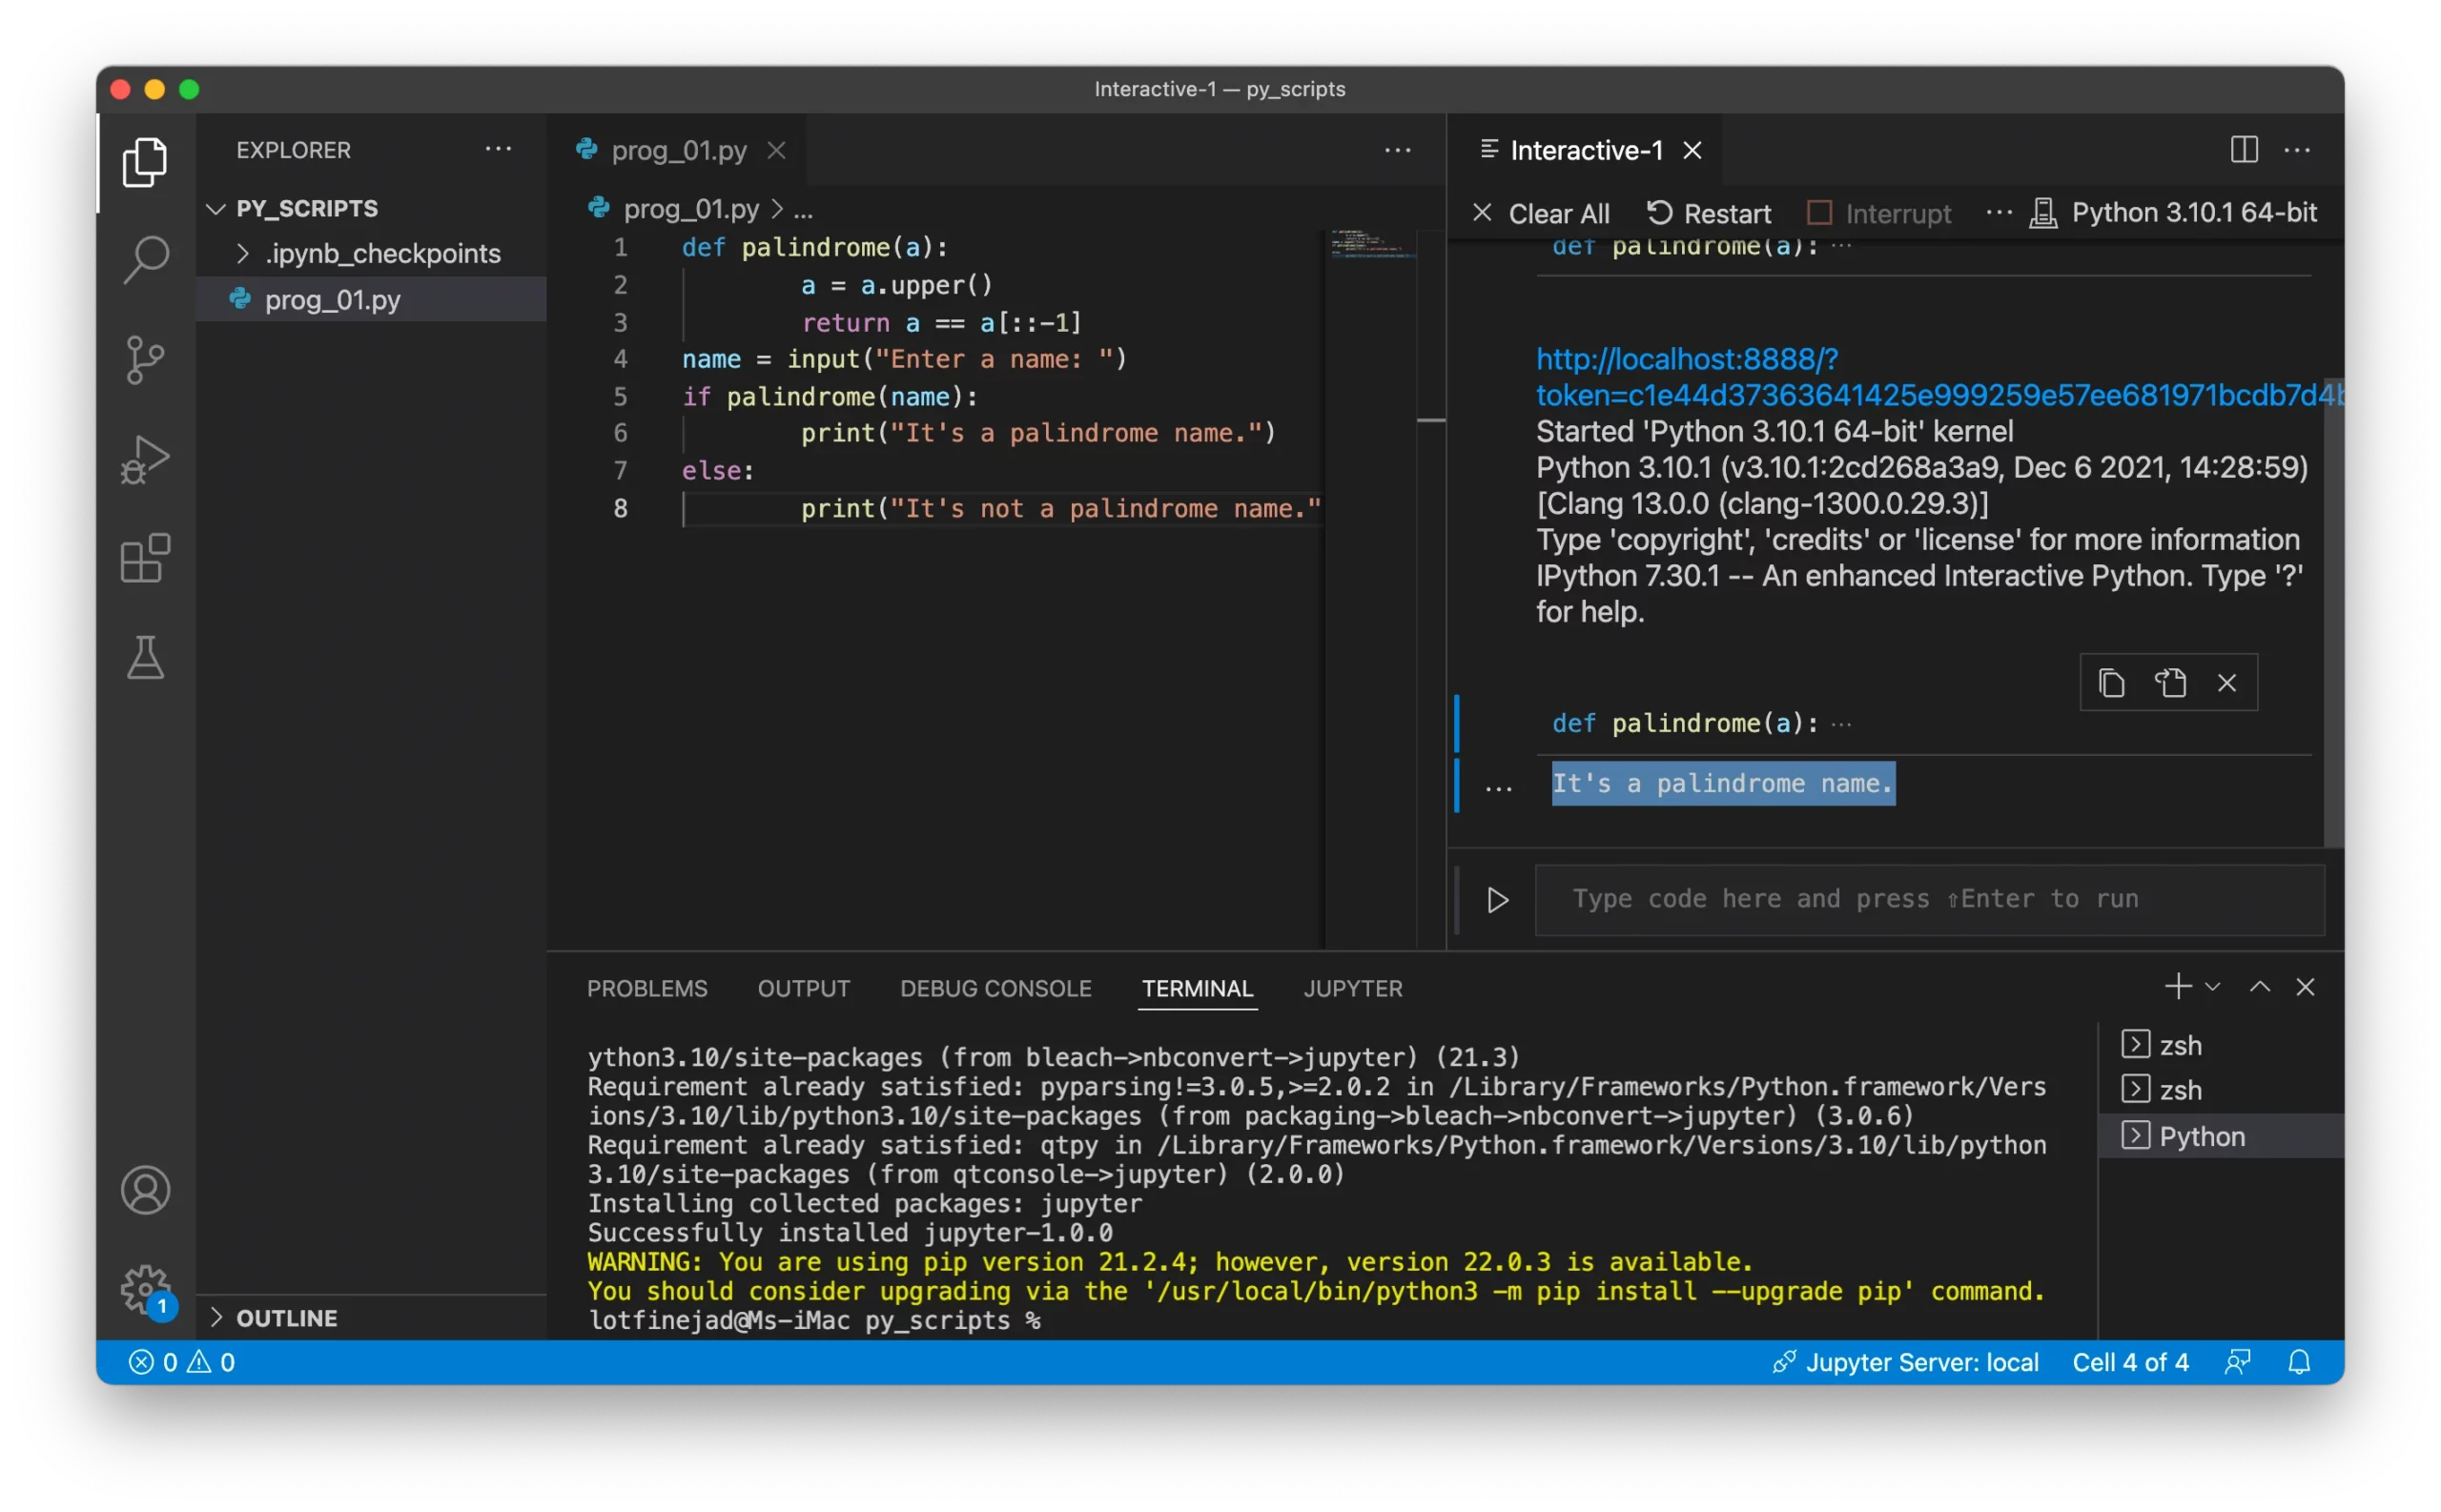
After the installation, an interactive window will appear, and in this case, you need to enter a name to check if it is palindrome or not:
Finally, you can see the result in the interactive window, as follows:
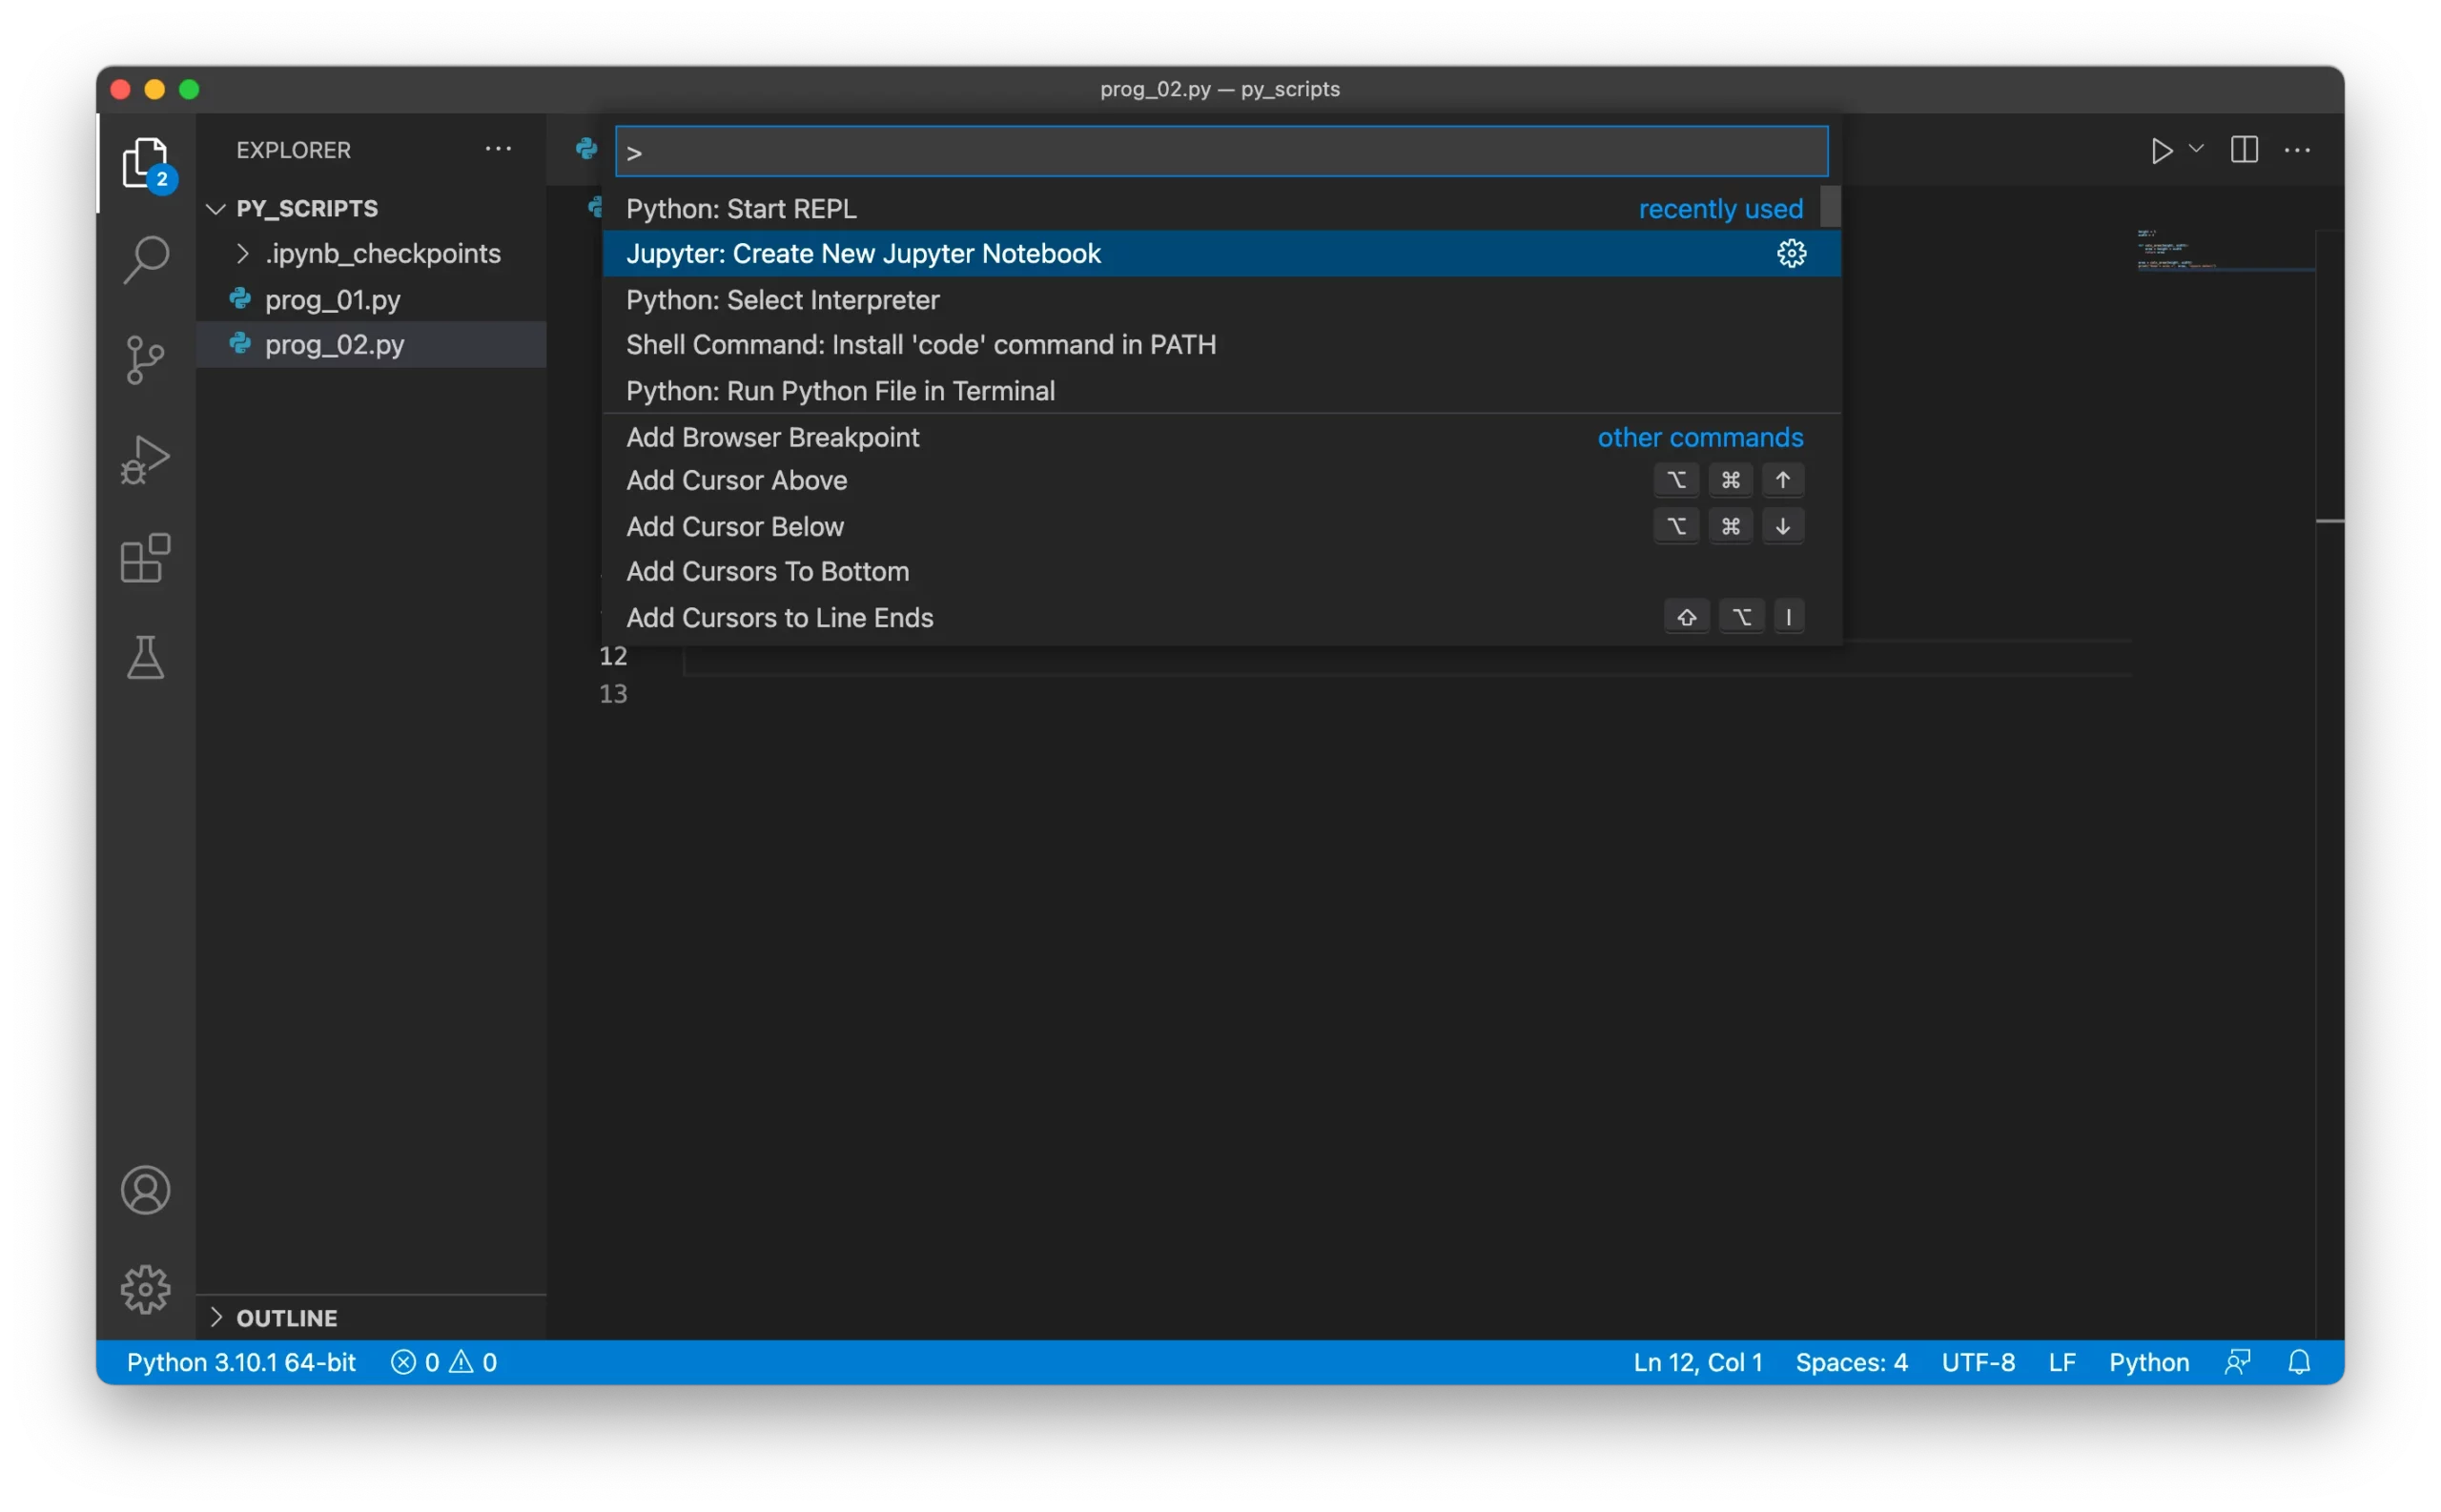
Moreover, to create a new Jupyter Notebook in VS Code, open up the Command Palette, and select Jupyter: Create New Jupyter Notebook, as follows:
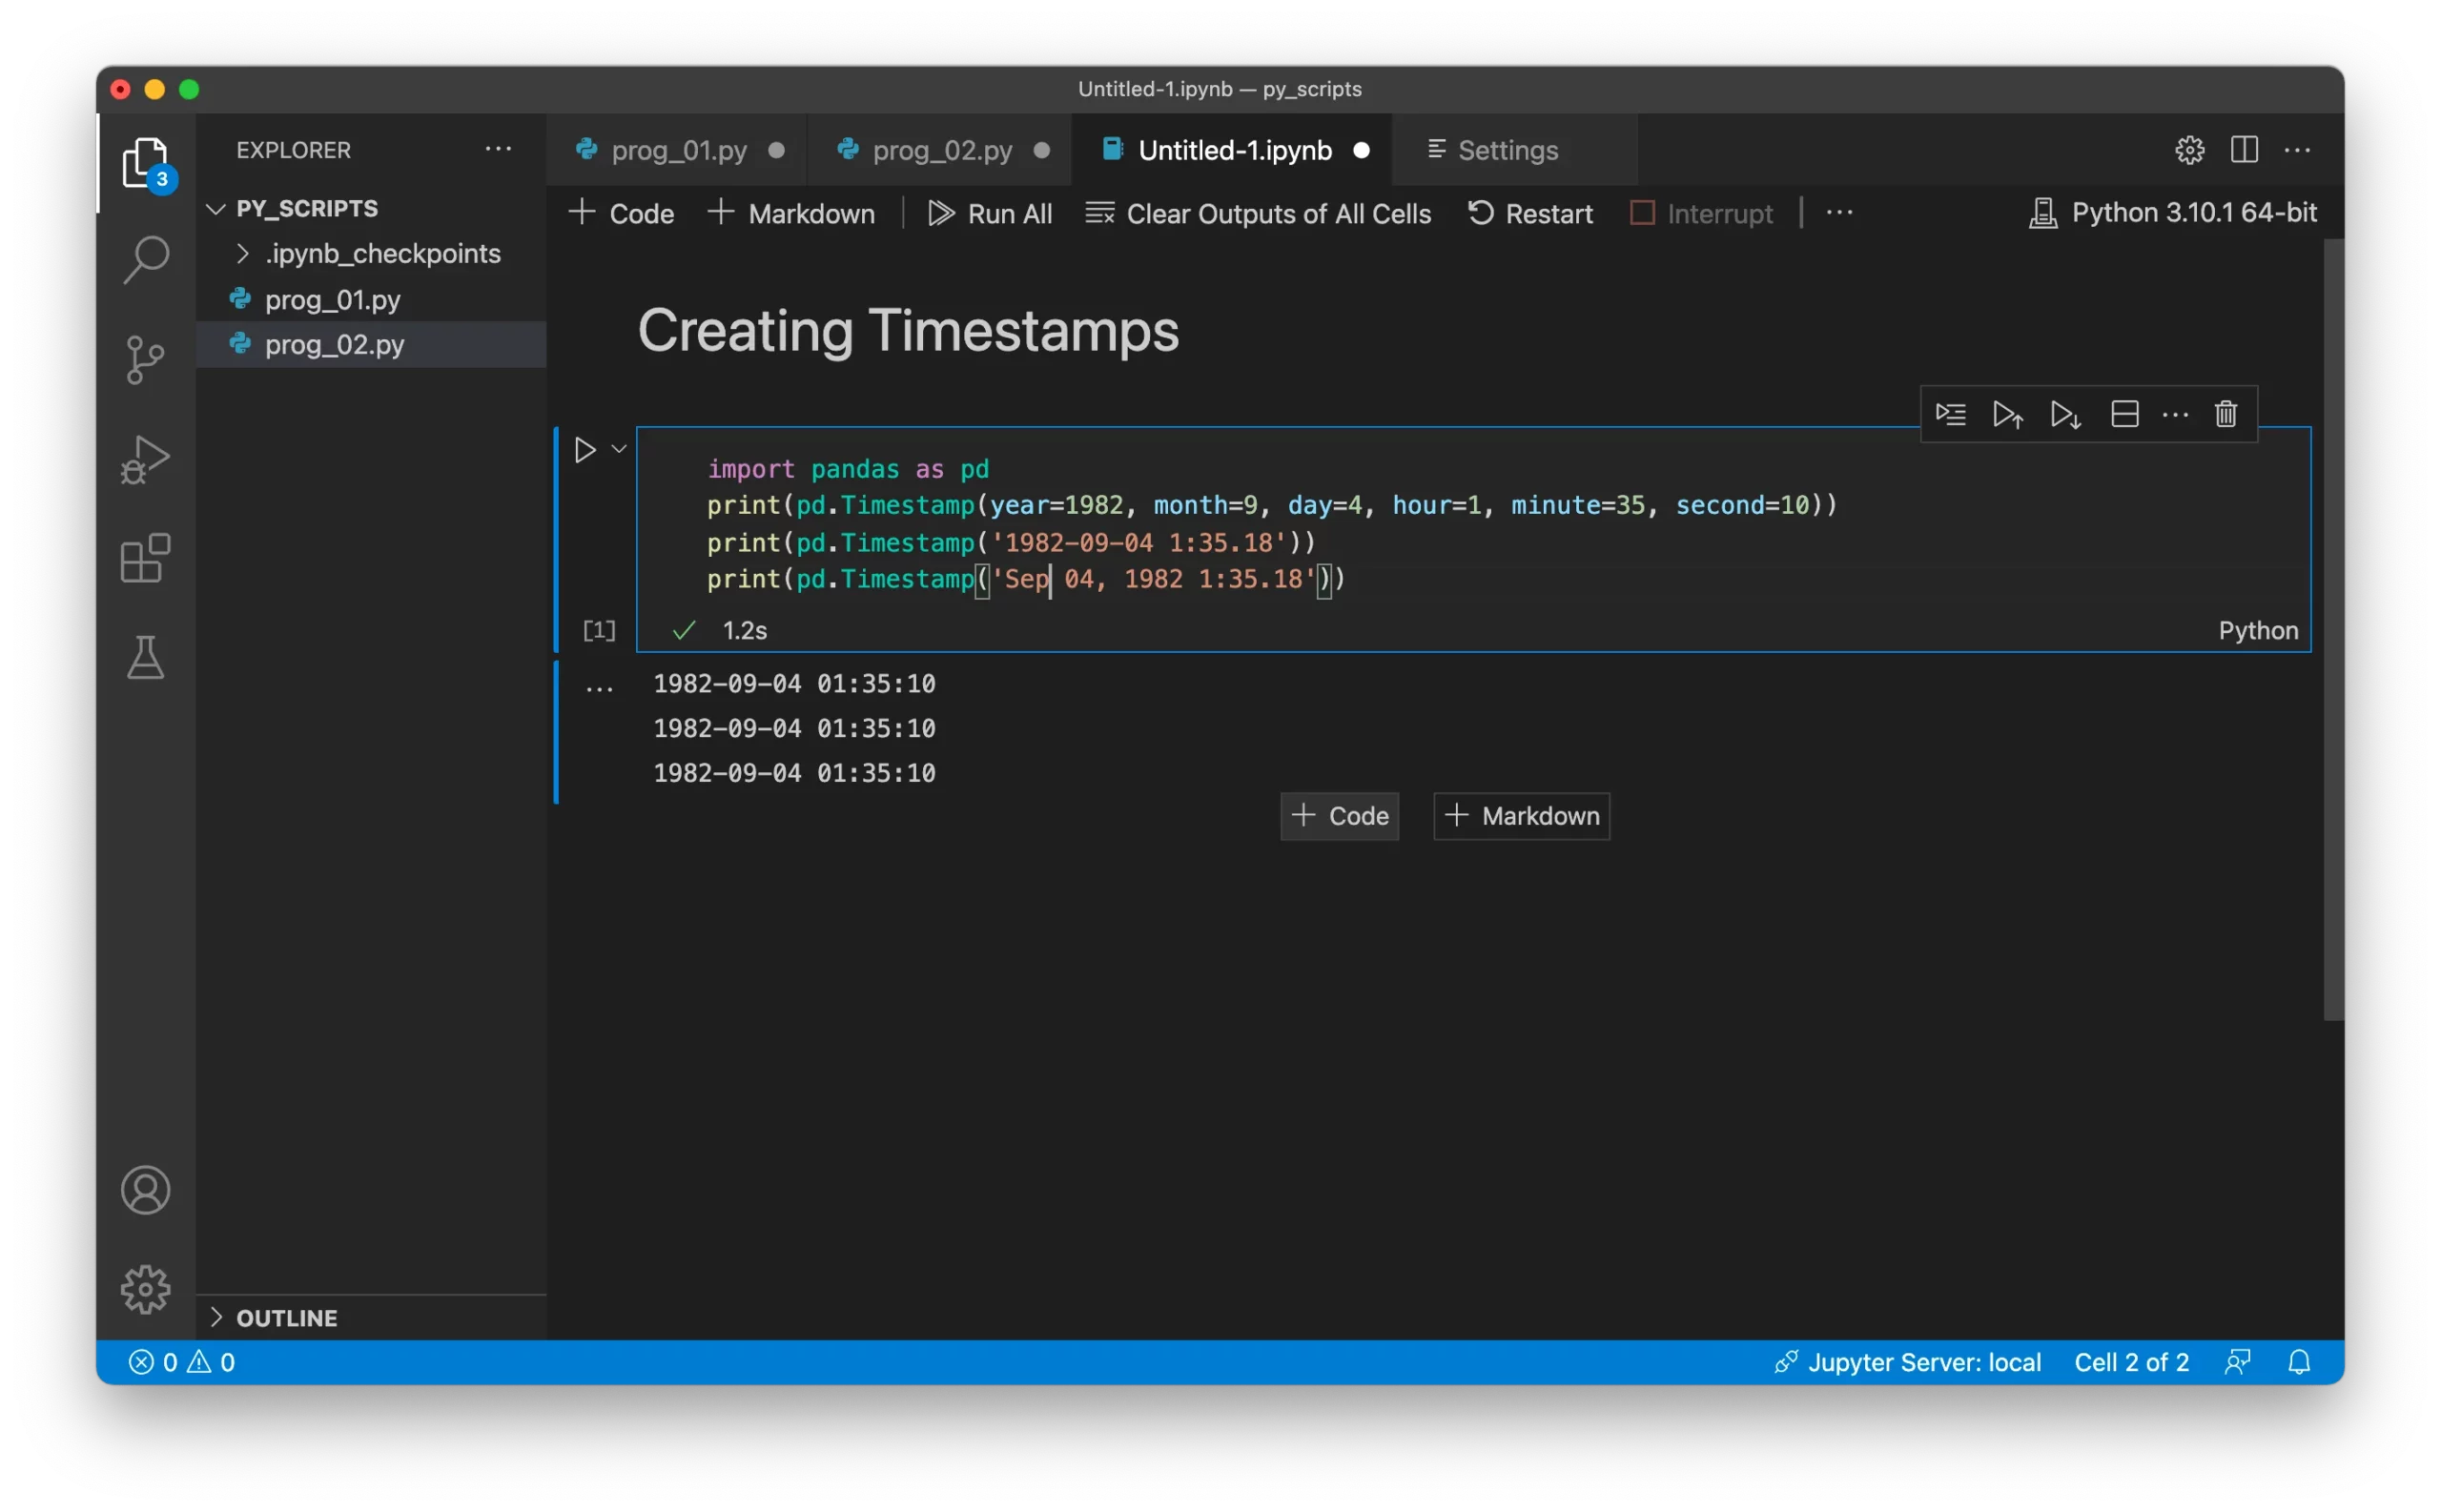
It will create a new Jupyter Notebook, and you can simply create markdown and code cells in VS Code:
Conclusion
This tutorial discussed helpful features of VS Code. However, it’s impossible to cover the Visual Studio Code capabilities for being more productive in coding with less effort in a single tutorial. If you’d like to learn more about working with VS Code for Python development, you can check out the official Visual Studio Code website at Get Started Tutorial for Python in Visual Studio Code.