How to Set Up PyCharm Community Edition (The Easy Way)
PyCharm is a powerful Integrated Development Environment (IDE) used for programming in Python. PyCharm provides valuable tools such as code analysis, a graphical debugger, and an integrated unit tester, making it an ideal choice for both data science and machine learning applications. In addition, it supports web development with various Python frameworks, including Django, Flask, Pyramid, and web2py. This tutorial is specifically tailored to the PyCharm Community Edition, which is free and open source.
Whether you're a Dataquest learner or a seasoned developer looking to switch IDEs, this guide will walk you through the process of installing and setting up PyCharm Community Edition for optimal Python development.
In this tutorial, we'll cover:
- How to install PyCharm Community Edition
- Creating and running a Python file
- Using the Python console
- Formatting Python code
- Refactoring Python code
- Setting up virtual environments
By the end of this guide, you'll have a fully configured PyCharm environment ready to handle your Python projects. Let's get started!
![]()
Installing PyCharm Community Edition IDE
Getting PyCharm Community Edition set up on your computer is a task that requires a few simple steps. These steps vary based on the operating system you're using.
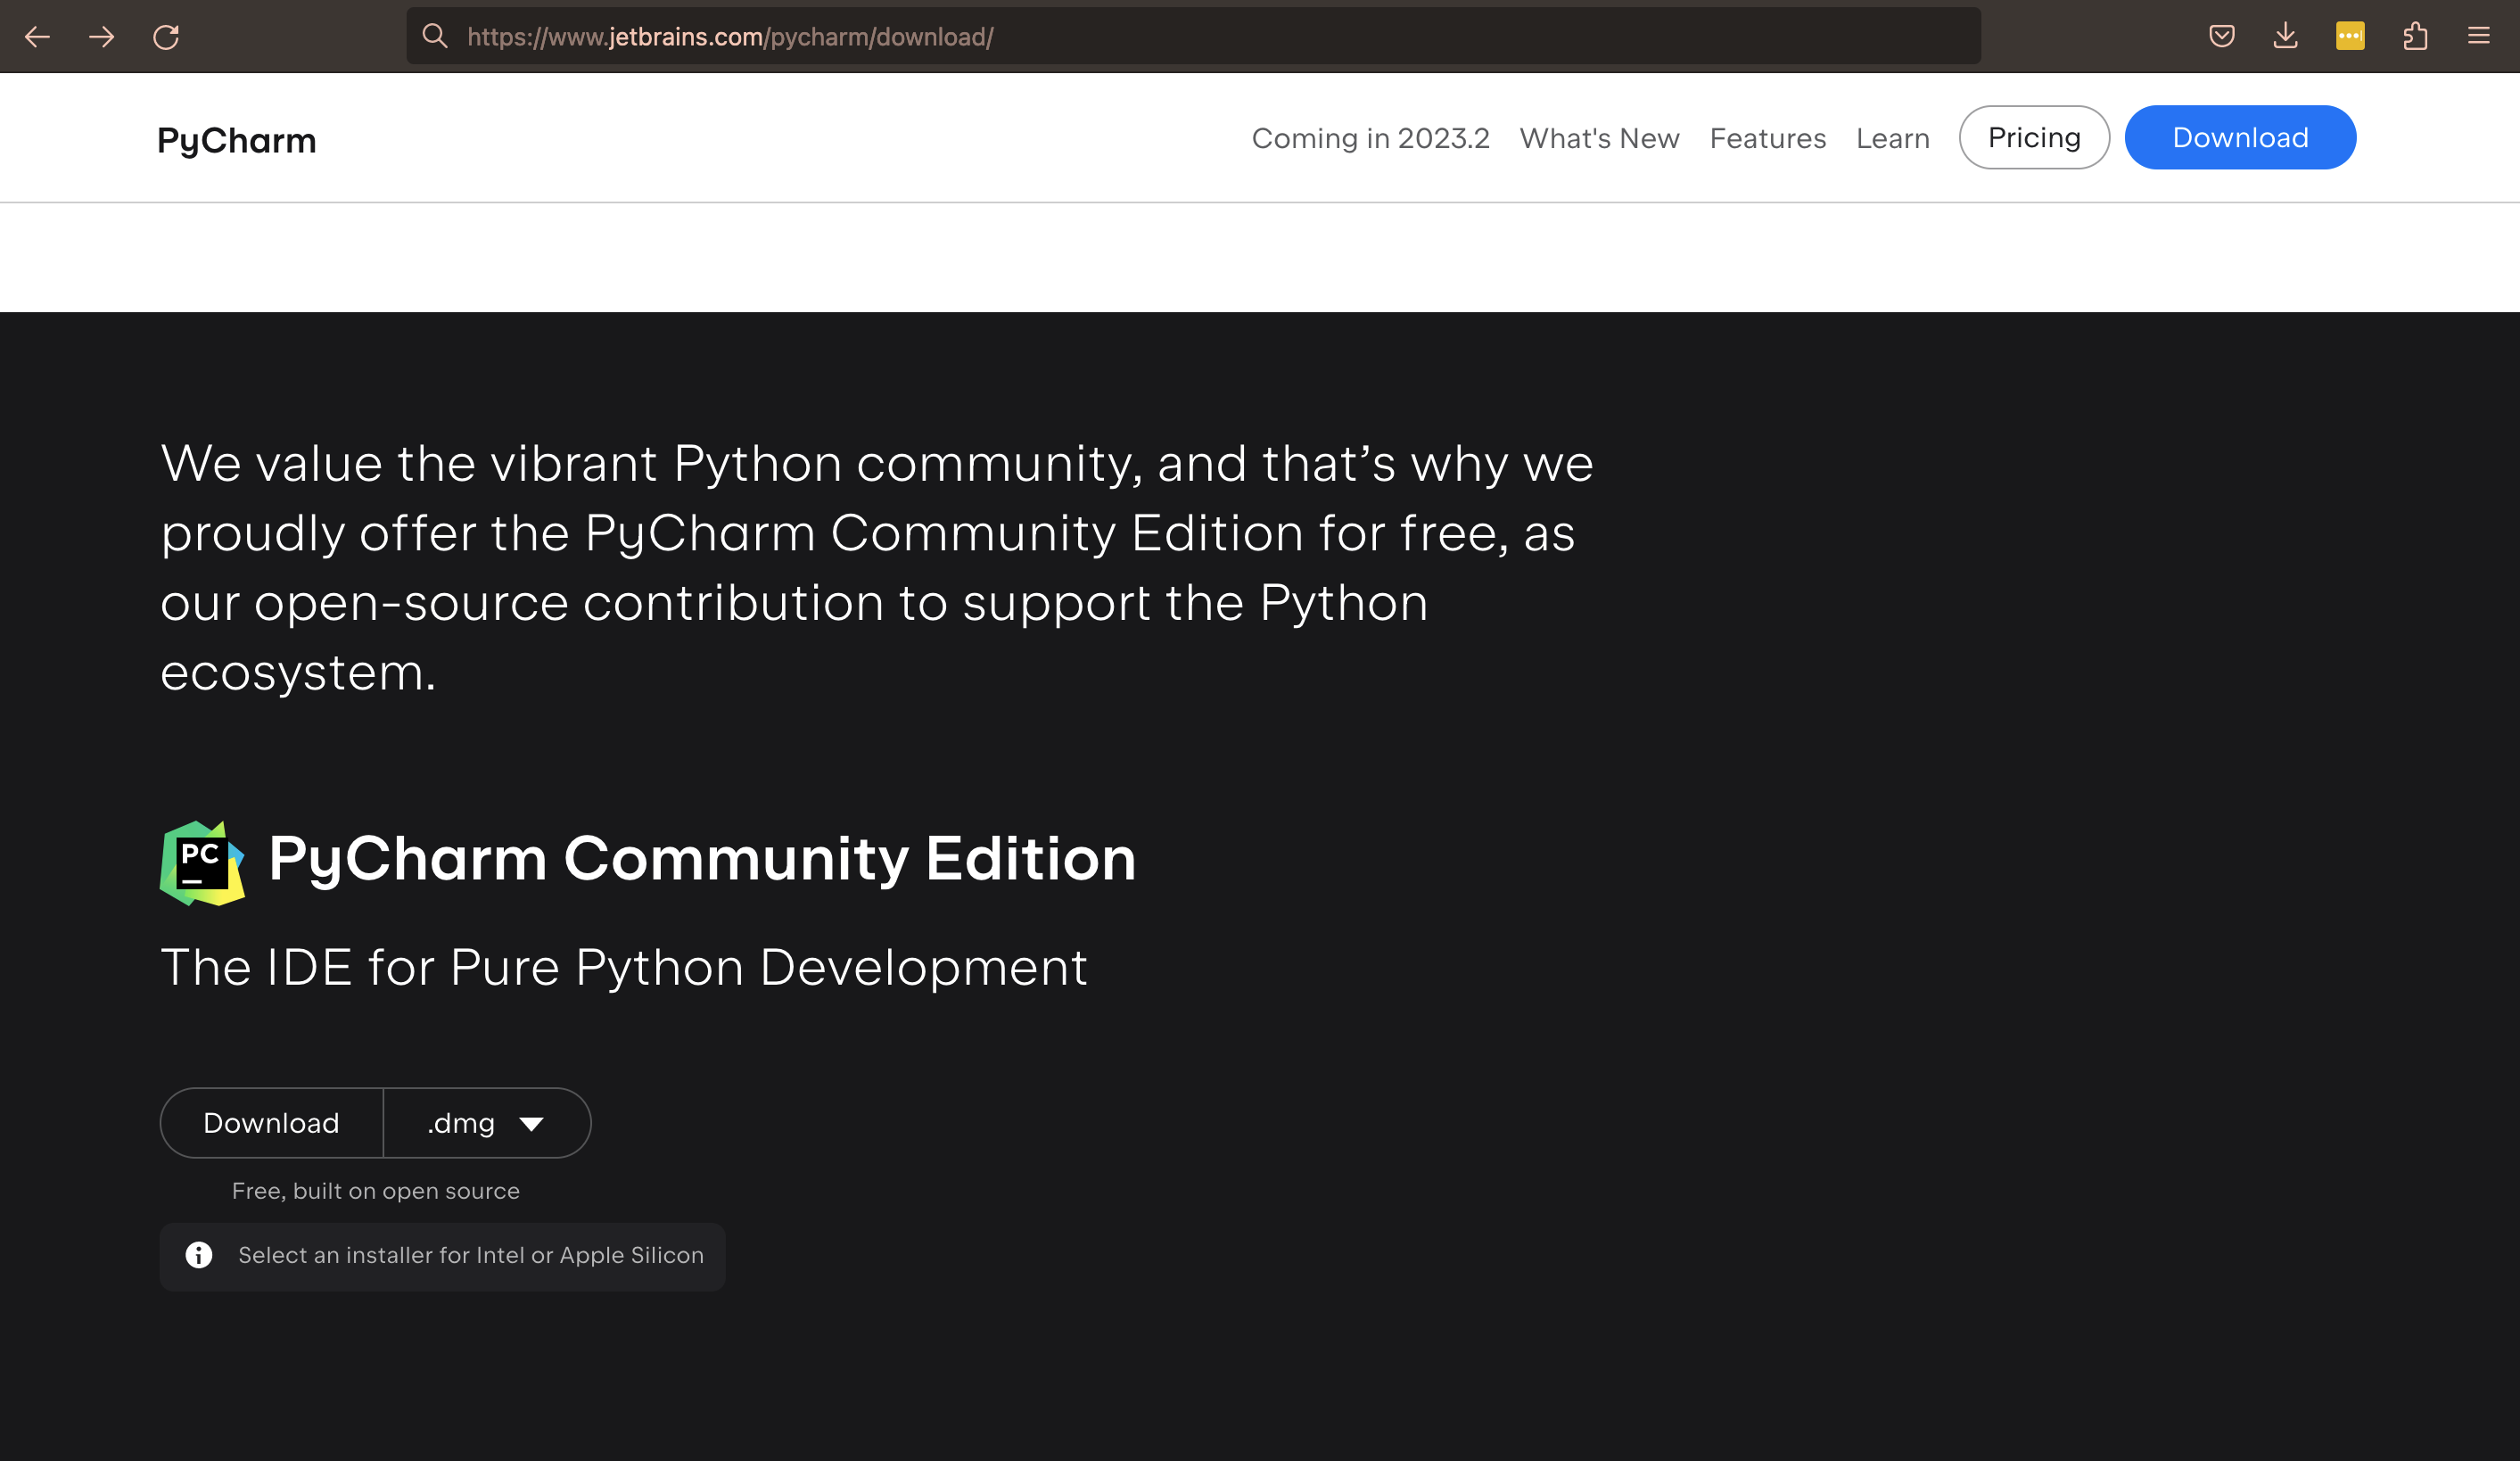
Step 1: Download PyCharm Community Edition
Begin by heading over to the official JetBrains website. Here you'll find the PyCharm Community Edition. The site automatically determines your operating system and suggests the appropriate version for download. For macOS users, please note that there are separate disk images for Intel and Apple Silicon processors. Click on the "Download" button in the PyCharm Community Edition segment of the webpage.
Step 2: Install PyCharm Community Edition
Once the download is finished, find the downloaded file (usually in your "Downloads" folder). Double-click on the downloaded file to initiate the installation process.
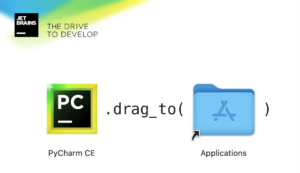
For macOS users, download the disk image. Drag the PyCharm icon into the Applications folder when prompted. Run the PyCharm app from the Applications directory, Launchpad, or Spotlight.
If you're a Windows user, start by downloading the .exe installer. Please note, if you're using an ARM64 processor, there's a dedicated installer available. Once downloaded, run the installer and adhere to the guidelines provided by the setup wizard.
During the setup process, be aware of a few key options: "64-bit launcher", "Open Folder as Project", ".py", and "Add launchers dir to the PATH". Ensuring these are correctly set up will help optimize your coding environment.
After completing the installation, you'll be able to access PyCharm either via the Windows Start menu or by utilizing the desktop shortcut if you chose to create one.
For Linux users, start by downloading the tar.gz file from the JetBrains website. There's a separate tarball for ARM64 processors.
You can unpack the tar.gz file to a folder of your choosing using the command below if your current Download folder doesn't support file execution:
tar -xzf pycharm-*.tar.gz -C <new_archive_folder>The recommended installation location according to the filesystem hierarchy standard (FHS) is /opt. If you want to extract the tar.gz file to this folder, use the following command:
sudo tar -xzf pycharm-*.tar.gz -C /opt/Remember, when using sudo, you'll be prompted for your password. Also, keep in mind that with great power comes great responsibility: use sudo judiciously, as it allows you to make significant changes to your system. Always double-check a command before running it with sudo.
Verify the integrity of the downloaded archive by using the SHA checksum linked from the Download page. Then, switch to the bin subdirectory of your installation folder:
cd /opt/pycharm-*/binFinally, run pycharm.sh from the bin subdirectory.
./pycharm.shCreate a desktop entry from the Welcome screen by clicking Configure | Create Desktop Entry, or by clicking Tools | Create Desktop Entry from the main menu.
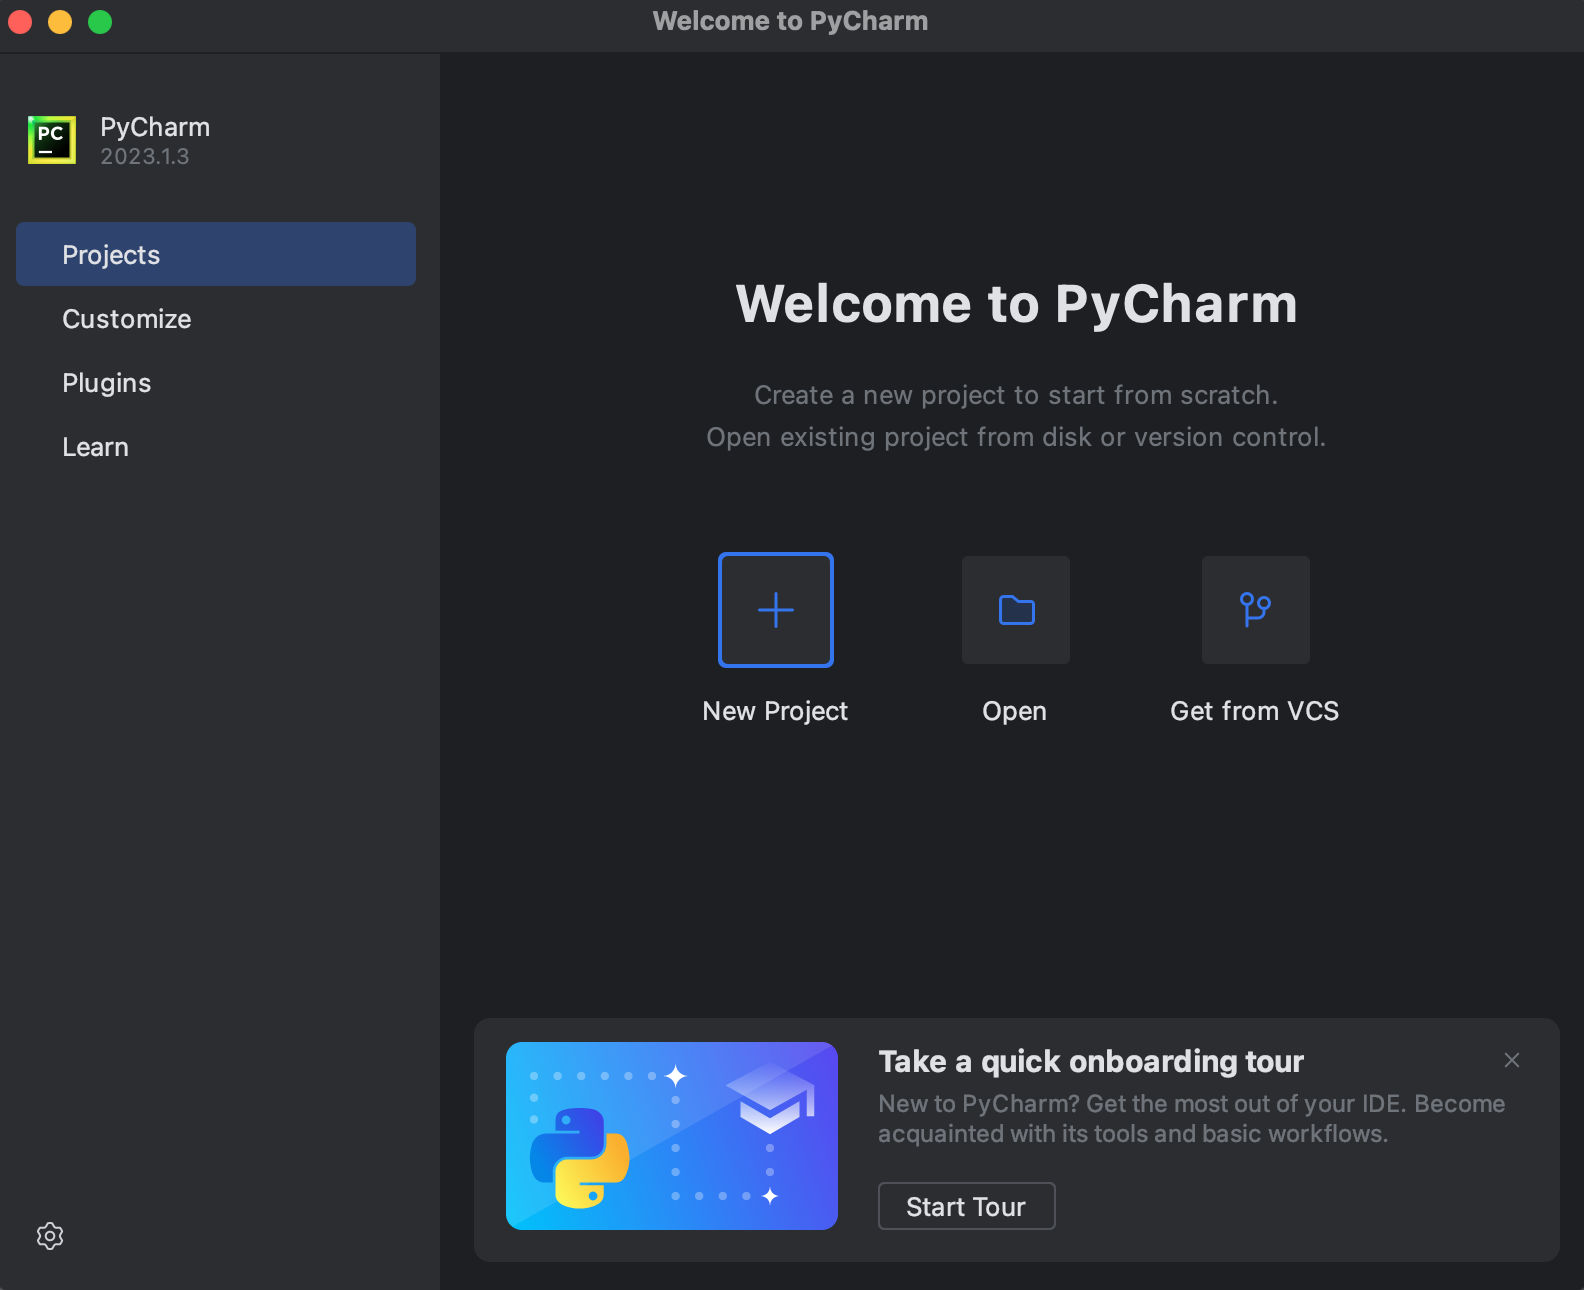
Step 3: Launch PyCharm Community Edition
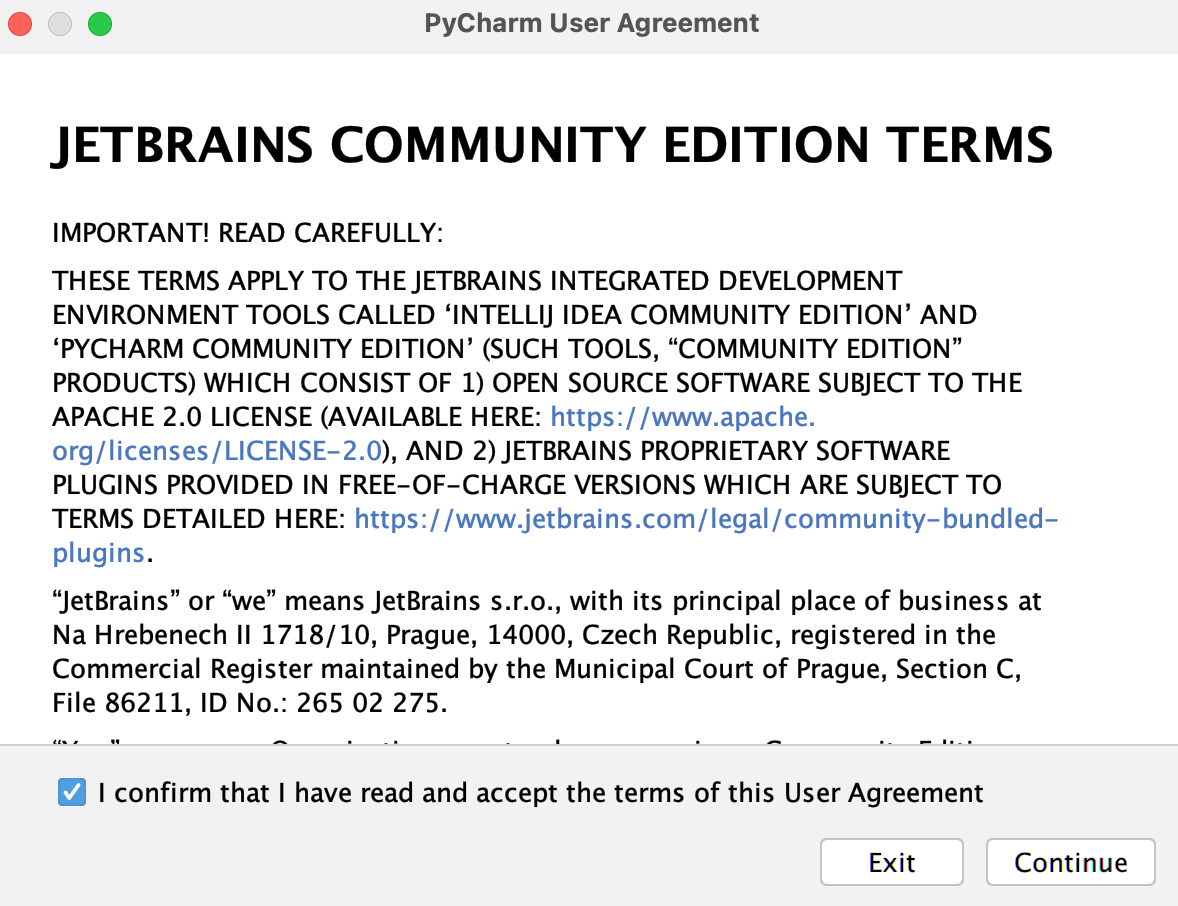
After the installation is complete, PyCharm can be found in your Applications folder (macOS) or in your list of installed programs (Windows). Open PyCharm to initiate the IDE and accept the security warning confirming your willingness to open the application. Follow the instructions and accept the PyCharm User Agreement terms.
For Windows users, you can open PyCharm through the Start menu or by typing "PyCharm" in the search bar.
For Linux users, you can open PyCharm through the applications menu or by typing pycharm in the terminal, depending on your specific installation process.
Creating and Running a Python File in PyCharm
One of the main reasons to use an IDE like PyCharm is the ease with which you can write and run Python code. Let's set up PyCharm Community Edition to run a Python file. Just a quick note: the steps to create and run a Python file in PyCharm might differ slightly based on whether you're on Windows, macOS, or Linux, so it's always a good idea to check out the OS-specific PyCharm documentation if you run into any hiccups!
Step 1: Create a New Project
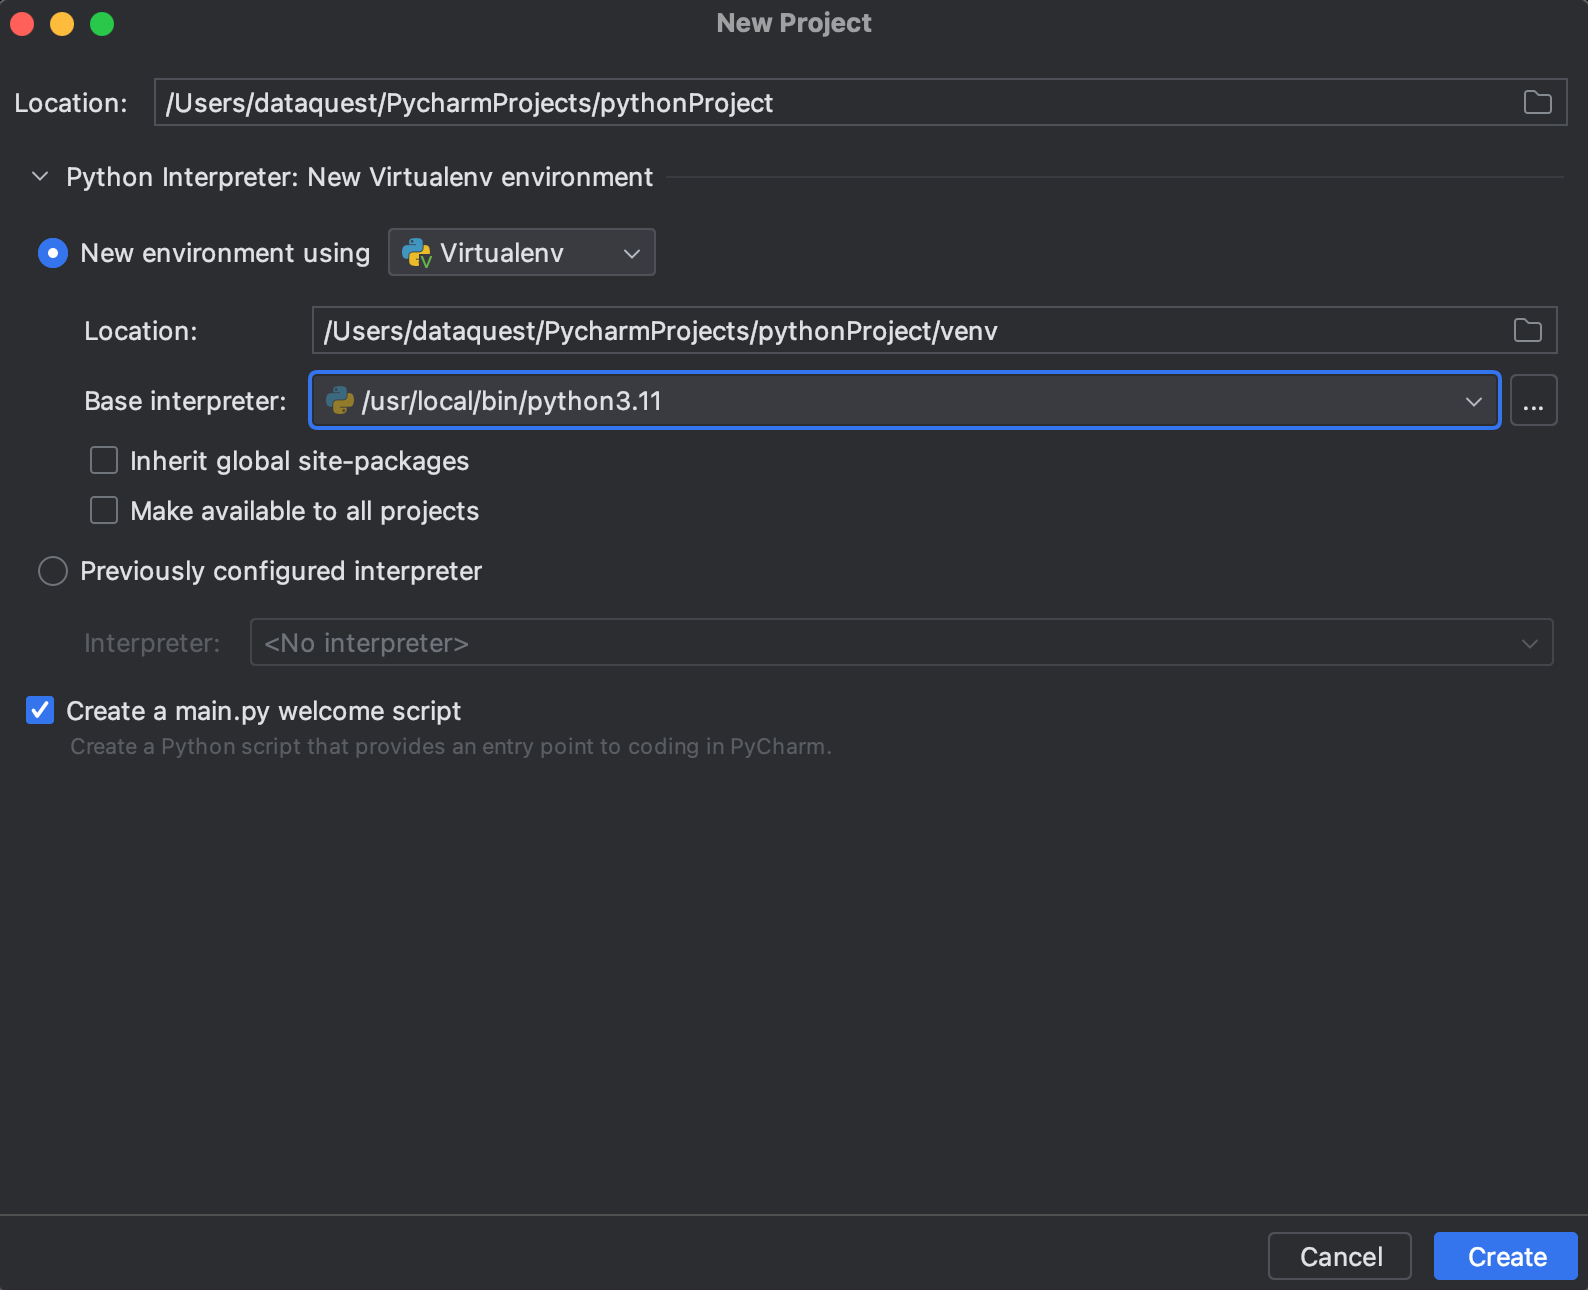
On the Welcome screen, select New Project.
Then specify the project location, environment, and Python interpreter. Select the most recent version of Python that you have installed.

If you do not see the option to select a Python base interpreter, you may need to install Python on your computer. If you're a Mac user check out this Dataquest blog post to learn how to install Python. If you're a Windows user, check out this blog post.
Leave the box checked that says "Create a main.py welcome script". This will create and open a Python script when the project is created.
Step 2: Create a New Python Script
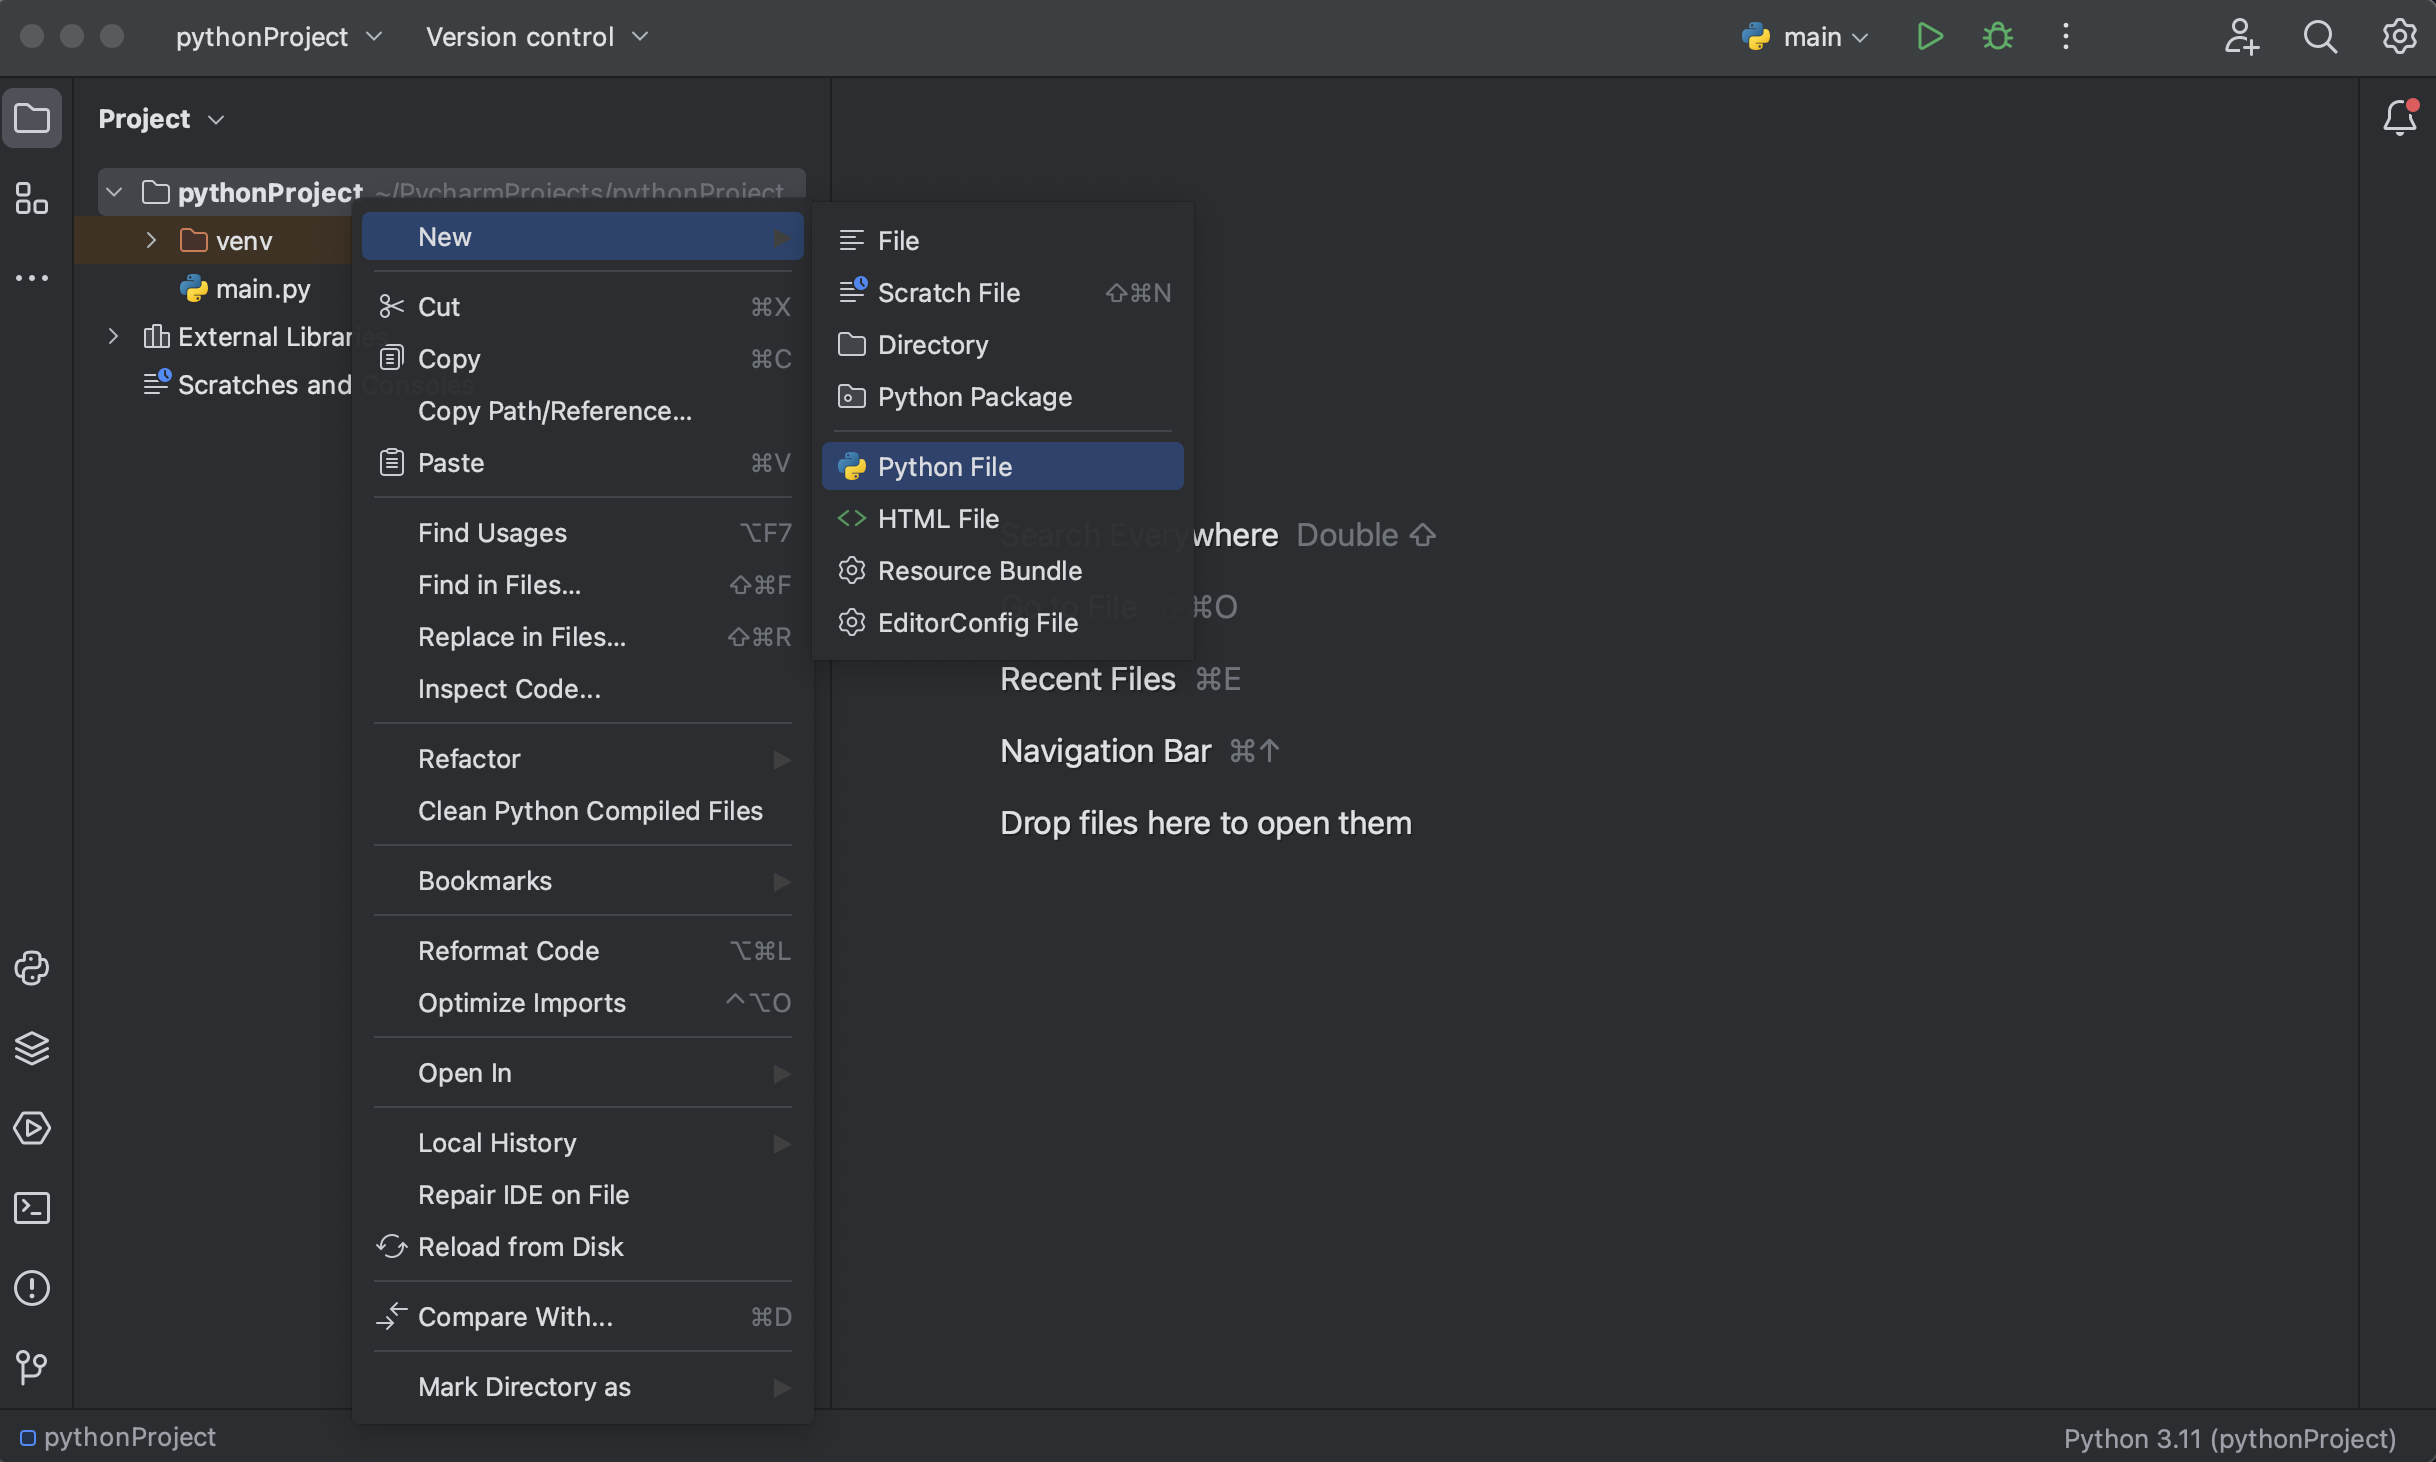
If you're greeted by the main.py file when the project opens, you're ready to start coding in Python. If you need to create a new Python file, right-click on your project in the "Project" pane, then select "New" > "Python File". You'll be prompted to enter a name for your file.
Step 3: Write Some Python Code
Once you've created your Python file, you can start writing code. For this tutorial, let's write a simple function that checks if a word is a palindrome (a word that reads the same backward as forward). Here's an example:
def is_palindrome(word):
    return word == word[::-1]

print(is_palindrome('radar'))  # This will print: True
print(is_palindrome('python'))  # This will print: False
Step 4: Run Your Python Code
To run your Python code, right-click anywhere in your code editor and select "Run [filename]", or click the green triangle above the code editor.

You'll see the output of your code in the "Run" pane at the bottom of the PyCharm window.
In the next section, we'll discuss how to use the Python console in PyCharm Community Edition.
Using the Python Console
The Python console is a built-in tool in PyCharm that allows you to execute Python commands interactively. It's a great place to experiment with code and test your functions.
Step 1: Open the Python Console
To open the Python console, go to "View" > "Tool Windows" > "Python Console" in the PyCharm menu.
Step 2: Use the Python Console
Once the Python console is open, you can start typing Python commands. The console will execute these commands immediately and show the results. For example, you can use the Python console to call the is_palindrome function we defined earlier. Right-click inside the code editor, then select "Run File in Python Console". We'll see the results from our Python script and then can continue to use the function:
True
False
>>> is_palindrome('noon')
True
In the next section, we'll discuss how to format Python code in PyCharm Community Edition.
Formatting Python Code
Writing clean, readable code is an important part of software development. PyCharm Community Edition comes with built-in tools to help you format your Python code according to the PEP 8 style guide.
To enable PEP 8 compliance checking, go to "PyCharm" > "Settings" > "Editor" > "Inspections". Under "Python", check "PEP 8 coding style violation", if it's not checked already. PyCharm will now highlight any parts of your code that violate the PEP 8 style guide.
Refactoring Python Code
Refactoring is the process of restructuring existing code without changing its external behavior. It's a way to improve the design, structure, and implementation of your code, while preserving its functionality.
One might ask, "Why bother with refactoring?" The reason is that refactoring can significantly enhance the readability and maintainability of your code. It makes your code more structured, efficient, and easier to understand. Furthermore, clean and well-structured code is simpler to extend or modify later on.
In PyCharm Community Edition, you can perform refactoring in a few clicks. But it's crucial to remember that after each refactoring step, you should run your tests to make sure the code still works as expected. This practice helps maintain the integrity of your code during the refactoring process.
Example 1: Renaming a Symbol
One of the most common refactoring tasks is renaming a symbol (a variable, function, class, method, etc.). To rename a symbol in PyCharm, right-click the symbol and select "Refactor" > "Rename". You'll be prompted to enter a new name for the symbol.
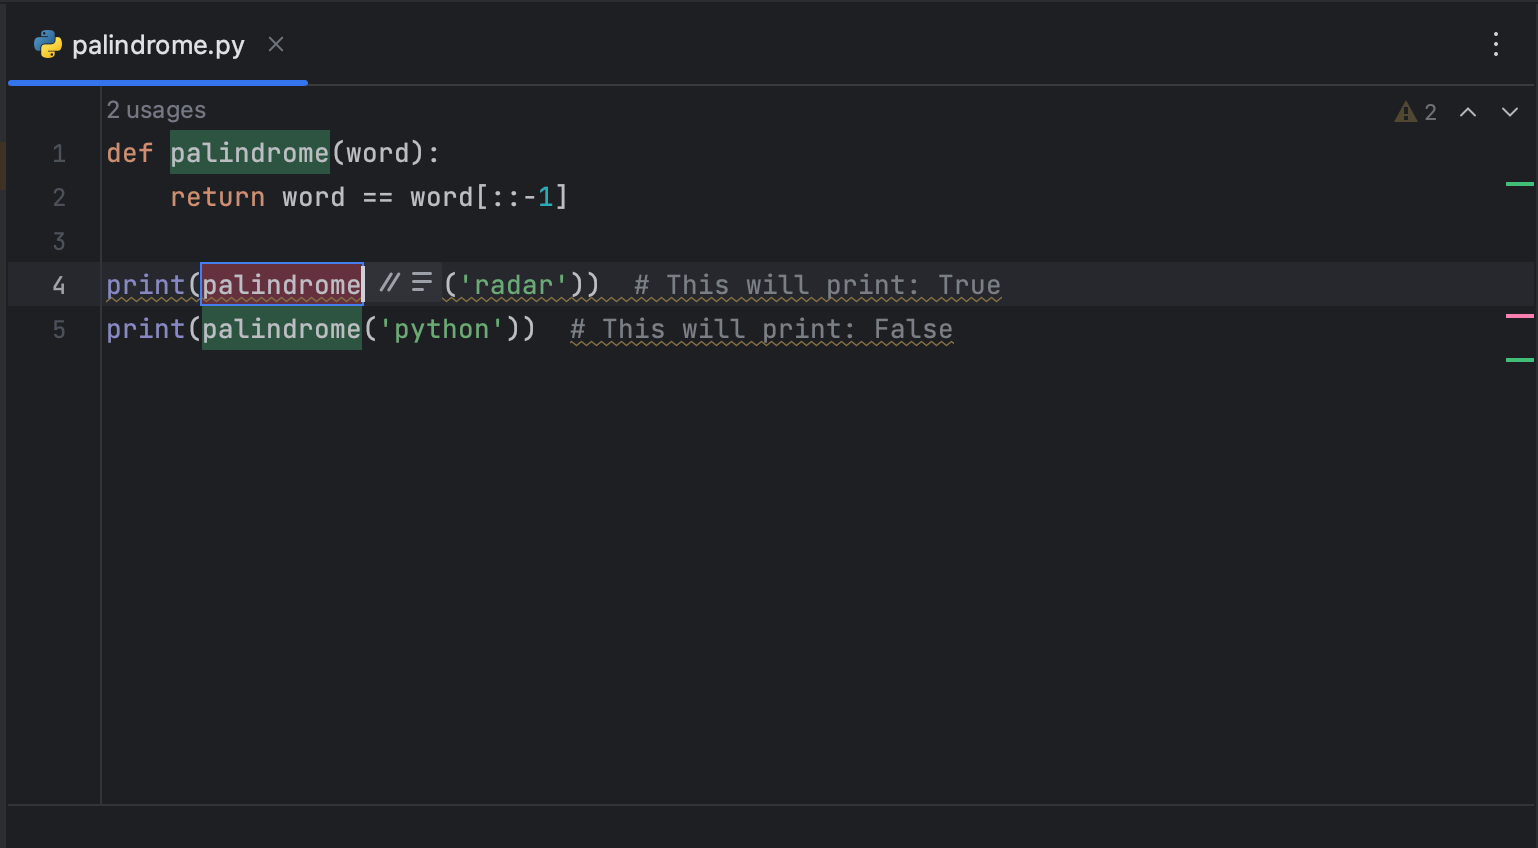
Now, all instances of is_palindrome have been changed to palindrome.
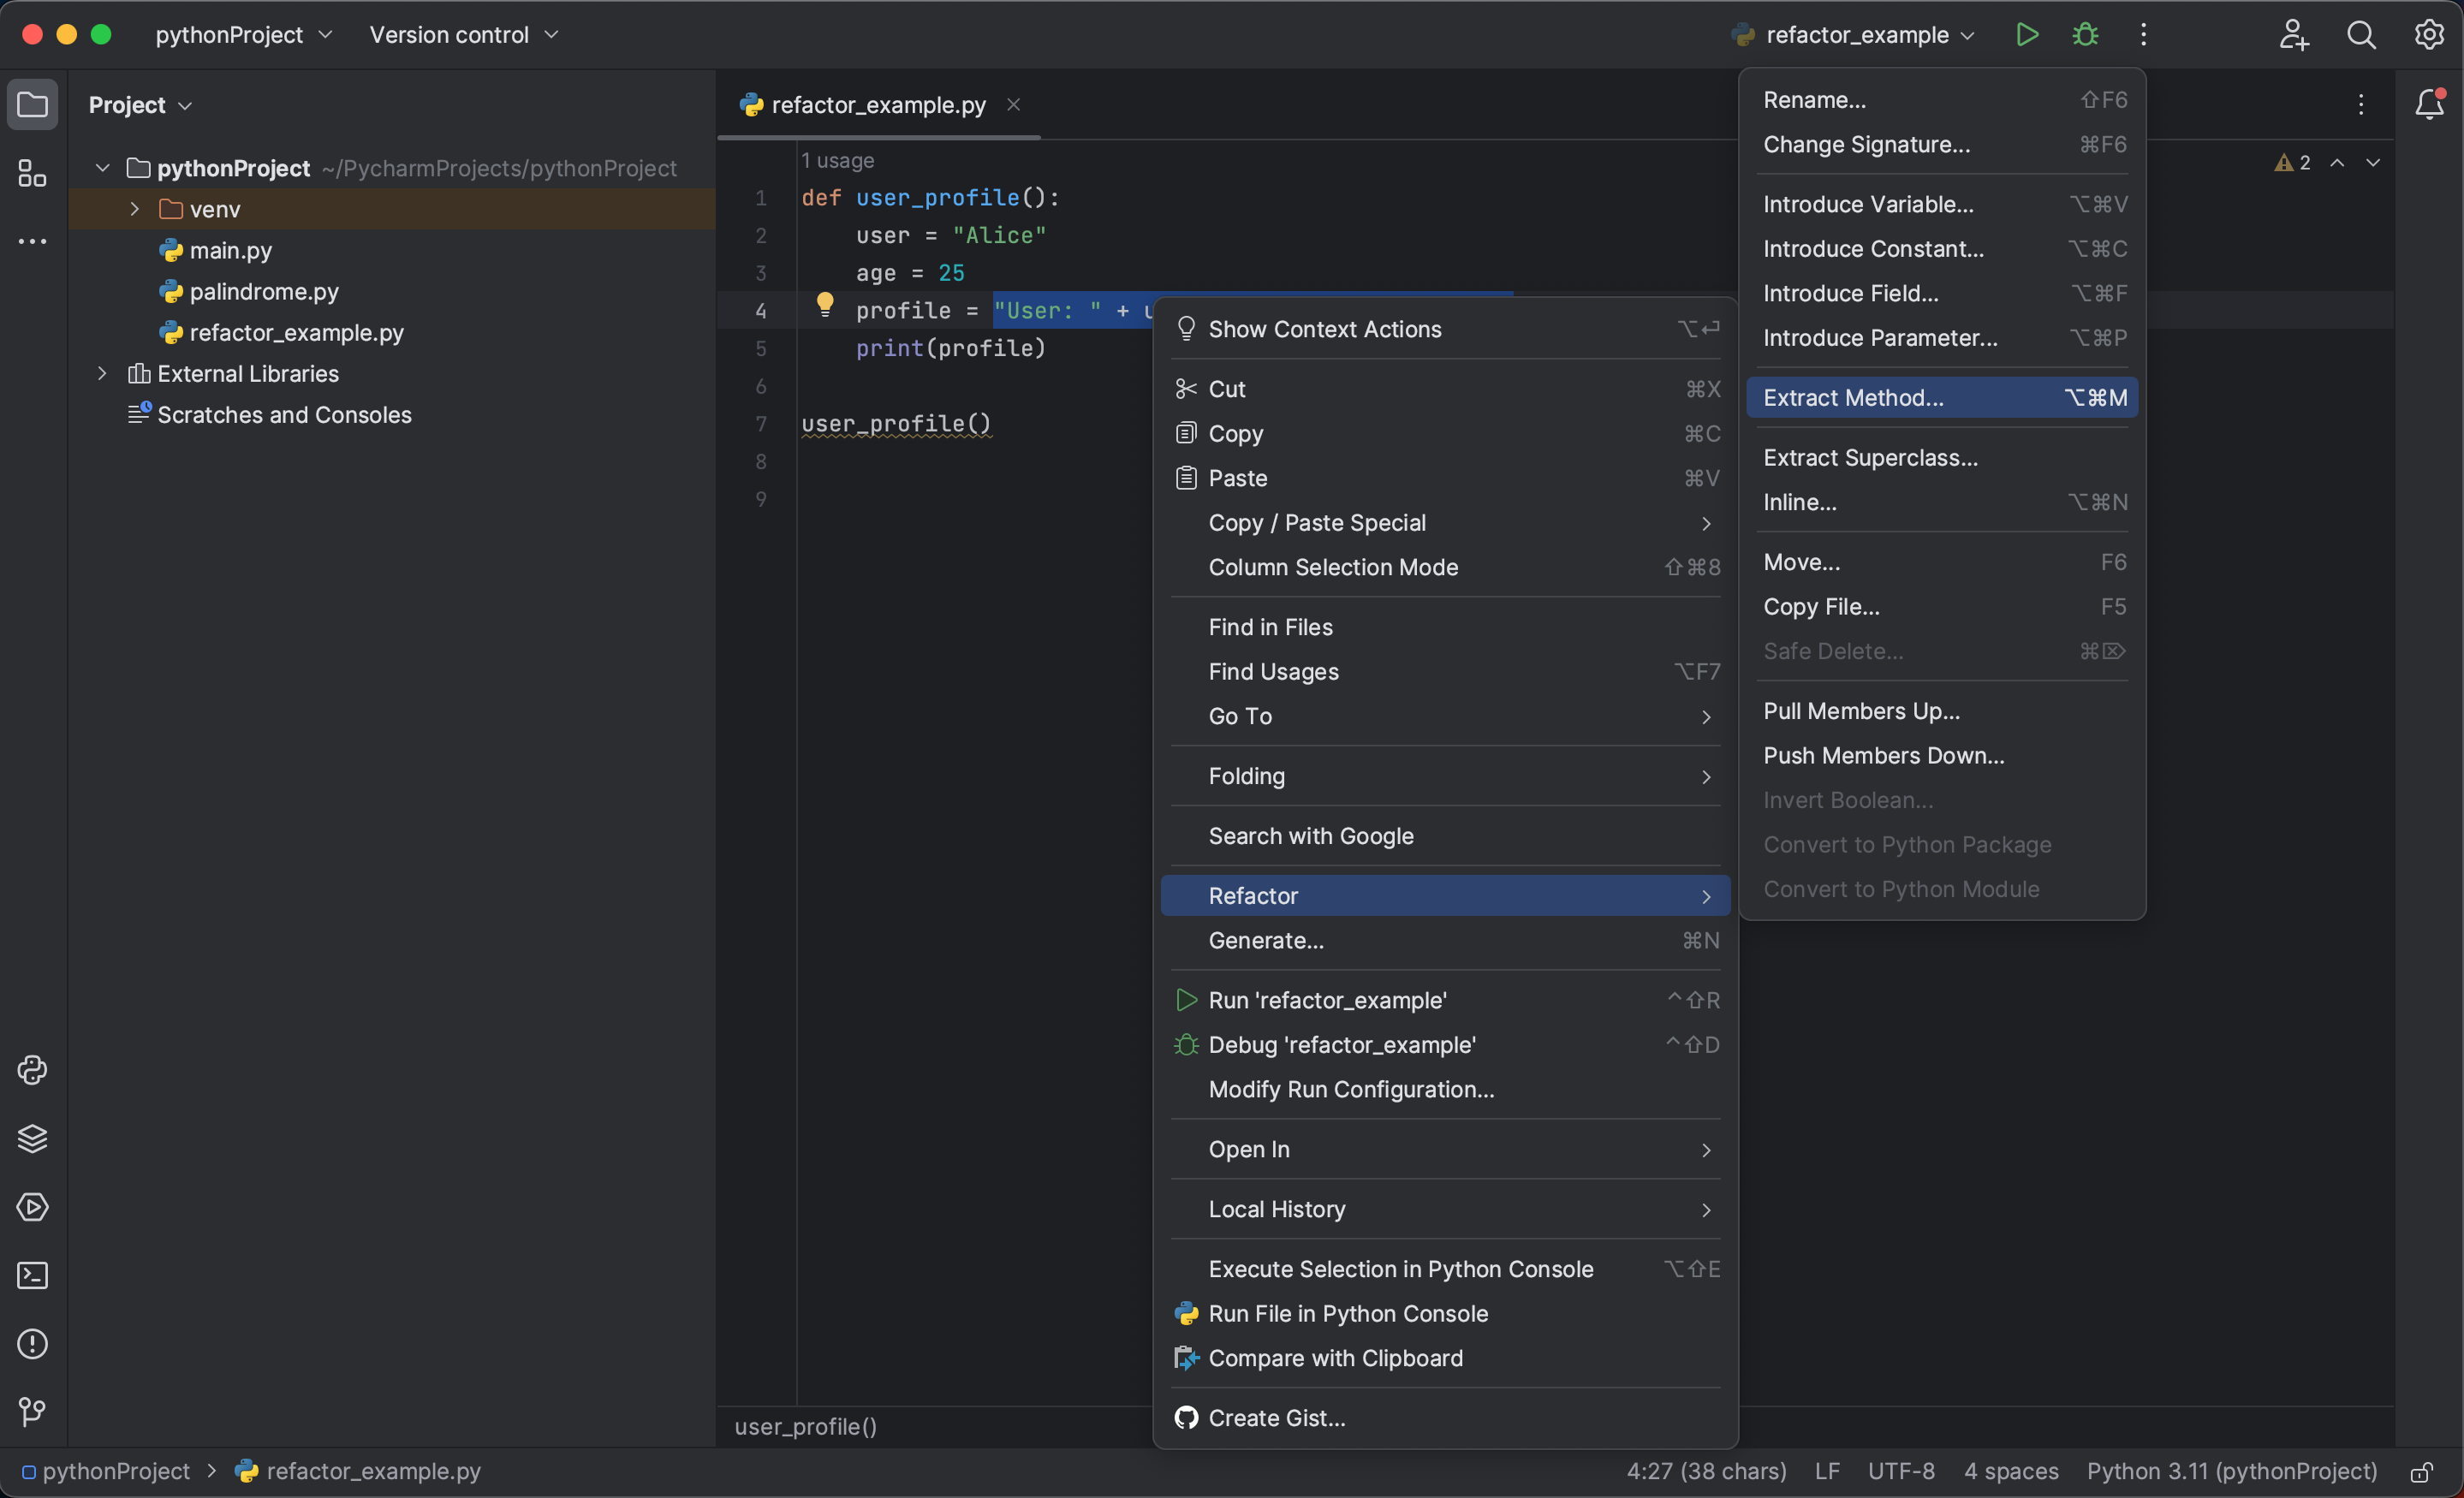
Example 2: Extracting a Variable, Constant, or Method
Another common refactoring task is extracting a piece of code into a variable, constant, or method. This can make your code more readable and reusable. To extract a piece of code in PyCharm, select the code, then right-click, select "Refactor" and choose an option.
Let’s see an example of the extract method feature. We'll start by creating a new Python file and pasting the following piece of code into it.
def user_profile():
    user = "Alice"
    age = 25
    profile = "User: " + user + ", Age: " + str(age)
    print(profile)

user_profile()
In this case, we can refactor the construction of the profile string into a separate method. To do this, we select the part of the code we want to extract, in this case, "User: " + user + ", Age: " + str(age). Then, right click and select "Refactor" > "Extract Method".
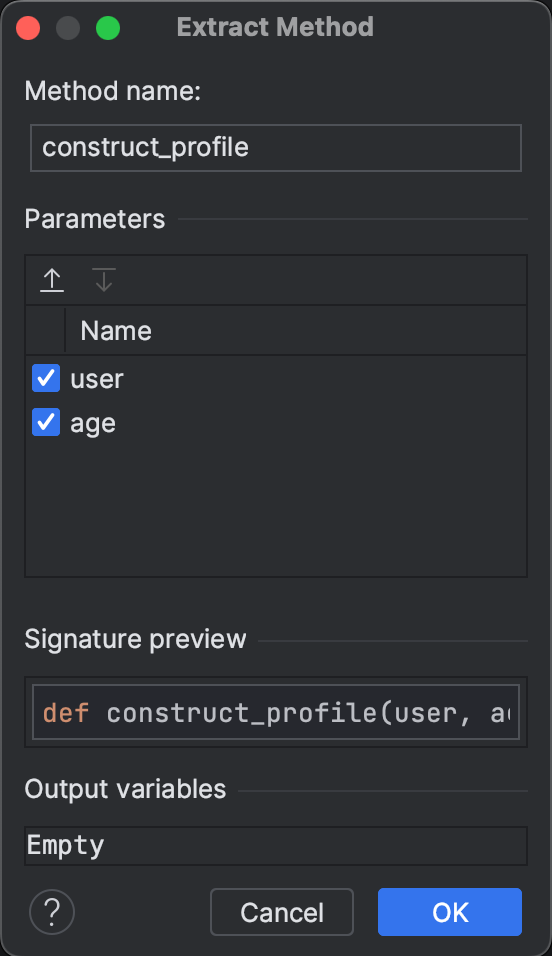
In the popup window, name the new method something like construct_profile. Then, toggle the order of the parameters so that user appears first and age appears second, similar to the structure we see in the profile. Logical parameter ordering makes your code easier to understand and use correctly.
Now, double check your work in the "Signature preview" then hit "OK".
Now our Python script looks like this:
def user_profile():
    user = "Alice"
    age = 25
    profile = construct_profile(user, age)
    print(profile)

def construct_profile(user, age):
    return "User: " + user + ", Age: " + str(age)

user_profile()
By using these refactoring tools, you can improve the quality of your Python code without changing its behavior.
Setting Up Virtual Environments
Virtual environments in Python are simply indispensable. Consider them as individual playgrounds for your projects, where each project gets its own set of dependencies. This becomes pivotal when you're working with multiple projects that require different versions of the same package. Not using these environments can lead to package conflicts which can disrupt your projects.
Luckily, we can create these individual playgrounds for our projects with the help of virtual environments. Each project gets its own custom environment, minimizing the risk of conflicts. This not only helps in maintaining the project's integrity but also makes the management of packages and dependencies far simpler.
If you're wondering how to go about setting up these environments, remember when we were setting up our first project? PyCharm made it super easy for us. But, just to make sure that we're all on the same page, let's delve into this critical concept a bit further.
Step 1: Create a New Project
To create a new project in PyCharm Community Edition, click "New Project" on the Welcome screen, or select "File" in the menu, then "New Project". You'll be prompted to enter a name for your project and choose a location where the project files will be stored.
Step 2: Set Up a Virtual Environment
In the "New Project" dialog, you'll also see an option to create a new virtual environment for your project. PyCharm Community Edition uses Virtualenv, or venv, to create virtual environments by default. Enter a name for your virtual environment, or leave it as the default venv.
Step 3: Start Using Your Virtual Environment
Once you've created your project, PyCharm Community Edition will automatically activate the virtual environment for you. Any packages you install using the PyCharm package manager or the terminal will be installed in this virtual environment, isolated from your other projects.
The process of setting up virtual environments is generally the same across different operating systems, but there might be slight differences in how to access the terminal or command line in PyCharm.
Conclusion
Congratulations! You've now set up your PyCharm Community Edition IDE for optimal Python development. We've covered a lot of ground in this tutorial, including:
- How to install PyCharm Community Edition
- Creating and running a Python file
- Using the Python console
- Formatting Python code
- Refactoring Python code
- Setting up virtual environments
By following these steps, you've created a powerful and flexible development environment that will support you in your Python projects. Whether you're a student on the Dataquest Backend Developer career path or a seasoned developer, PyCharm Community Edition has a lot to offer.
Remember, this is just the beginning of what you can do with PyCharm Community Edition. There are many more features and tools to explore. For more information, check out the official PyCharm documentation.
Happy coding!