Cloud Setup for Airflow (Part II)
You’ve built and tested your ETL pipeline locally using Apache Airflow and Docker — well done. But running it on your own machine has its limits. What happens when your laptop is off? Or when other teams need access? Or when your workload grows beyond what your local setup can handle?
In this next phase, we’ll bring your Airflow project to life in the cloud using Amazon Web Services (AWS). The goal? To build out the infrastructure that supports a reliable, automated, and scalable pipeline, no more manual restarts or local limitations.
Here’s what you’ll set up in this part of the tutorial:
- An S3 bucket to store your transformed CSV files
- A PostgreSQL database on Amazon RDS to persist Airflow metadata
- A custom IAM role to allow Airflow to interact securely with AWS
- A security group to manage traffic between services
- An Application Load Balancer (ALB) to expose the Airflow UI
- And a tested DAG that runs locally and successfully uploads to S3
By the end of this tutorial, you’ll have built the cloud infrastructure needed to support Airflow in a real deployment environment, and you’ll have verified that your DAG runs successfully from start to finish with S3 as its target destination.
You’ll create all of these AWS resources step-by-step, with clear instructions and the reasoning behind each one.
To follow along, you’ll need an AWS account. If you don’t have one, you can create a free account here. You’ll also need to create an Access Key ID and Secret Access Key from your root account to authenticate with AWS via the CLI. (We’ll use the root account just for simplicity in this practice project — not recommended in production.)
When setting up your AWS account, make sure you save your AWS Access Key ID and Secret Access Key for the root user as you'll need them in Part 3 when configuring the AWS CLI. Also record your default region setting in the top right of the AWS Console while you're creating resources during this tutorial; you'll need that setting as well.
Ready to launch into the cloud? Let’s get started, one resource at a time.
Amazon S3 Bucket – Store Pipeline Output
Earlier in our tutorial, we created Task 3 in our DAG — the one responsible for sending our final CSV to cloud storage. It looked like this:
# Task 3: Upload to S3
def upload_to_s3(**kwargs):
    run_date = kwargs['ds']
    bucket_name = 'your-bucket-name'
    s3_key = f'your-directory-name/events_transformed_{run_date}.csv'
    s3 = boto3.client('s3')
    s3.upload_file(transformed_path, bucket_name, s3_key)
    print(f"Uploaded to s3://{bucket_name}/{s3_key}")
This is the very last stop in our ETL pipeline — the part that loads data into the cloud. But for this to work, you’ll need to create a place for it to land. That’s where Amazon S3 comes in.
What Is Amazon S3?
Think of S3 as your pipeline’s cloud-based file cabinet. Every time your DAG runs, it creates a CSV file — and this final task uploads that file into a designated S3 bucket.
To make this work, you only need to configure two key values:
bucket_name: This is the name of the S3 bucket where the file will be stored.s3_key: This is the path and filename the file will be saved as inside that bucket.
These two values must exactly match the configuration of your AWS resources — let’s set those up now.
Creating an S3 bucket:
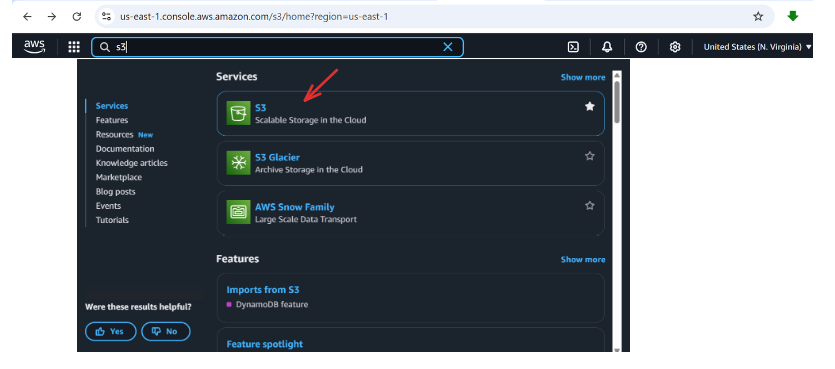
Go to the AWS Console → Search S3 → Click Create bucket
Under General configuration: Bucket type → General purpose ; Bucket name→your-bucket-name e.g.my-airflow-bucket (this is what will be assigned to bucket_name field, in upload_to_s3 in your task)
Leave all other fields as default.
Then scroll down to Block Public Access settings for this bucket:
- Uncheck “Block all public access” (we’re doing this for learning purposes)
- Acknowledge the warning checkbox that appears
Click Create bucket

Creating a bucket policy
Now that we’ve created our bucket, it’s time to give it permission to accept uploads.
By default, S3 buckets are locked down tight, and nothing can be uploaded until we explicitly allow it. That’s where a bucket policy comes in. We’ll use it to tell AWS:
Hey, let certain resources, like our Amazon Elastic Container Service (ECS) tasks, to put files into this specific folder.
Here’s how to do it:
Go to your newly created bucket and click it:
Click on the Permissions tab → Bucket policy → Edit
Under Edit bucket policy → Policy Generator (you should copy your Bucket ARN; we will use it in the next step)
Step 1: Select policy type
- Type of Policy →
S3 Bucket Policy
Step 2: Add statement(s)
- Effect →
Allow - Principal →
* - Actions →
PutObject - Amazon Resource Name (ARN)→ your-bucket-arn(
arn:aws:s3:::your-bucket-name/*)- Make sure to include the
/*at the end ofyour-bucket-namein the ARN field—this specifies access to all objects within the bucket, not the bucket itself.
- Make sure to include the
- Click on Add Statement
Step 3: Generate policy
- Click on Generate Policy
Once the policy is generated, copy the JSON file to your clipboard and then go back to your Bucket policy, under policy section, paste it into the bucket policy editor, and then click Save changes.
What this policy means is: allow everyone (*) in the world to upload (PutObject) files to the your-bucket-name S3 bucket. This setup is acceptable for practice but not recommended for production. The best practice is to define separate security groups and access controls.
So far, you’ve:
- Created an S3 bucket for storing your ETL output
- Added a bucket policy to allow uploads to a specific folder inside that bucket
But here’s the catch: just because the bucket can accept uploads doesn’t mean your Airflow tasks are automatically allowed to do so.
Airflow will be running inside an ECS container, and that container needs permission to call AWS services, like putting a file into S3.
That’s where the ecsTaskExecutionRole comes in.
This is the identity your ECS task assumes when it runs. By giving this role the right permissions, we can safely allow your DAG’s upload_to_s3() task to send data to your S3 bucket without making your bucket publicly open in a real deployment.
Let’s go ahead and create that role.
Creating the ecsTaskExecutionRole
Go to the AWS Console → Search IAM and open it.
Click on Roles under Access management → Create role.
Step 1: Select trusted entity; Trusted entity type → AWS service; Use case →Service or use case – Search for and select Elastic Container Service → Use case → Choose Elastic Container Service Task, and click Next
Step 2: Permission policies; Search for and select AmazonECSTaskExecutionRolePolicy by placing a check in the box next to its name. This policy allows ECS tasks to call AWS services on your behalf. Click Next.
Step 3: Name, review, and create; Role name → Enter ecsTaskExecutionRole → Leave the description as the default. Click Create role.
Once done, the ecsTaskExecutionRole will be created successfully. However, we still need to explicitly attach an additional policy—besides AmazonECSTaskExecutionRolePolicy—to allow ECS to put objects into our S3 bucket.
Grant S3 Access with an Inline Policy
To allow this role to put files into your bucket — and specifically into the folder referenced in your DAG’s s3_key — do the following:
In the IAM Console, go to Roles; Find and click on ecsTaskExecutionRole; then under Permissions → Add permissions → Create inline policy; under the policy editor, choose JSON, and paste the following:
{
    "Version": "2012-10-17",
    "Statement": [
        {
            "Effect": "Allow",
            "Action": "s3:PutObject",
            "Resource": "arn:aws:s3:::your-bucket-name/our-files/*"
        }
    ]
}
Make sure:
your-bucket-namematches the name of your actual S3 bucket.-
our-filesmatches the folder path in your DAG’ss3_key— for example:s3_key = f'our-files/events_transformed_{run_date}.csv'
Click Next, give your policy a name(e.g AirflowS3UploadPolicy ), and click Create policy
- What we are basically saying is: allow the role (in this case,
ecsTaskExecutionRole) to upload files (PutObject) into any object key under theour-files/folder in your specified S3 bucket.
(Note: The folder nameour-filesin theResourcefield can be any name—just make sure it matches the directory name (your-directory-name) you reference in your DAGs, specifically in thes3_keyfield.)
Congratulations; you’ve now connected the dots:
- The S3 bucket is ready to store output
- The bucket policy allows uploads to a specific folder
- The ECS task role (
ecsTaskExecutionRole) is now authorized to put files in that folder
With this setup, when your DAG runs and hits the upload_to_s3() task, it will have everything it needs to push the file to the right place in S3 — securely, automatically, and cloud-natively.
Now that our pipeline has permission to send data to S3 and ECS knows how to do it securely — it’s time to open the right doors for all our cloud services to communicate.
Adding a Security Group
Now that you’ve set up your S3 bucket and given your ECS tasks permission to upload to it, the next step is to make sure all your AWS services, Airflow UI, RDS database, and ECS containers — can talk to each other securely.
That’s where a Security Group comes in.
Think of a security group as a cloud firewall — it controls which types of traffic are allowed in and out of your services.
In our Airflow deployment, we need to do two things:
- Let users access the Airflow UI (via HTTP on port
80, exposed through an Application Load Balancer) - Let ECS connect to the RDS database (on port
5432, which is PostgreSQL’s default)
These open up the essential communication pathways your pipeline depends on.
Creating the Security Group
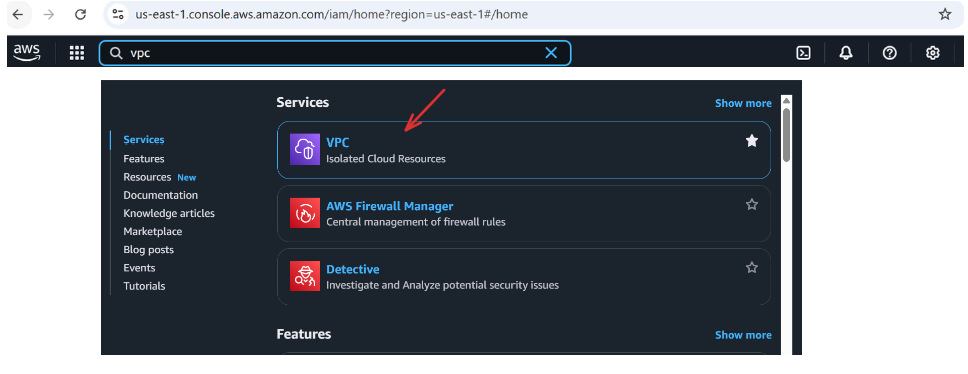
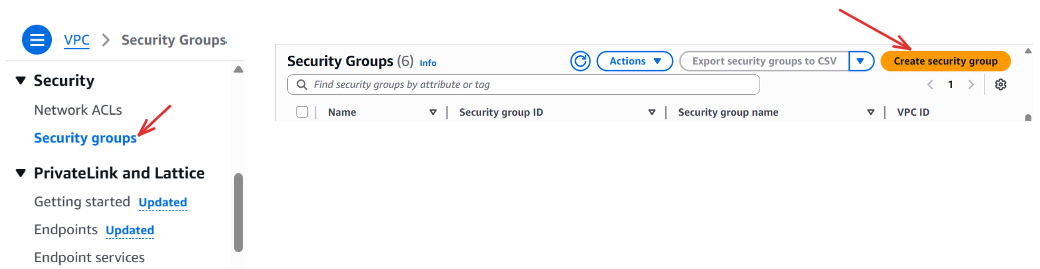
To create a security group, go to the AWS Console → Search for VPC → Under Security, select Security Groups → Click Create security group.
Under Basic Details; Security group name → Enter the name of your security group (e.g., my-airflow-sg) → Description → Add a brief description (e.g., “Security group for Airflow resources”) → VPC → Leave it/Choose the default vpc
Under Inbound rules → click Add rule to add the first set of rules:
- First Inbound rules:
- Type →
HTTP; Protocol →TCP; Port range →80; Source→Custom, 0.0.0.0/0; Description - optional→Allow all users to access
- Type →
- Click
Add ruleagain to add a second set of rules - Second Inbound rules:
- Type →
PostgreSQL; Protocol →TCP; Port range →5432; Source→Custom, 0.0.0.0/0; Description - optional→Allow ecs to connect to our db
- Type →
Leave anything else as default, and click Create security group.
And that’s it — you’ve successfully created a security group for your Airflow project.
Allowing access from 0.0.0.0/0 means anyone on the internet can attempt to reach your resource — which is fine for testing but not safe in production.
In a real deployment, you should:
- Create separate security groups for ECS and RDS
- Limit RDS access to only ECS and/or the ALB
- Restrict HTTP traffic to only known IPs (or your team’s VPN)
For now, though, this setup gives you the flexibility to move quickly while developing and testing.
Next, we’ll use this security group when setting up Amazon RDS for Airflow’s metadata — and later attach it to our ALB and ECS tasks to control network access across the pipeline.
Setting Up an Application Load Balancer (ALB)
Now that our services can communicate and the security group is in place, it’s time to make your Airflow UI publicly accessible so you (or your team) can open it in a browser anytime, from anywhere.
That’s the job of an Application Load Balancer.
Think of the ALB as your project’s front door — it takes in all incoming HTTP traffic and routes it to the right ECS task running your Airflow api-server.
This gives your application a single, public-facing URL and ensures that requests are only forwarded to healthy, running containers behind the scenes.
But before we create the ALB itself, we need to define where it should send traffic. That’s done using a target group.
i. Create a Target Group
The target group is a collection of resources (in our case, ECS tasks) that the ALB will forward traffic to.
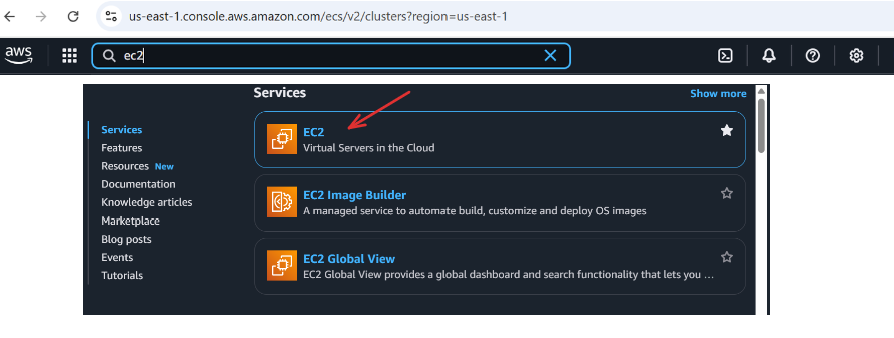
Go to AWS Console → Search ec2 and click on it.
Under Load Balancing, select Target Groups, and click Create target group ;
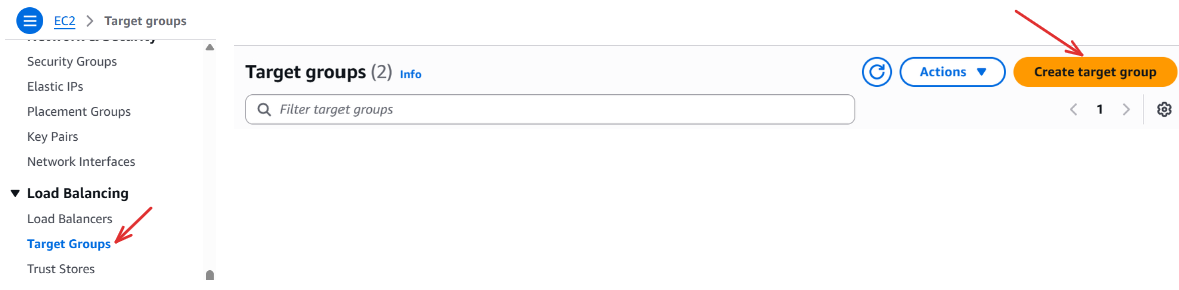
Step 1: Specify group details:
Basic configuration: Choose a target type → ip addresses ; Target group name → your-target-group-name (e.g my-airflow-tg) ; Protocol → HTTP ; Port → 8080 ; IP address type → IPV4 ; VPC → Select the default ; Protocol version → HTTP1
Health checks: Health check protocol → HTTP ; Health check path → / (to perform health checks on the root)
Click Next
Step 2: Register targets:
Leave everything else as default, then click Create target group.
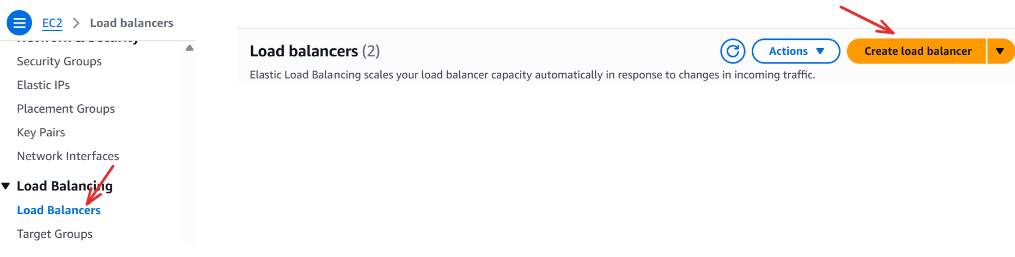
ii. Create the Application Load Balancer
Now that we have the target group created, let’s move on to creating the Application Load Balancer (ALB). In the EC2 Dashboard still, scroll down to the Load Balancing section → Click on Load Balancers → Then click Create Load Balancer :
Compare and select load balancer type: Load balancer types → Application Load Balancer → create
Under Basic configuration: Load balancer name → your-alb-name(e.g. my-airflow-alb); Scheme → Internet-facing ; Load balancer IP address type → IPV4
Under Network mapping: VPC → select-your-default-vpc ; Availability Zones and subnets → select all listed
Under Security groups: Security groups → select-your-security-group-name (i.e. the security group we created above)
Under Listeners and routing: Protocol → HTTP; Port → 80; Default action → select-your-target-group (i.e. the target group we created above)
Keep everything as default and click Create Load Balancer.
That’s It — You Now Have an ALB!
Give it a minute or two to finish provisioning.
Once it’s ready, head back to the Load Balancers page and look for the DNS name of your ALB — this will look something like:
my-airflow-alb-1234567890.us-east-1.elb.amazonaws.com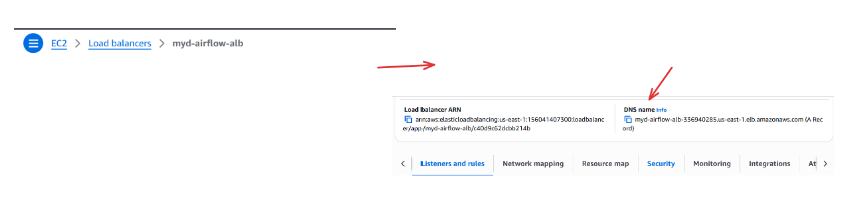
Make sure to note this URL — you’ll use it to configure our ECS services and access the Airflow UI once everything is deployed.
Coming up next: we’ll set up a database (Amazon RDS) so Airflow has a place to store its state and metadata. Let’s give Airflow a memory!
Amazon Relational Database Service(RDS)
Now that we’ve created an S3 bucket for our uploads, assigned the necessary IAM roles, set up a security group to manage traffic, and configured an Application Load Balancer to expose the Airflow UI, our pipeline is almost fully cloud-ready.
So… what do you think we need next?
We’ve built the system, exposed the interface, and opened communication between services — but where does Airflow actually store everything it knows?
By default, Airflow uses a lightweight SQLite database, and while that’s fine for local development, it just won’t cut it in the cloud.
That’s why we’re now switching to Amazon RDS, using a managed PostgreSQL database.
Airflow doesn’t just run tasks — it also remembers:
- Which DAGs were triggered
- What their outcomes were
- Who ran them, and when
- User accounts, roles, login credentials
- Your entire operational history
All of this needs to live somewhere persistent, resilient, and accessible from anywhere — and that’s exactly what RDS gives us.
Let’s set it up.
Creating a PostgreSQL Database with Amazon RDS
We’ll use the Standard Create option to spin up a simple, cloud-managed PostgreSQL instance.
Go to AWS Console → Search Aurora and RDS, and open it.
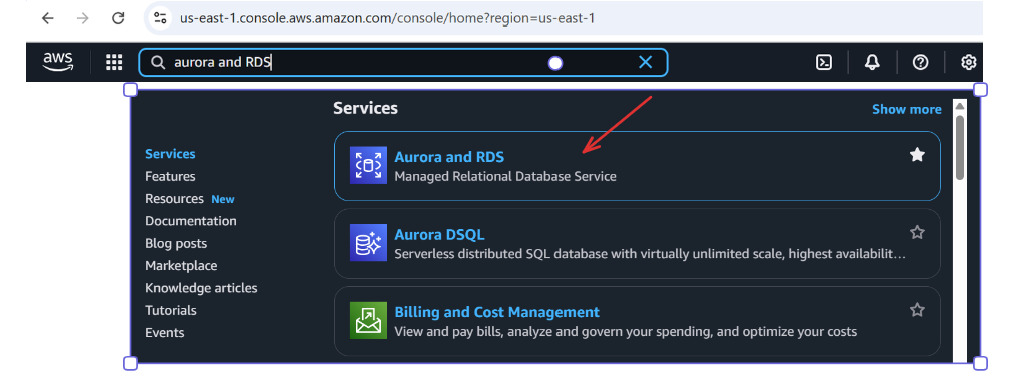
Under Databases select create database.

Under Choose a database creation method → Standard create
Under Engine options → PostgreSQL
Under Templates → Free tier (This gives us a simpler instance for free of up to 12 months, ideal for development).
Under Settings: DB instance identifier → your-db-identifier-name (e.g. my-database) ; Master username → your-db-username (e.g. postgres) ; Credentials management → Self managed → Master password (create a strong password and save it somewhere safe).
Under Instance configuration: DB instance class → Burstable classes (includes t classes) → db.t3.micro.
Under Connectivity: Compute resource → Don’t connect to an EC2 compute resource ; Network type → IPv4 ; Virtual private cloud (VPC) → select-your-default-vpc ; DB subnet group → select-your-default-db-subnet-group ; Public access → yes ; VPC security group (firewall)→ choose existing → select-your-security-group (the one we created earlier e.g. my-airflow-sg ).
Leave everything else as default, then Click Create database.
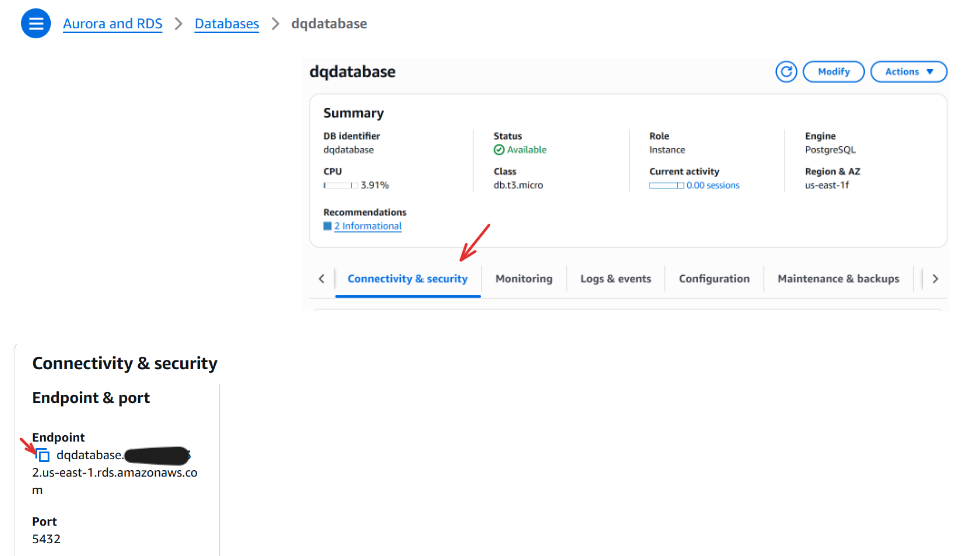
It may take a few minutes to provision. Once it’s ready, the status will change to Available.
Once the database is ready:
- Click on your new database
- Scroll to Connectivity & security
- Copy the endpoint — it will look something like:
my-database.1234567890.us-east-1.rds.amazonaws.comYou’ll use this endpoint to configure your Airflow Docker image and connect the ECS task to the metadata database.
With your RDS instance up and running, Airflow now has a persistent, cloud-based memory to keep track of tasks, users, and more, ready to support your workflow reliably, even as containers spin up or down.
Updating Our Docker for Local S3 Testing
Now that we’ve set up all the necessary AWS resources — especially our S3 bucket — it’s time to test the full pipeline locally before deploying anything to the cloud.
We’re not touching RDS or the Application Load Balancer just yet. For now, we just want to make sure our DAG can run from start to finish and successfully upload the final CSV to S3.
To do that, we’ll:
- Update our Docker setup with the required Python dependencies (like
boto3) - Uncomment Task 3 in our DAG to enable the S3 upload
- And run everything locally to verify it works as expected
Step 1: Navigate to Your Project
Before anything else, open your terminal and move into the directory containing your Airflow project — the one with your docker-compose.yaml file: e.g.,
cd path/to/your/airflow-dockerStep 2: Configure AWS Credentials
Next, let’s give your local environment access to your AWS account. Add the following environment variables to your docker-compose.yaml under the environment section of the x-airflow-common block:
    AWS_ACCESS_KEY_ID: your-aws-access-key
    AWS_SECRET_ACCESS_KEY: your-aws-secret-access-key
    AWS_DEFAULT_REGION: your-region-as-indicated-in-your-aws-account e.g., us-east-1
These keys authenticate your Airflow container with AWS and allow it to upload files to S3 using the boto3 library.
Your updated section in docker-compose.yaml should look something like this:
x-airflow-common:
  &airflow-common
  image: ${AIRFLOW_IMAGE_NAME:-apache/airflow:3.0.1}
  environment:
    &airflow-common-env
    AIRFLOW__CORE__EXECUTOR: LocalExecutor
    AWS_ACCESS_KEY_ID: your-aws-access-key
    AWS_SECRET_ACCESS_KEY: your-aws-secret-access-key
    AWS_DEFAULT_REGION: your-region-as-indicated-in-your-aws-account e.g., us-east-1

    # ... other Airflow settings
Reminder: These credentials are for development purposes only. Never expose AWS secrets in public projects or production code.
Once this is done, you're ready to proceed with updating your DAG and testing the pipeline end-to-end.
Step 2: Finalize Your DAG
Now that the S3 bucket is ready and permissions are in place, go ahead and update your DAG.
Here’s how your final DAG should look:
from airflow import DAG
from datetime import datetime, timedelta
from airflow.operators.python import PythonOperator
import os
import pandas as pd
import random
import boto3

default_args = {
    'owner': 'your-name',
    'retries': 3,
    'retry_delay': timedelta(minutes=1)
}

output_dir = '/opt/airflow/tmp'
raw_file = 'raw_events.csv'
transformed_file = 'transformed_events.csv'
raw_path = os.path.join(output_dir, raw_file)
transformed_path = os.path.join(output_dir, transformed_file)

# Task 1: Generate dynamic event data
def generate_fake_events():
    events = [
        "Solar flare near Mars", "New AI model released", "Fusion milestone", "Celestial event tonight",
        "Economic policy update", "Storm in Nairobi", "New particle at CERN", "NASA Moon base plan",
        "Tremors in Tokyo", "Open-source boom"
    ]
    sample_events = random.sample(events, 5)
    data = {
        "timestamp": [datetime.now().strftime("%Y-%m-%d %H:%M:%S") for _ in sample_events],
        "event": sample_events,
        "intensity_score": [round(random.uniform(1, 10), 2) for _ in sample_events],
        "category": [random.choice(["Science", "Tech", "Weather", "Space", "Finance"]) for _ in sample_events]
    }
    df = pd.DataFrame(data)
    os.makedirs(output_dir, exist_ok=True)
    df.to_csv(raw_path, index=False)
    print(f"[RAW] Saved to {raw_path}")

# Task 2: Transform data and save new CSV
def transform_and_save_csv():
    df = pd.read_csv(raw_path)
    df_sorted = df.sort_values(by="intensity_score", ascending=False)
    df_sorted.to_csv(transformed_path, index=False)
    print(f"[TRANSFORMED] Sorted and saved to {transformed_path}")

# Task 3: Upload to S3
def upload_to_s3(**kwargs):
    run_date = kwargs['ds']
    bucket_name = 'your-bucket-name'
    s3_key = f'your-directory-name/events_transformed_{run_date}.csv'
    s3 = boto3.client('s3')
    s3.upload_file(transformed_path, bucket_name, s3_key)
    print(f"Uploaded to s3://{bucket_name}/{s3_key}")

# DAG setup
with DAG(
    dag_id="daily_etl_pipeline_with_transform",
    default_args=default_args,
    description='Simulate a daily ETL flow with transformation and S3 upload',
    start_date=datetime(2025, 5, 24),
    schedule='@daily',
    catchup=False,
) as dag:
    task_generate = PythonOperator(
        task_id='generate_fake_events',
        python_callable=generate_fake_events
    )
    task_transform = PythonOperator(
        task_id='transform_and_save_csv',
        python_callable=transform_and_save_csv
    )
    task_upload = PythonOperator(
        task_id='upload_to_s3',
        python_callable=upload_to_s3,
    )

    # Task flow
    task_generate >> task_transform >> task_upload
Important:
- Replace
'your-bucket-name'with your actual S3 bucket name - Replace
'your-directory-name'in thes3_keywith the exact folder name used in your IAM role’s S3 policy — e.g.,our-files
Step 3: Run It Locally
-
Make sure Docker Desktop is open and running
-
If you have containers already running, take them down cleanly:
docker compose down -v -
Save your DAG file and start your environment:
docker compose up -d -
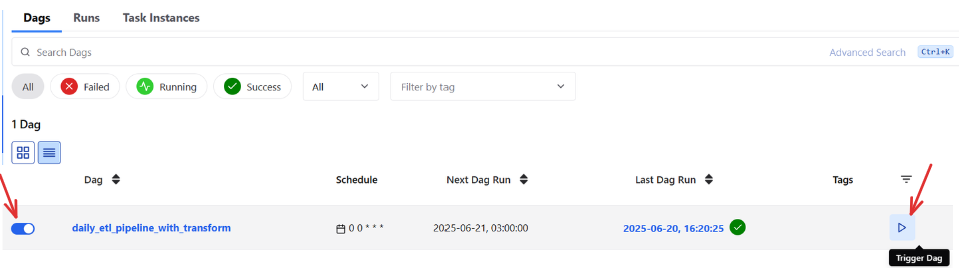
Once all containers are marked as healthy, go to:
-
Log in, turn on your DAG, and trigger it manually
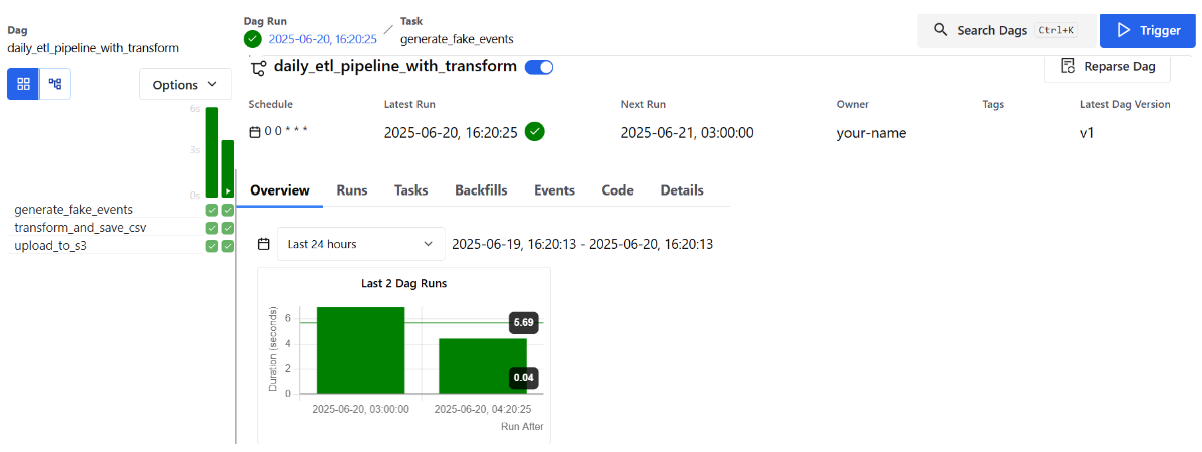
What to Expect
-
All three tasks should run without errors

-
The transformed CSV file should appear in your S3 bucket under the correct folder (e.g.,
our-files/)
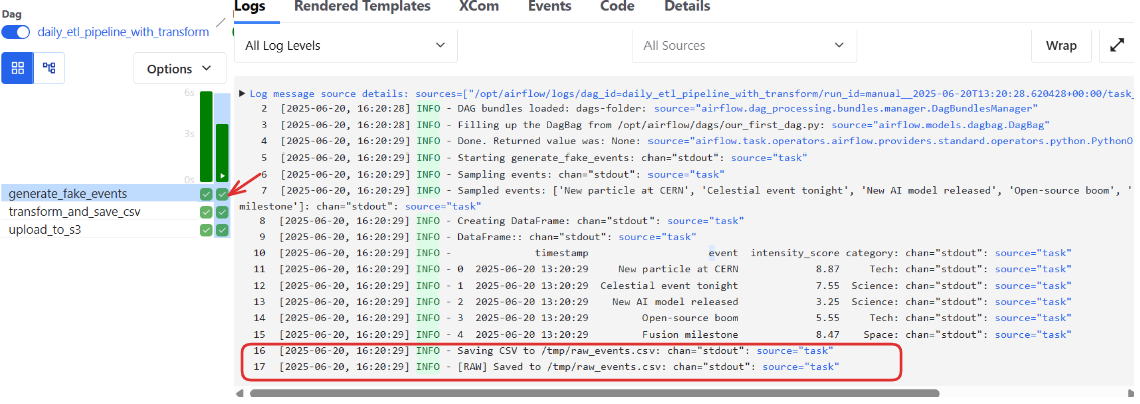
-
You can double-check by visiting your bucket in the AWS console and browsing to the file like:

s3://your-bucket-name/our-files/events_transformed_2025-06-20.csv- The logs also confirm the activities that happened when we triggered our dags
If you hit an obstacle or this part feels overwhelming, no worries; you can always revisit the first part of this tutorial to review the Docker and DAG setup before continuing.
You’ve got this, and now your DAG is cloud-aware and tested from end to end!

Wrap-Up & What’s Next
At this point, you've done a lot of the heavy lifting — and you’ve moved far beyond just running Airflow locally.
You’ve:
- Set up essential AWS resources like an S3 bucket, ALB, RDS, IAM roles, and a security group
- Built a working DAG that simulates a real ETL process
- Configured and tested your Airflow project to successfully upload files to S3
- Gained hands-on experience editing and running Airflow inside Docker containers
This phase gave you a strong foundation in both DAG design and cloud-aware orchestration while keeping everything testable and manageable in your local environment.
But now it’s time to go further.
In the next and final part of this tutorial, Deploying Airflow to the Cloud with Amazon ECS (Part III), we’ll deploy your Airflow pipeline fully to the cloud. You’ll learn how to:
- Create and push a custom Docker image to Amazon ECR/Repository
- Launch a PostgreSQL metadata database using Amazon RDS
- Configure Airflow to use your RDS backend and run reliably in production
- Deploy all Airflow components to Amazon ECS (Fargate)
- Route traffic through an Application Load Balancer, giving you a public Airflow UI
By the end of Part III, you’ll have a fully operational, cloud-hosted Airflow environment — automated, scalable, and production-ready. Let’s do it!