10 Git Skills You Still Need to Know for Version Control

I hope this never happens to you―because it happened to me once and it was awful! While working on a complex software project with a team of developers from around the world, one of my worst nightmares became a reality: I accidentally deleted some critical code by overwriting a colleague's work. But the worst part was, we didn't have a backup! I spent hours cleaning up my mistake by meticulously rebuilding my teammate's work.
Terrifying scenarios like these are why developers rely on Git, a version control system that enables teams to collaborate on software projects safely. In today's increasingly distributed workforce, investing time in acquiring Git skills is one of the smartest moves you can make for your career.
In this post, I'll go over the fundamentals of Git, share lots of practical tips, and encourage you to learn Git. We'll look at key concepts, from basic commands to advanced features, to give you the confidence to use Git effectively in your projects.
To connect the dots between these skills and advancing your tech career, Dataquest's Tooling Essentials for Python Users course is a great hands-on approach to grow your Git skills using the command line.
Ready to discover how you can streamline your workflow, collaborate efficiently, and become a Git pro? Let's Git to it!
Why you still need Git skills
I think everyone can agree that having a robust toolkit is a requirement for staying competitive in today's tech industry. To that end, Git has become one of the most important tools for developers, and its significance is only going to grow in the coming years.*
Today, Git is a foundational element of the modern developer experience—93% of developers use it to build and deploy software everywhere.
Source: GitHub
When I first got the hang of using Git, I was so relieved. Instead of constantly worrying about losing progress or overwriting files (again!), I could just focus on writing quality code and collaborating with my team. It was a game-changer for me.
Git skills continue to be more valuable than ever. They help us stay organized, work efficiently with others, and contribute to cutting-edge open-source projects in fields like AI and machine learning.* Plus, with more companies embracing the post-pandemic remote work culture, being able to use Git effectively is quickly becoming a must-have skill for landing top tech jobs.
Top 10 Git skills to learn
Learning Git might seem daunting at first, but trust me—it's well worth the effort! Whether you're a seasoned developer or just starting out, investing time in learning Git will pay off big time in terms of productivity and career growth.
Ready to become a Git pro? Here are the top 10 Git skills to focus on:
- Installing and setting up Git on your computer
- Initializing a new repository or cloning an existing one
- Making changes, staging, and committing them
- Reviewing your project's history to see how it has evolved
- Creating branches for parallel development
- Merging branches to integrate changes
- Resolving merge conflicts when changes overlap
- Rolling back changes if you need a do-over
- Working with remote repositories for collaboration
- Collaborating with others using pull requests
In the rest of this guide, I'll break down each of these skills and explore why they're so critical for boosting your productivity and advancing your tech career. By the end, you'll have a clear roadmap for mastering Git, one skill at a time.
1. Installing and setting up Git on your computer
Want to be under the protection of version control? Installing and configuring Git is (by definition) the first step. Once installed, you'll be able to efficiently track changes, create separate areas to work on new features safely, and collaborate with others.
To get started, head over to the official Git website and download the version that works with your operating system. The site provides easy-to-follow installation instructions to get you up and running quickly.
Once you have Git installed, it's best to take a moment to configure your global settings. This step is essential because it labels your contributions with your identity, making it obvious who is responsible for each change to the project. This is especially important in collaborative environments where multiple contributors make changes, and so it helps with tracking modifications and maintaining accountability on your team.
Simply run the commands below in your terminal (command line), replacing "Your Name" and "[email protected]" with your own:
$ git config --global user.name "Your Name"
$ git config --global user.email "[email protected]"
And that's it! You've now set up Git to attribute your contributions correctly across all your projects. It's a small but important step in using this industry-standard tool effectively.

When one identity is not enough
If you're working on multiple projects and prefer not to use the same identity for them all, you can omit the --global option to set your name and email for just your current project (directory). This allows you to manage different identities across each project, which can be useful for maintaining separate personal and professional personas.
With the initial Git setup complete, it's time for us to go through the basic Git workflow together. Many struggle with this, so I find it helps to think of a project under version control as a physical drawing rather than a bunch of digital files. To protect our drawing, we won't modify it directly. Instead, any changes we want to make to it will be done on clear sheets of plastic that we'll use to overlay onto that drawing. More on this analogy as we go through the Git skills below.
2. Initializing a new repository or cloning an existing one
To start using Git for version control, we need to create a repository—a workspace for our project. A repository (often abbreviated as "repo") is just a normal directory that's been initialized to track changes under Git. Put another way, a repo is a directory that's been set up to contain your project and its associated revision history.
Initializing
If you're starting from scratch, you'll initialize a new empty repository with the git init command from your project's top-level directory. This is like setting up your workspace and preparing a fresh stack of clear plastic sheets, ready to layer changes on top of your base drawing.
# Initialize a new Git repository in the current directory
$ git init

Cloning
On the other hand, if you want to contribute to an existing project, you'll clone its repository using git clone. This is like receiving a stack of clear plastic sheets that already have some changes layered on them, along with a copy of the base drawing.
# Clone an existing repository into the current directory
$ git clone https://github.com/example/repo.git
In both cases, Git will create/copy a hidden .git subdirectory in your project folder. This is where Git stores all the metadata and history it needs to manage your project's versions—like a special storage box for your stack of change-tracking plastic sheets. After running either of these commands, you can use the ls -a command to verify that the hidden .git subdirectory was created in your project folder.
So whether you're starting a new project or joining an existing one, git init and git clone are your gateway commands to version control. They set up your workspace, complete with a virtual stack of clear plastic sheets, so you're ready to start layering your project's evolution, change by change.
3. Making changes, staging, and committing them
The key to using Git effectively is understanding how to make changes to your project, selecting (staging) the changes you want to keep, and saving (committing) them to your repository. Let's break down this essential workflow using our physical drawing and clear plastic sheets analogy.
When you make changes to your drawing, you're doing so by making an incremental change on one of those clear plastic sheets, not to the drawing itself. While these changes are automatically tracked in your repo by Git, they aren't applied to your project until you select which changes you want to keep by staging them, and then finalizing those changes by committing them to your repo.
Selecting your changes
Staging is the process of deciding which changes you want to (eventually) be applied to your project. It's like laying a clear plastic sheet over your drawing and tracing only the edits you want to keep. In Git, you use the git add command to stage changes:
# Stage all changes in the current directory
$ git add .

# Stage a specific file
$ git add path/to/file

Finalizing your changes
Once you've staged your desired changes, you commit them to finalize those modifications. A commit is like firmly pressing the clear plastic sheet onto your drawing, making the traced changes a part of the picture. Use the git commit command with a descriptive message summarizing your changes with the -m option:
# Commit with a message
$ git commit -m "Add header to homepage"
Committing regularly with clear messages creates a detailed history of your project's evolution. This makes it easier to understand the progress, revert changes if needed, and collaborate effectively with others.
Tips for effective commits:
- Commit small, related changes together―these are called atomic commits
- Write descriptive commit messages that explain the why behind your changes
- Commit often to create a granular project history
By mastering the skill of making, staging, and committing changes, you'll be able to track your project's development with precision and confidence. Our Tooling Essentials for Python Users course is a great way to get some experience with these commands directly in your browser without having to install anything on your computer. Reading about these commands is a great first step, but there is no substitute for seeing them in action for yourself!
4. Reviewing your project's history to see how it has evolved
As you become more proficient with Git, you'll find that reviewing your repository's history is an essential skill for understanding how your project has evolved over time. It's like flipping through a stack of clear plastic sheets, each representing a commit, to see the changes made at different points in the project's lifecycle.
Viewing your repo's history
The git log command is your way of seeing this history. It displays a list of all your commits in the current branch, along with their commit messages, authors, and timestamps. We'll discuss branches in the next section. For now, here's an example of what the output might look like:
$ git log

commit 3a7d2c5f9f71b2d8c55c40a92b1695d6e3917a2a
Author: John Doe <[email protected]>
Date:   Tue May 18 14:32:10 2023 -0400
    Add header to homepage

commit 7c2efd1b4a0d7b1a6e8d5c3b2a1e0f7d6c5b4a3d
Author: Jane Smith <[email protected]>
Date:   Mon May 17 09:15:45 2023 -0400
    Initialize repository
In this example, we can see two commits: one that adds a header to the homepage and another that initializes the repository. Each commit is identified by a unique hash, which allows you to reference it later if needed.
Viewing your repo's current state
Another useful command for reviewing your project's current state is git status. This command shows you which files have been modified, staged, or are untracked. It's like taking a quick glance at your clear plastic sheets to see which ones have new changes that haven't been committed yet.
$ git status

On branch main
Your branch is up to date with 'origin/main'.
Changes not staged for commit:
  (use "git add <file>..." to update what will be committed)
  (use "git restore <file>..." to discard changes in working directory)
        modified:   index.html
Untracked files:
  (use "git add <file>..." to include in what will be committed)
        images/logo.png
no changes added to commit (use "git add" and/or "git commit -a")
In this example, git status tells us that the index.html file has been modified but not staged, and there is an untracked file called logo.png in the images directory.
By regularly reviewing your project's history and status using git log and git status, you'll have a clearer understanding of how your project has progressed and what changes are yet to be committed. This knowledge is invaluable for effective version control and collaboration with others.
5. Creating branches for parallel development
As your project grows, you'll often need to work on multiple features or experiments simultaneously without affecting the main codebase. This is where branching comes in. Branching allows you to create separate lines of development, enabling you to work on different aspects of your project in parallel.
Using our clear sheet analogy, you can think of branching as creating a copy of your base drawing along with the existing stack of committed clear sheets. This new copy serves as a separate workspace where you can add new clear sheets (commits) without modifying the original drawing or the committed changes in the main branch.
Create a branch
To create a new branch, use the git branch command followed by the branch name:
# Create a new branch named 'feature-x'
$ git branch feature-x
To switch to the newly created branch, use the git checkout command:
# Switch to the 'feature-x' branch
$ git checkout feature-x
You can also combine these two steps into a single command using the -b flag with git checkout:
# Create a new branch named 'feature-y' and switch to it
$ git checkout -b feature-y

Working with a new branch
Once you've created a new branch, you can work on your changes independently without affecting the main branch. You can stage and commit your changes on this new branch just like you would on the main branch:
# Make changes and commit them on the new branch
$ git add .
$ git commit -m "Add new feature"
To see a list of all branches in your repository, use the git branch command without any arguments:
$ git branch

  feature-x
* feature-y
  main
The asterisk (*) indicates the current branch you're on.
By creating branches, you can work on multiple features, bug fixes, or experiments concurrently, keeping your main branch stable and your development process organized. Branching is a powerful tool for collaborative development, as it allows team members to work on different aspects of the project without interfering with each other's progress.
Remember, branching is a key component of the Git workflow, enabling parallel development and facilitating seamless collaboration among team members. I highly recommend you use branching in your projects; you'll find it easier to manage complex development tasks and maintain a clean, stable codebase.
6. Merging branches to integrate changes
As you become more comfortable with branching, the next thing you'll need to learn how to do is bring your changes back together. This is where merging comes in. Merging allows you to integrate the changes made in different branches into a unified codebase, combining the work of multiple developers seamlessly. It's an essential Git skill for combining the work of multiple developers into a single, cohesive project.
Using our clear sheet analogy, merging is like layering the clear sheets from one branch onto another branch or the original drawing. Imagine you and a colleague have been working on separate stacks of clear sheets, each representing a different branch. When you're both finished, each of you can merge your changes by carefully aligning and combining your clear sheets onto the main drawing.
Smooth merge example
To merge a branch, you must first ensure that you have the branch you want to merge into checked out. For example, if you want to merge changes from a feature branch (feature-y) into the main branch, you should switch to the main branch when you're ready to perform the merge.
Continuing from where we left off in the previous section, assume we're still on the feature-y branch and that we've made all the changes we want to make there:
# Commit changes on the feature-y branch
$ git add .
$ git commit -m "Complete feature-y"

# Switch to the main branch
$ git checkout main

# Merge the changes from 'feature-y' into the main branch
$ git merge feature-y
In this example, we first commit the changes made on the currently checked out feature-y branch. Then, we switch to the main branch using git checkout main. Finally, we use git merge feature-y to merge the changes from the feature-y branch into the main branch.

To ensure a smooth merging process, follow these best practices:
- Create separate branches for each distinct feature or bug fix
- Merge your branches back into the
mainbranch frequently - Communicate with your team and integrate changes regularly
By mastering the skill of merging, you'll be able to effectively collaborate with others and maintain a cohesive codebase. Merging is a crucial part of the Git workflow, allowing you to bring together the work done in parallel on different branches.
But what happens when the changes in different branches conflict with each other? This is where the challenge of resolving merge conflicts comes into play. In the next section, we'll explore how to handle these situations and keep your project on track.
7. Resolving merge conflicts when changes overlap
So, you're cruising along on your project, merging branches and feeling like a Git pro. But then, suddenly, you're faced with every developer's worst fear: a merge conflict. It's like your clear plastic sheets have overlapping scribbles, and you're not sure which changes to keep. But, no need to panic! Resolving merge conflicts is a key skill that every developer needs to master.
Merge conflicts happen when Git can't automatically integrate changes from different branches. This usually occurs when two branches have modified the same lines in a file or when a file has been deleted in one branch but modified in another. It's like trying to combine two clear plastic sheets with conflicting changes―you need to decide which parts to keep and which to discard.

How to resolve a merge conflict
Here's a step-by-step guide to resolving merge conflicts, using our trusty clear plastic sheet analogy:
- Identify the conflict: Git will tell you which files have conflicts when you try to merge. It's like holding up your clear plastic sheets to the light and seeing where the overlapping changes are.
- Open the conflicting file(s): Inside the problematic file(s), Git will mark the conflicting changes with special markers. It's like seeing the conflicting scribbles on your clear plastic sheets.
- Decide which changes to keep: Go through each conflict and choose which version to keep, or create a new version that incorporates changes from both branches. This is like carefully erasing and redrawing on your clear plastic sheets until you have a clean, merged version.
- Remove the conflict markers: Delete the special markers Git added to the file. This is like cleaning up any stray marks on your clear plastic sheets.
- Commit the resolved file(s): Once all conflicts are resolved, stage and commit the changes to complete the merge. It's like placing your final, merged clear plastic sheet on top of the stack, ready to be added to the main project.
Here's an example of what a merge conflict might look like in a file:
<<<<<<< HEAD
This is the version from the current branch.
=======
This is the version from the branch being merged.
>>>>>>> branch-being-merged
To resolve this conflict, you would edit the file to choose the desired version or create a new combined version, then remove the <<<<<<<, =======, and >>>>>>> markers.
Best practices
Some best practices to minimize and handle merge conflicts:
- Communicate with your team to avoid making conflicting changes in the first place.
- Merge branches frequently to keep conflicts small and manageable.
- Use clear, descriptive commit messages to make it easier to understand changes.
- Test your code after resolving conflicts to ensure everything still works as expected.
Resolving merge conflicts can be intimidating at first, but with practice and a solid understanding of the process, you'll be handling them like a pro in no time. It's a crucial skill for collaborating effectively on Git projects and keeping your codebase clean and healthy.
8. Rolling back changes if you need a do-over
Picture this: you're working on a complex project, and you make a change that unexpectedly breaks something. No worries! With Git, you can easily revert your codebase to a previous working state. It's like removing specific clear sheets from a stack, each representing a different version of your project, until you get back to the one you want.
That's where commands like git revert, git reset, and git checkout come in.
Revert
git revert is the safest option, as it creates a new commit that undoes previous changes without altering the project's history. This is important if you're collaborating with others. To use git revert, specify the commit hash you want to undo:
# Revert a specific commit
$ git revert 3a7d2c5
In this example, 3a7d2c5 is the commit hash that we want to revert. You can find the commit hash by using the git log command, which we covered in the section on reviewing your project's history.
Reset
git reset, on the other hand, actually erases commits, which can be risky and lead to lost work if you're not careful. To use git reset, specify the commit hash you want to reset to:
# Reset the repository to a specific past commit
$ git reset --hard 7c2efd1
Here, 7c2efd1 is the commit hash that we want to reset our repository to. Keep in mind that this will discard all changes made after that commit, so use it with caution.*
Checkout
Finally, git checkout lets you precisely revert changes to specific files without impacting the entire repository.* To restore a file from a previous commit, use git checkout followed by the commit hash and the file path:
# Checkout a specific file from a past commit
$ git checkout 3a7d2c5 path/to/file
This command will restore the version of the file located at path/to/file from the commit with the hash 3a7d2c5.
Of course, an ounce of prevention is worth a pound of cure. To minimize the need for undoing changes in the first place, get in the habit of making frequent, small commits with clear messages, as we discussed in the section on staging and committing changes. And always communicate with your team about what you're working on. With these techniques in your toolkit, you'll be able to confidently manage even the trickiest of coding situations. Mastering the ability to undo changes is an essential skill for any serious Git user.
9. Working with remote repositories for collaboration
Collaborating smoothly on a Git project with your team is all about getting comfortable with remote repositories. You can think of remote repositories as shared storage spaces in the cloud for your project's stack of clear plastic sheets. They let you and your teammates store and share code, work on the same project simultaneously, and keep a backup of your work.
Using remote repositories has some significant benefits:
- Your code is backed up and secure, even if your local setup has issues
- Multiple developers can collaborate on the same codebase concurrently, even from different locations
- You can easily manage different versions of the project and roll back changes if needed
Globally, developers are using GitHub to build software and collaborate in larger numbers than ever before—and that spans across public and private projects. This not only proves the foundational value of Git in today's developer experience, but also shows the global community of developers using GitHub to build software.
Source: GitHub
What is GitHub?
GitHub is a popular web-based platform that provides hosting for Git repositories and offers various collaboration features. It's free to create an account and start using GitHub for your projects.*
Here's an example of how you might work with a remote repository on GitHub:
# Initialize a new local Git repository
$ git init

# Stage and commit your initial files
$ git add .
$ git commit -m "Initial commit"

# Create a new repository on GitHub and copy its URL

# Add the GitHub repository as a remote
$ git remote add origin https://github.com/your-username/your-repo.git

# Push your local commits to the remote repository
$ git push -u origin main

# Make some changes to your files

# Stage and commit those changes
$ git add .
$ git commit -m "Update README"

# Push the new commits to the remote repository
$ git push origin main

# Collaborate with others by pulling their changes
$ git pull origin main
In this example, we initialize a new Git repository, make an initial commit, and then connect it to a remote repository on GitHub. We push our local commits to the remote, make some changes, and push those as well. Finally, we demonstrate how to pull changes made by collaborators from the remote repository.
Whether you're on a distributed team or working on a complex project, mastering remote repositories will serve you well. Try incorporating these techniques into your regular workflow, and you'll be surprised at how much smoother your collaboration becomes!
10. Collaborating with others using pull requests
While pull requests aren't a native Git feature, they're an essential collaboration tool offered by platforms like GitHub. As the final skill in our top 10 list, I felt compelled to show you how to use pull requests to get the most out of collaborating with your team.
What is a pull request?
A pull request is a way to propose changes you've made in a branch to be merged into the main branch of a repository. It allows your teammates to review your code, provide feedback, and ensure that the changes meet the project's standards before incorporating them into the main codebase.
Here's an example of how you might create a pull request:
# Create a new branch for your feature
git checkout -b feature-z

# Make changes and commit them
git add .
git commit -m "Add new feature"

# Push the branch to the remote repository
git push origin feature-z
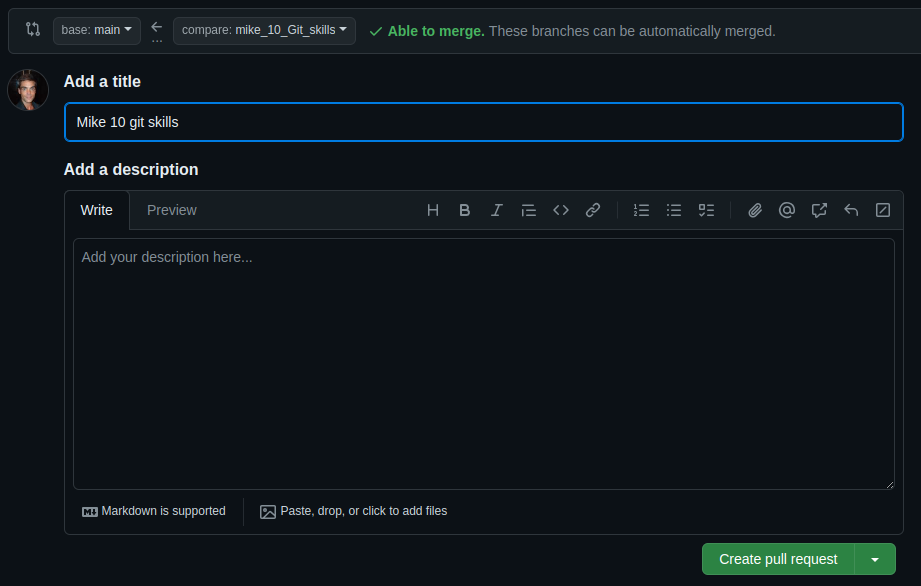
After pushing your branch to the remote repo, head over to your GitHub repository page. You should see a prompt to create a new pull request for your recently pushed branch. Click on the "Compare & pull request" button to open a new pull request. As you can see in the screenshot below, I've been using GitHub to keep my work safe while writing this post!

Next, fill in a descriptive title and description for your pull request, explaining the changes you've made and why they're important. This is also a good place to mention any issues or discussions related to your changes. Here's what that looks like on my end:
Once you've created the pull request, your teammates can review your code, leave comments, and suggest improvements. You can also continue to push new commits to the branch, and they'll be automatically added to the pull request.
After your changes have been reviewed and approved, you can merge the pull request into the main branch. This incorporates your changes into the primary codebase, making them available to everyone working on the project.
Pull request best practices:
- Keep your changes focused and small. Large, complex pull requests are harder to review and more likely to introduce bugs.
- Write clear, descriptive titles and descriptions for your pull requests. This helps your reviewers understand the context and purpose of your changes.
- Be open to feedback and willing to make changes based on your teammates' suggestions. Code reviews are an opportunity to learn and improve your skills.
- Review your teammates' pull requests carefully and provide constructive feedback. Helping others improve their code is just as important as getting feedback on your own work.
By mastering pull requests, you'll be able to collaborate more effectively with your team, catch bugs early, and ensure that your project's codebase stays clean and maintainable. It's a crucial skill for any developer working on a shared codebase.
For more information on creating and managing pull requests, check out the GitHub documentation on pull requests.*
Common misconceptions and challenges with Git
When I first started using Git, I have to admit, I was pretty overwhelmed. It seemed like there were so many commands and concepts to learn, and I wasn't sure where to begin. Sound familiar? If you're feeling this way, don't worry―you're not alone. Many developers, myself included, have struggled with wrapping our heads around Git when we first started using it.
Where things go wrong
The main issue is that people often jump straight into using Git commands without first understanding the core concepts behind how it works. It's a common trap: you want to start using Git in your projects, so you look up some basic commands online and try them out. But when you run into a tricky situation involving branching or merging, suddenly things get confusing fast. Discussions on sites like Hacker News echo this struggle, with many developers admitting they use Git without fully grasping it conceptually.*
How to make things go right
The key to overcoming this is to approach learning Git methodically. Start by studying the fundamental concepts:
- What are commits, branches, and merges?
- How does Git's distributed model work?
Then reinforce that knowledge through hands-on practice.
Remember, learning Git is a journey, and it's okay if it takes some time to fully grasp the concepts. The effort you put in now will pay off tremendously throughout your career as a developer. And if you ever feel stuck or discouraged, know that you've got a supportive community of learners and experts at Dataquest who are here to help you every step of the way. You've got this!
How to get started with Git
Now that we've explored the top 10 Git skills essential for success in today's collaborative tech landscape, you might be wondering how to begin your own Git journey. Here's a concise roadmap to help you get started:
1. Set up your environment
Begin by installing Git on your computer and configuring your global settings, such as your username and email address. Refer to the first skill in our list for a detailed walkthrough of this process. If you plan to be part of a collaborative team, I strongly recommend creating and setting up a free account on GitHub while you're at it.
2. Choose a hands-on learning resource
Learn core Git concepts and best practices by selecting a learning resource that offers a project-based approach. The Pro Git book by Scott Chacon and Ben Straub, available online for free (or as a "dead tree version" from Amazon) is another valuable resource.
3. Practice regularly
Reinforce your understanding of Git by practicing regularly. Create a repository for a personal project or contribute to an open-source project on GitHub. As you work, make a habit of committing your changes frequently and writing clear, descriptive commit messages. Gradually explore more advanced features like branching and merging to expand your skill set.
4. Embrace continuous learning
Remember that mastering Git is an ongoing process. Stay curious, keep practicing, and don't hesitate to seek help when needed. As you progress, the skills you acquire will greatly benefit your career as a developer or data professional, enabling you to collaborate effectively and showcase your work.
By following this roadmap and leveraging the resources mentioned throughout this post, you'll be well on your way to becoming a Git pro. Start your journey today, and watch your version control skills flourish!
Why Dataquest is the Best Place to Grow Your Git Skills
Learning Git can seem daunting, but with the right resources, you'll be collaborating like a pro in no time. At Dataquest, we've designed our courses to help you master Git effectively and efficiently. Here's why Dataquest is the ideal place to grow your Git skills:
Hands-On, Project-Based Learning
Our Tooling Essentials for Python Users course immerses you in real-world Git scenarios from the start. You'll work on practical projects that build your skills in key areas like initializing repositories, staging changes, and resolving merge conflicts. This hands-on approach ensures you gain the experience top companies look for in effective collaborators.
Comprehensive Skill Paths
Dataquest offers structured learning paths that guide you from Git basics to advanced techniques. Our Generative AI Fundamentals skill path provides a comprehensive foundation, covering not only Git essentials but also cutting-edge topics like AI chatbots and Python programming. You'll systematically build job-ready skills through our interactive curriculum.
Supportive Learning Community
When you learn with Dataquest, you're never alone. Our vibrant community of learners and experts is always ready to offer guidance and support. Connect with peers, get your questions answered, and stay motivated as you progress along your Git learning journey.
At Dataquest, we're committed to your success. That's why we offer a satisfaction guarantee: if you're not happy with what you've learned, we'll refund your subscription. We're confident our platform will transform your Git skills and open up new career opportunities.
Start Your Git Journey Today
As we've seen, mastering Git is essential for thriving in today's collaborative tech landscape. By steadily building your stack of version control skills, you'll be prepared to contribute confidently to any project.
Ready to become a Git pro? Follow these steps:
- First, install Git and get comfortable with the basics, like staging and committing changes.
- Next, dive into more advanced topics such as branching, merging, and working with remote repositories.
- Finally, solidify your skills with Dataquest's hands-on Git lessons, which guide you through real-world scenarios.
Don't wait to unlock your full potential. Sign up for Dataquest today and start collaborating like a pro. With the right tools and mindset, there's no limit to what you can achieve!