How to Install the Anaconda Distribution on Your Computer
Before jumping into data science, you need to set up the required software and tools and learn how to use them. This tutorial will teach you how to install and use the Anaconda platform for building a data science ecosystem. You'll also learn Conda to manage packages and environments using the command-line interface. Let's dive in.
What Is the Anaconda Distribution?
Anaconda is a trusted suite that bundles Python and R distributions. Anaconda is a package manager and virtual environment manager, and it includes a set of pre-installed software packages. The Anaconda open-source ecosystem is mainly used for data science, machine learning, and large-scale data analysis. Anaconda is popular because it's simple to install, and it provides access to almost all the tools and packages that data professionals require, including the following:
- the Python interpreter
- an extensive collection of packages
- Conda, a package and virtual environment management system
- Jupyter Notebook, a web-based interactive integrated development environment (IDE) that combines code, text, and visualizations in the same document
- Anaconda Navigator, a desktop application that makes it easy to launch software packages that come with Anaconda distribution and manages packages and virtual environments without using command-line commands
How to Install Anaconda
Anaconda is a cross-platform Python distribution that you can install on Windows, macOS, or different distributions of Linux.
NOTE If you already have Python installed, you don’t need to uninstall it. You can still go ahead and install Anaconda and use the Python version that comes along with Anaconda distribution.
- Download Anaconda installer for your operating system from: https://www.anaconda.com/downloads.
-
- The good news is the download page automatically identifies your operating system and helps you to download the correct installer.

- Once the download is complete, double-click the package to start installing Anaconda. The installer will walk you through a wizard to complete the installation; the default settings work well in most cases.
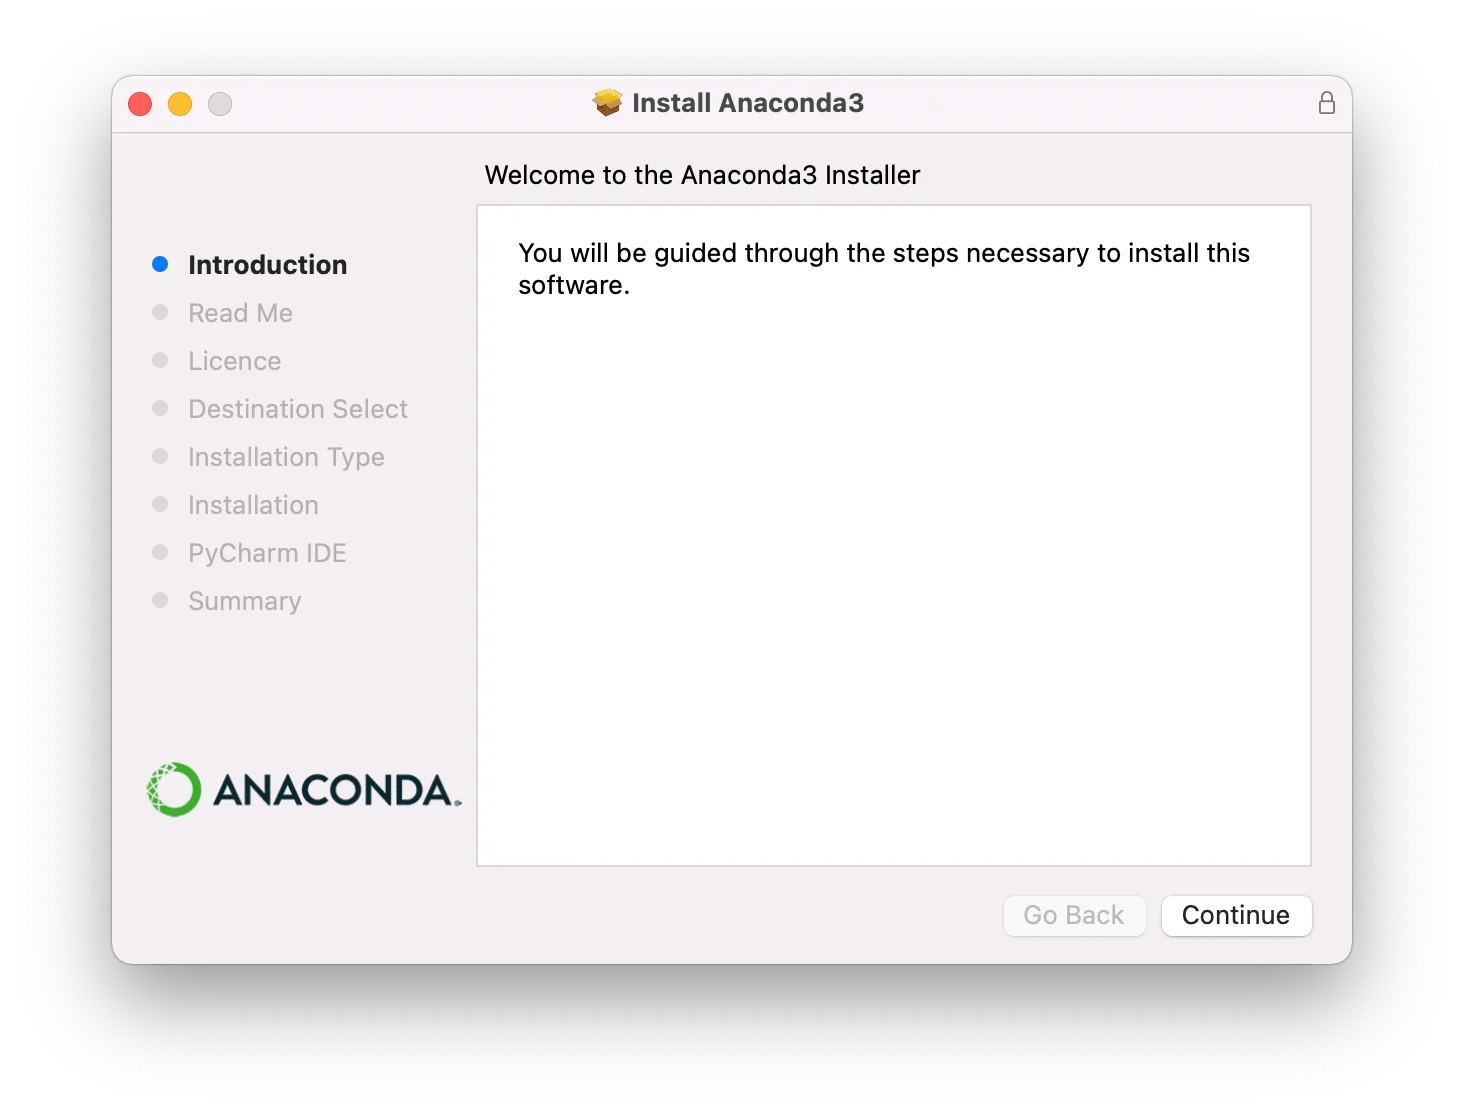
- Click on Continue on the Introduction, Read Me, and License screens. Click on Agree to continue the installation, once the prompt below appears.

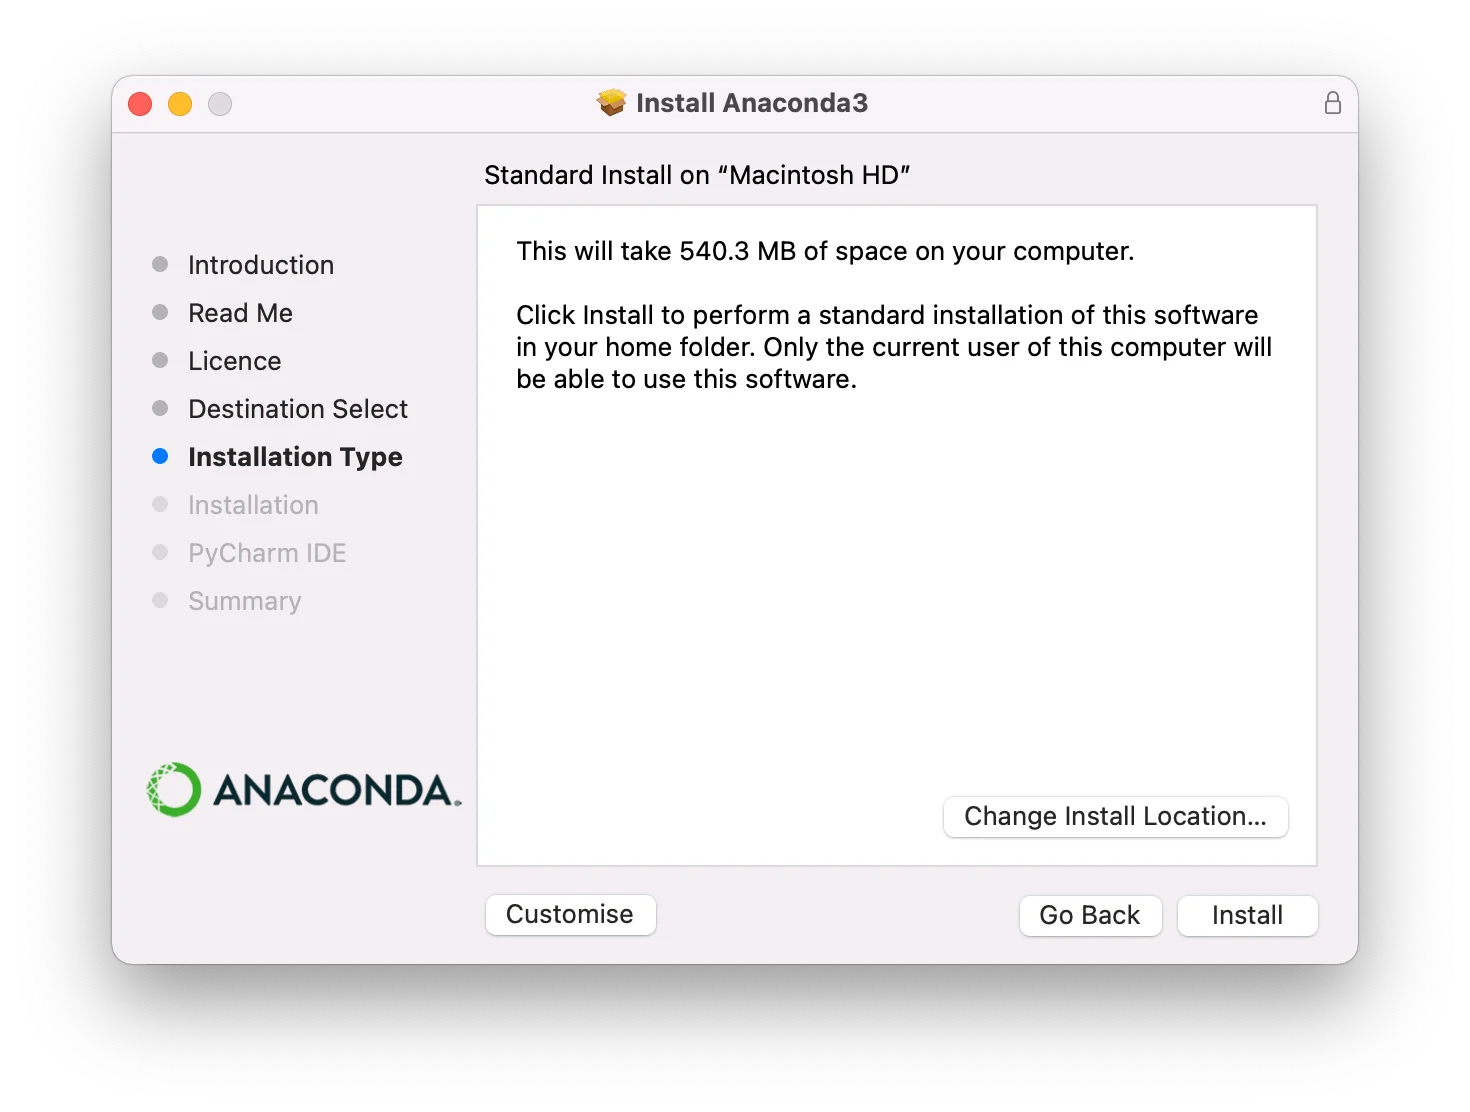
- On the Destination Select screen, select "Install for me only." It’s recommended to install Anaconda on the default path; to do so, click on Install. If you’d like to install Anaconda on a different location, click on Change Install Location… and change the installation path.
- On the PyCharm IDE screen, click on Continue to install Anaconda without the PyCharm IDE.
- After the installation completes, click on Close on the Summary screen to close the installation wizard.

- There are two ways to verify your Anaconda installation: Locate Anaconda Navigator in the installed applications on your computer, and double-click on its icon.
If Anaconda is installed properly, the Anaconda Navigator will run.

Run the conda info command via the command-line interface. If Anaconda is installed correctly, it will show all the current Conda installation information.
How to Use Conda
In this section, we will learn how to use Conda to create, activate, and deactivate virtual environments. In addition, we will discuss installing packages in an environment and managing channels.
If you want to learn more about Python virtual environments, you can read A Complete Guide to Python Virtual Environments on the Dataquest blog.
First, let’s check the conda version installed on our computers. To do so, open a terminal window on macOS/Linux or an Anaconda Prompt on Windows, then run the following command:
(base) ~ % conda --version
conda 4.11.0
The default environment in Anaconda is the base environment that is created when you install Anaconda. So, every time you open a terminal window, the environment’s name appears in parentheses at the start of the terminal prompt. The base environment contains conda as well as more than 400 pre-installed packages. Now, let’s discuss how we can manage environments with conda commands.
Creating a Conda Environment
To create a Conda environment, use the conda create command:
(base) ~ % conda create -n my_envThe command above creates a new Conda environment where my_env is the name of the environment. You need to type y then press Enter, or just press Enter once the following prompt appears.
Proceed ([y]/n)?By default, all environments will be created into the envs folder in anaconda3 folder without any packages. The command below creates a new Conda environment that includes the latest version of Python:
(base) ~ % conda create -n my_env pythonOr if you would like to create an environment with a specific Python version, run the following command:
(base) ~ % conda create -n my_env python=3.6It displays all the packages that will be installed in the environment. Press Enter once you see the prompt:
Proceed ([y]/n)?All the packages will be installed in the environment.
Activating a Conda Environment
To activate an environment, run the conda activate command:
(base) ~ % conda activate my_envRunning the command above activates the my_env environment, and it shows the active environment name in parentheses at the beginning of the command prompt. The following command displays the active environment details:
(my_env) ~ % conda infoInstalling Packages in an Environment
To install packages into the current environment, use the conda install <package-name> command. For instance, the following command installs the latest version of pandas package in the environment.
(my_env) ~ % conda install pandasTo install a specific version of a package such as pandas , you can use the following command:
conda install pandas=1.2.4You can also install a set of packages using a single conda install command, as follows:
(my_env) ~ % conda install seaborn scikit-learn jupyterIf you’d like to see the installed packages on the current environment, run the following command:
(my_env) ~ % conda listTo check out the list of environments, use the following command that lists the environments on your computer and highlights the active environment with an asterisk:
(my_env) ~ % conda env listNOTE
If you want to update all the packages in an environment, run the conda update command.
Reproducing a Conda Environment
It’s a common task to reproduce an environment on your computer or other computers. Conda allows us to make a YAML file that contains all the installed packages in an environment along with the versions. Let’s see how we can create the file by exporting the active environment to a YAML file:
(my_env) ~ % conda env export > environment.ymlRunning the command above creates the environment.yml file that can be used to create another environment with the same packages. If you want to ensure your environment file works on various platforms, use the --from history option at the end of the conda env export command, as follows:
(my_env) ~ % conda env export --from history > environment.ymlThe new environment.yml file is more cross-platform compatible because it only contains the packages we’ve explicitly installed, unlike the previous one containing all the installed packages in the environment. Now you can use the environment file to reproduce the Anaconda environment on any machine.
(my_env) ~ % conda env create -n new_env --file environment.ymlThe command above creates a new environment, new_env, and installs all the packages listed in the environment.yml file.
Managing Conda Channels
Channels are Conda’s package repositories hosted on remote servers. Conda searches these repositories containing Conda packages whenever you want to install a package. Then the package will automatically be downloaded and installed from the channels. The command returns the current Conda channels:
(base) ~ % conda config --show channels
channels:
  - defaults
To reveal the URLs to the default channel’s folders, run the following command:
(base) ~ % conda config —show default_channels

default_channels:
  - https://repo.anaconda.com/pkgs/main
  - https://repo.anaconda.com/pkgs/r
Sometimes, when we want to install a package, Conda issues the
(my_env) ~ % conda install click-default-groupRunning the command above indicates that the click-default-group package is unavailable in the current channels. There are two ways to solve the issue:
- The first solution is specifying a channel that the package exists in its repositories using the following command:
(my_env) ~ % conda install -c conda-forge click-default-group- The second solution is adding a new channel that contains the package to the top of the channel list, then installing the package:
(my_env) ~ % conda config --add channels conda-forge
(my_env) ~ % conda install click-default-group
Deactivating a Conda Environment
To deactivate a Conda environment, run the conda deactivate command. Deactivating an environment will return you back to the base environment.
Removing a Conda Environment
To remove an environment, first deactivate it, then run the command in your terminal window:
(base) ~ % conda remove -n my_envNOTE
If you don’t like managing environments and packages by typing Conda commands in a command-line shell, you can use Anaconda Navigator. Navigator provides a graphical user interface (GUI) to manage environments and packages without using Conda commands.
Conclusion
In this tutorial, you learned how to install Anaconda and work with Conda to manage environments and install packages. The heart of the Anaconda distribution is the Jupyter Notebook; data scientists love Jupyter Notebook because it simplifies developing and presenting their projects interactively. If you're interested in learning more about Jupyter Notebook, there is an excellent tutorial on the Dataquest blog at How to Use Jupyter Notebook in 2020: A Beginner’s Tutorial.
